Create a shipment
A new shipment takes one or more packed fulfillment orders and the details the carrier needs. Nothing is saved until you confirm, so you can change your mind at any point.
- In the sidebar, open Fulfillment and choose Shipments, then click Create Shipment. The New Shipment page opens.
- Click Add Fulfillment Order to Shipment. The dialog lists the packed orders with their company, items, quantity, destination and default shipping charge. Type in the search box to narrow it by number, sales order or company.
- Click the row of each order to include; this ticks its box. Then click Add Fulfillment Order (or Add Fulfillment Orders with the count). Orders already on the shipment are ticked and disabled.
- Review the rows. Change a Shipping Charge if needed, or click Remove to drop an order. Click Add FO to Shipment to add more.
- Under Shipping Details, choose a carrier in Select Carrier. AWM Fulfillment adds a Driver field; every other carrier adds a Tracking button to each row where you can enter tracking numbers.
- Check Expected Delivery Date and Expected Delivery Time. They default to today and the current time; pick a different date and time if you know them.
- Add Shipping Notes if needed, then click Create Shipment.
- In the Create Shipment? dialog, read which orders will be marked as Assigned and that They will not be available to be assigned to other shipments, then click Create Shipment.
| Field | Required | What to enter |
|---|---|---|
| Fulfillment orders | Yes, at least one | Packed orders picked from the dialog. Each arrives with its default Shipping Charge; a blank charge saves as 0. |
| Select Carrier | Yes | AWM Fulfillment, UPS, FedEx, USPS, DHL Express or Other. |
| Driver | No (AWM Fulfillment only) | The driver’s name, up to 100 characters. |
| Tracking | No (other carriers) | One or more tracking numbers per order, up to 50 characters each and 100 per order. |
| Expected Delivery Date and Time | Yes | When the shipment should arrive, in your own time zone. A date and time that have already passed are accepted. |
| Shipping Notes | No | Up to 2,000 characters. |
Number of Packages above the form is the total of the orders’ packages; you cannot edit it here. The Destination of each row is its Supply Point, or the address when the order has none. Create Shipment stays disabled until a carrier is chosen and at least one order is on the shipment.
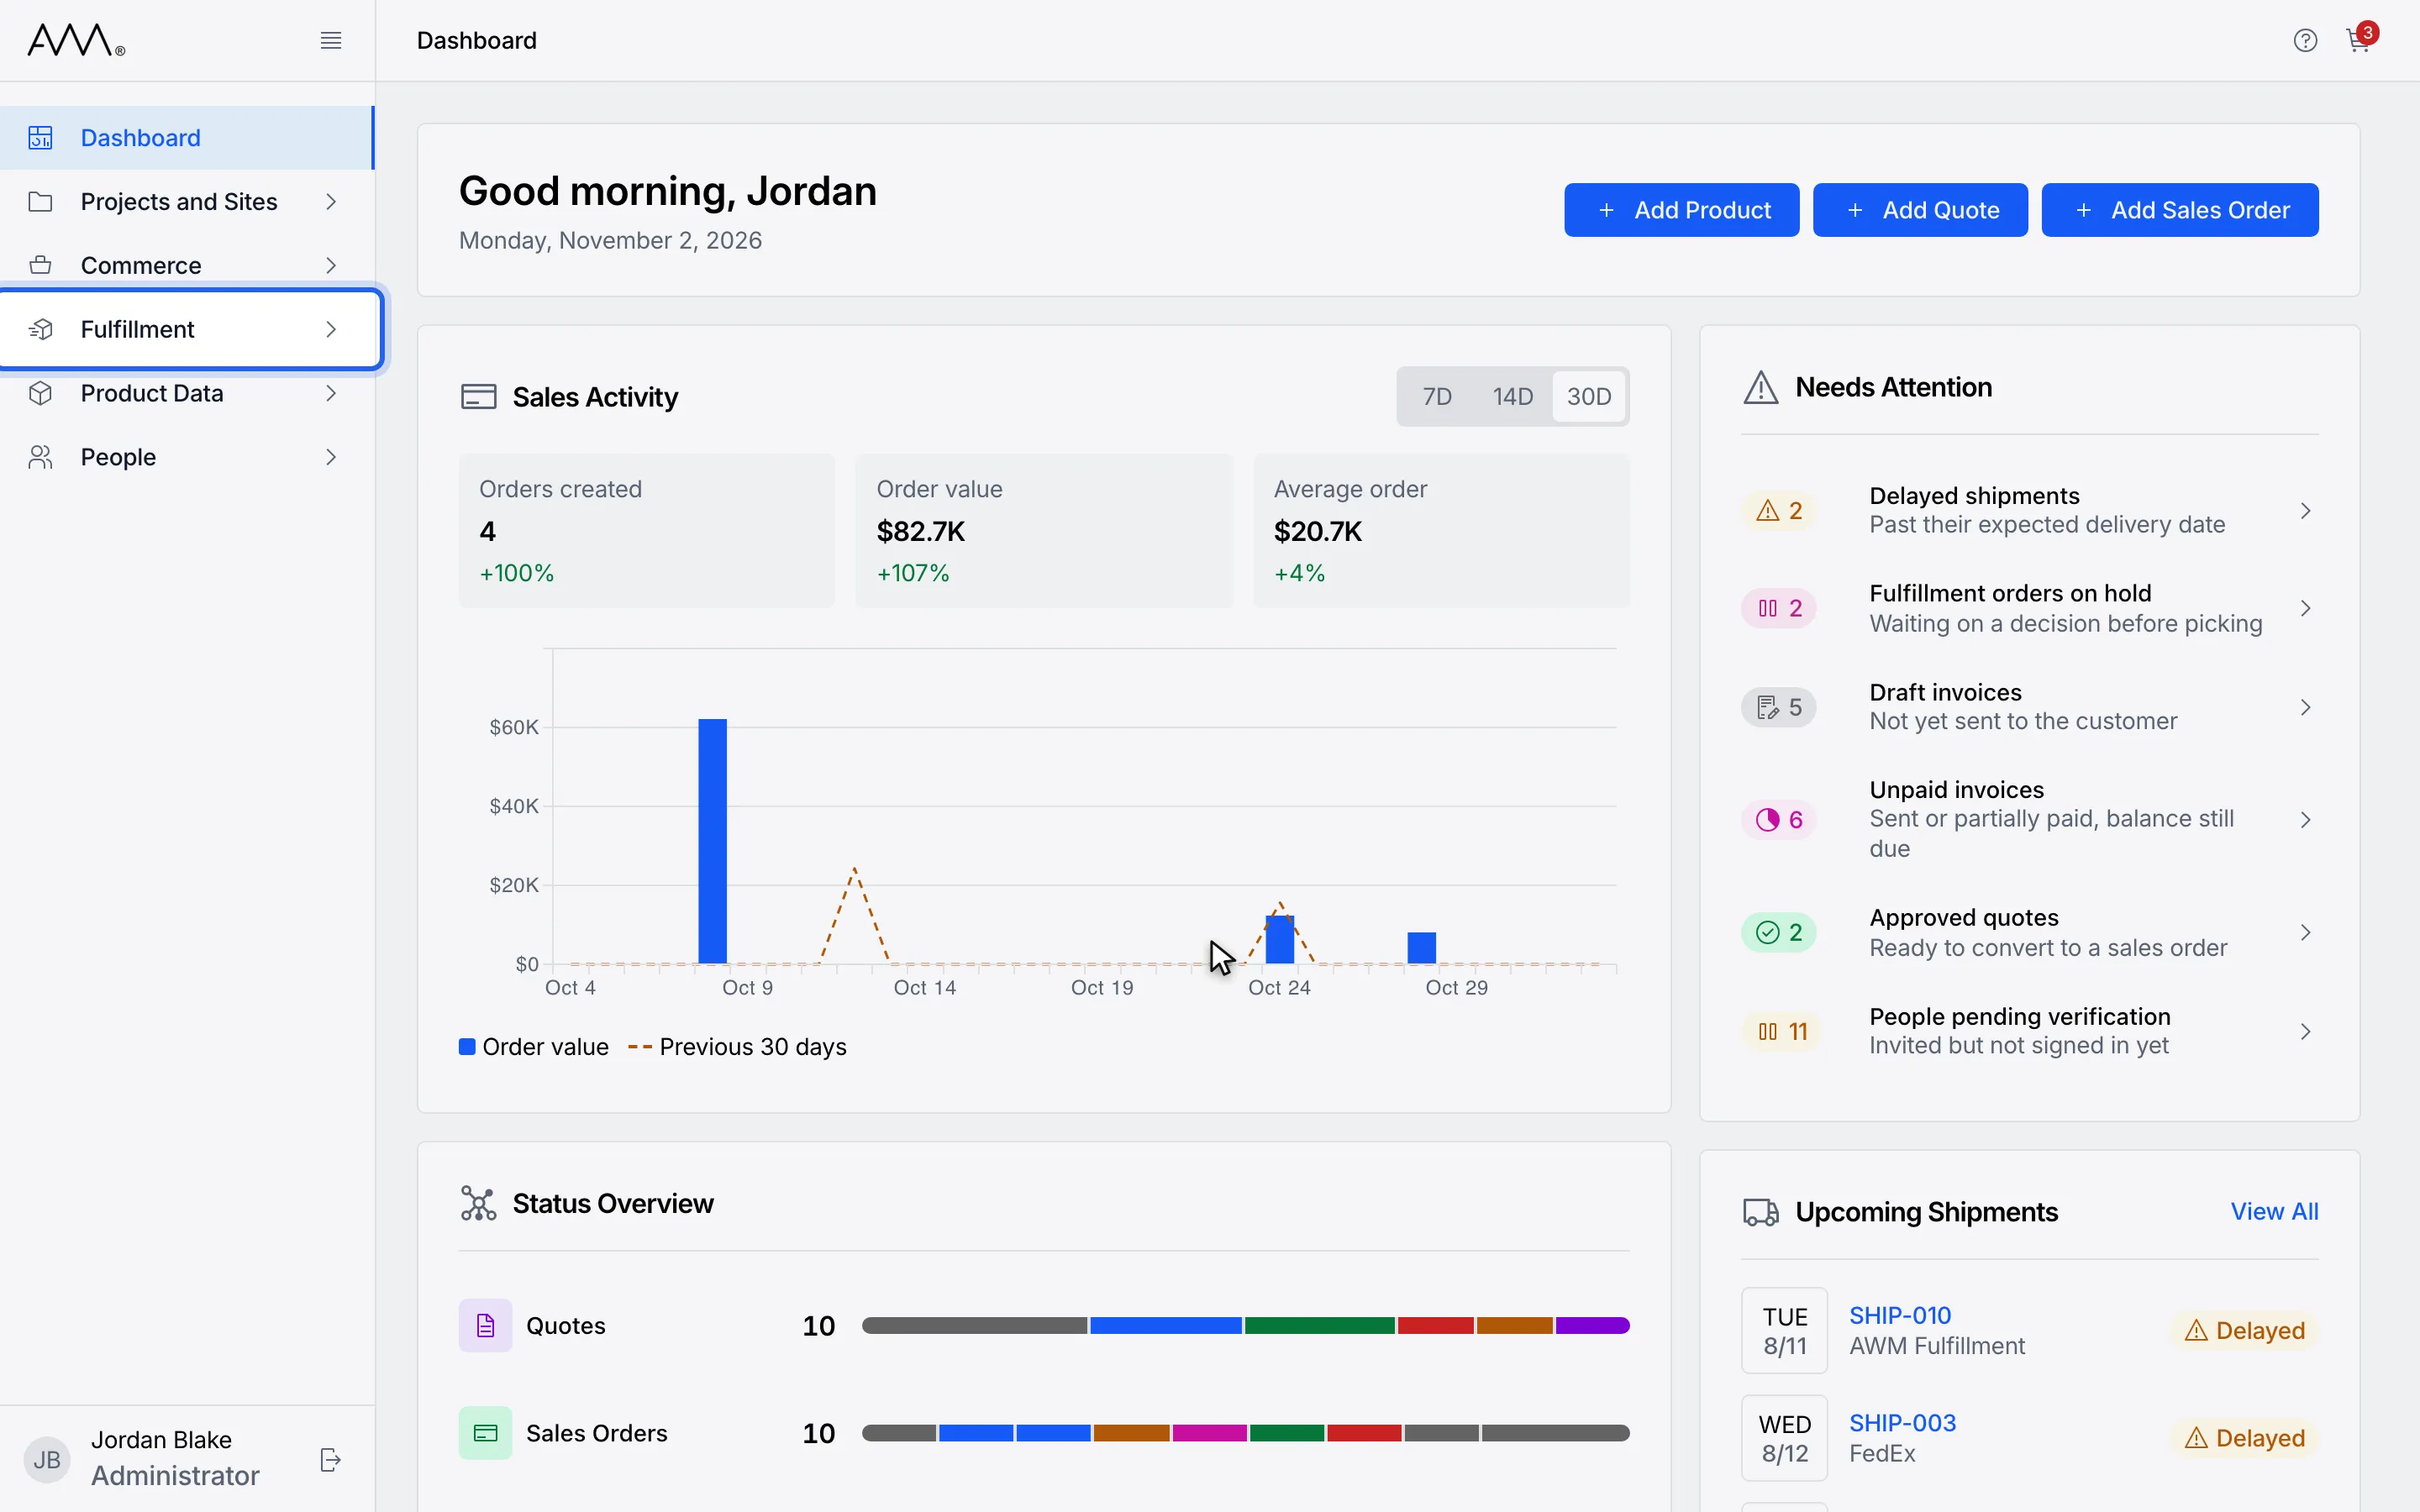
1In the sidebar, open Fulfillment.
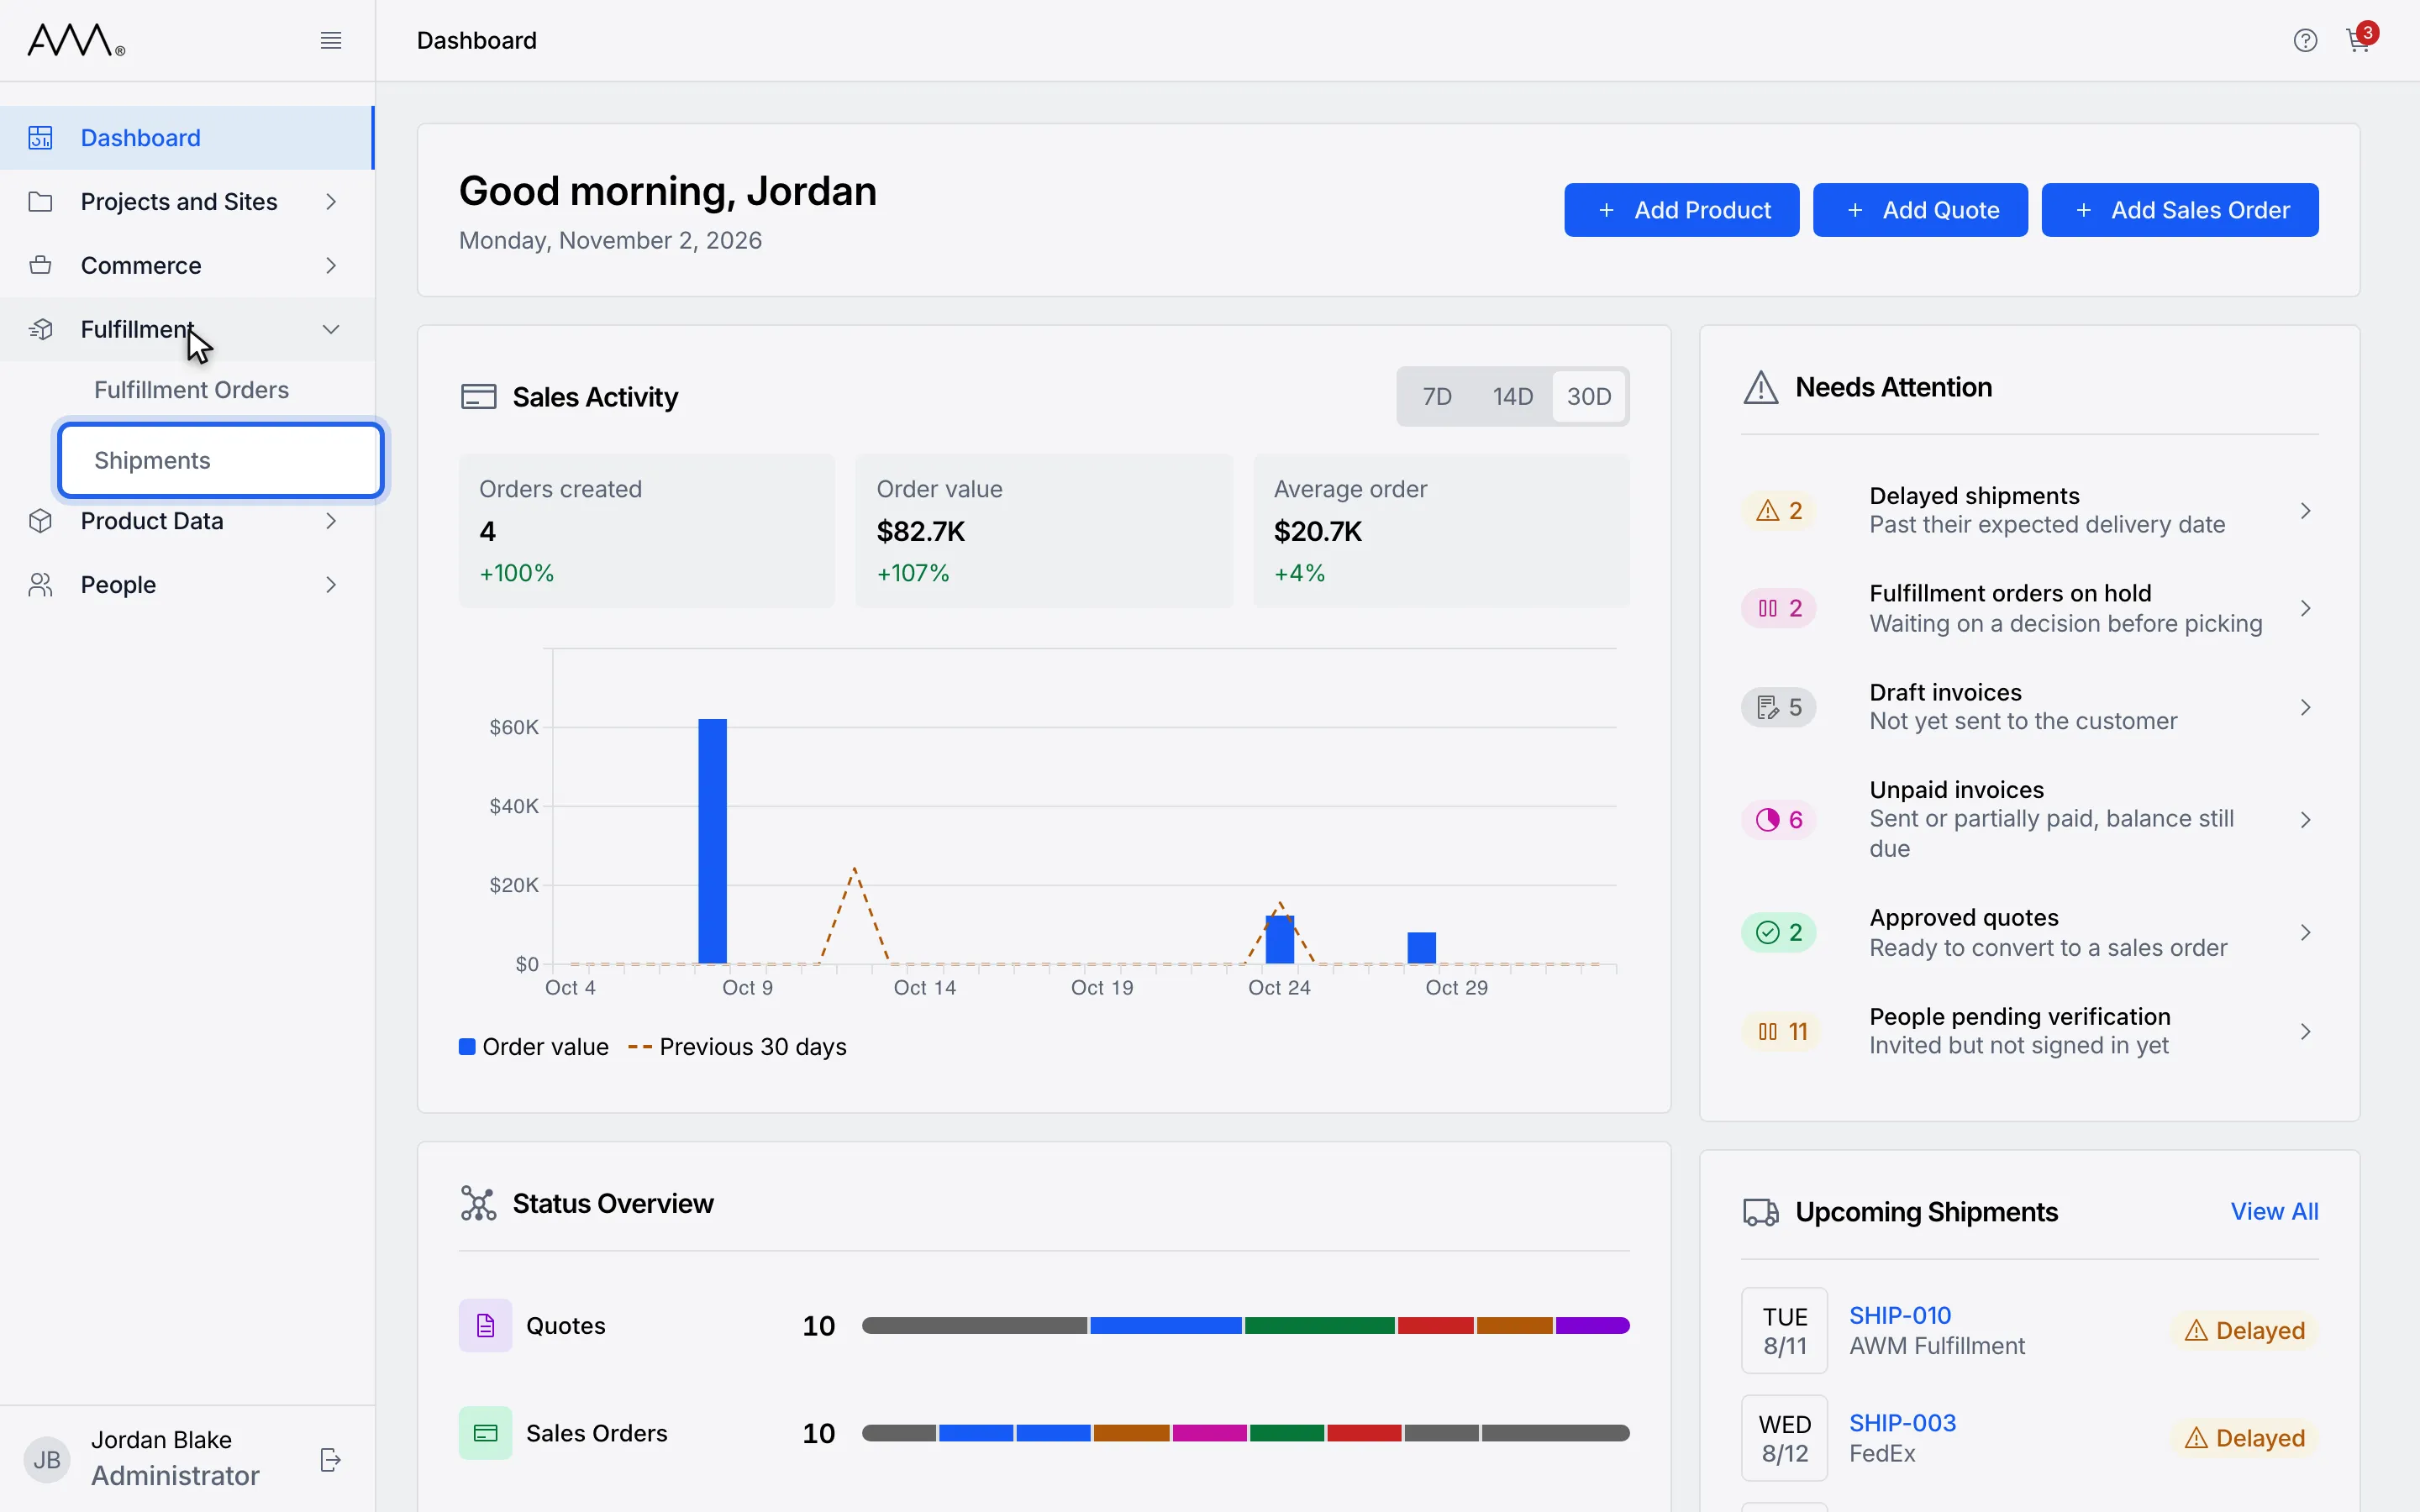
2Choose Shipments.
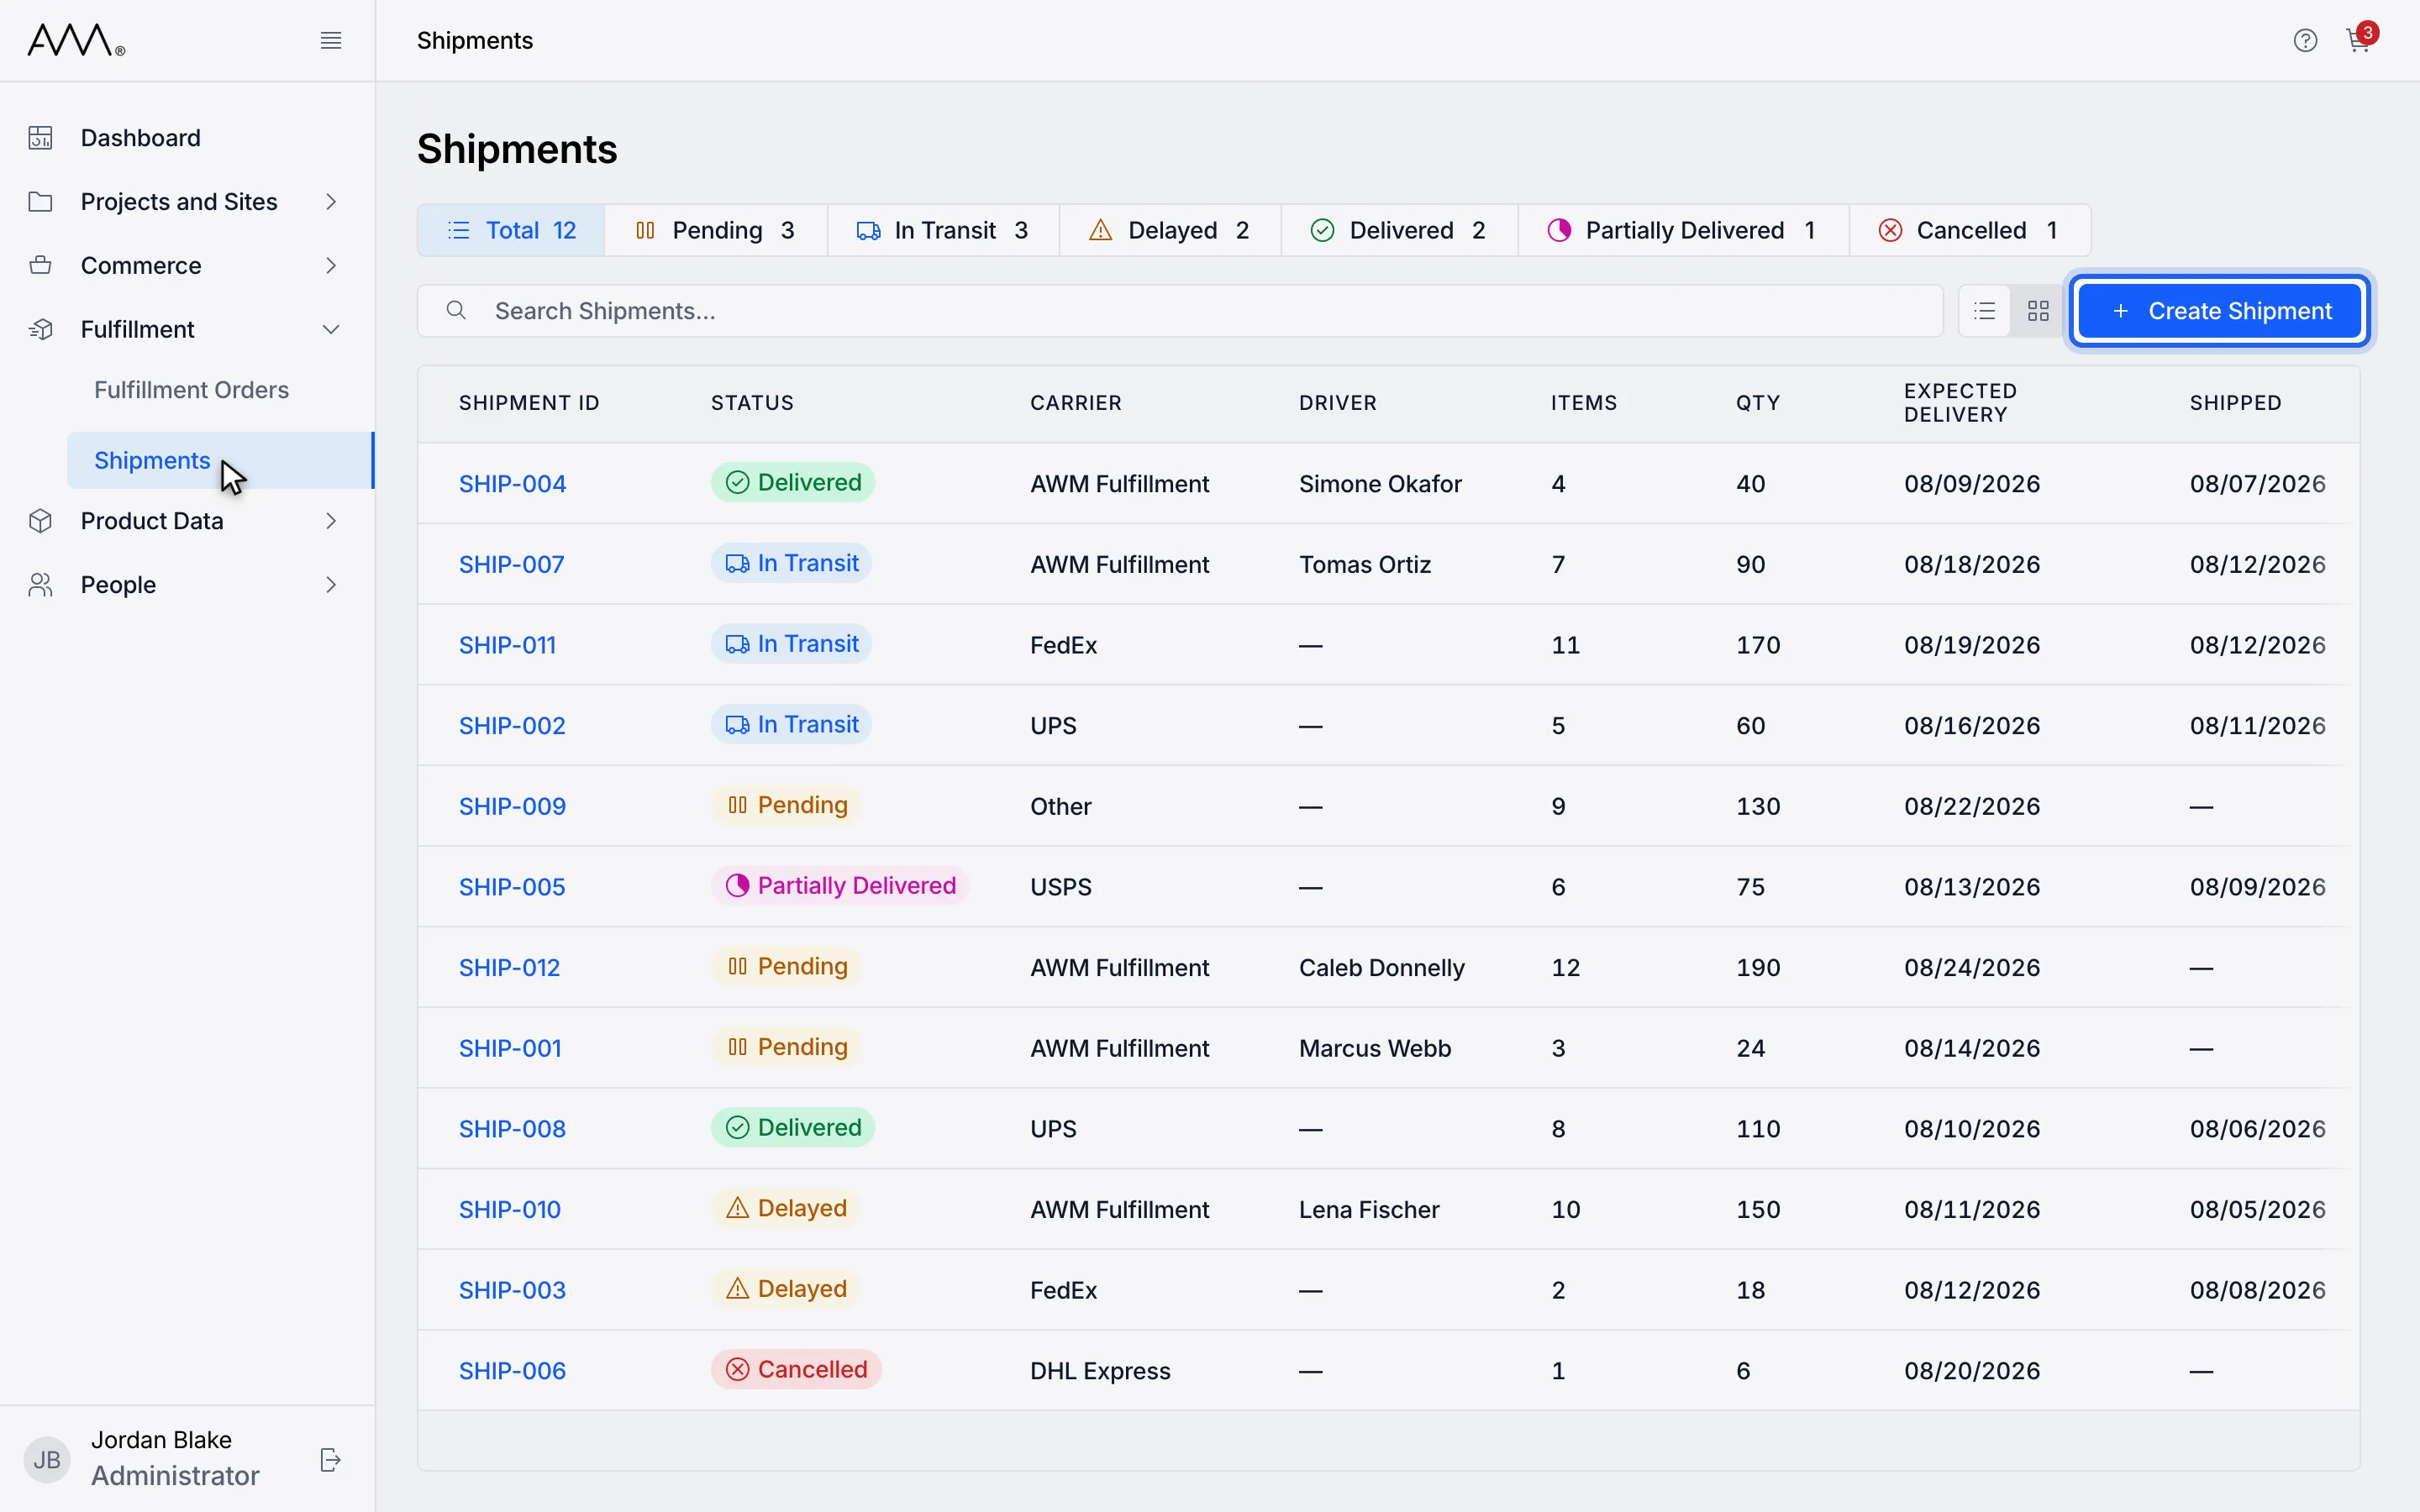
3Click Create Shipment.
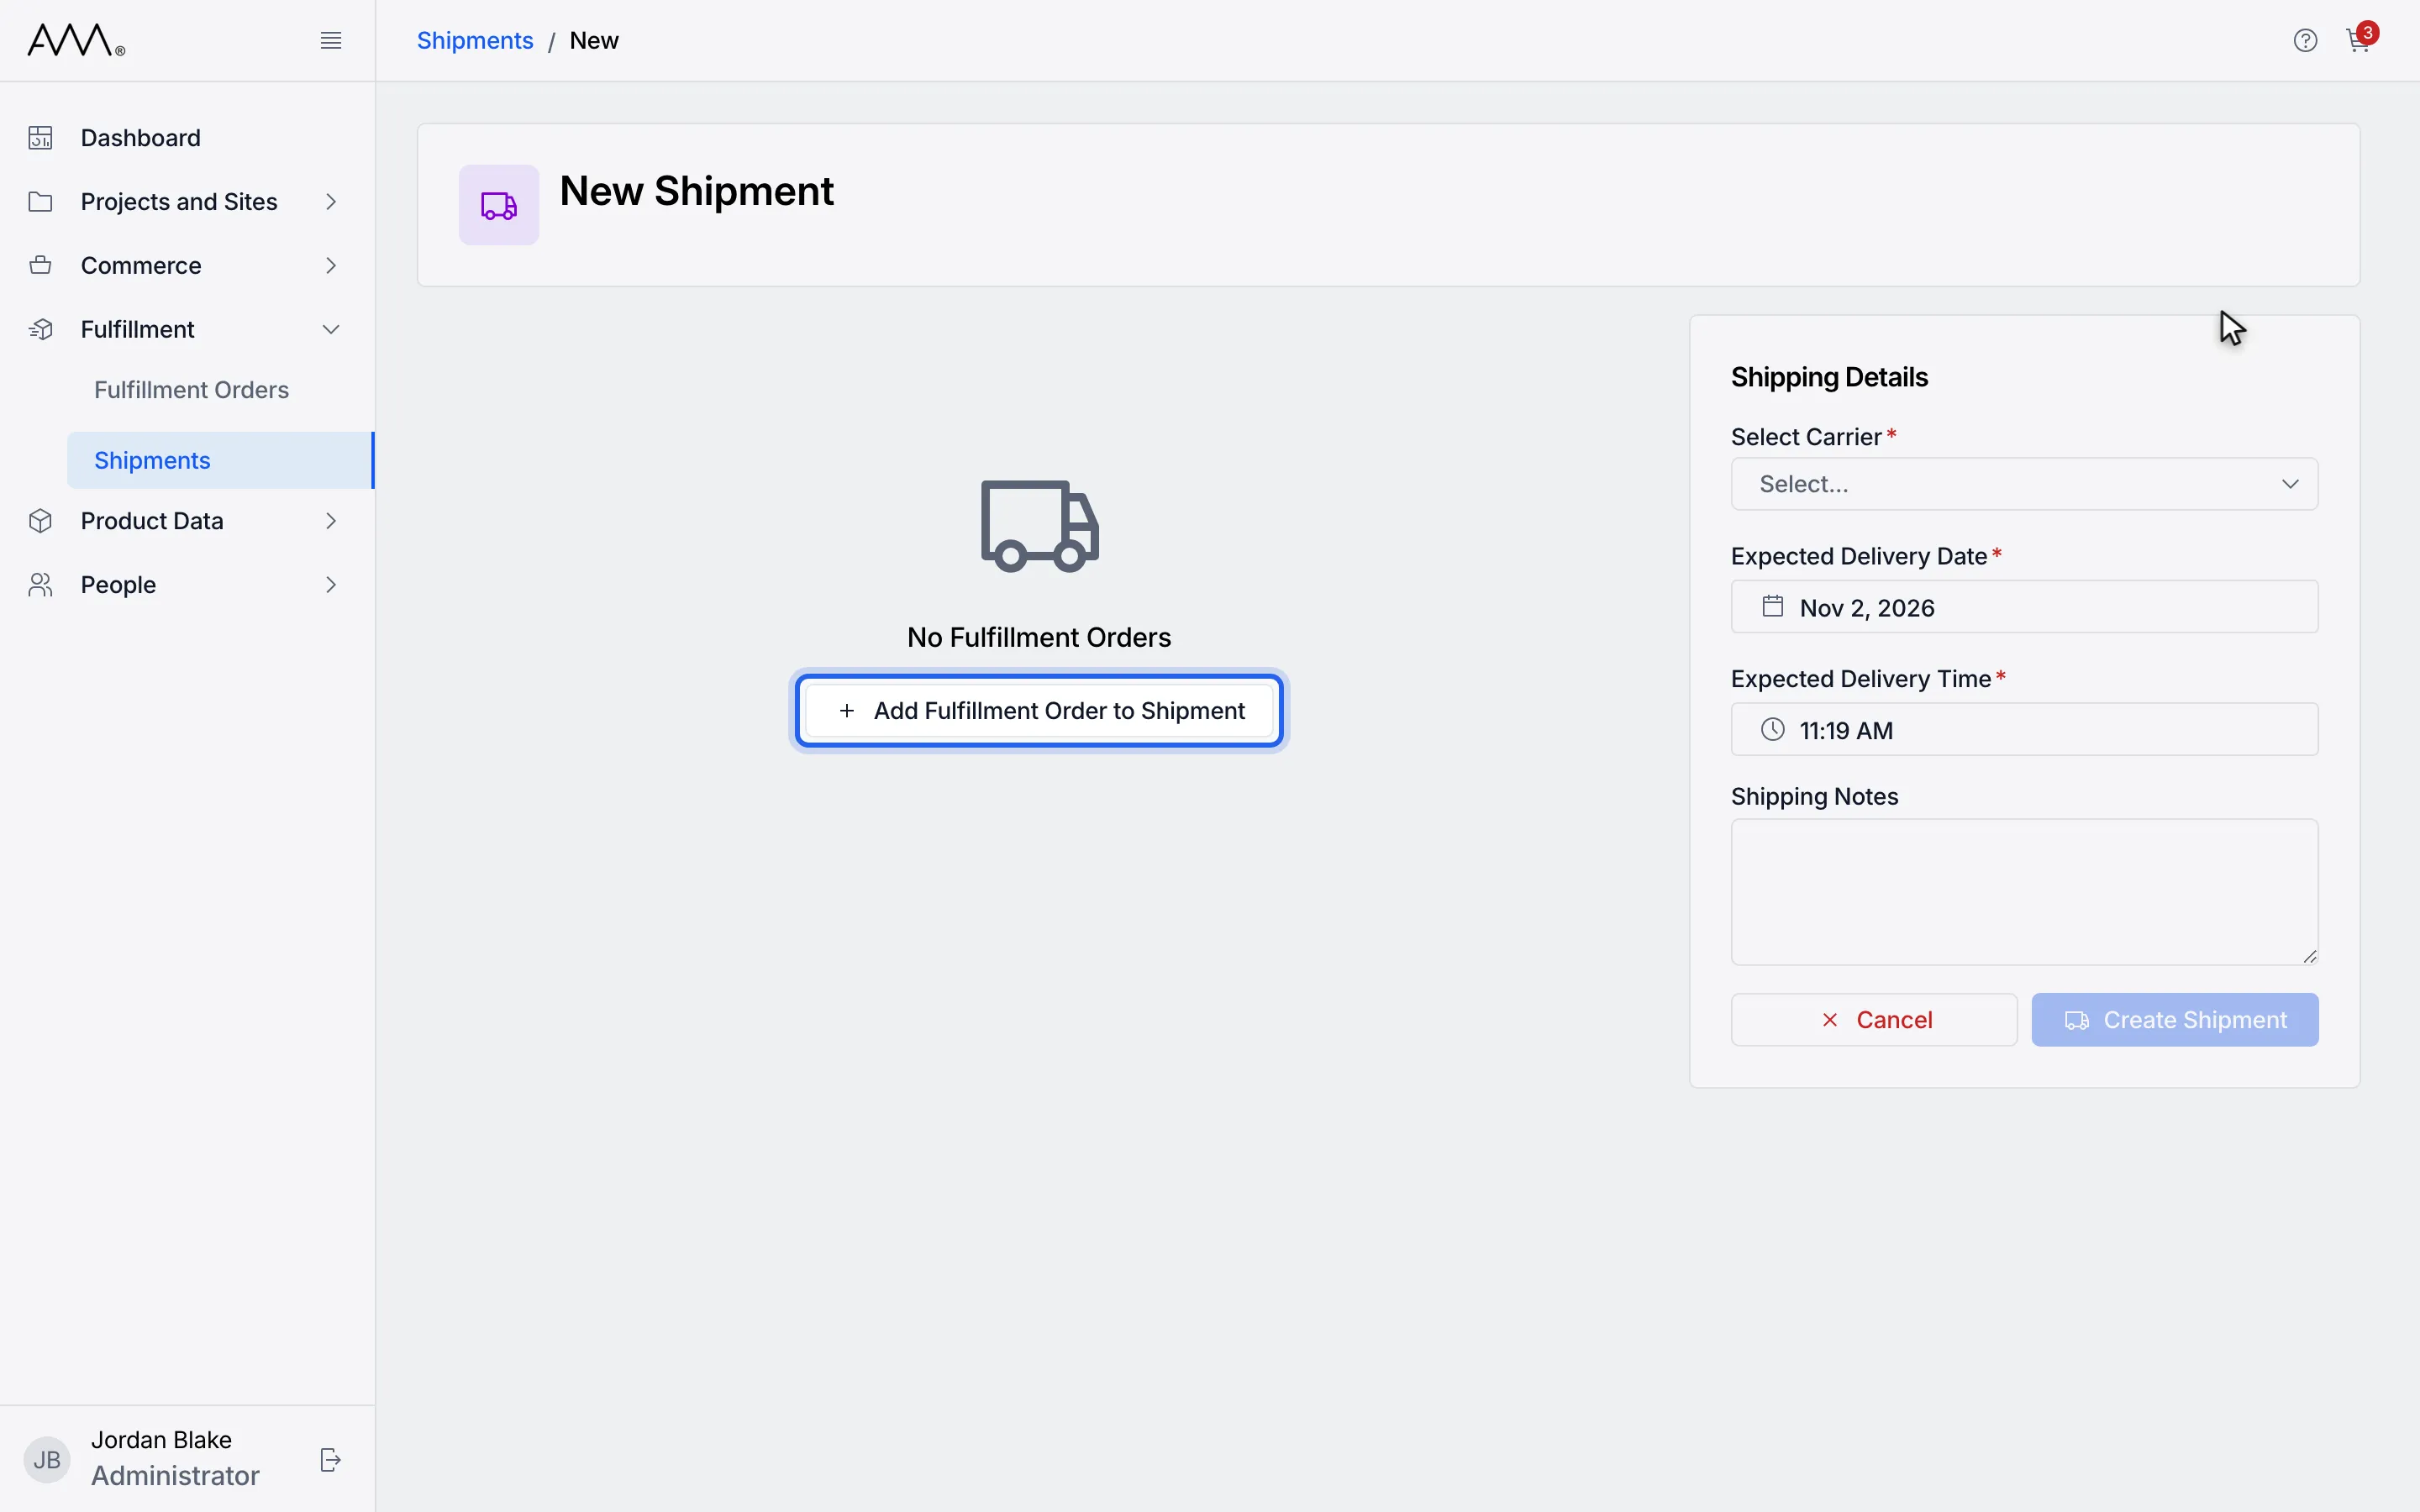
4Click Add Fulfillment Order to Shipment. The dialog lists packed orders.
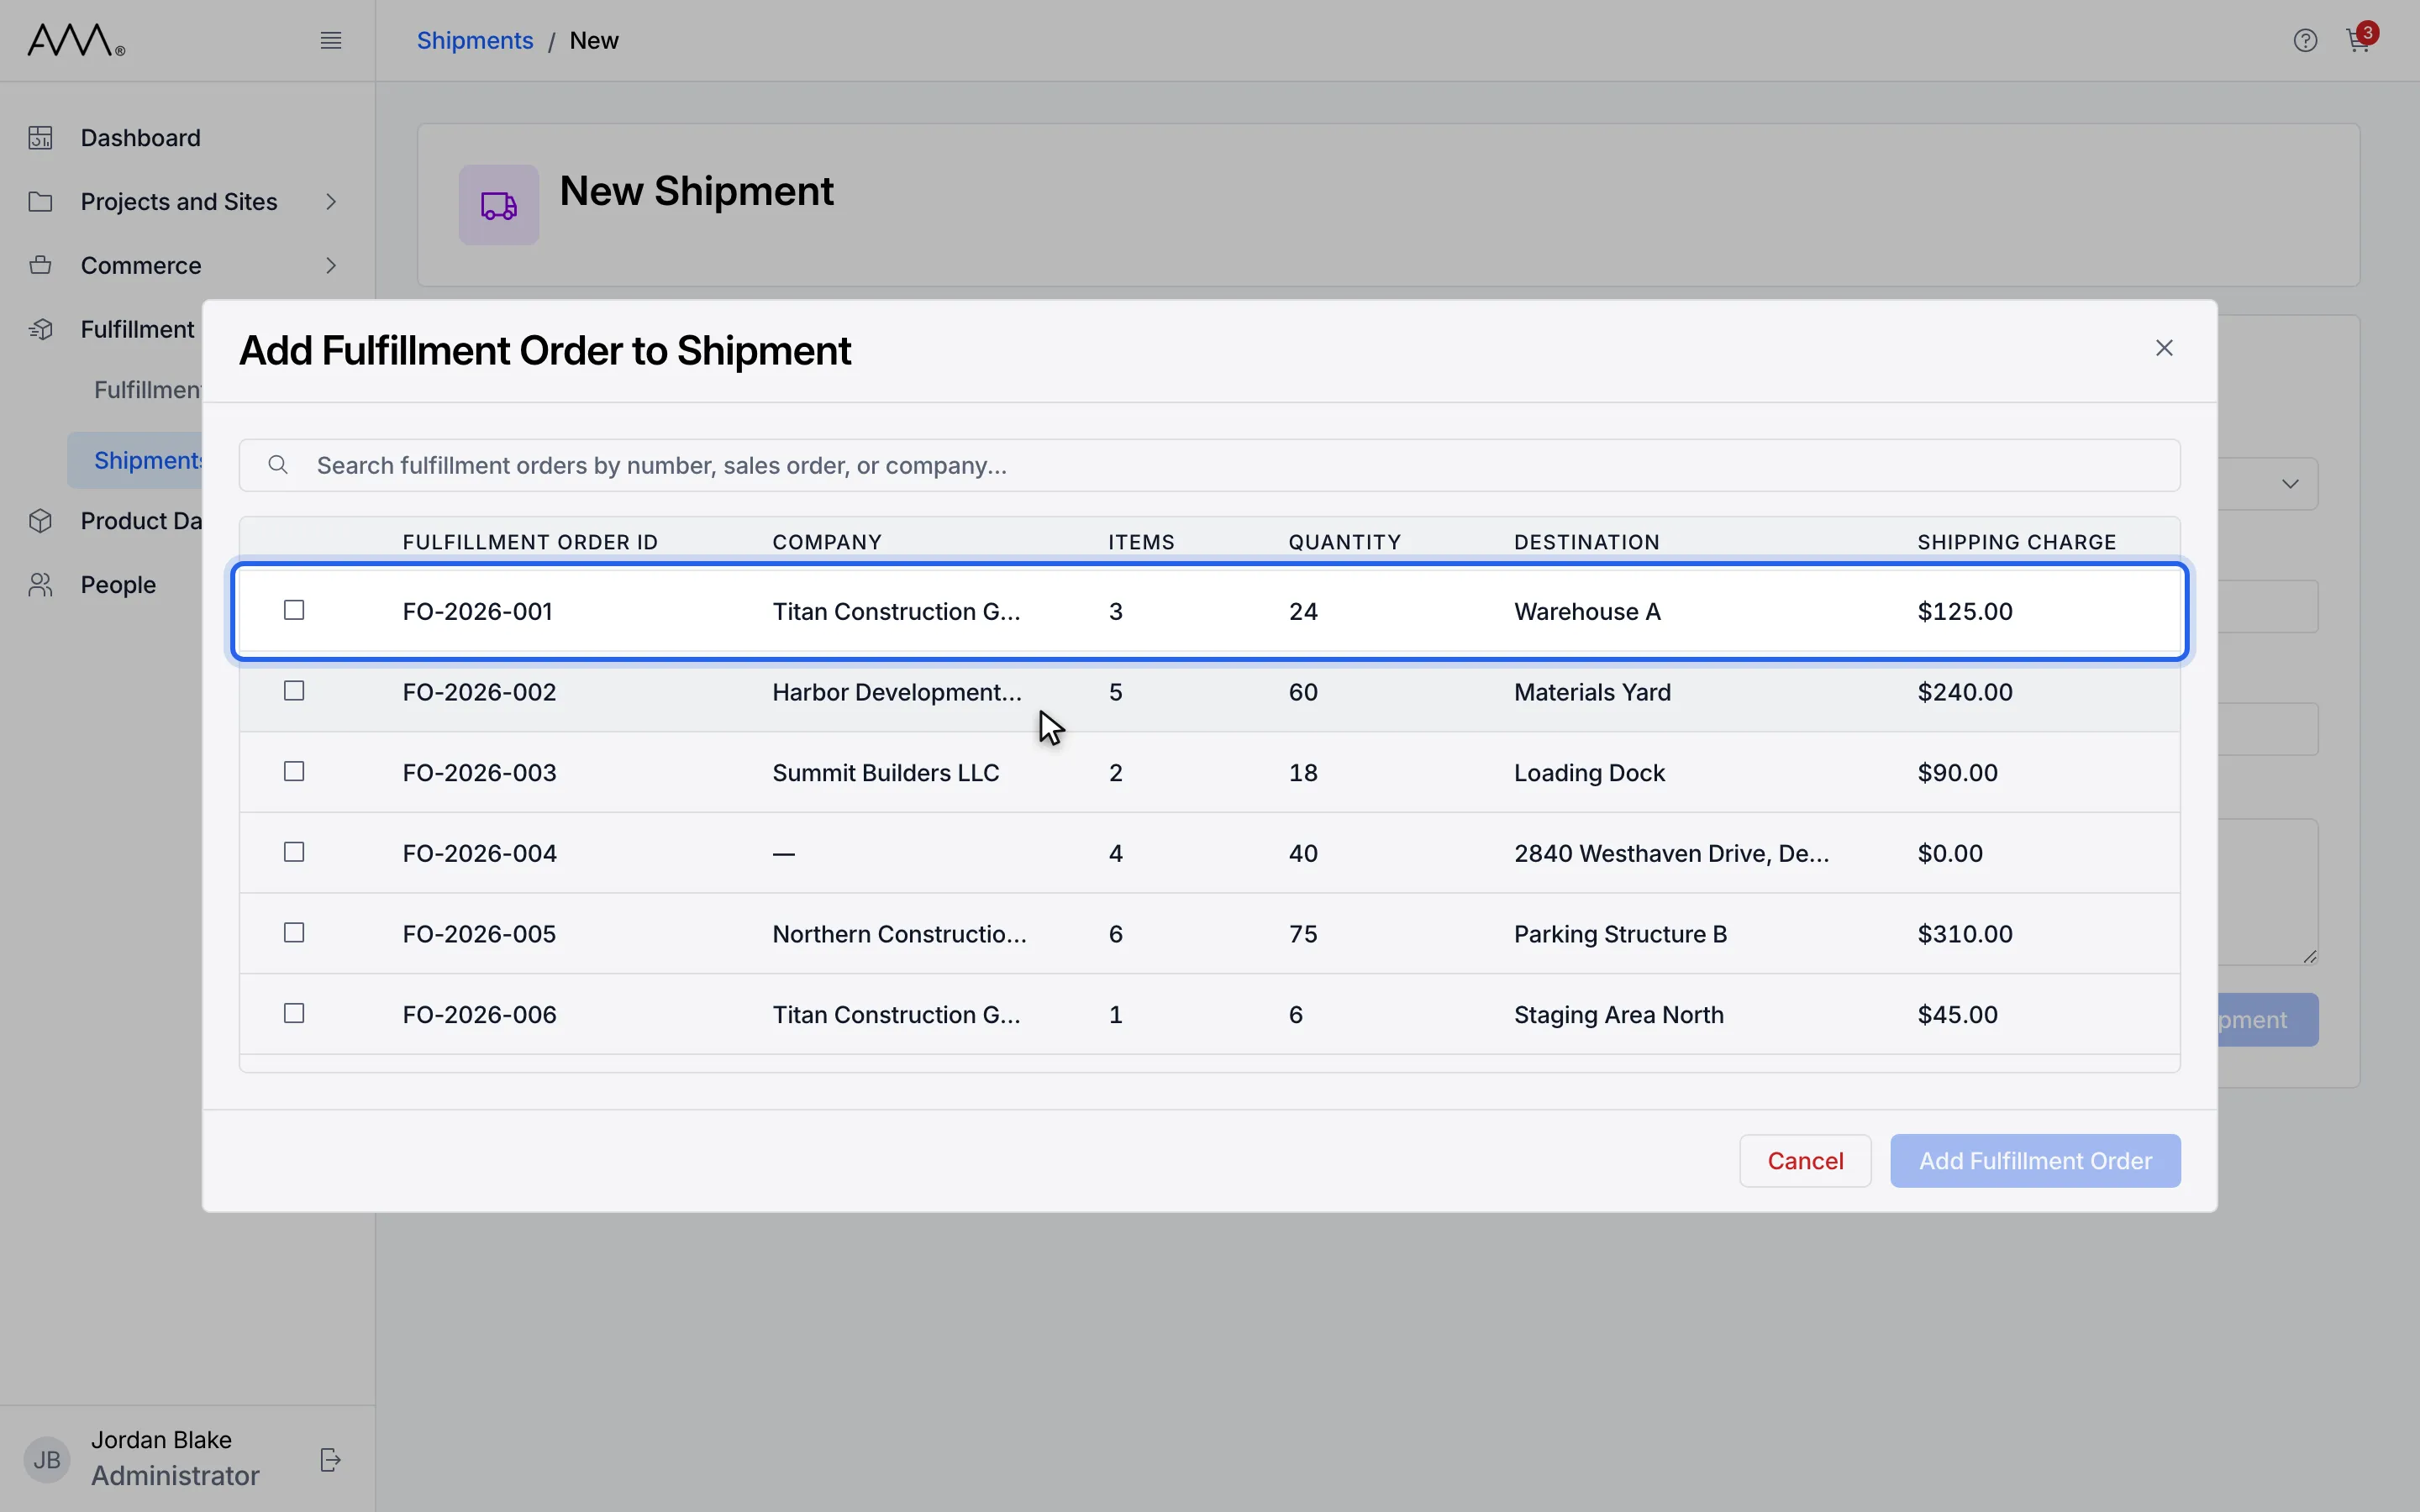
5Click the row of each fulfillment order to ship. This ticks its box.
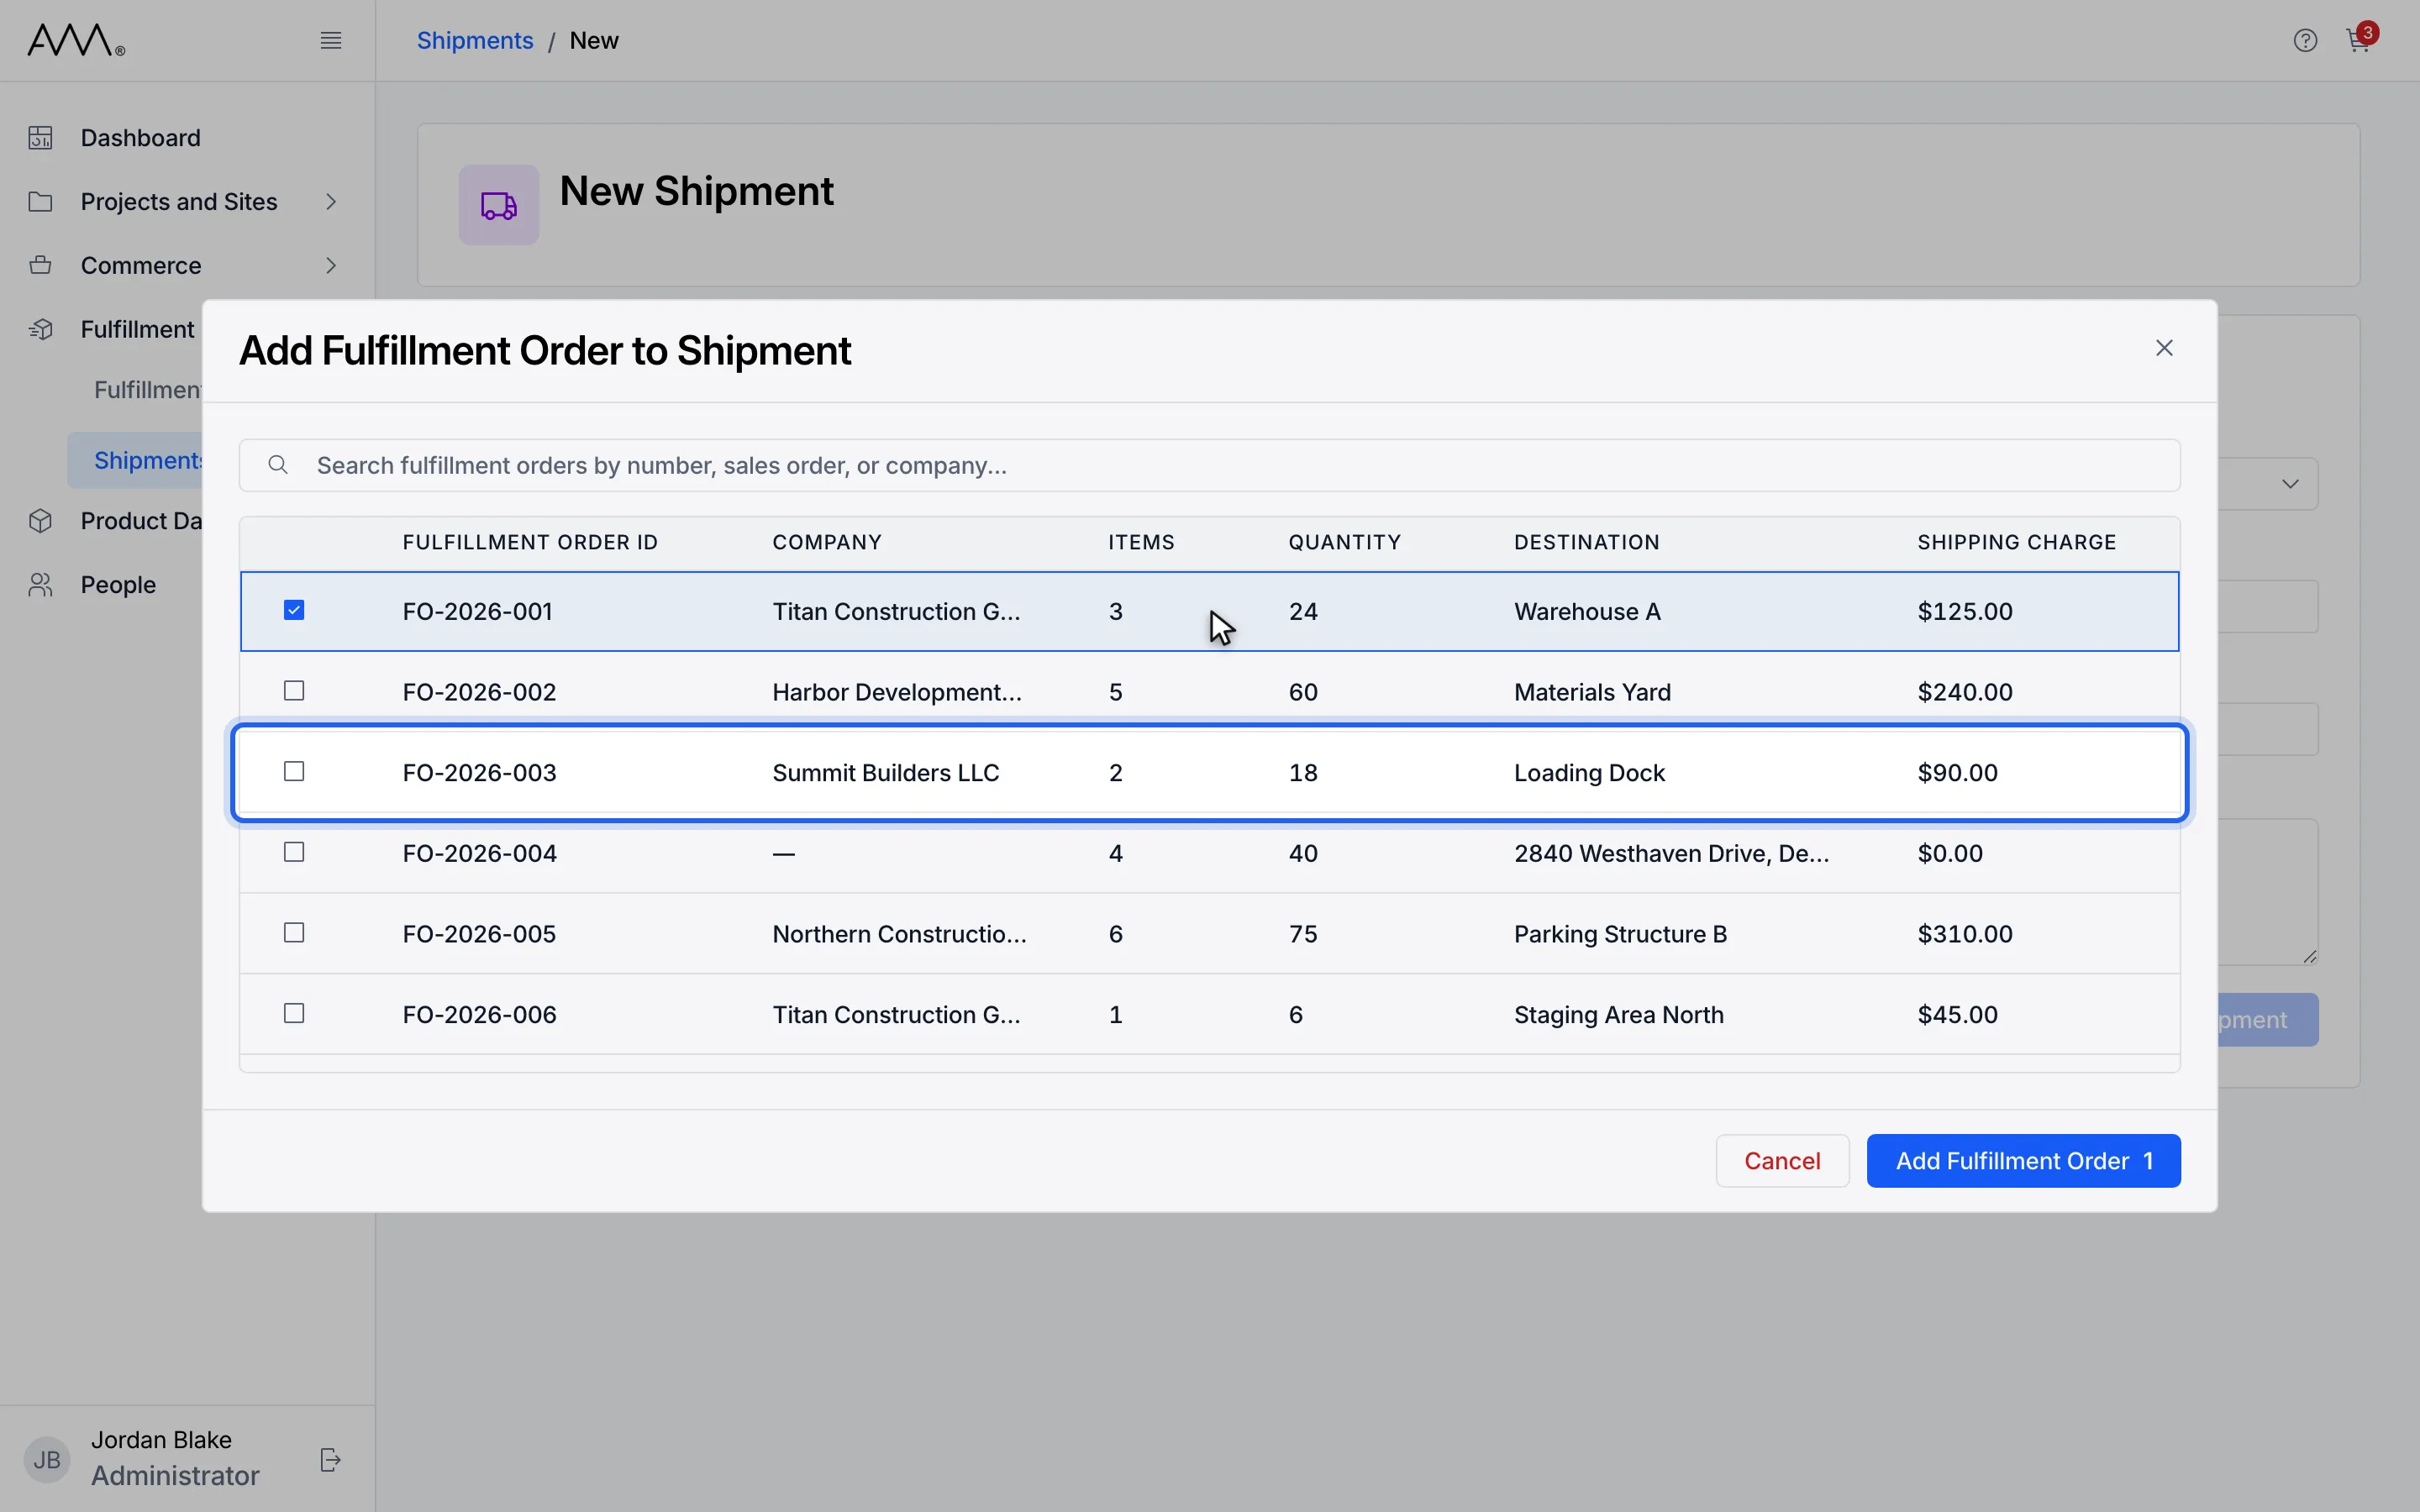
6You can tick more than one.
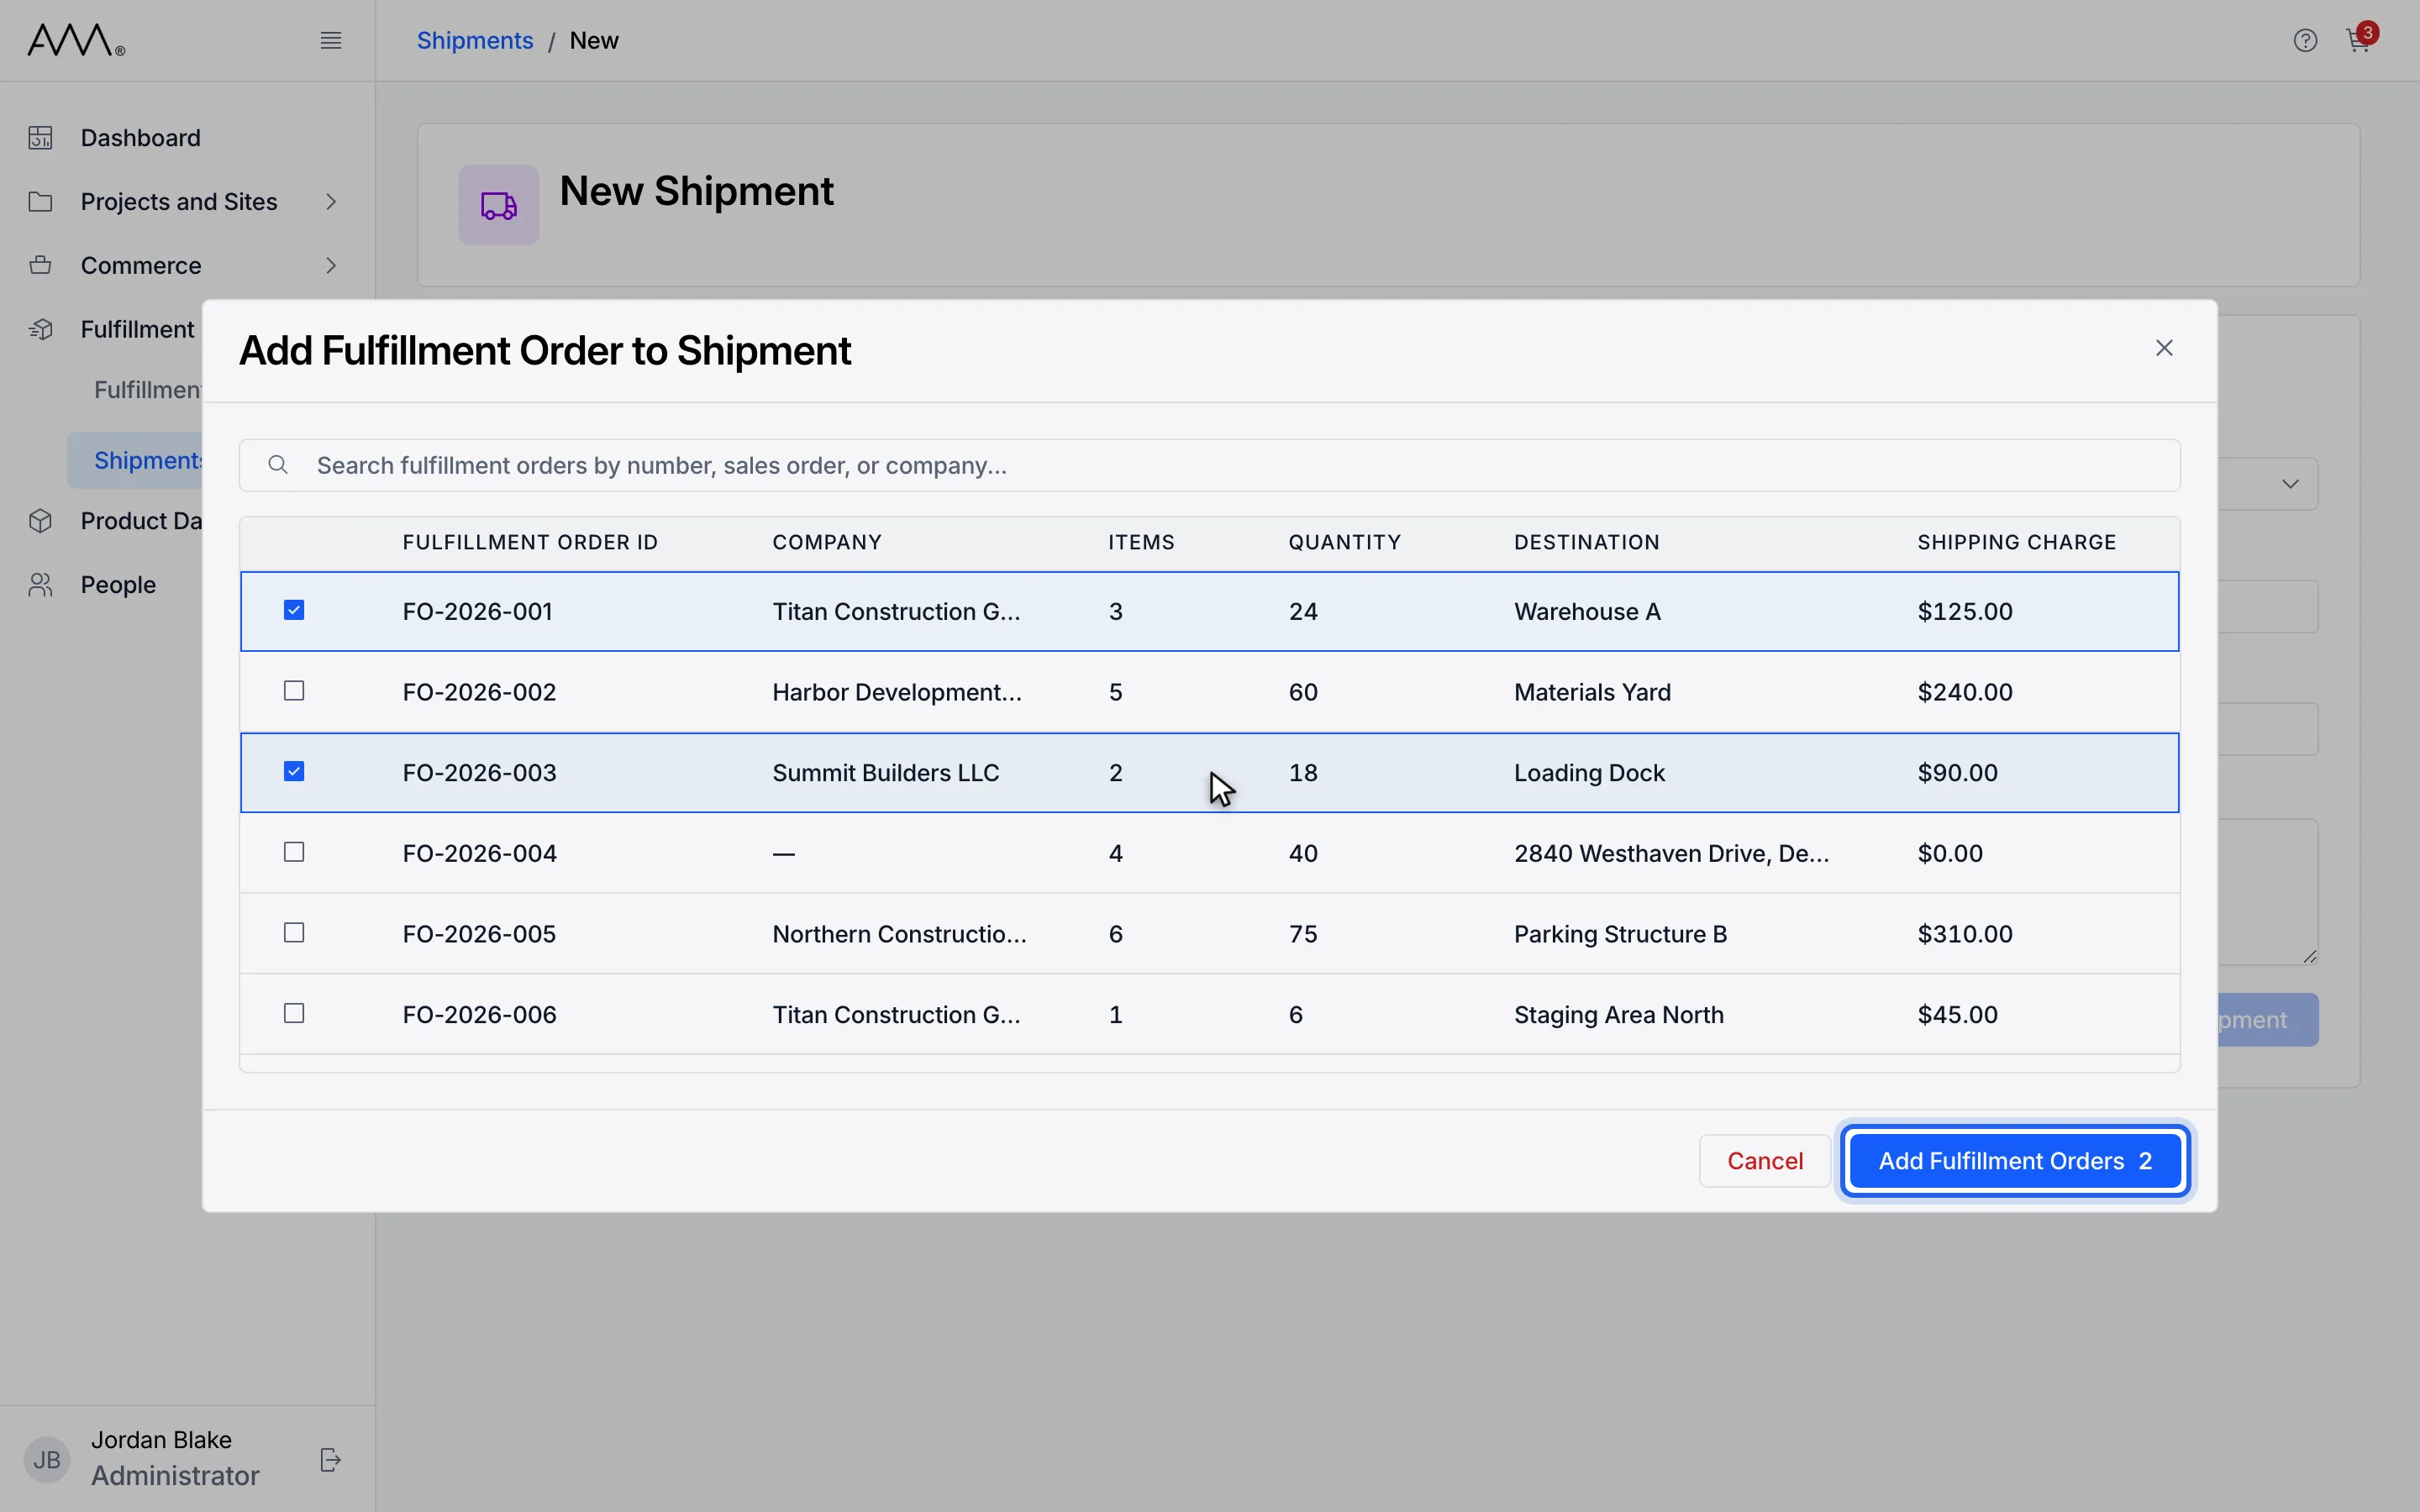
7Click Add Fulfillment Orders.
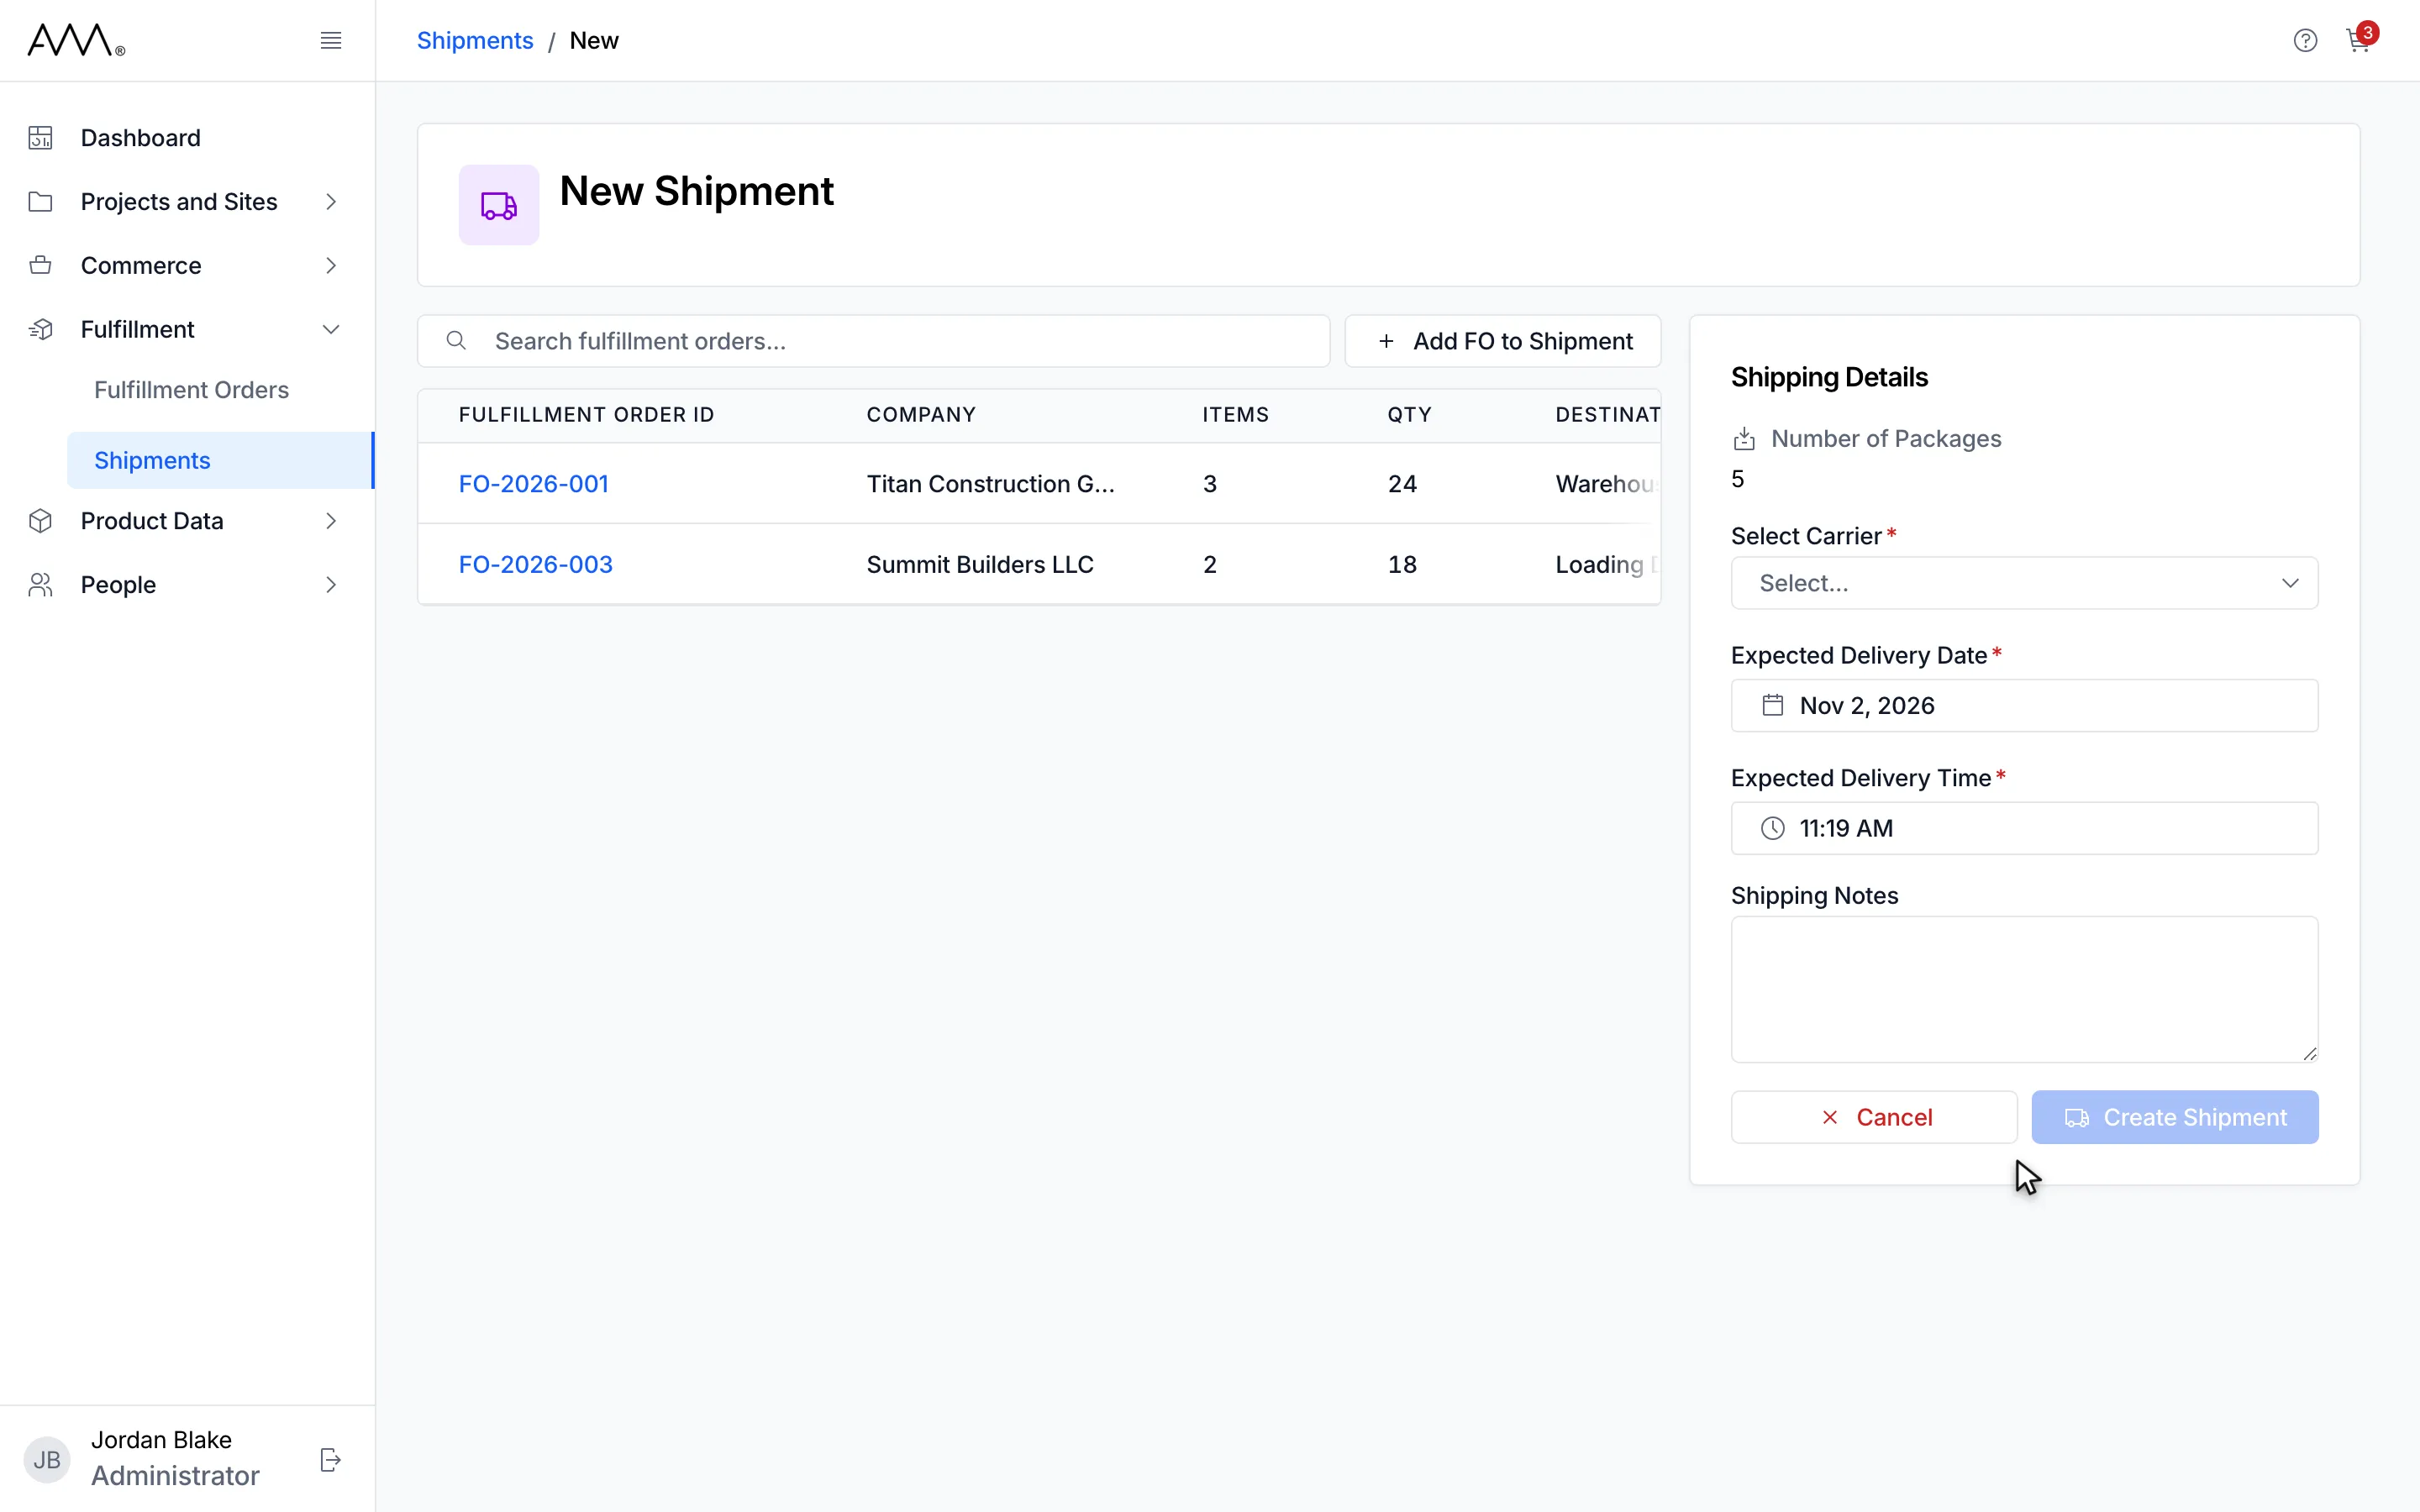
8Each order arrives with its default Shipping Charge. Number of Packages totals the orders.
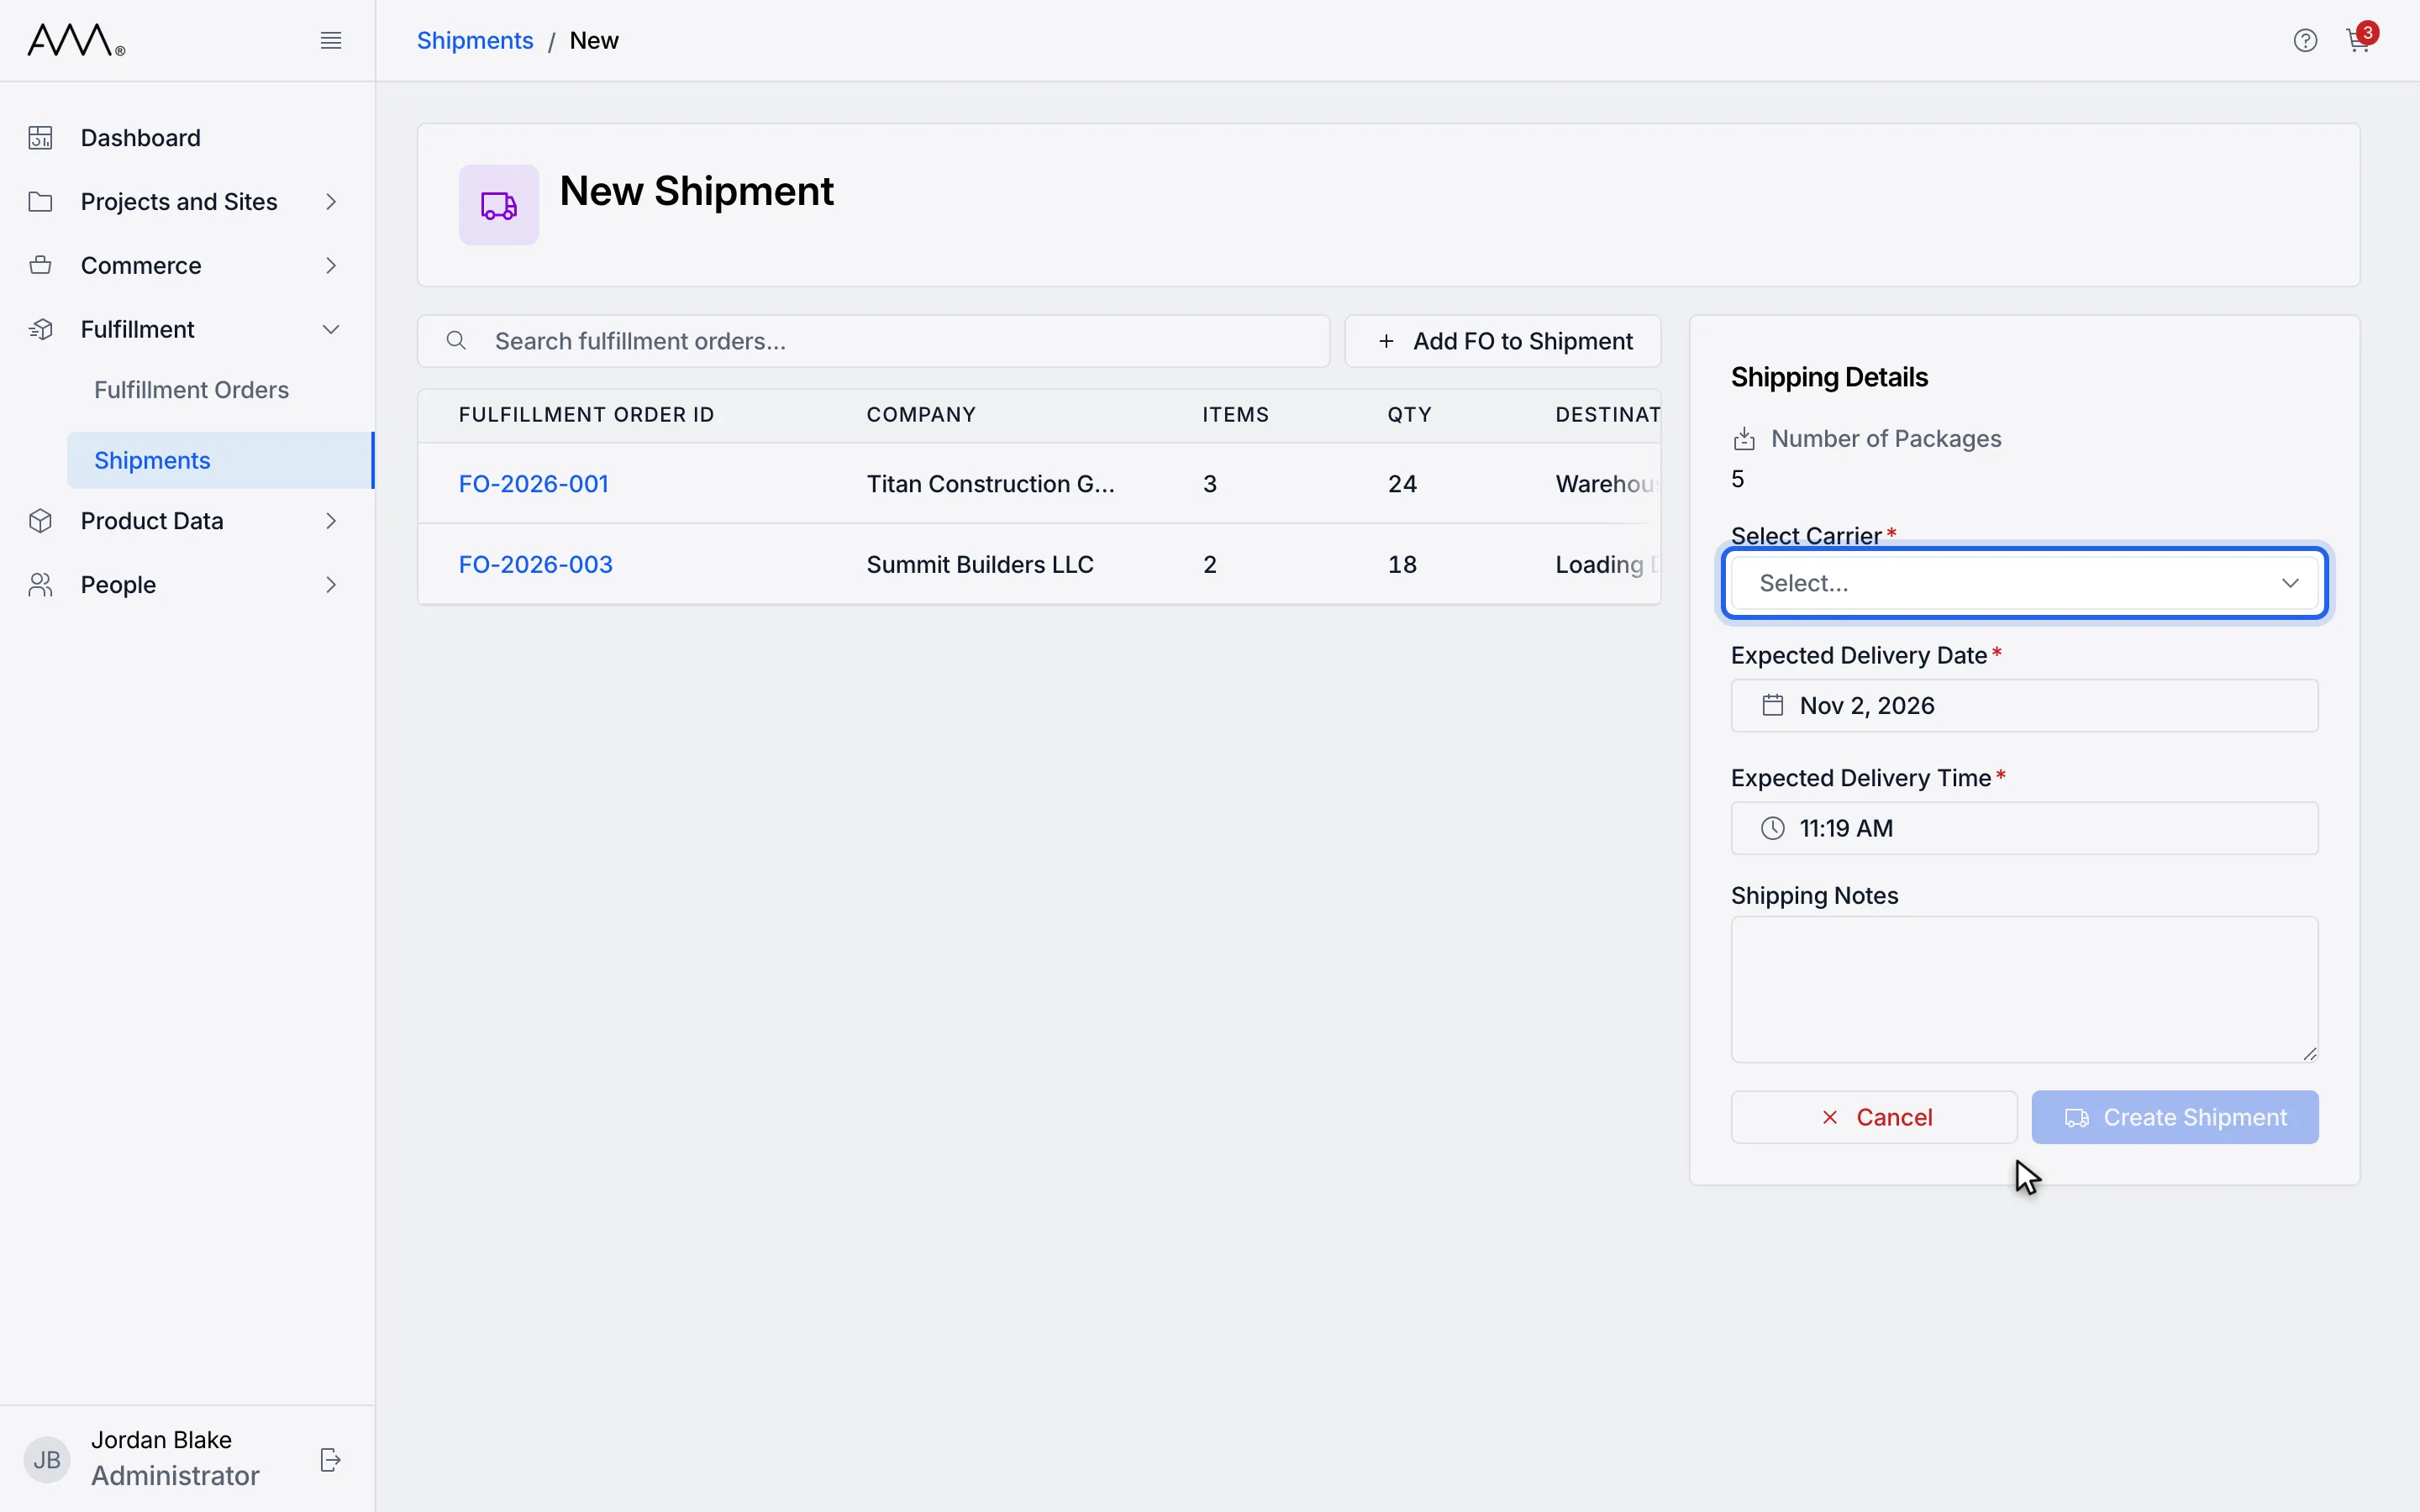
9Open Select Carrier.
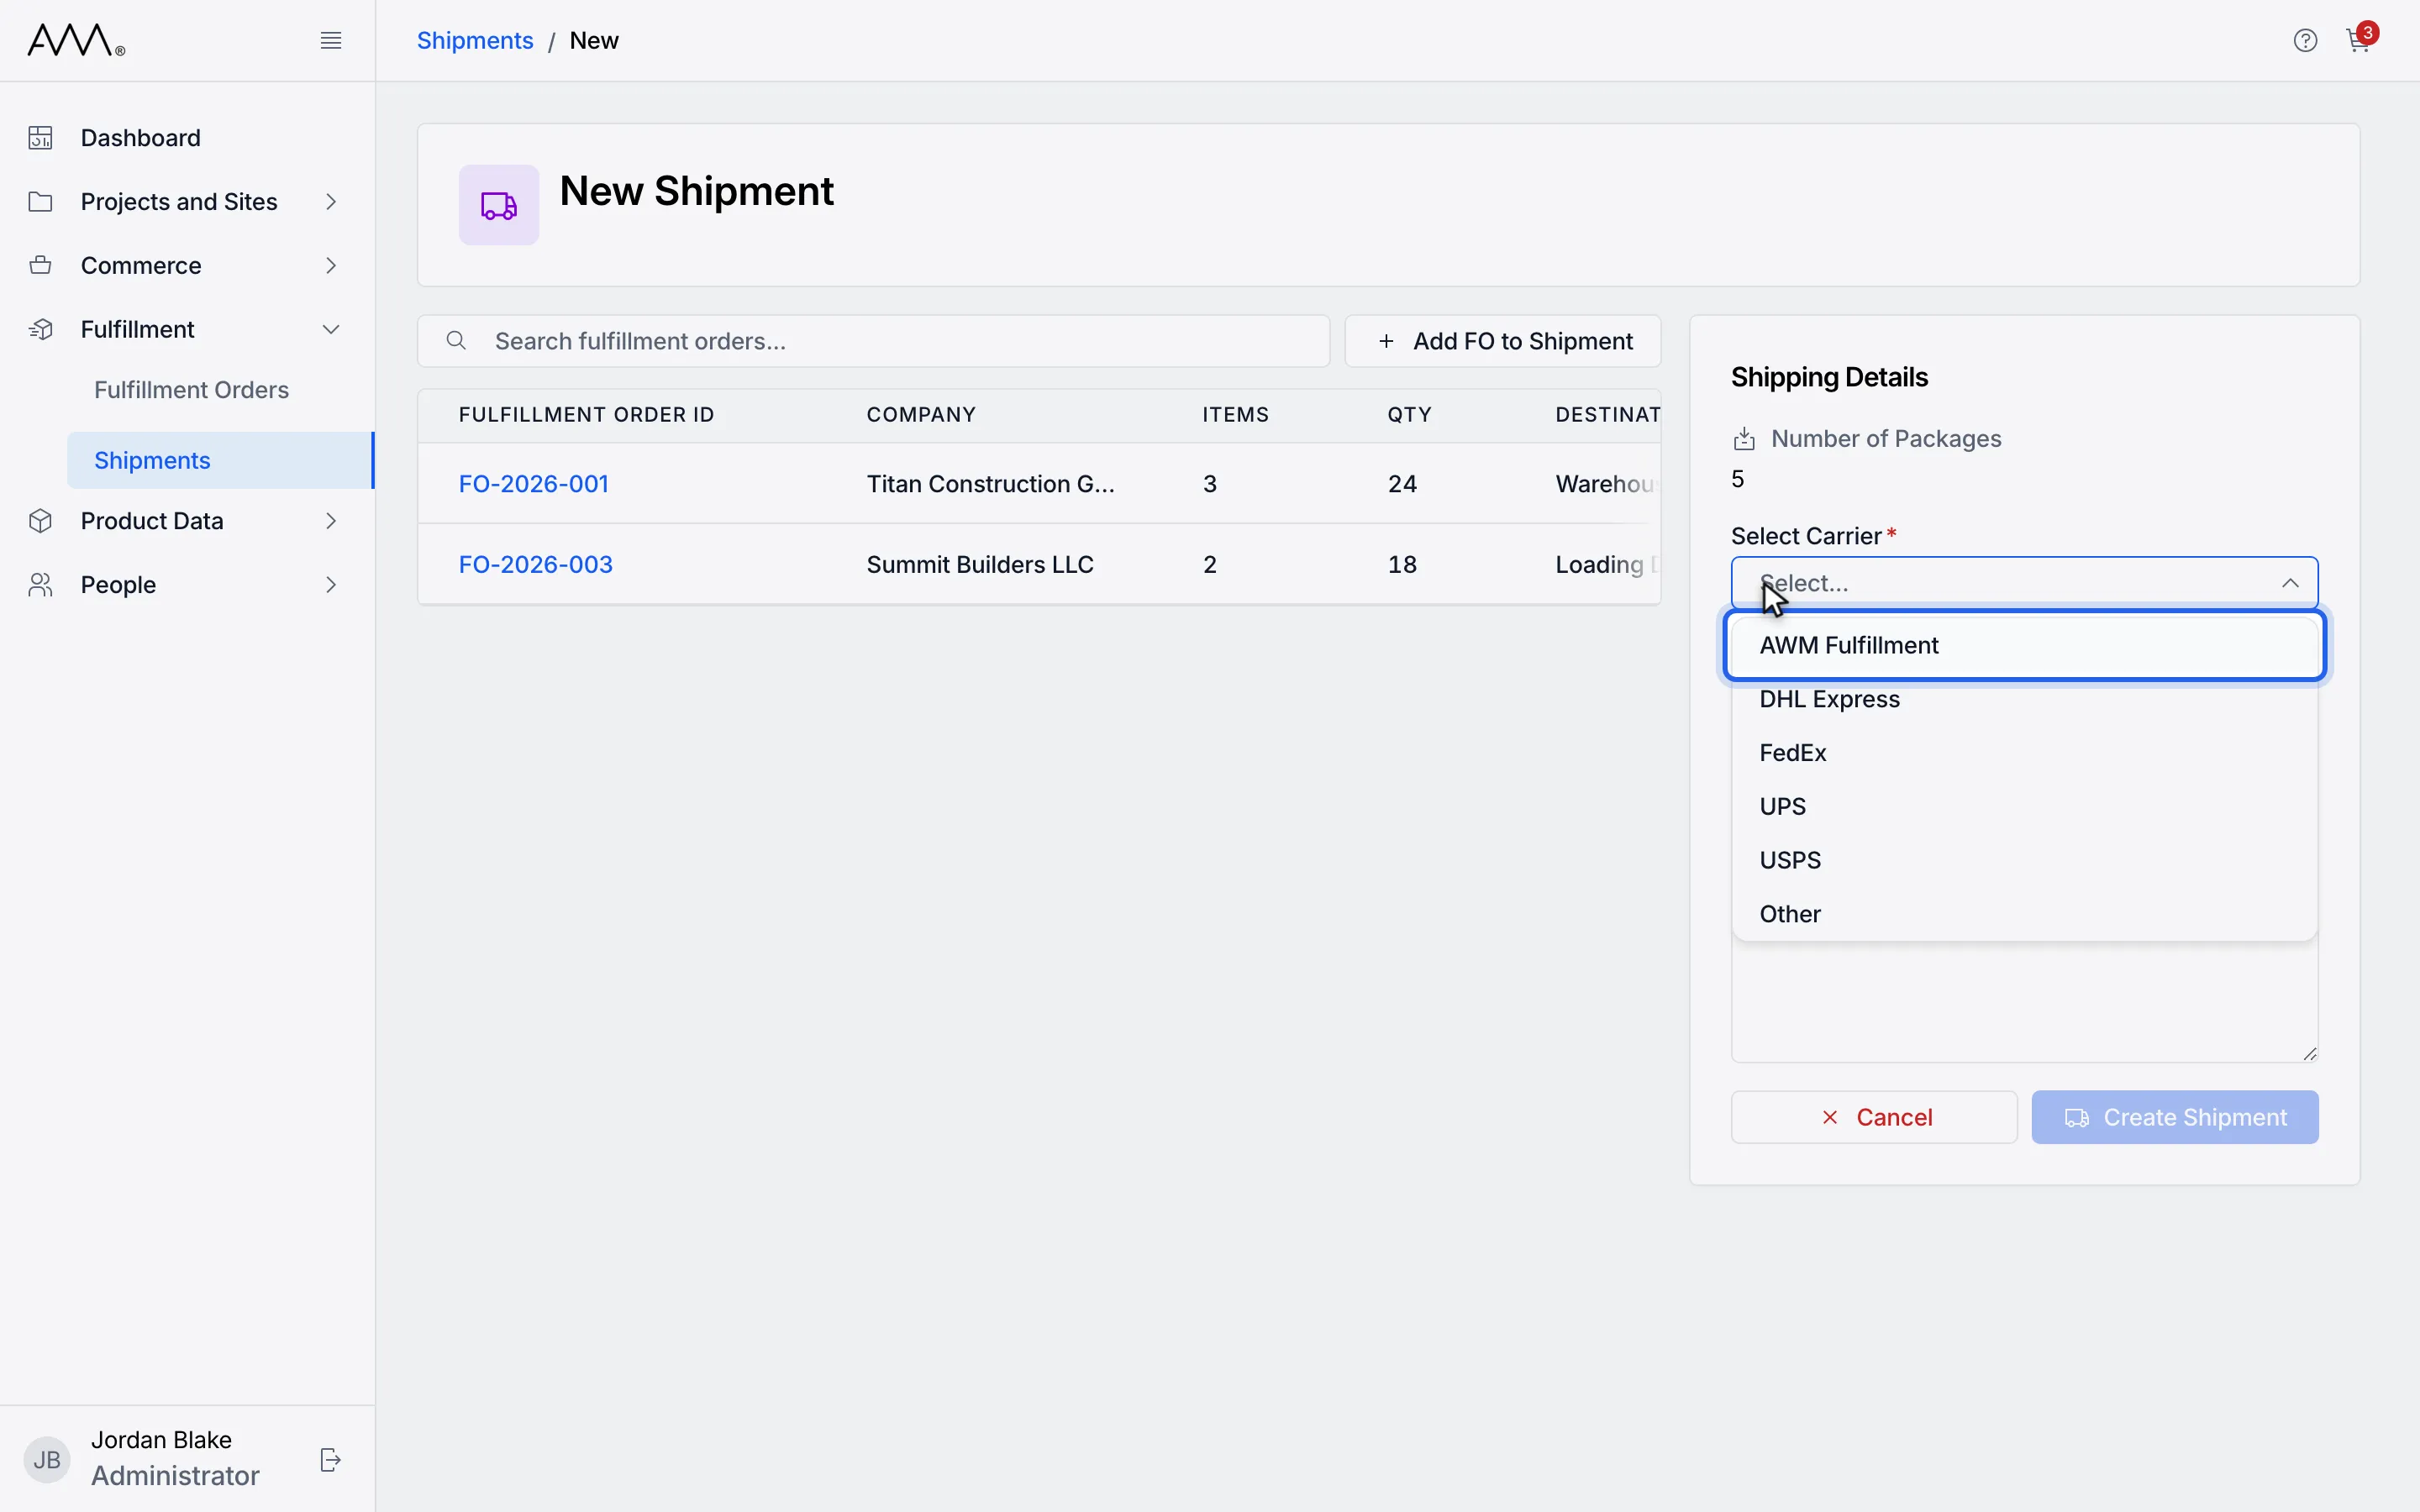
10Choose the carrier. AWM Fulfillment adds a Driver field; other carriers add Tracking.
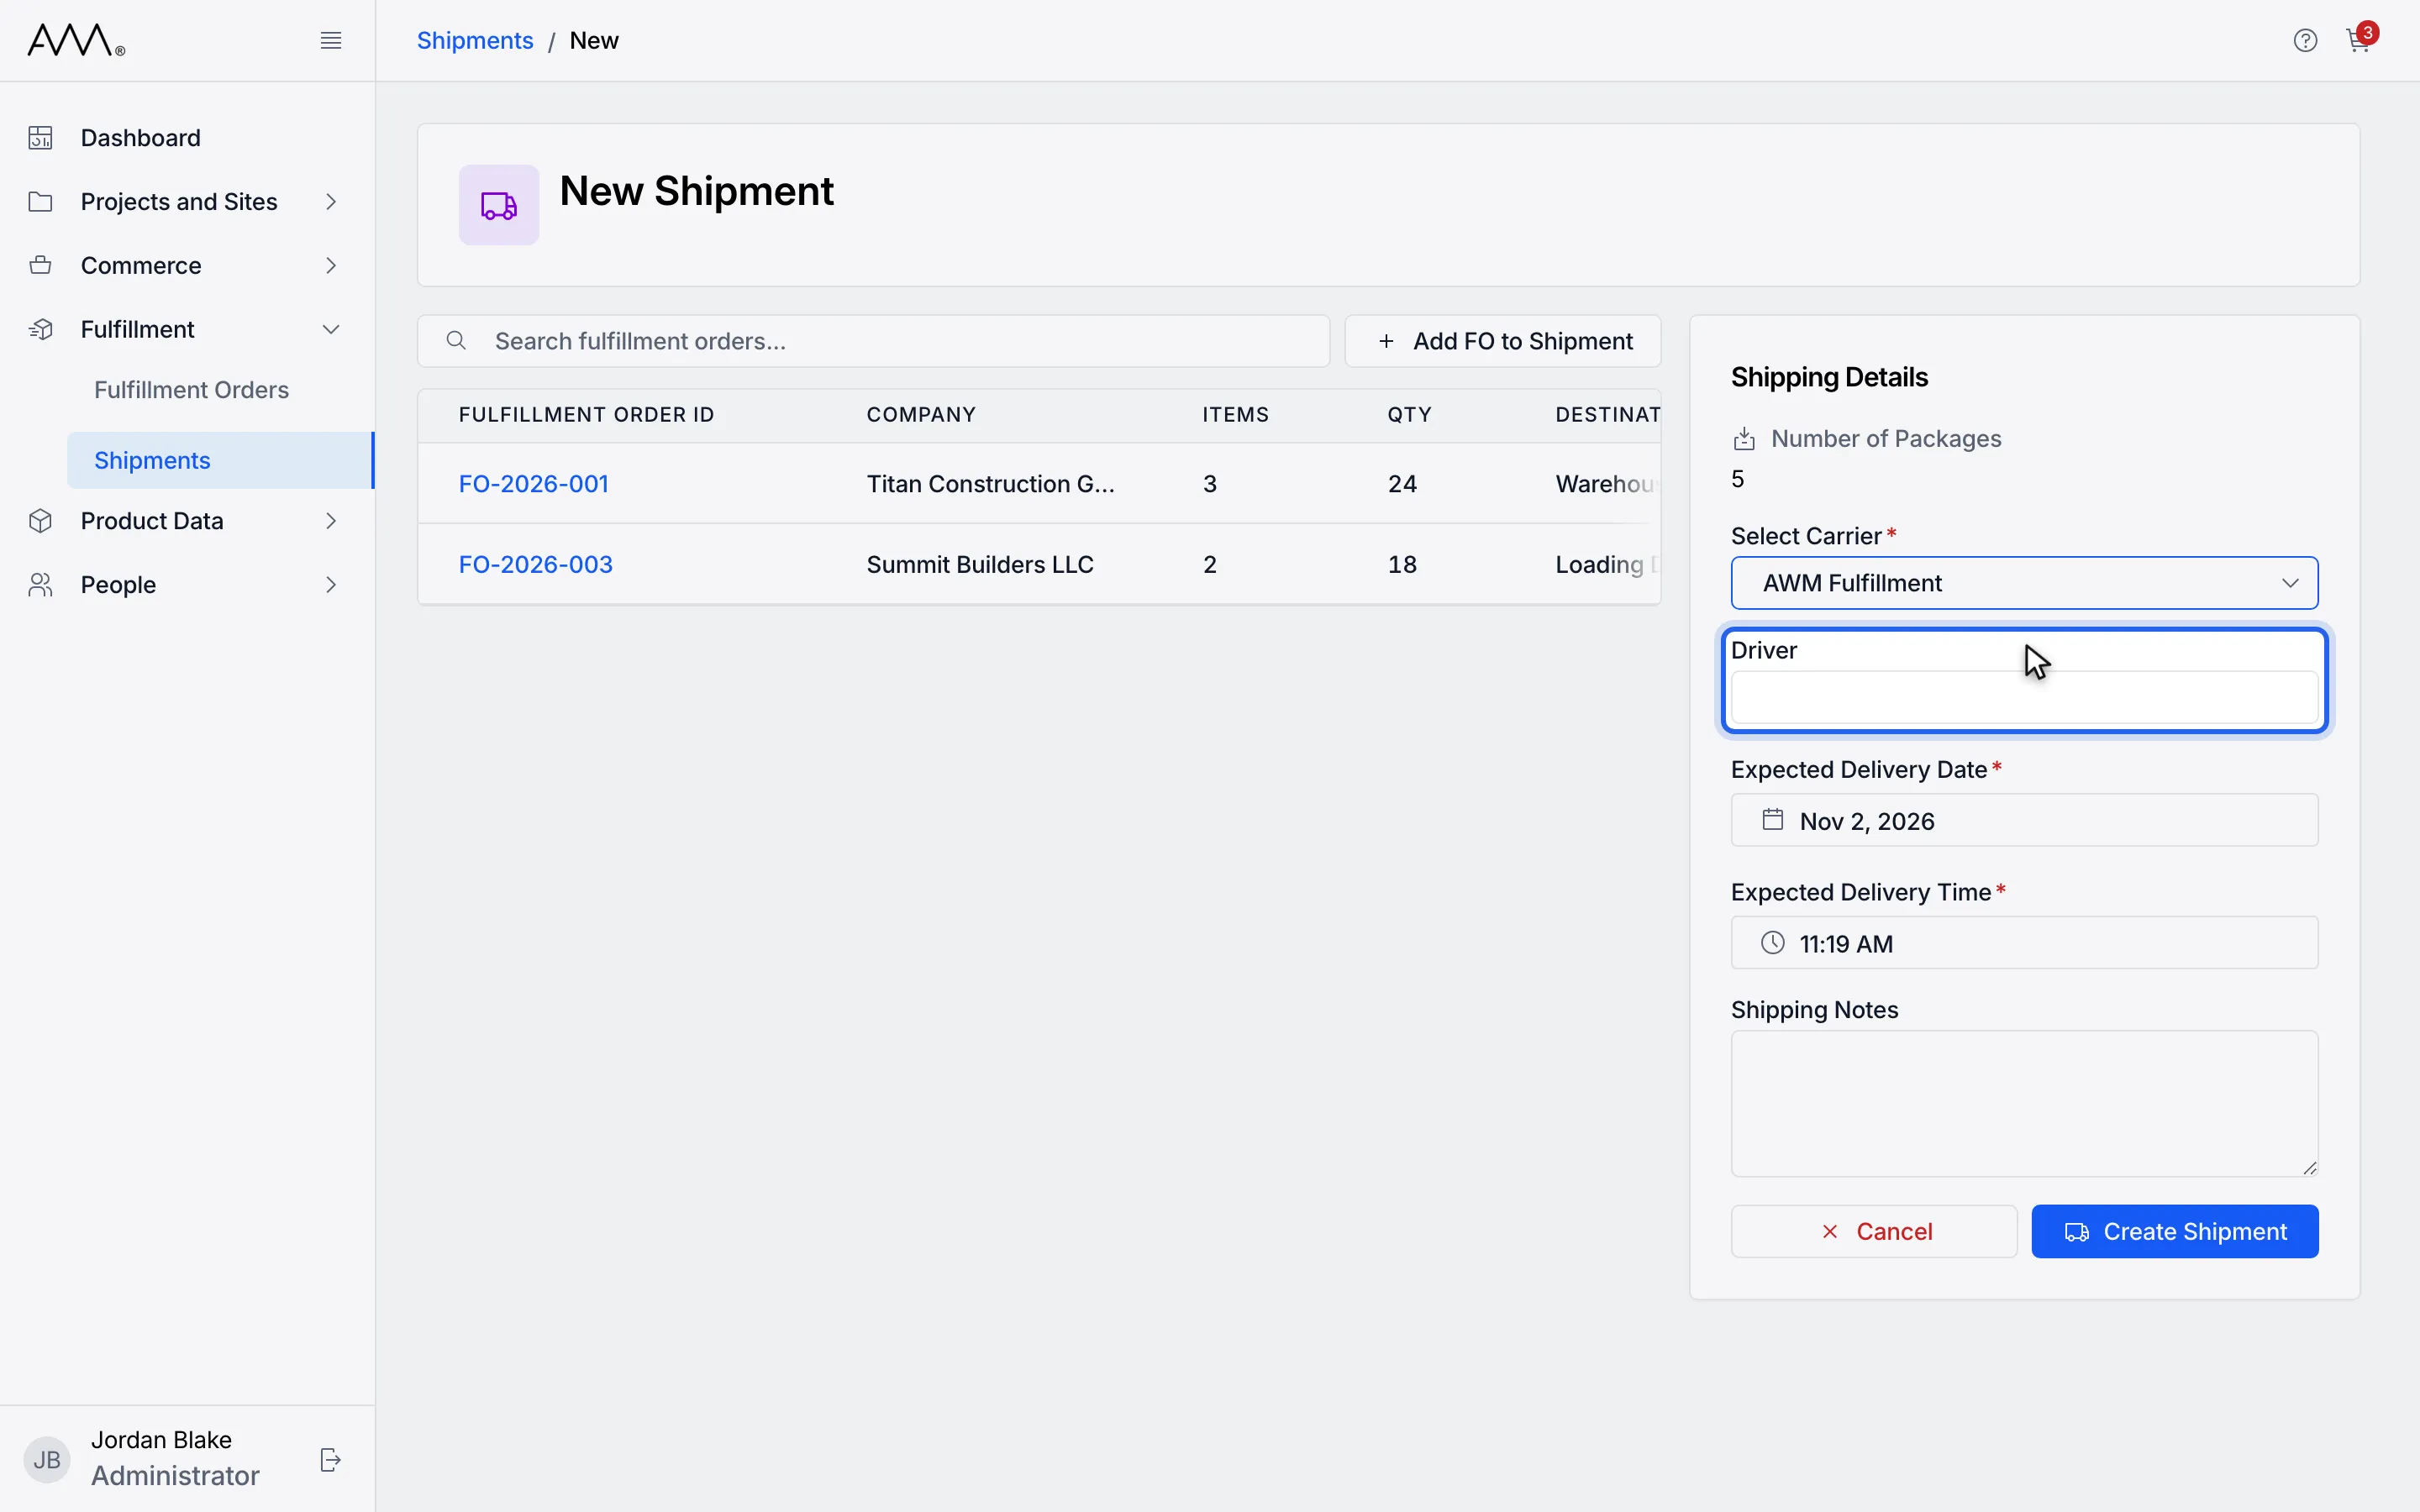
11Enter the Driver (AWM Fulfillment only).
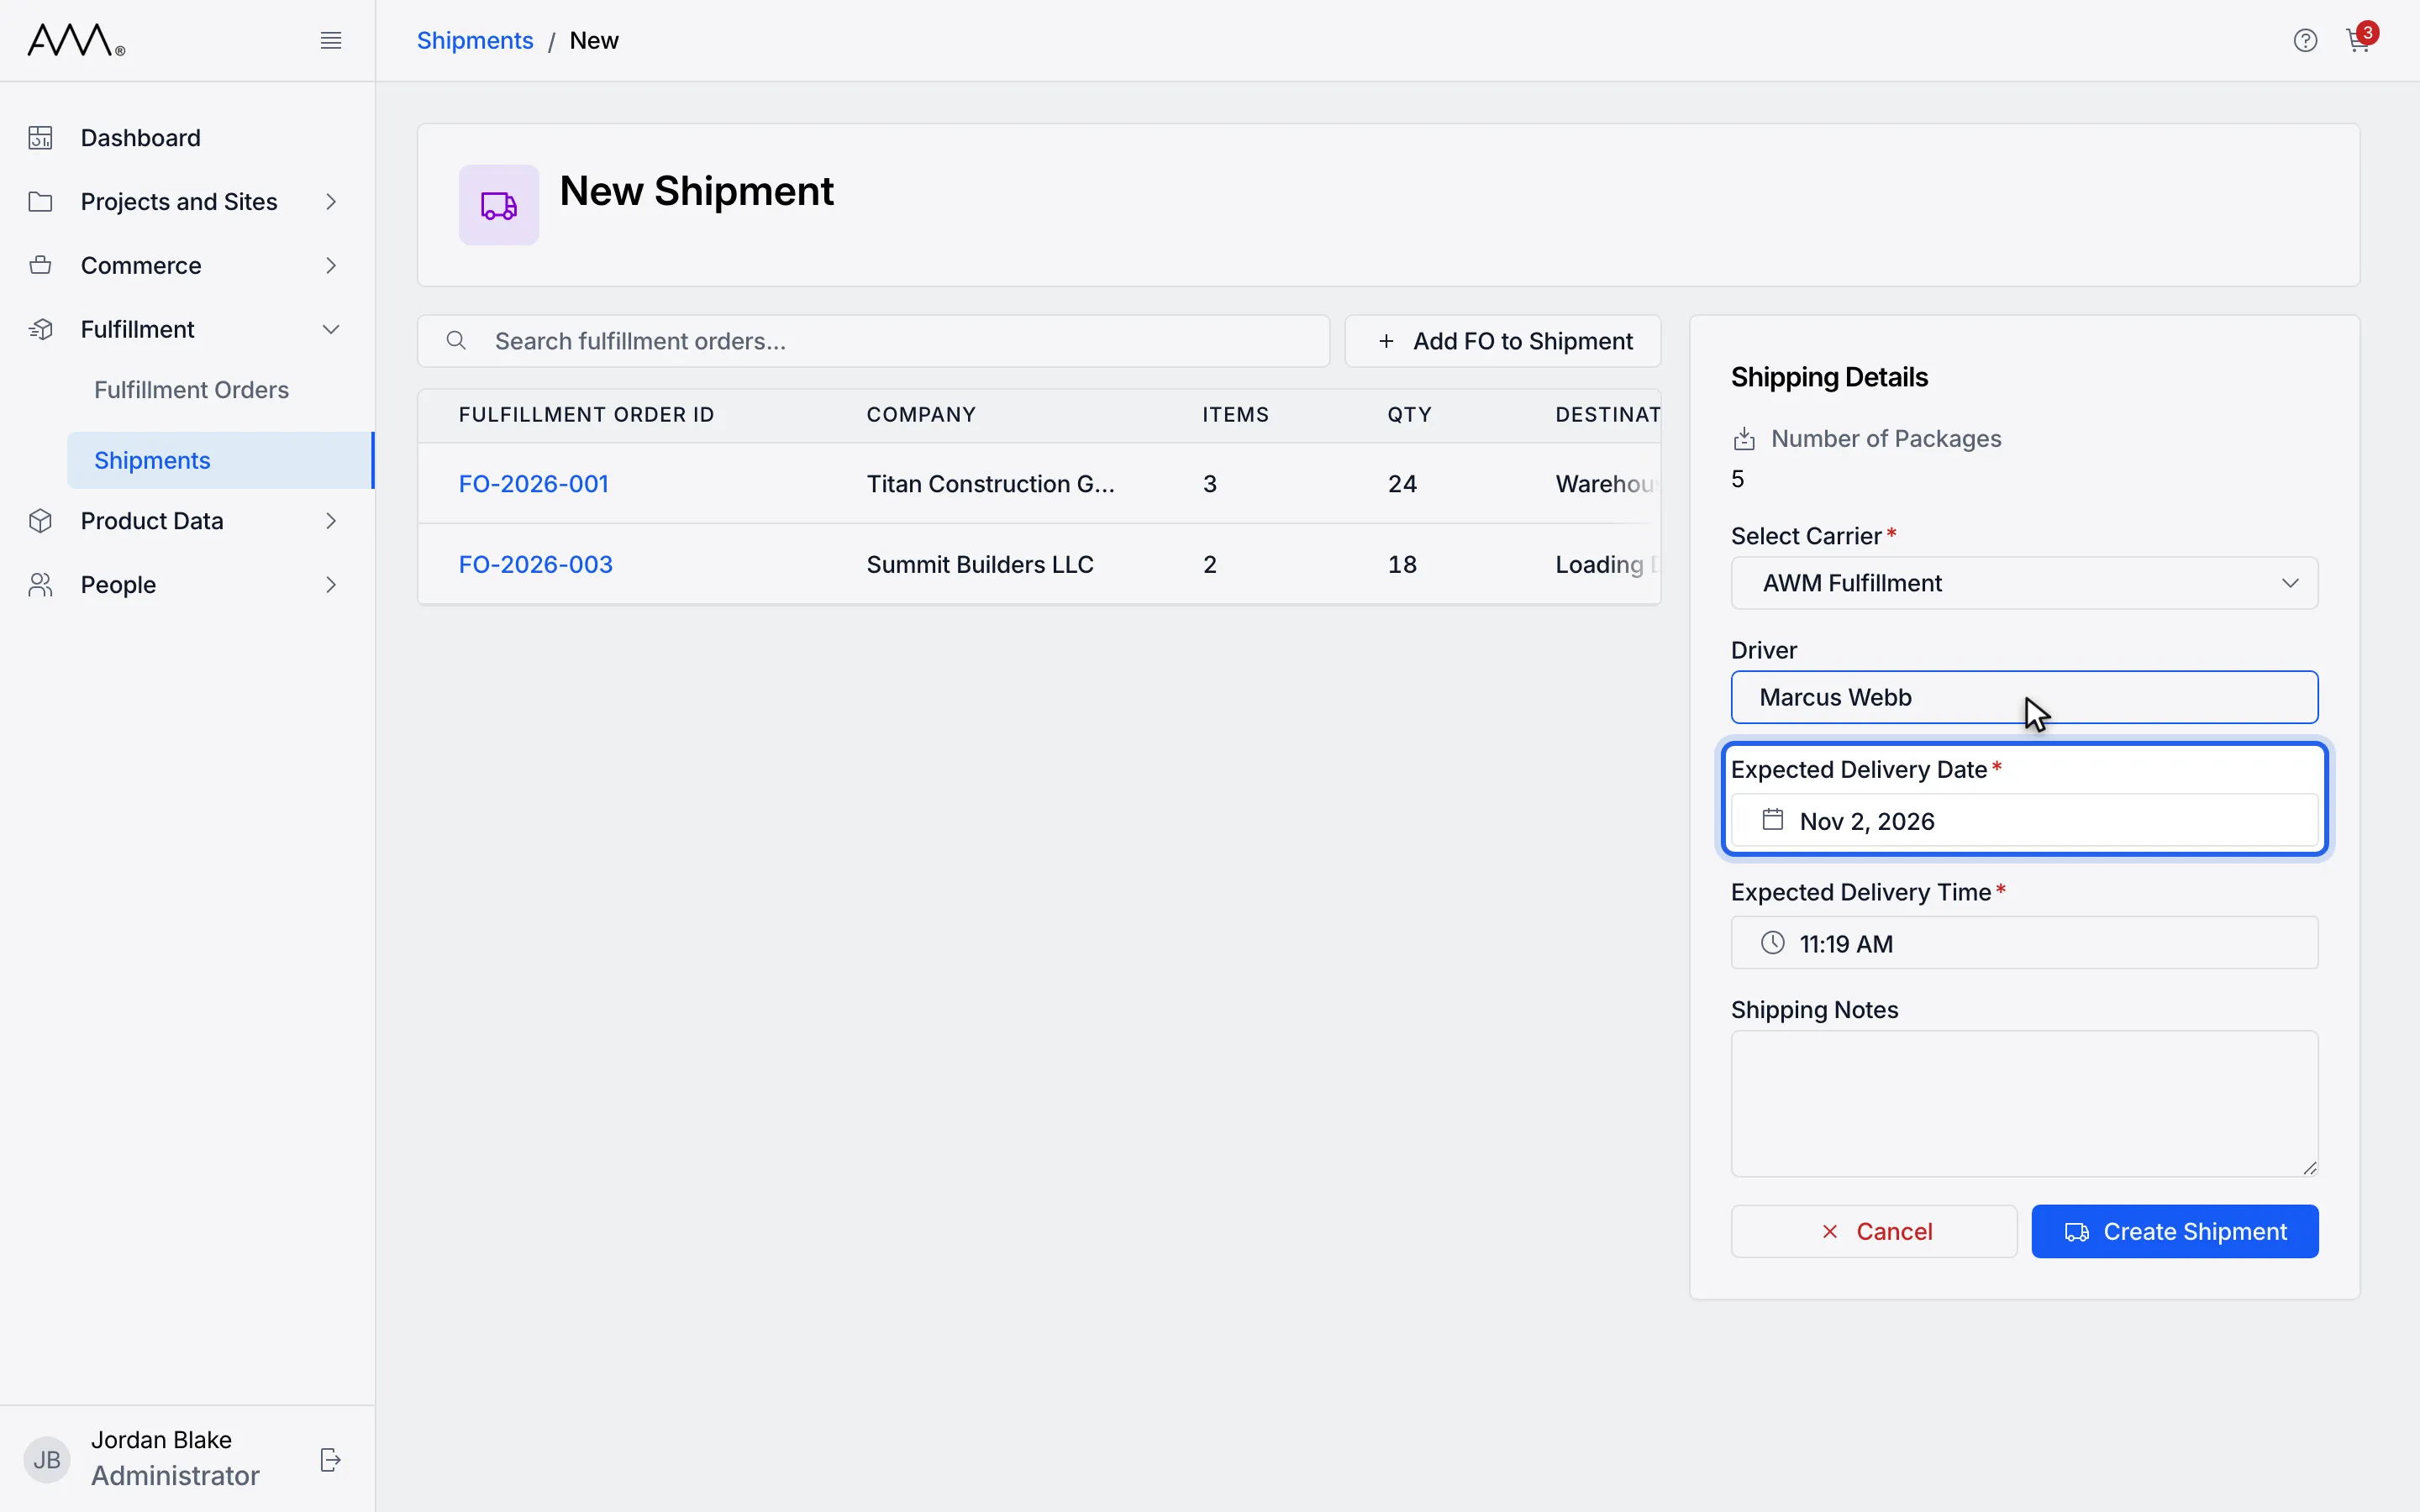
12Expected Delivery Date and Time default to today and now. Change them if needed.
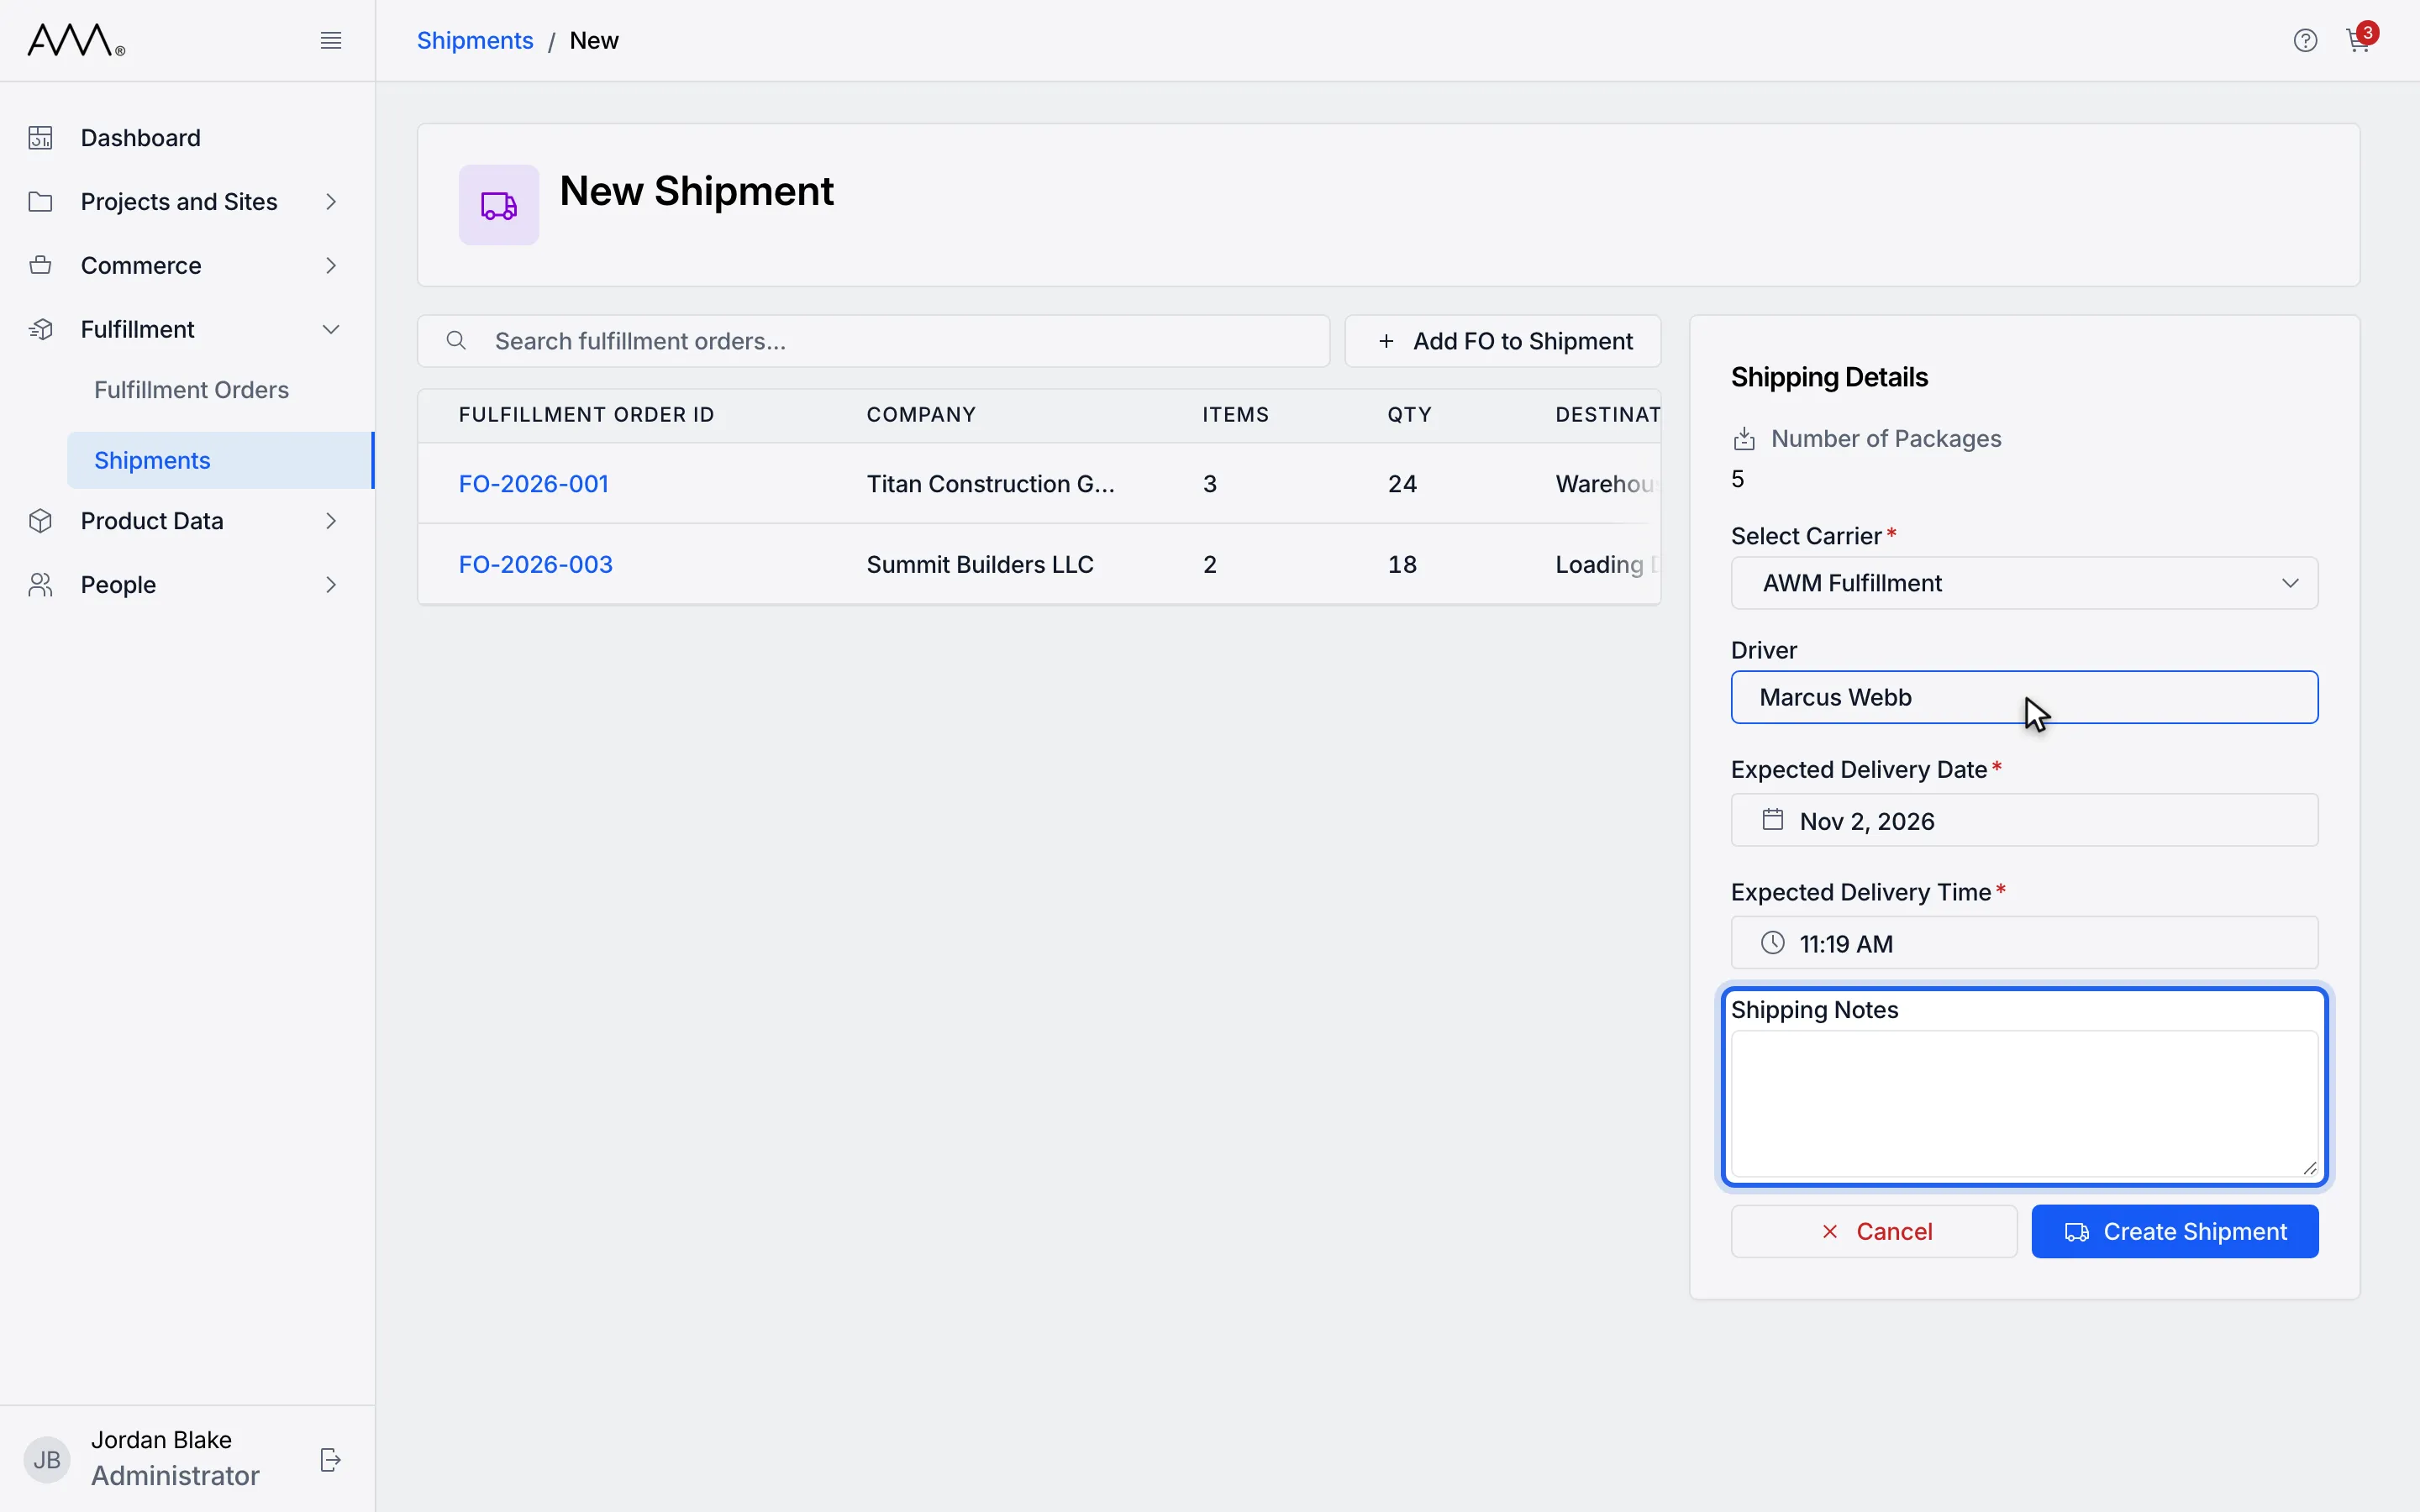
13Add Shipping Notes if needed.
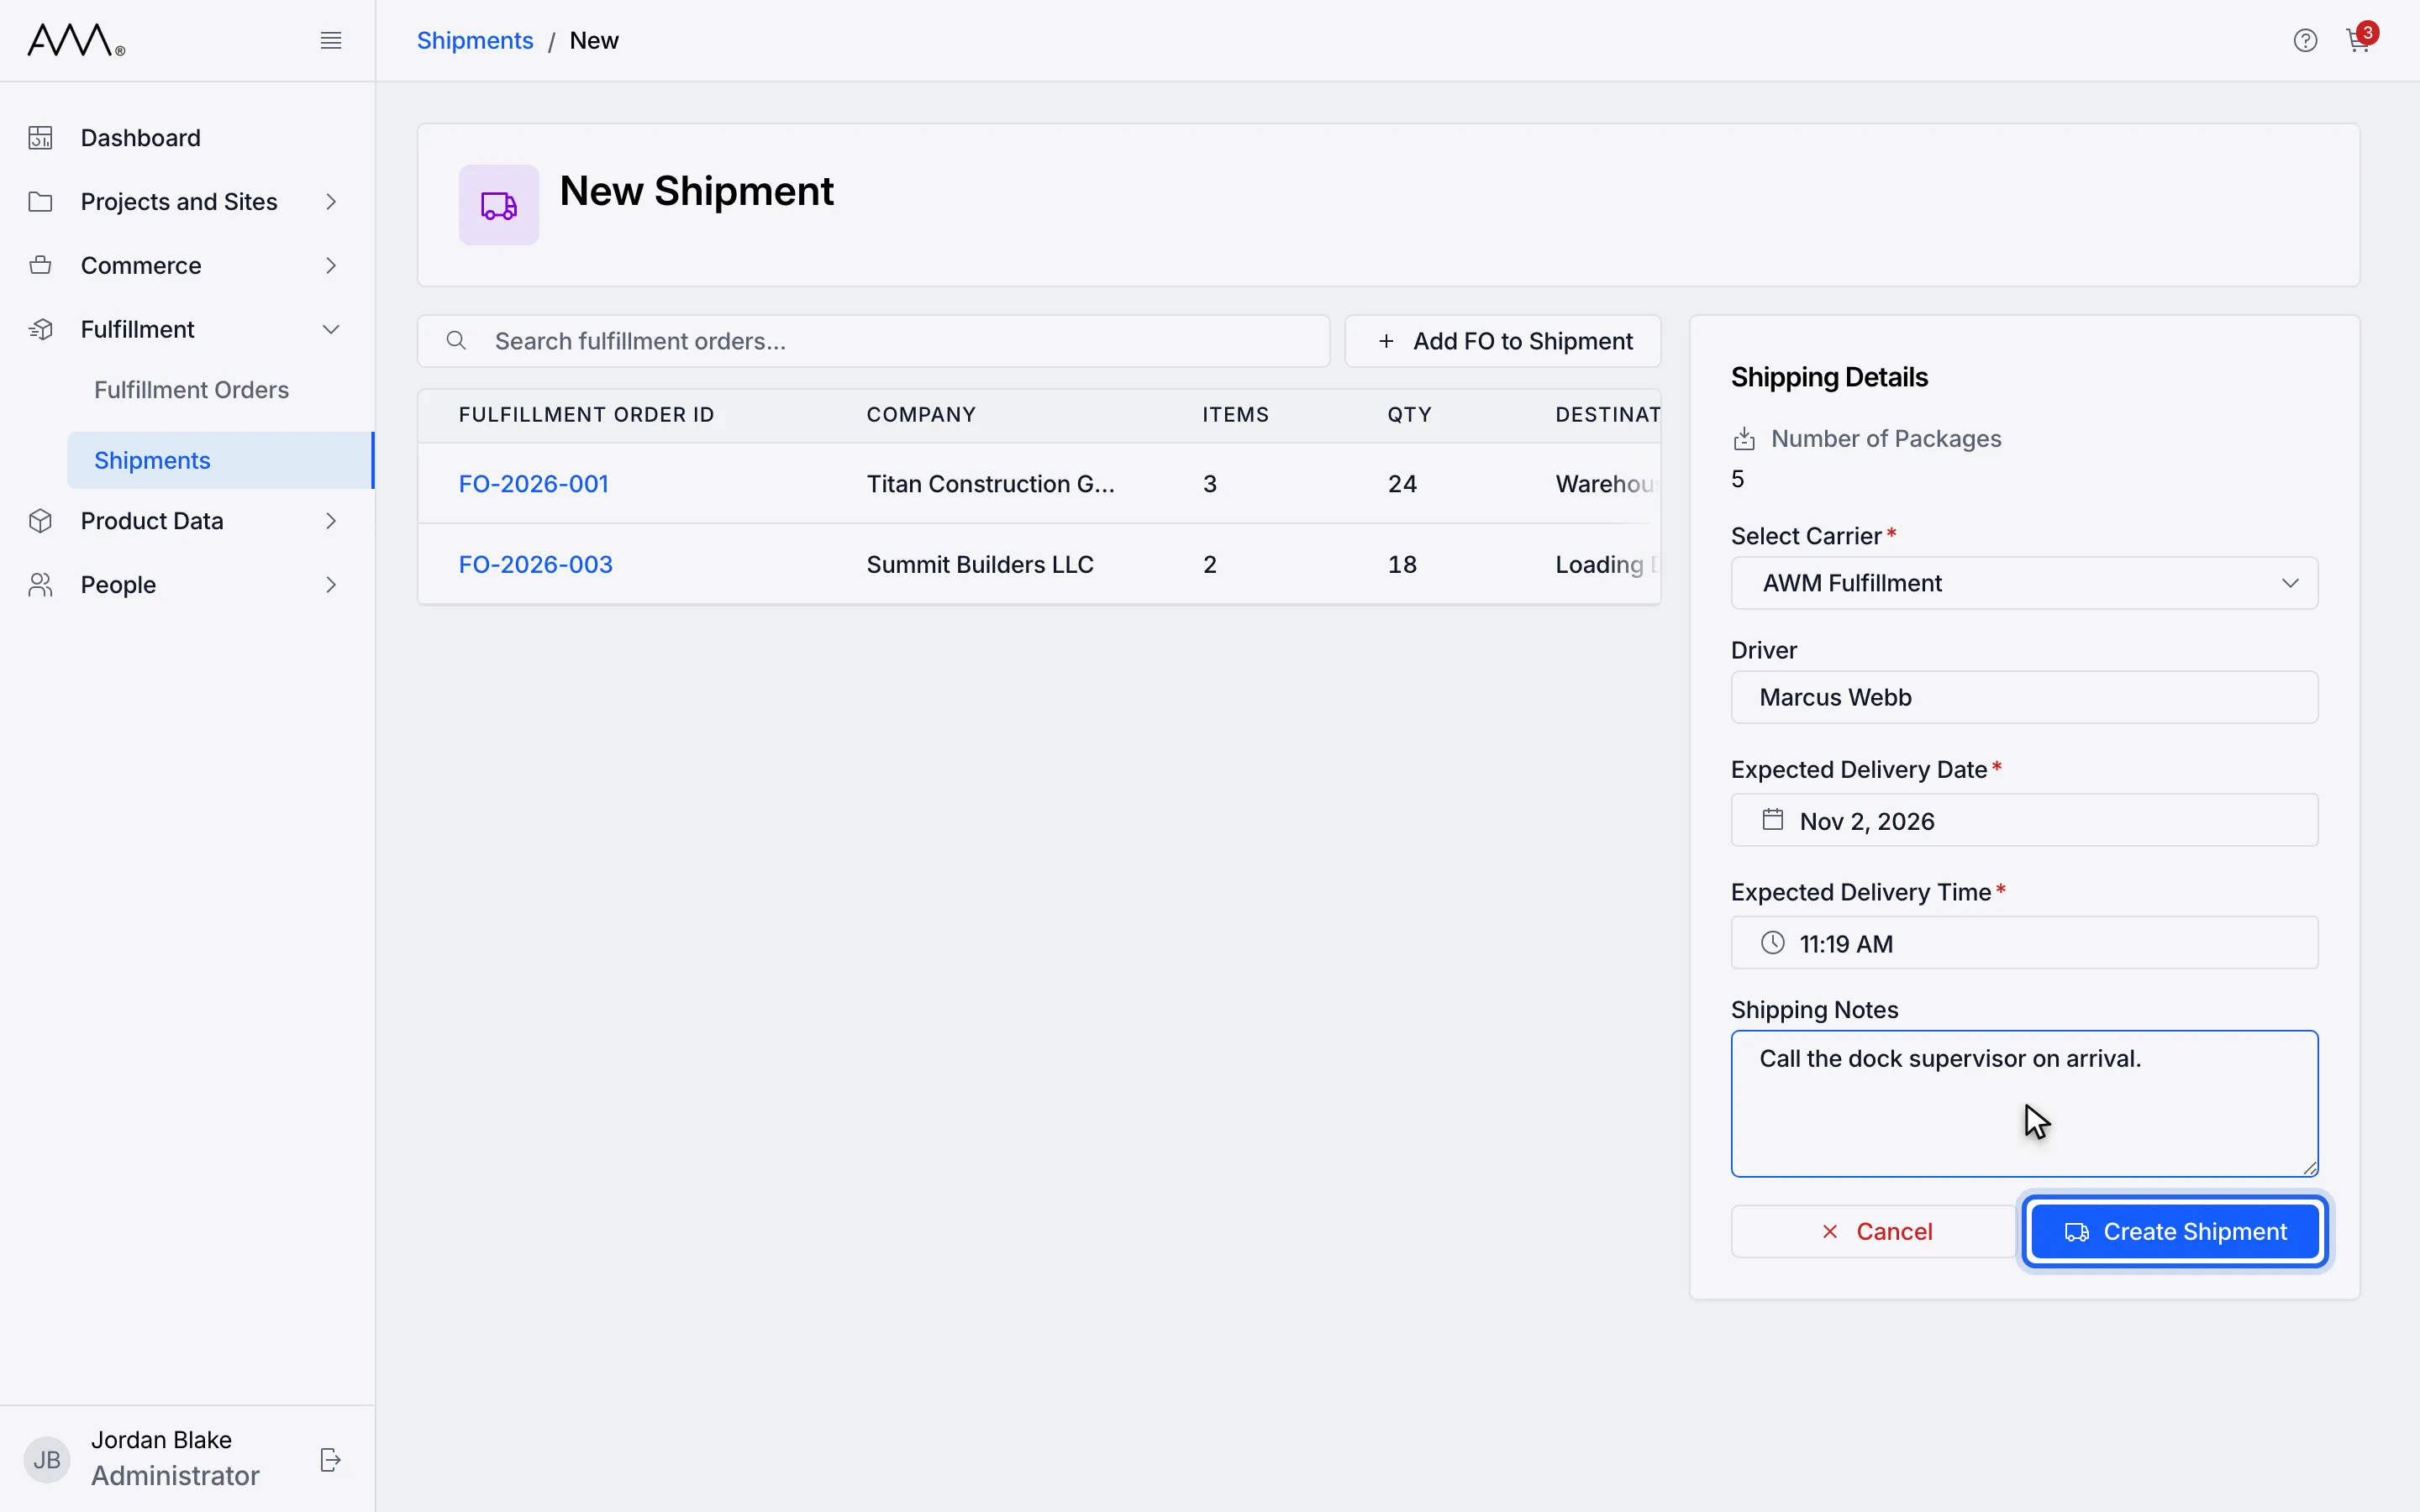
14Click Create Shipment.
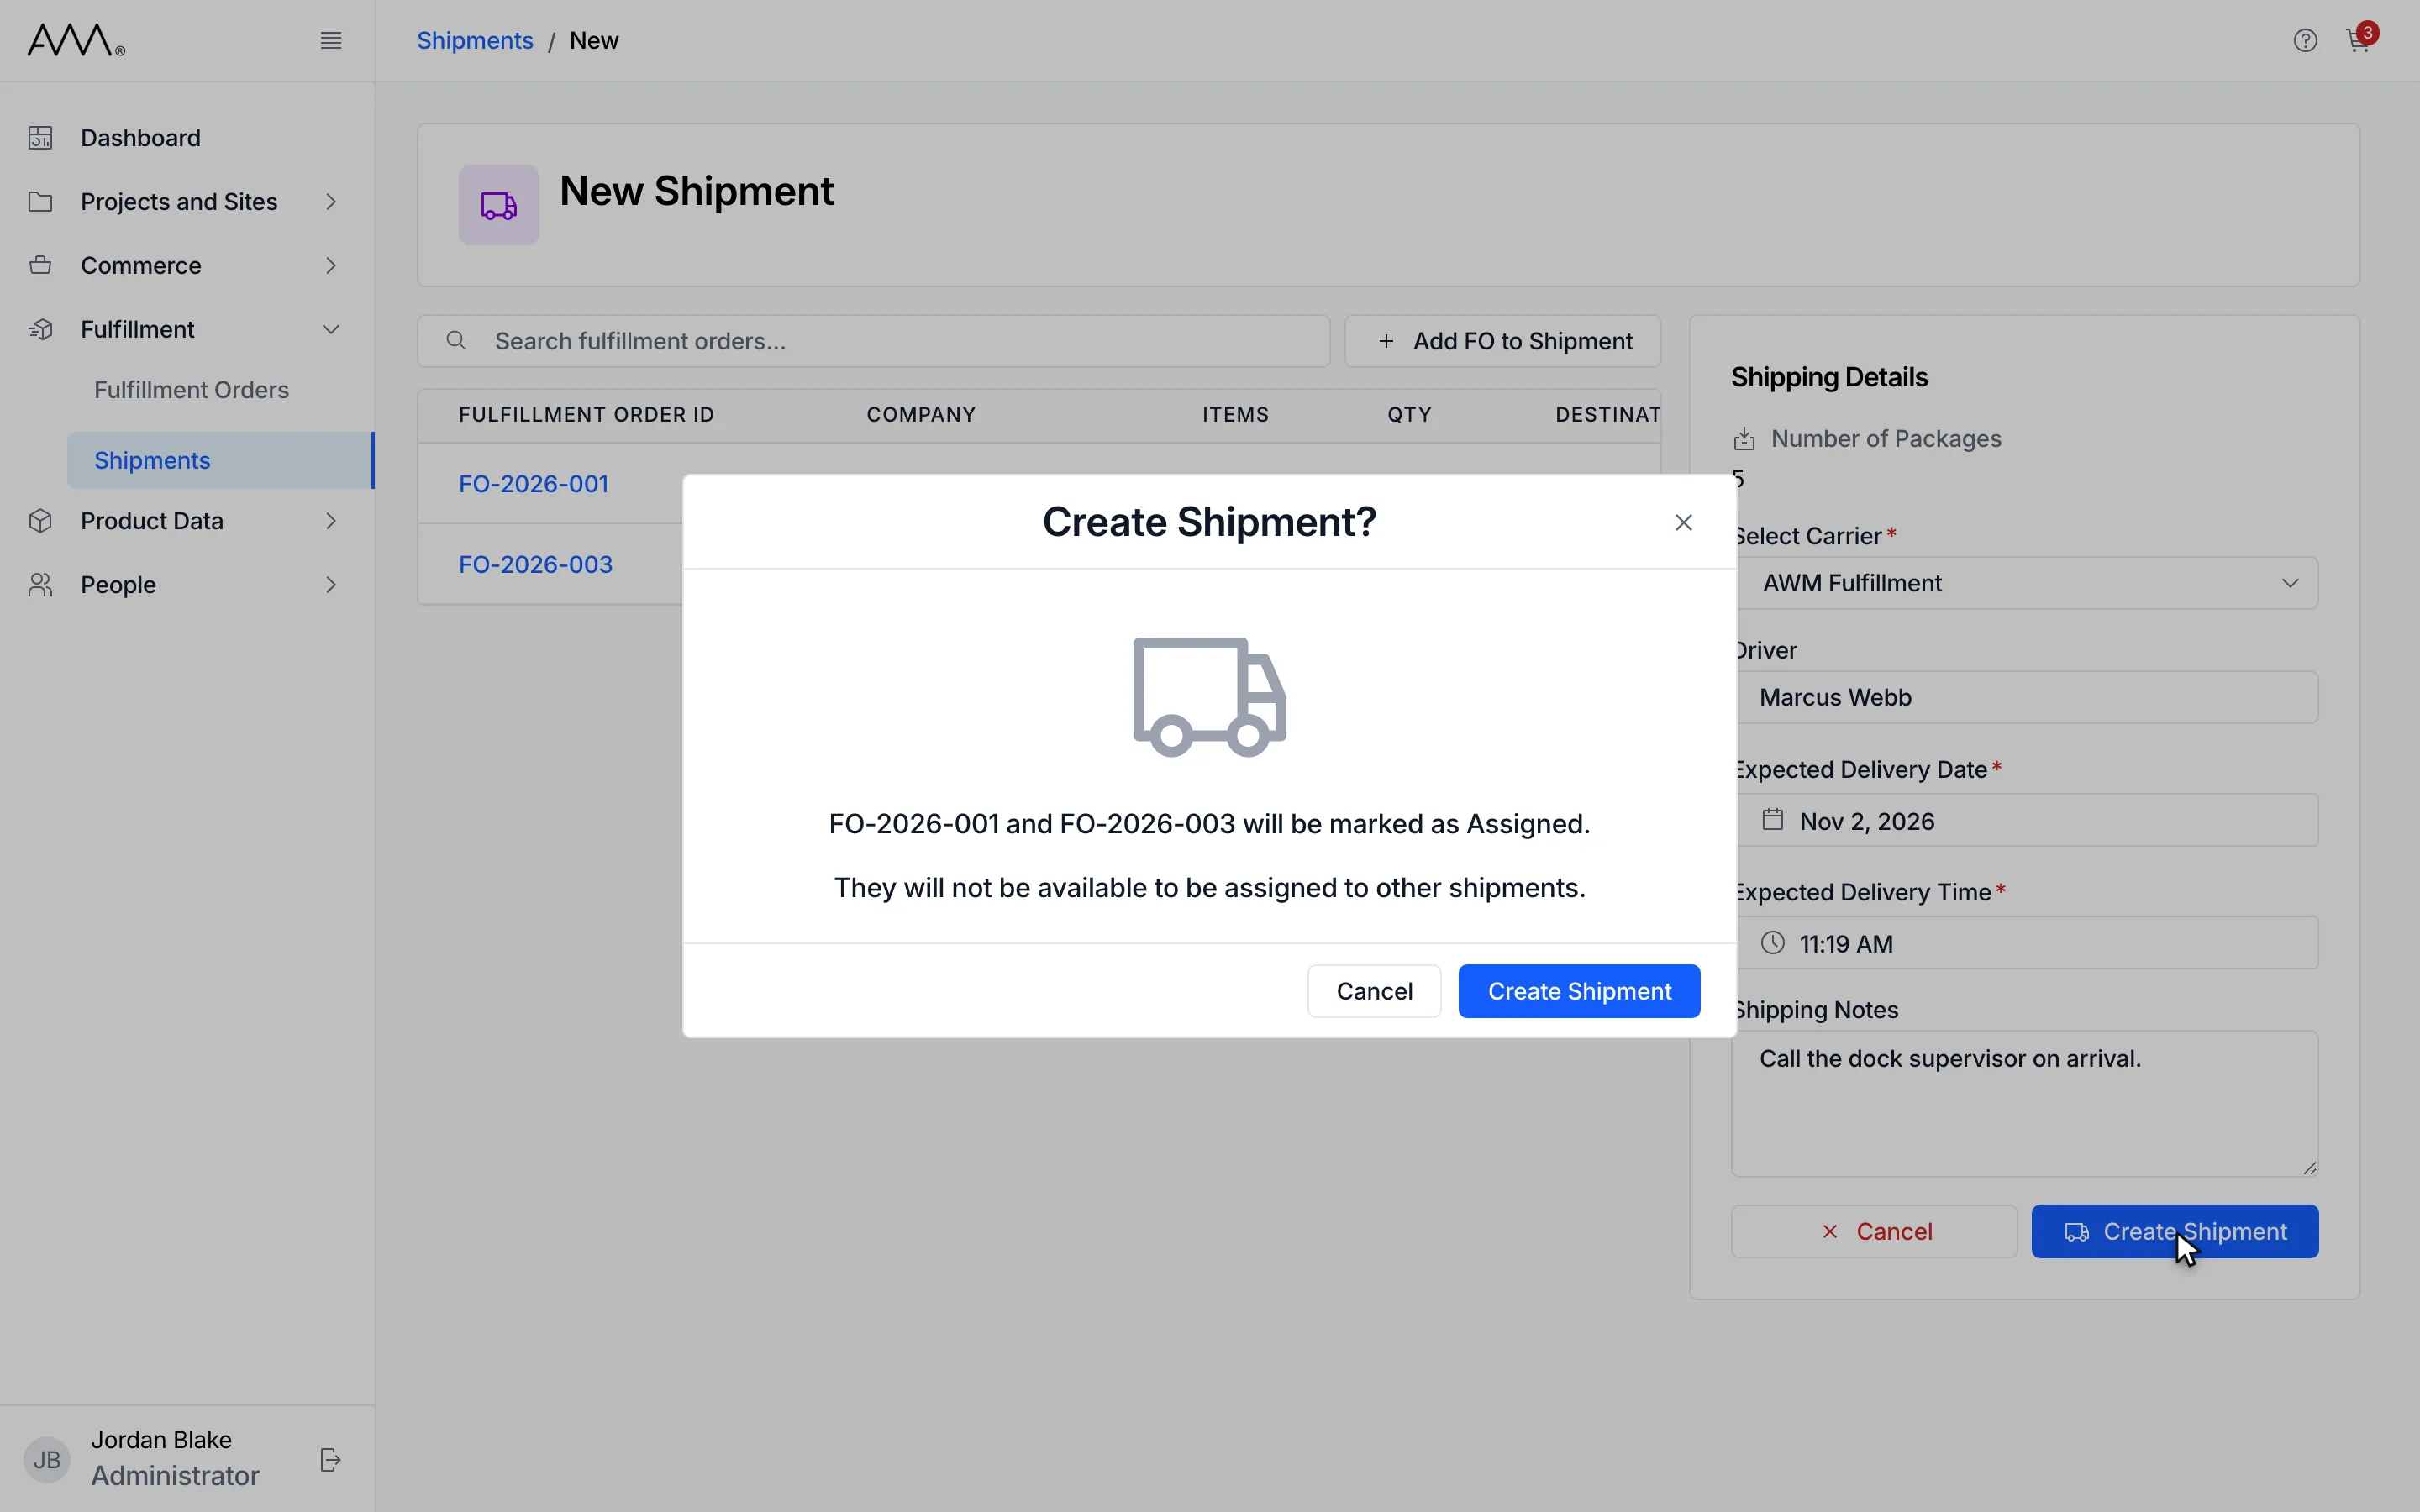
15Create Shipment? names the orders that will be marked Assigned.
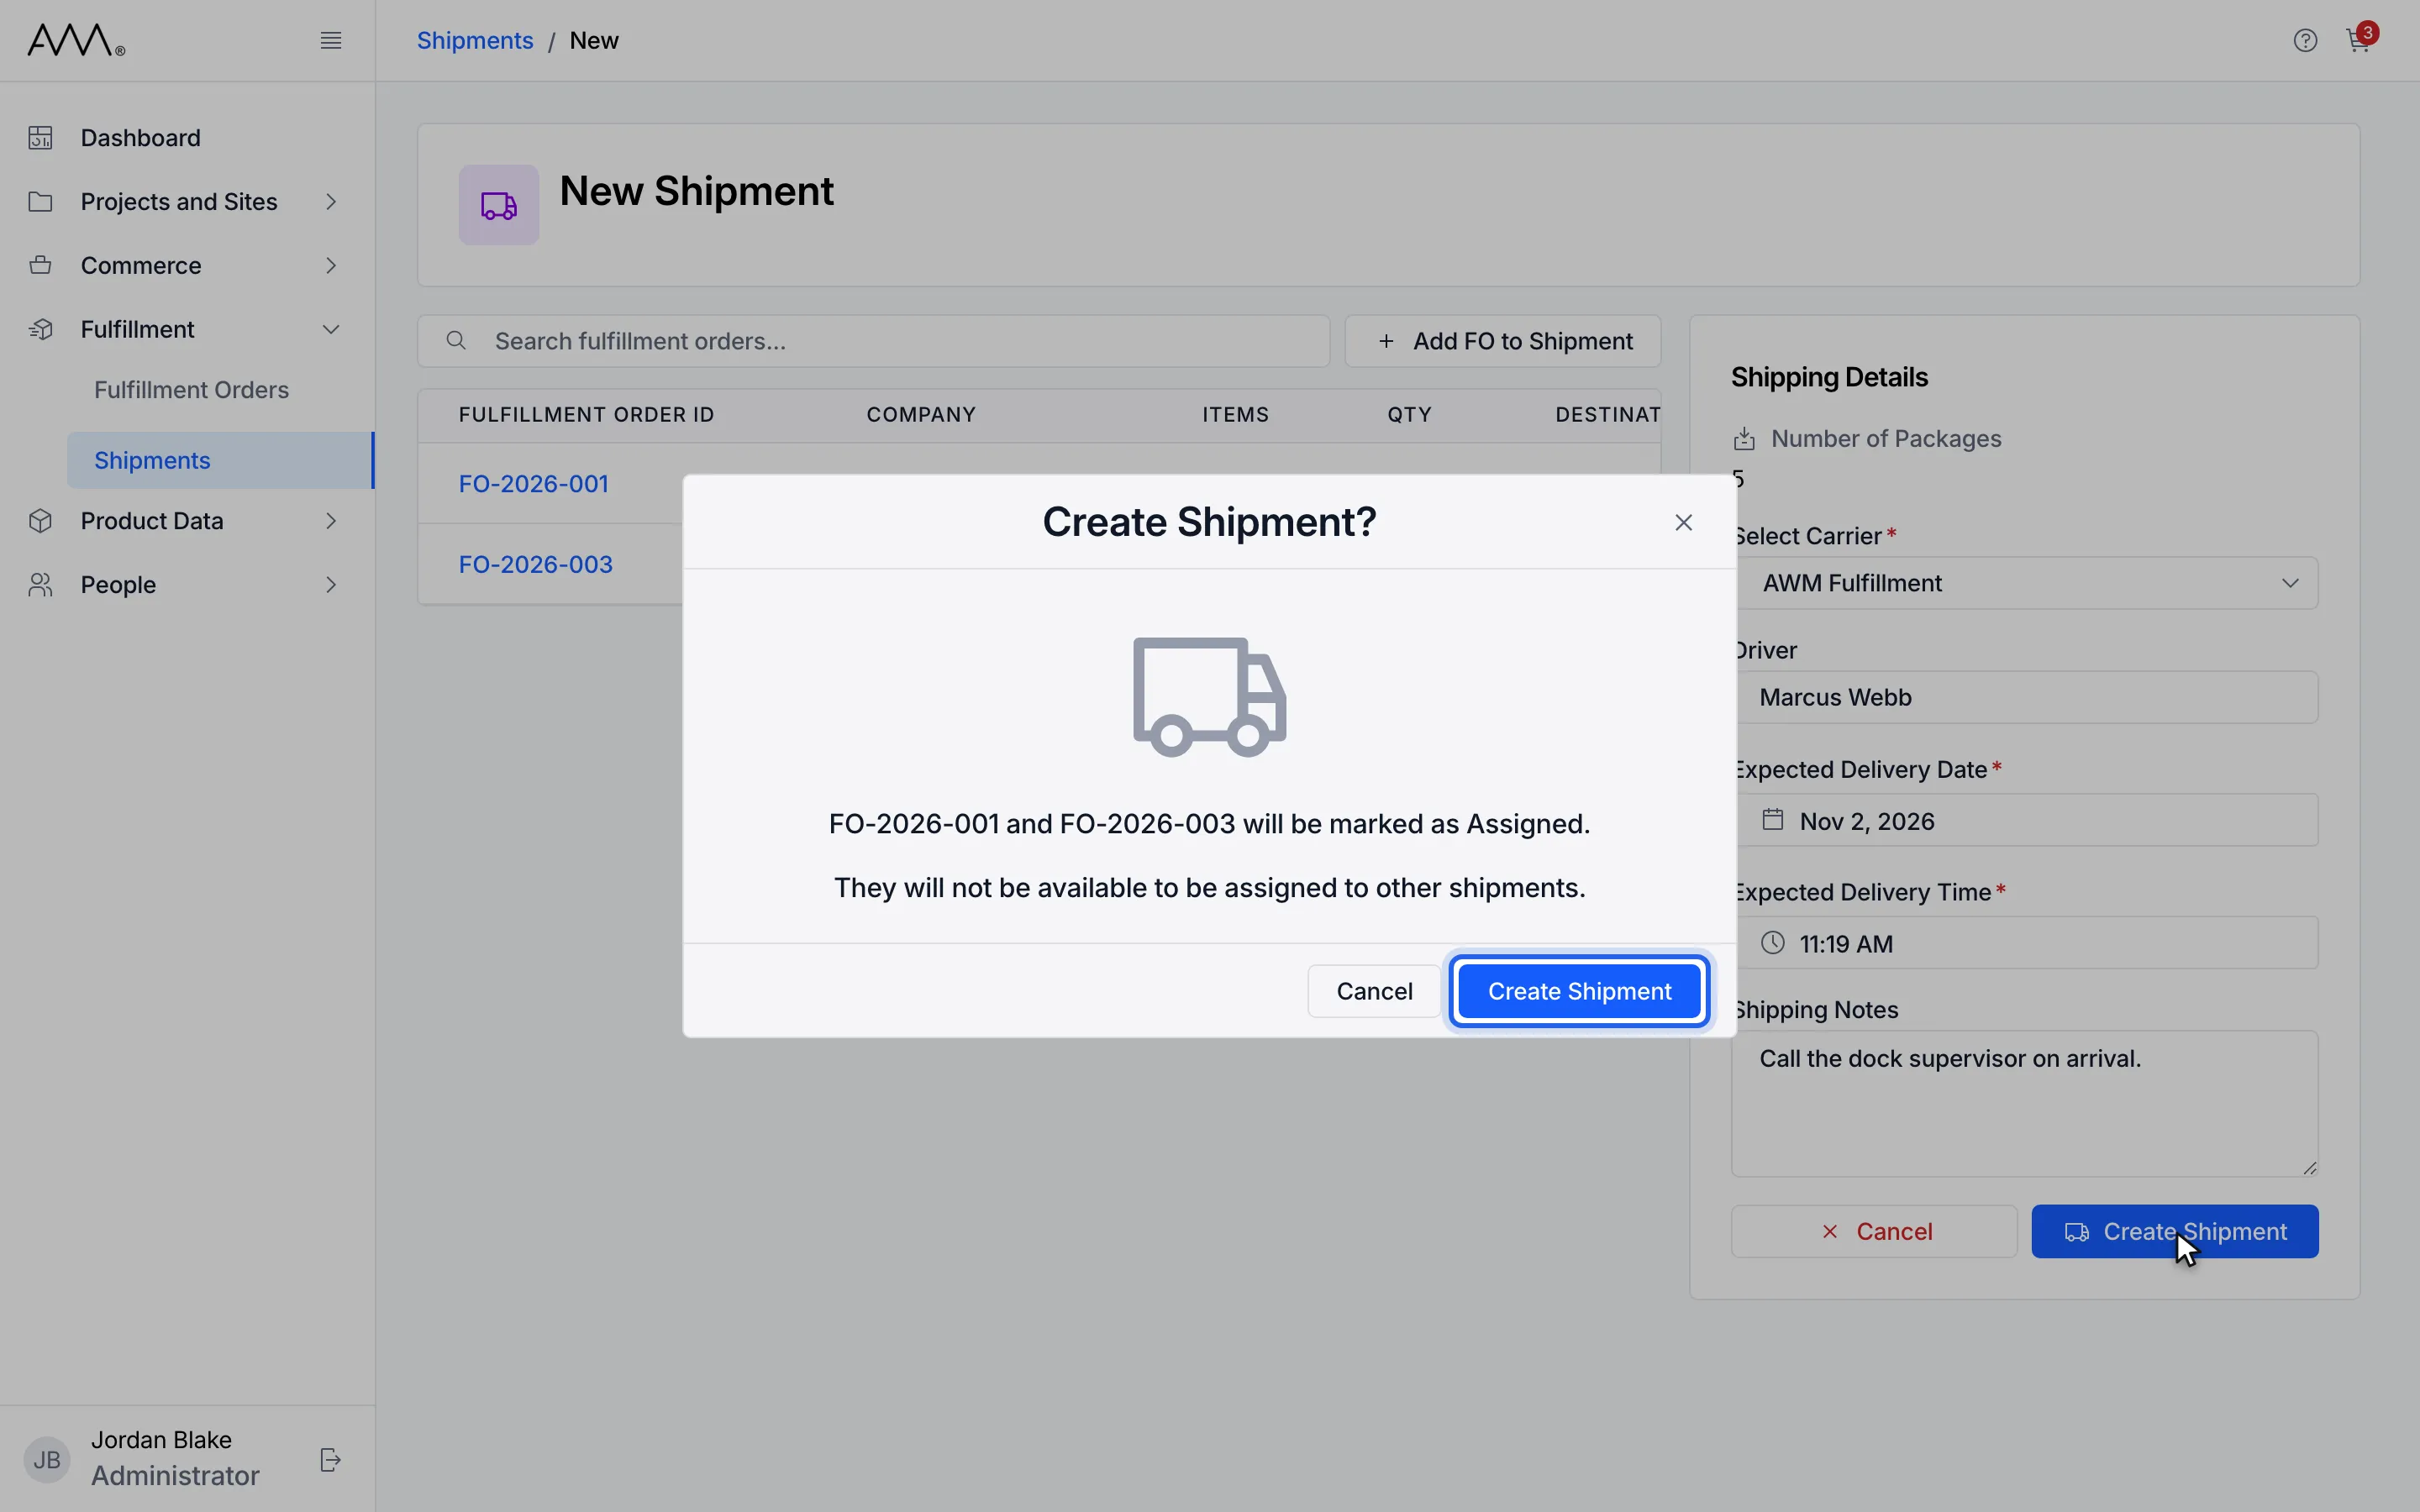
16Click Create Shipment to confirm.
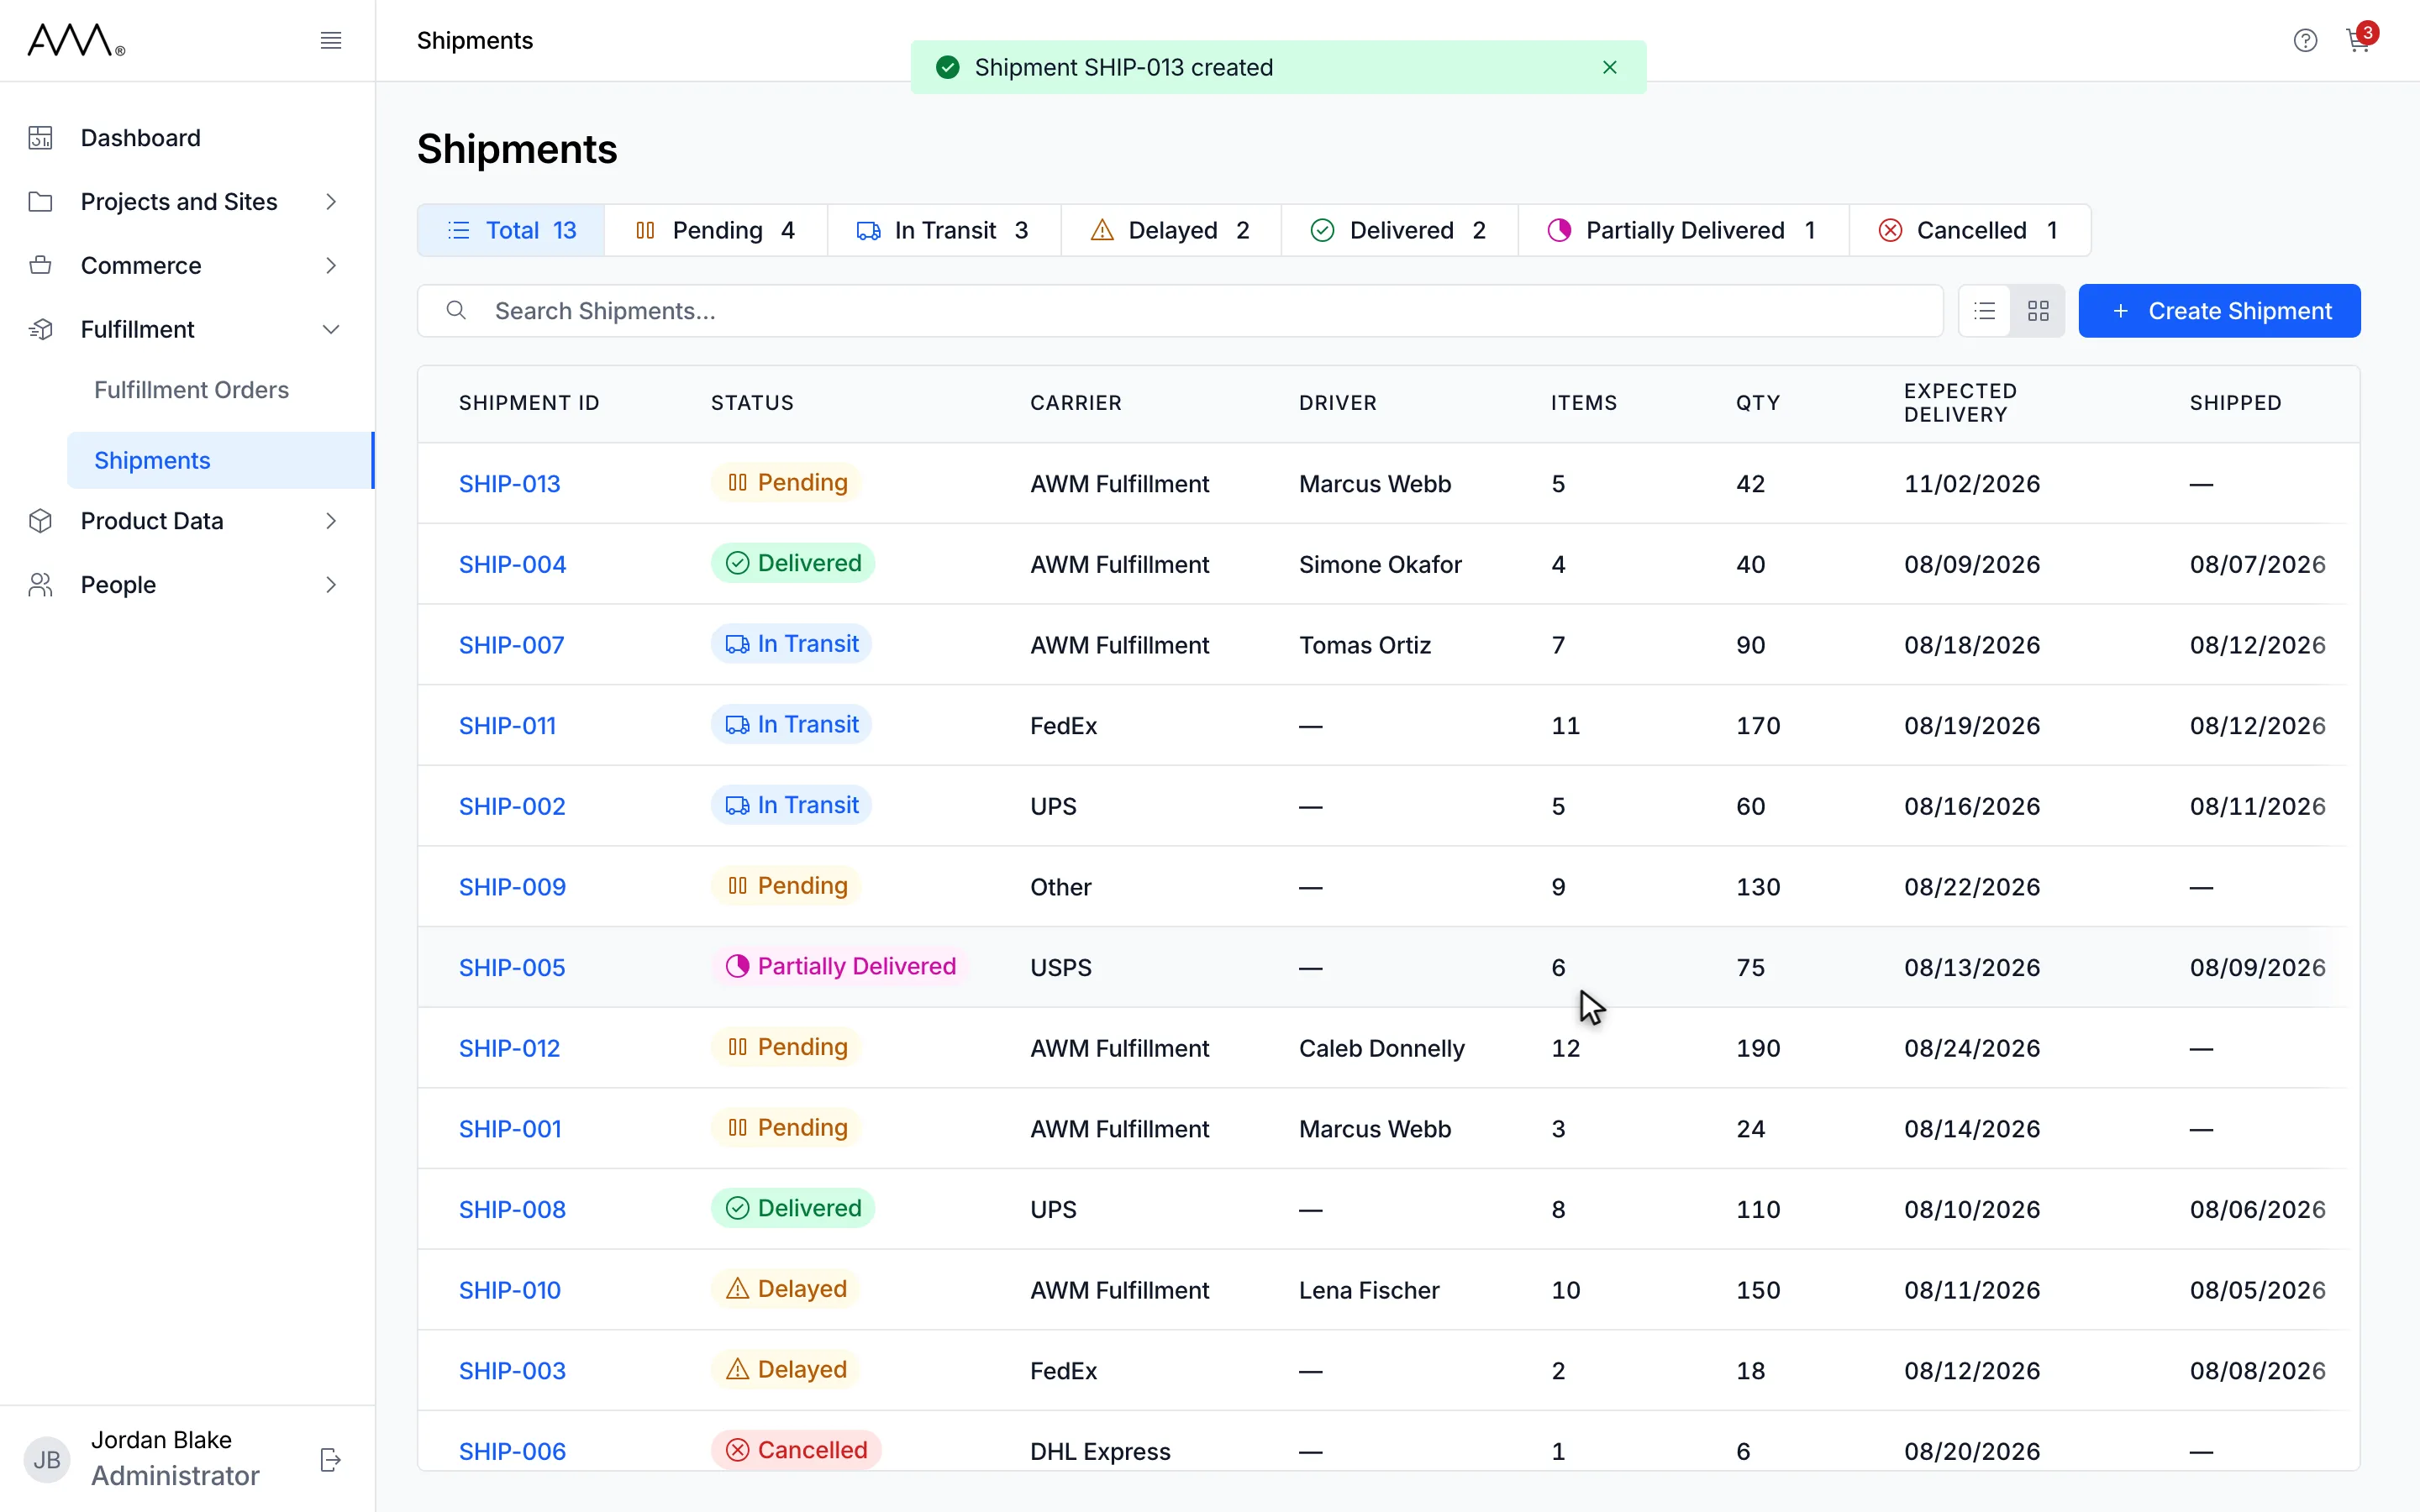
17A toast confirms the new shipment number and the list shows it as Pending.
18The new shipment is listed as Pending and a toast confirms its number.
Watch this as a video (create a shipment)
What happens next
Section titled “What happens next”A toast confirms Shipment followed by the new number and created, and you return to the Shipments list where the shipment appears as Pending. The orders on it are now Assigned. Next, mark the shipment in transit when it leaves.
If you leave the page with unsaved changes, Leave without saving changes? warns that You’ve made changes to this shipment that haven’t been saved. Continuing will discard those changes and leave this page. Choose Stay on This Page or Discard & Continue.
Validation messages
Section titled “Validation messages”These appear under the field when you click Create Shipment:
- Expected Delivery is required
- Enter a valid Expected Delivery date.
- Expected Delivery time is required
- That time doesn’t exist on this date in your time zone. (a time skipped by a daylight-saving change)
- Driver can be up to 100 characters.
- Shipping Notes can be up to 2000 characters.
- A shipment can hold up to 250 fulfillment orders.
If the shipment cannot be created
Section titled “If the shipment cannot be created”The reason appears above the page. These fulfillment orders can’t be shipped. Remove them and submit again. lists each refused order and why (Not packed, Not found, Cancelled or Already on another shipment). If the connection drops, We couldn’t confirm whether the shipment was created. It’s safe to submit again: if it was, you’ll be pointed to it. The shipment reference lists every message.