Add hardware
Add a unit when a new Crib, QDU or SBU joins the fleet. You register its identity here. You assign it to a supply point later, from the supply point’s Hardware tab.
-
In the sidebar, open Projects and Sites and choose Hardware.
-
Click Add Hardware. The Add Hardware dialog opens with the prompt Enter the hardware details to get started.
-
Fill in the fields.
Field Required What to enter Serial Number Yes The serial number printed on the unit. Status Yes Available, In Progress, Active or Inactive. New units start as In Progress. Type Yes Crib, QDU or SBU. Model No The model designation. Owner No The person responsible for the unit. -
Click Add Hardware. The button stays disabled until every required field is filled in.
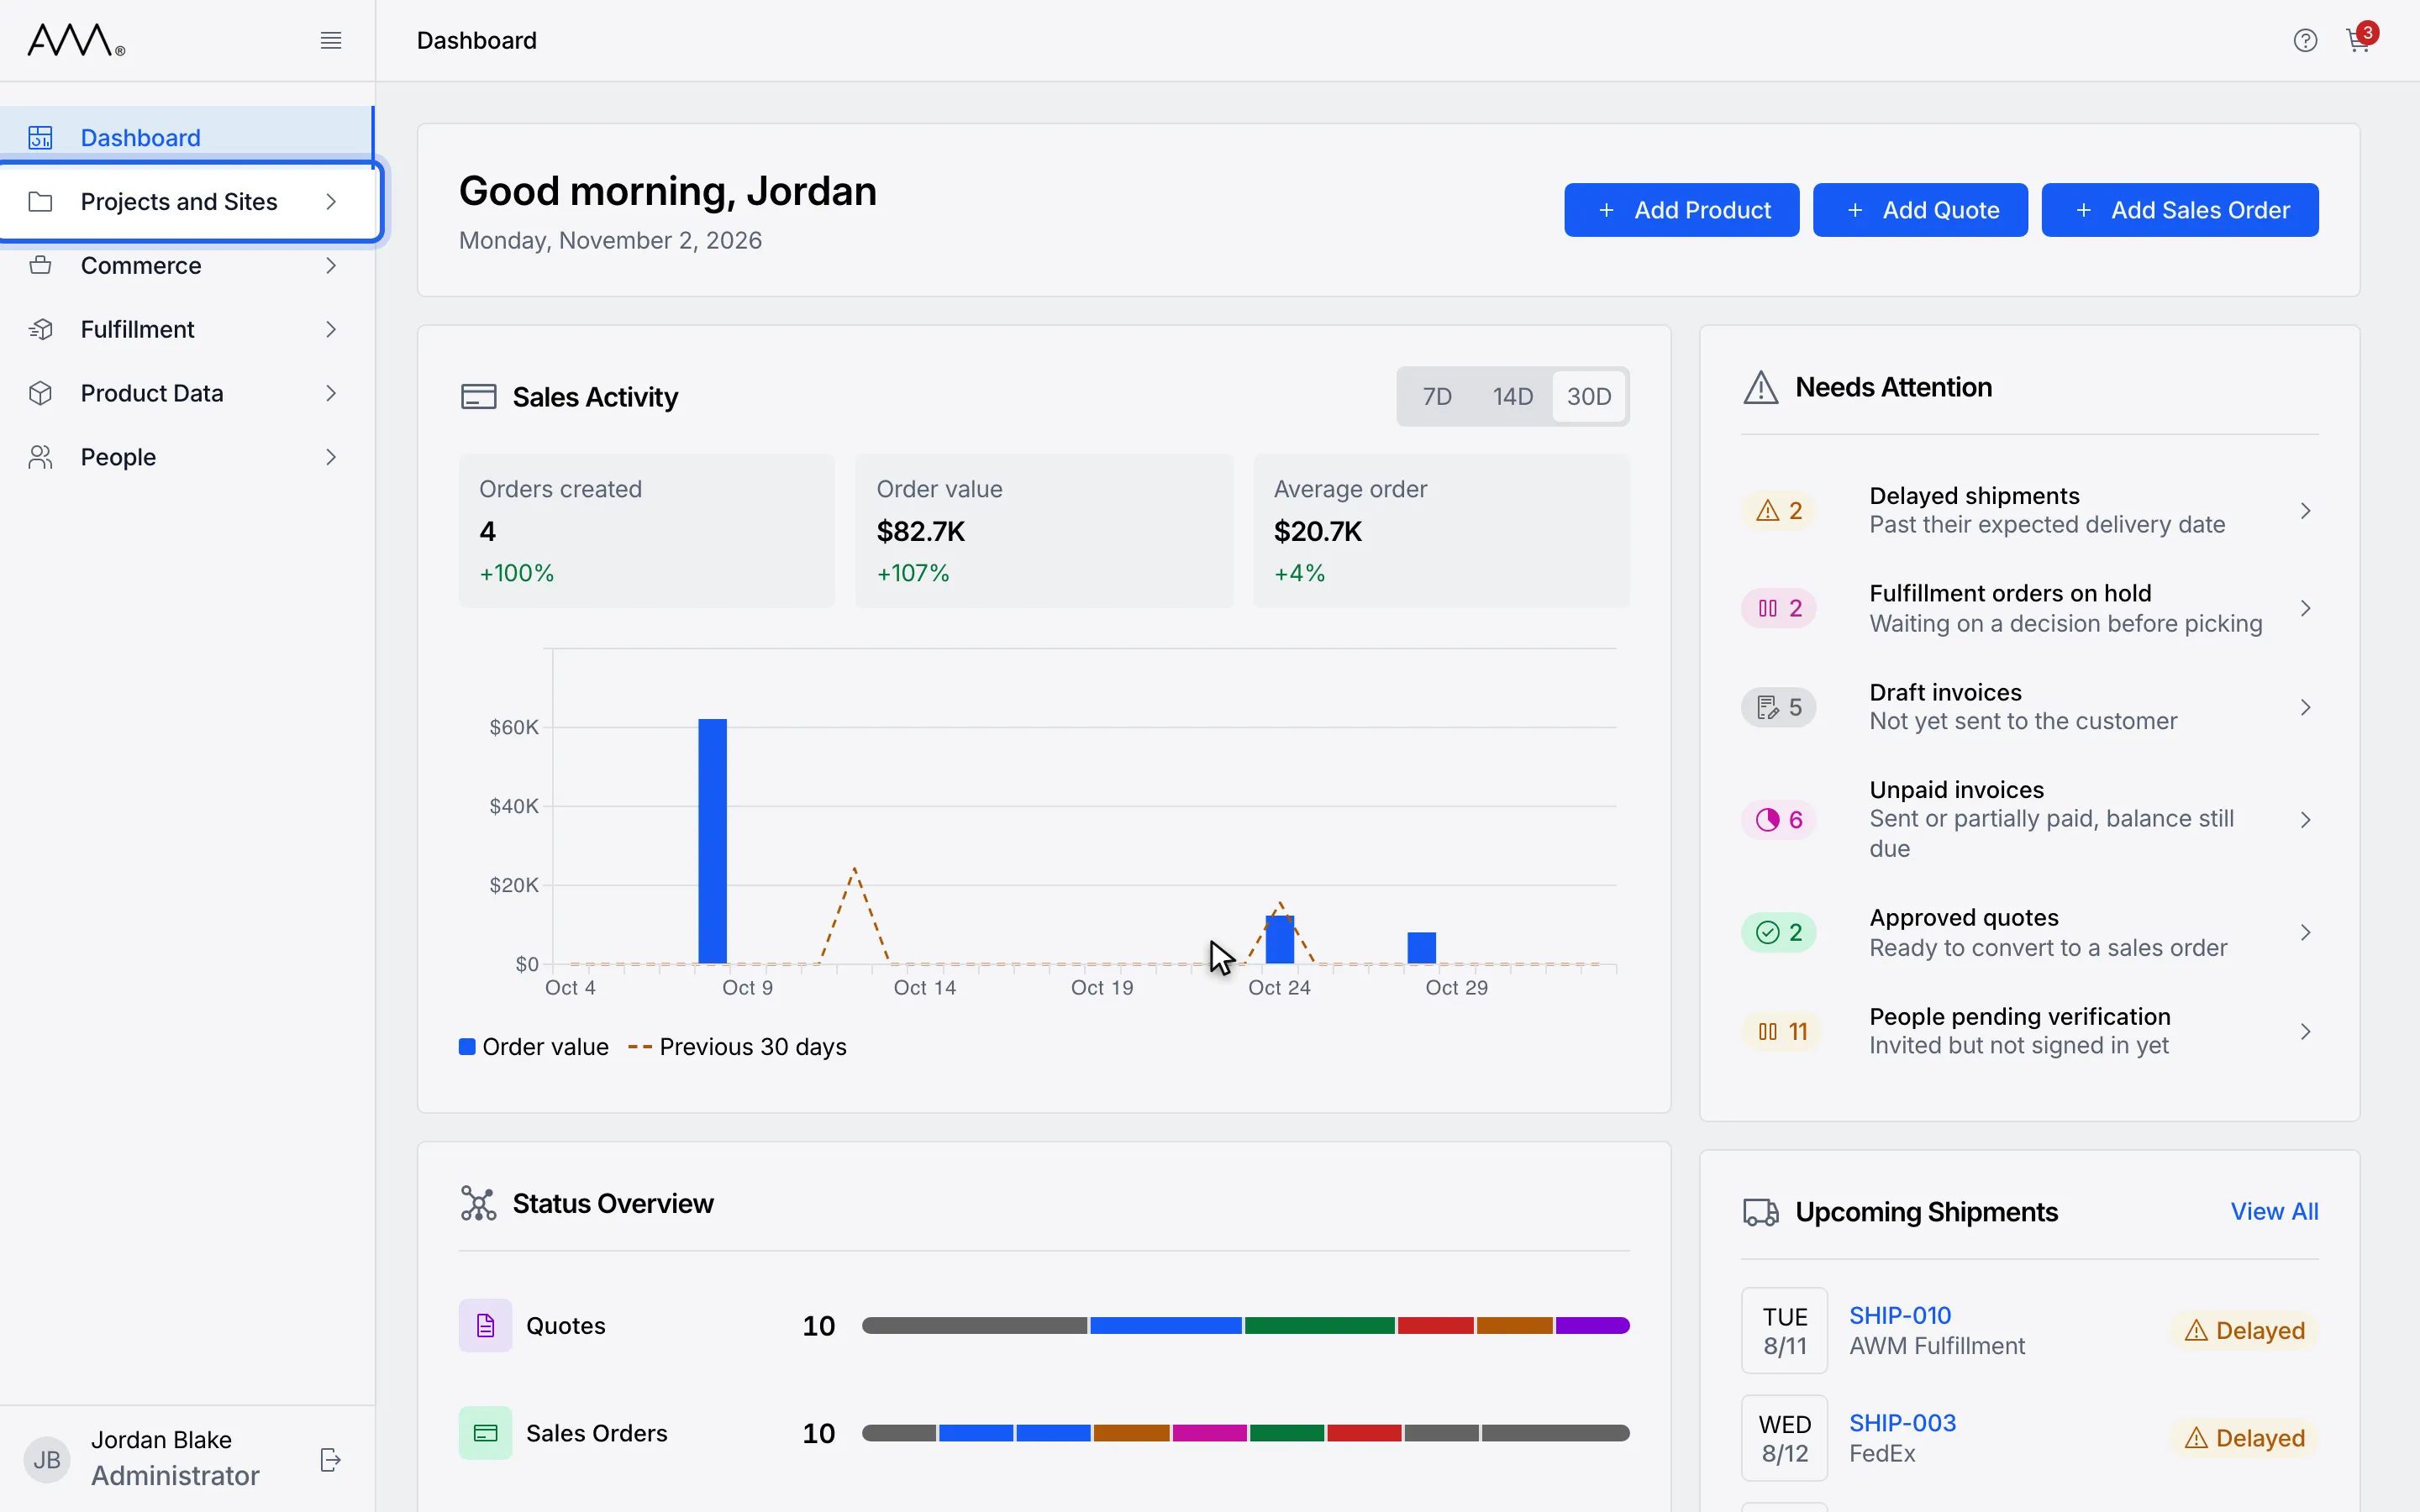
1In the sidebar, open Projects and Sites.
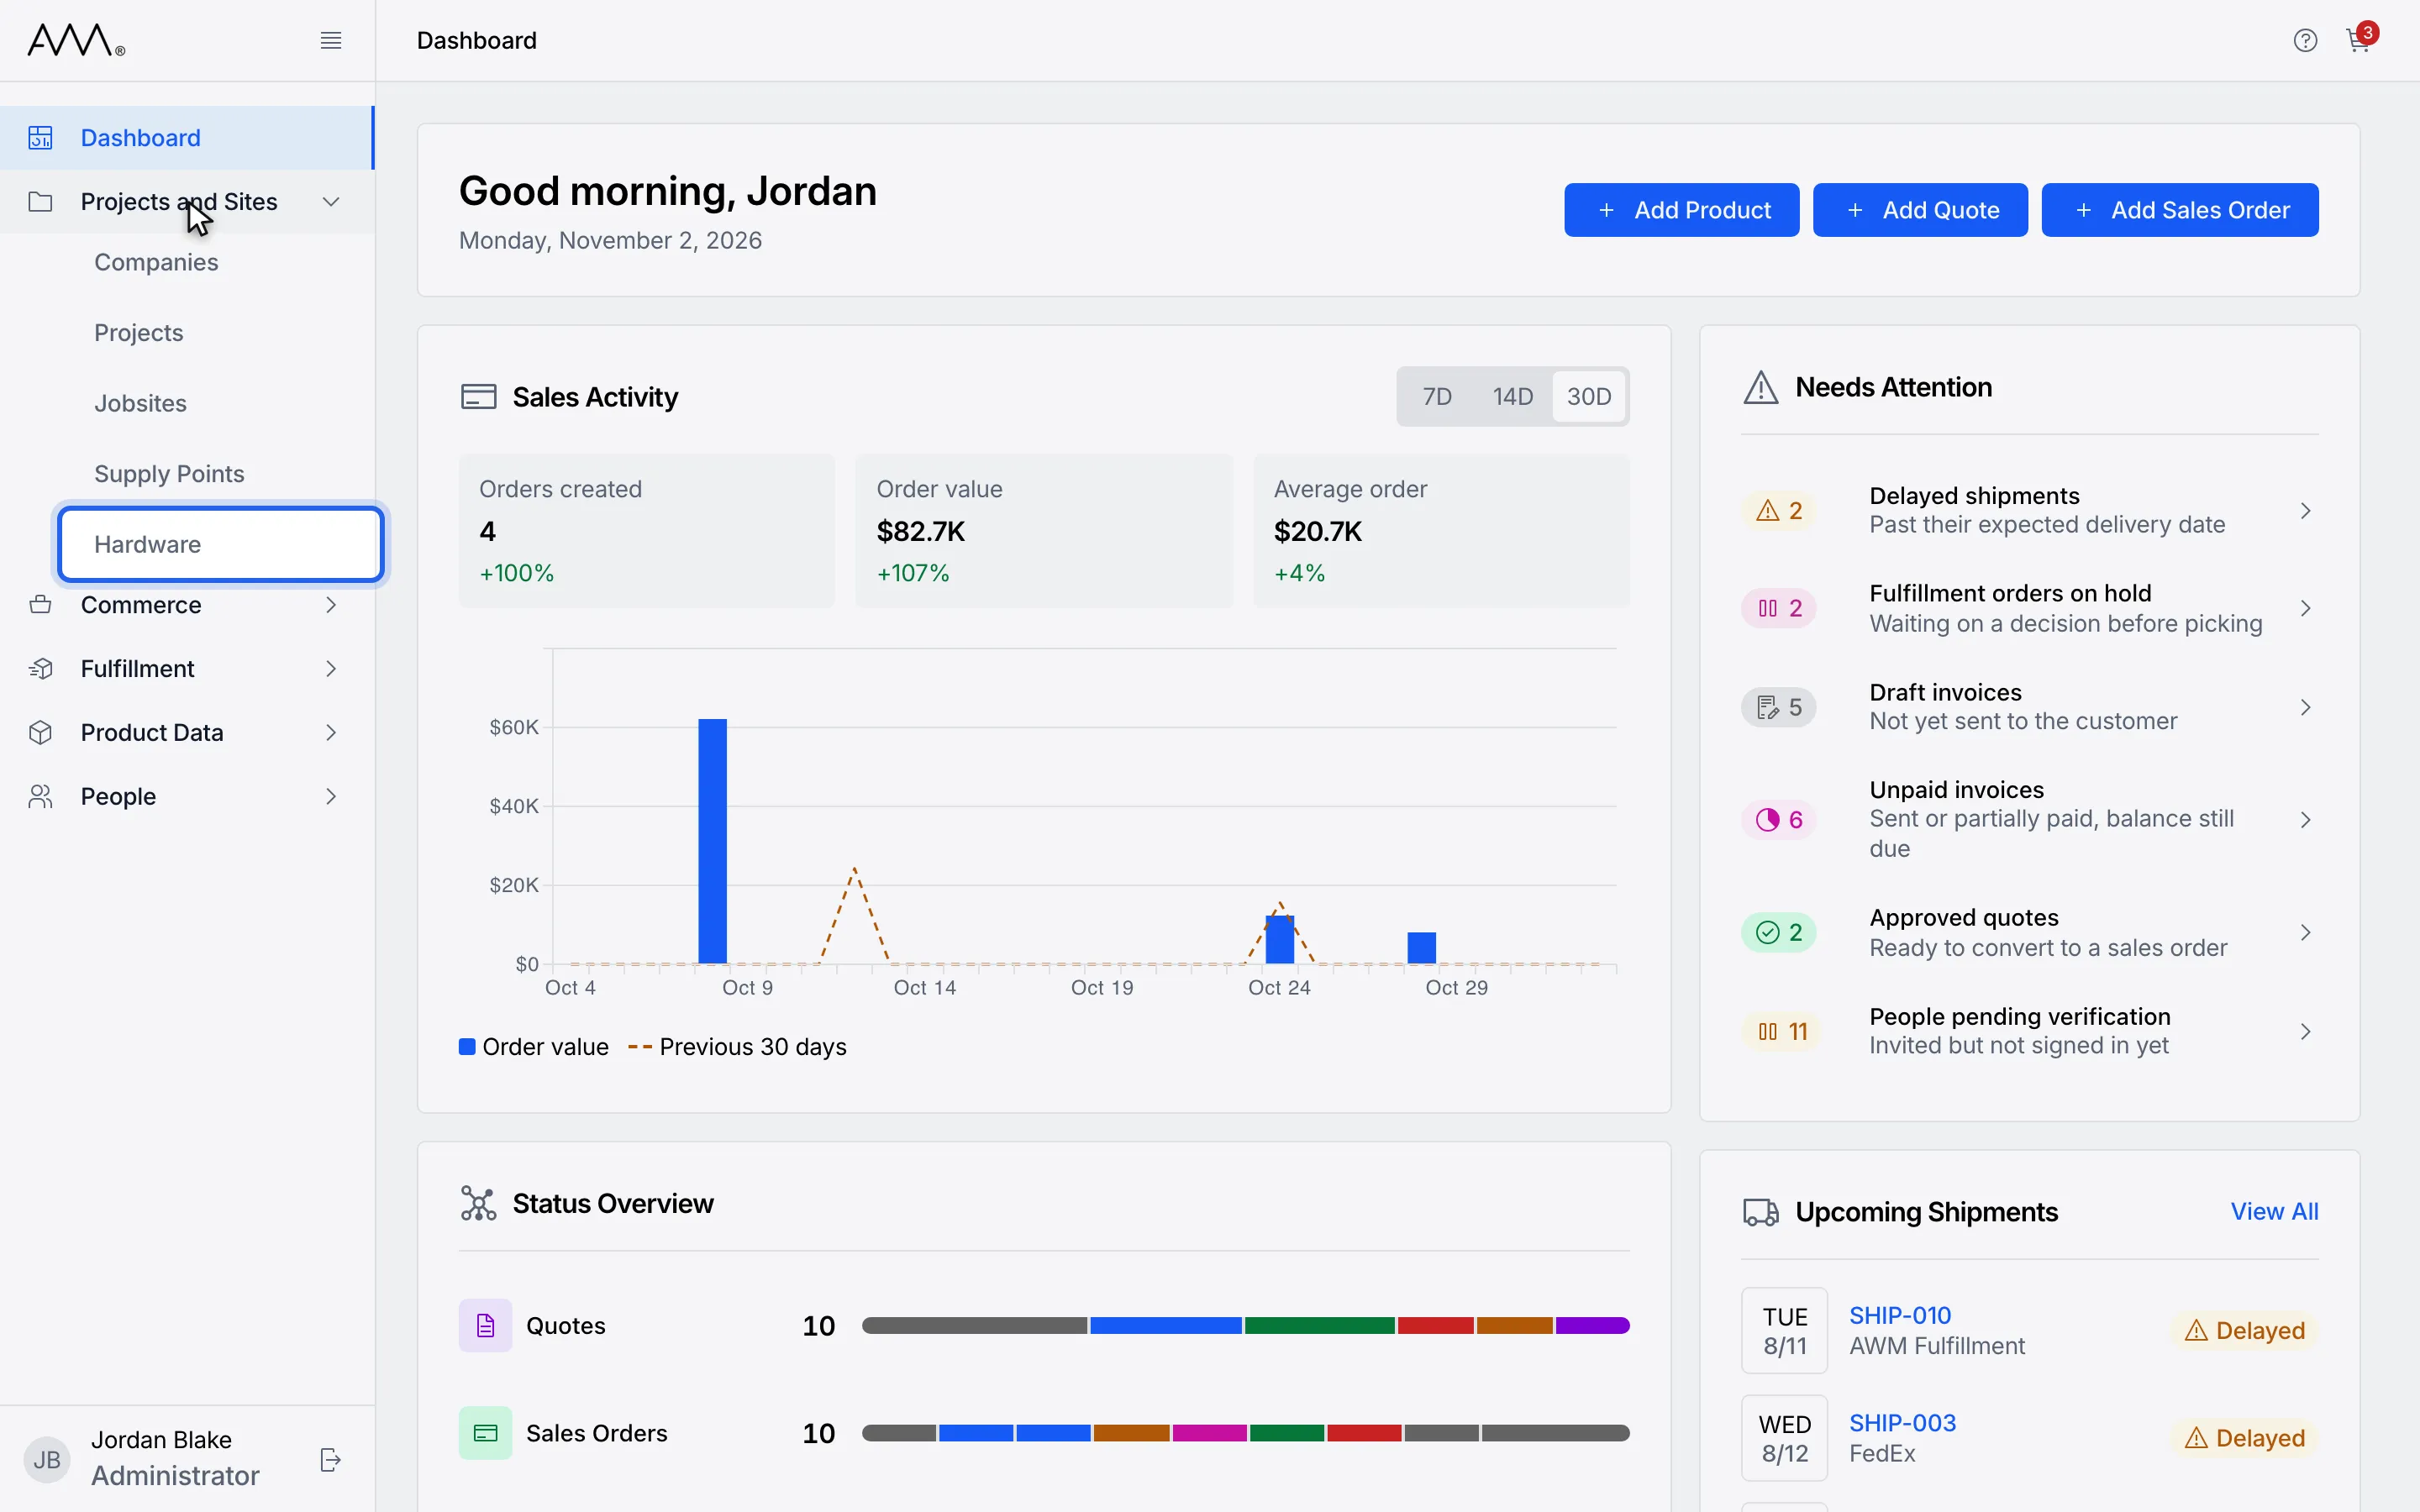
2Choose Hardware.
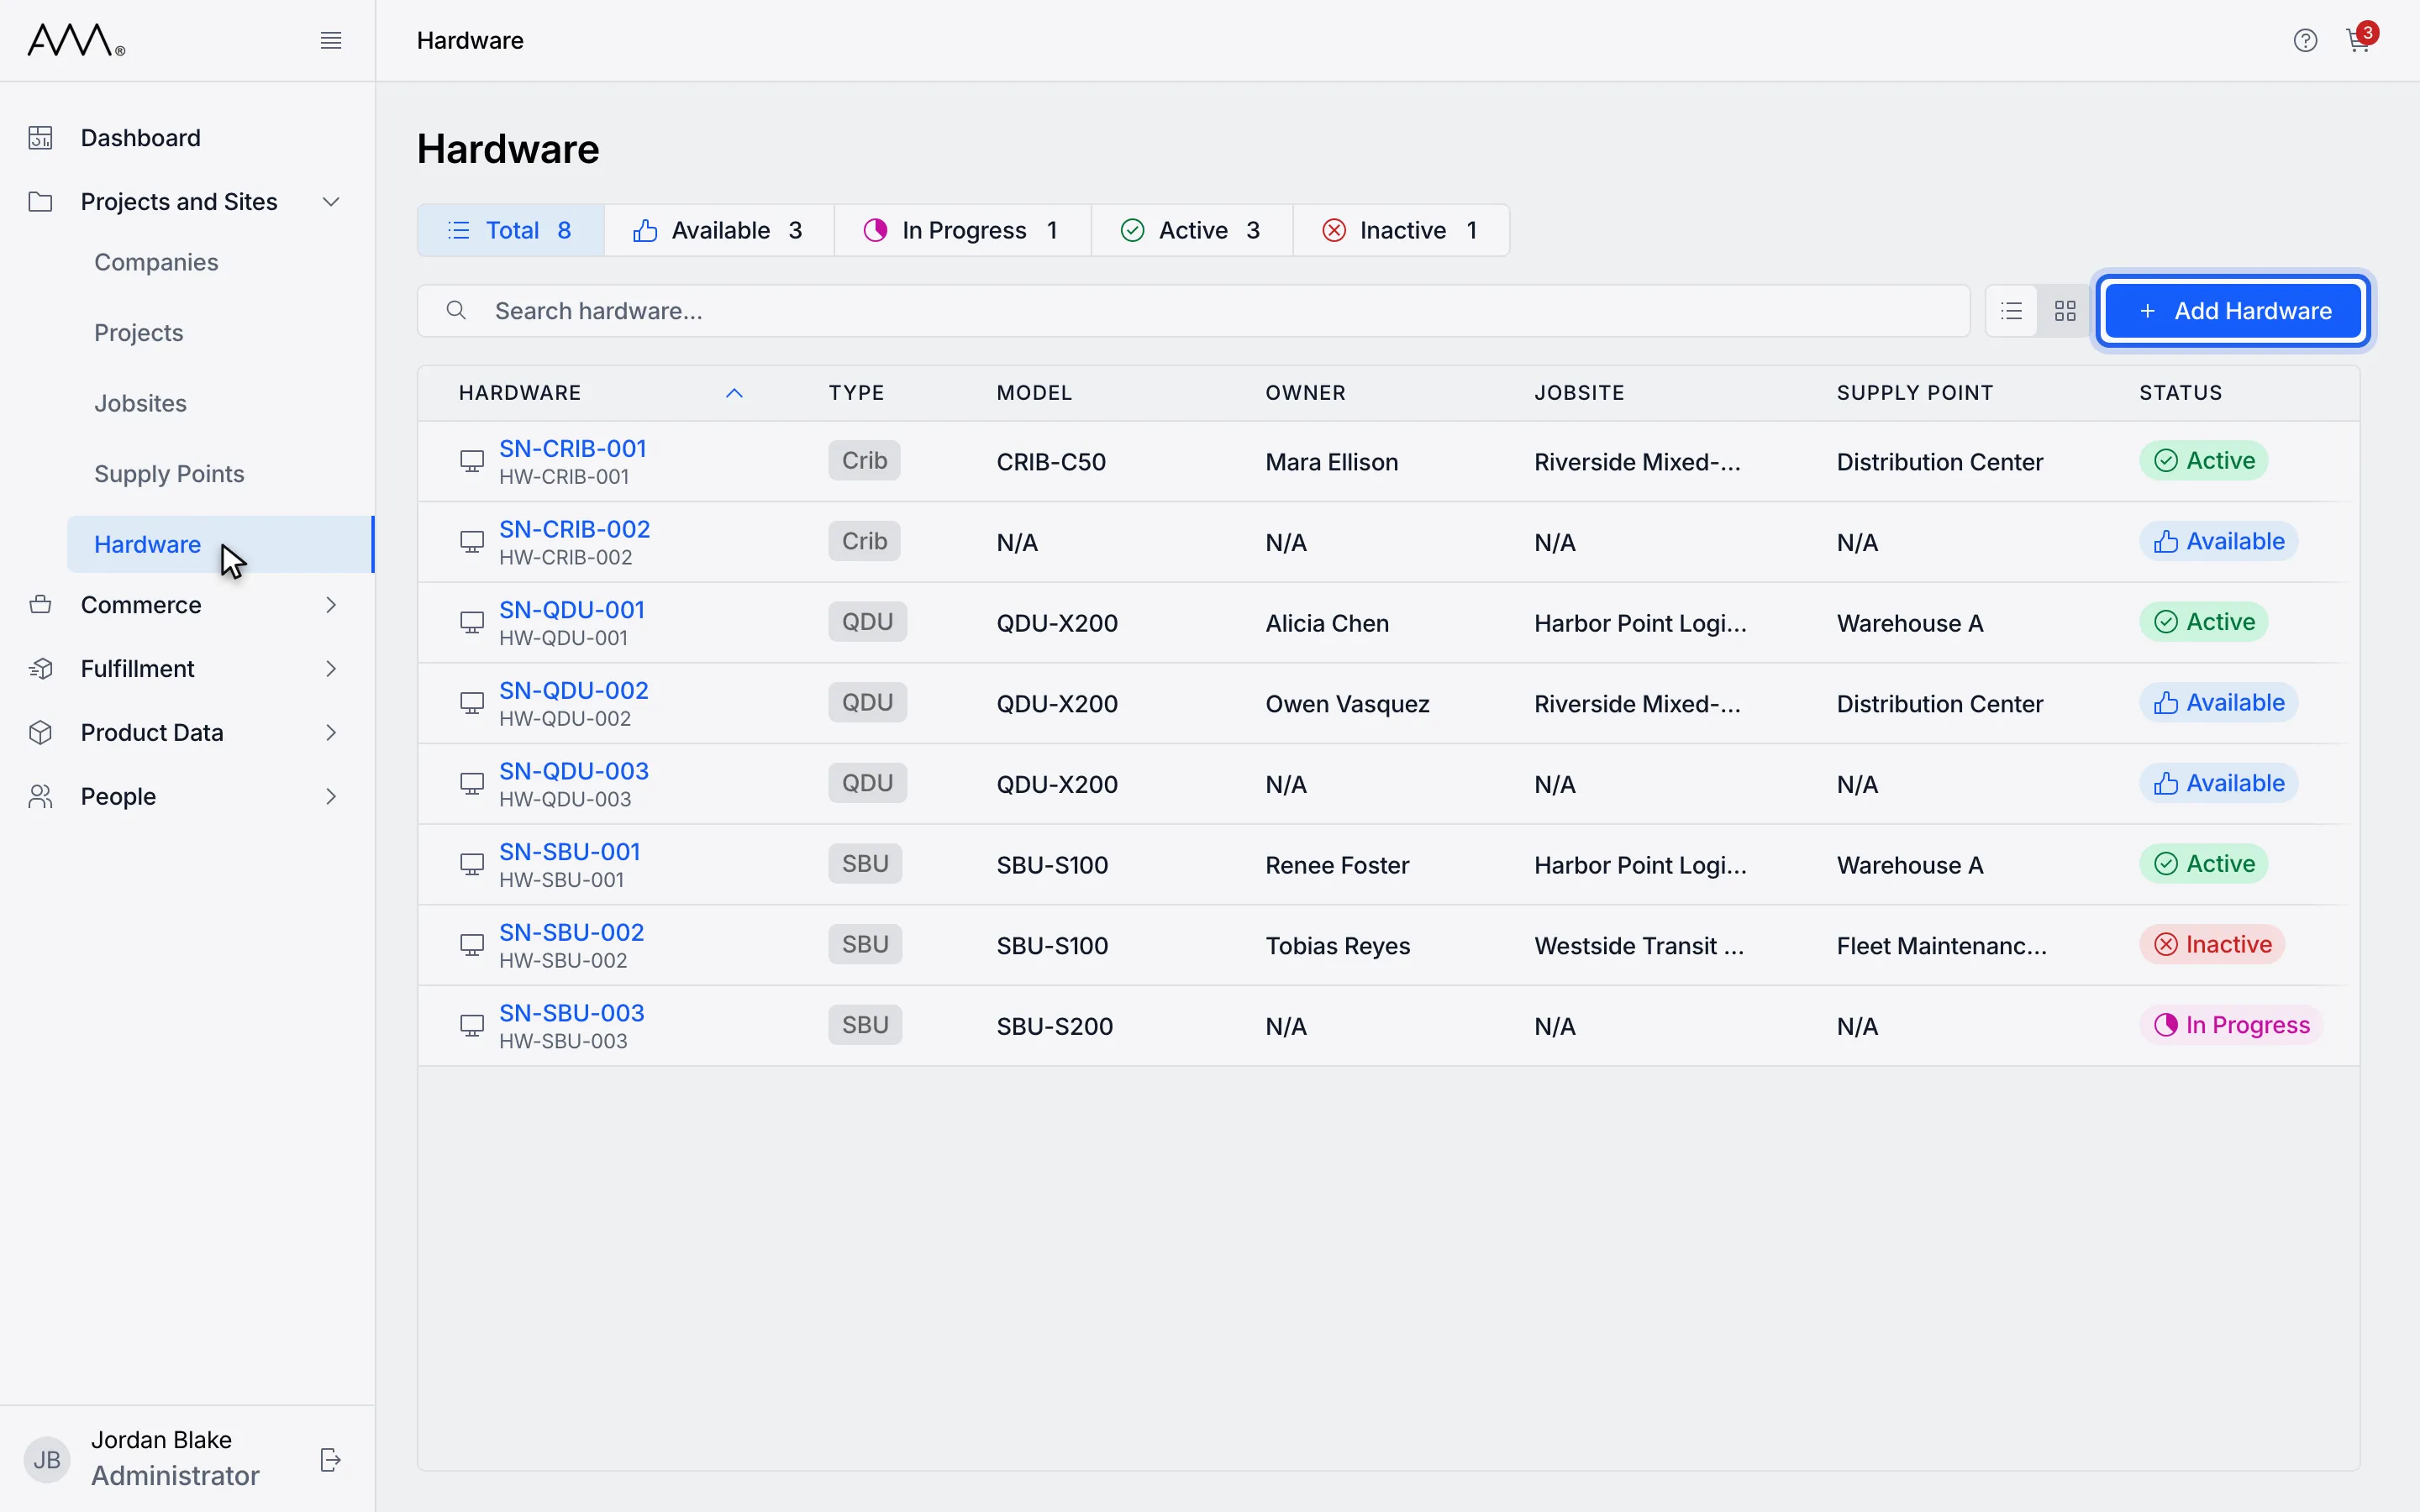
3Click Add Hardware.
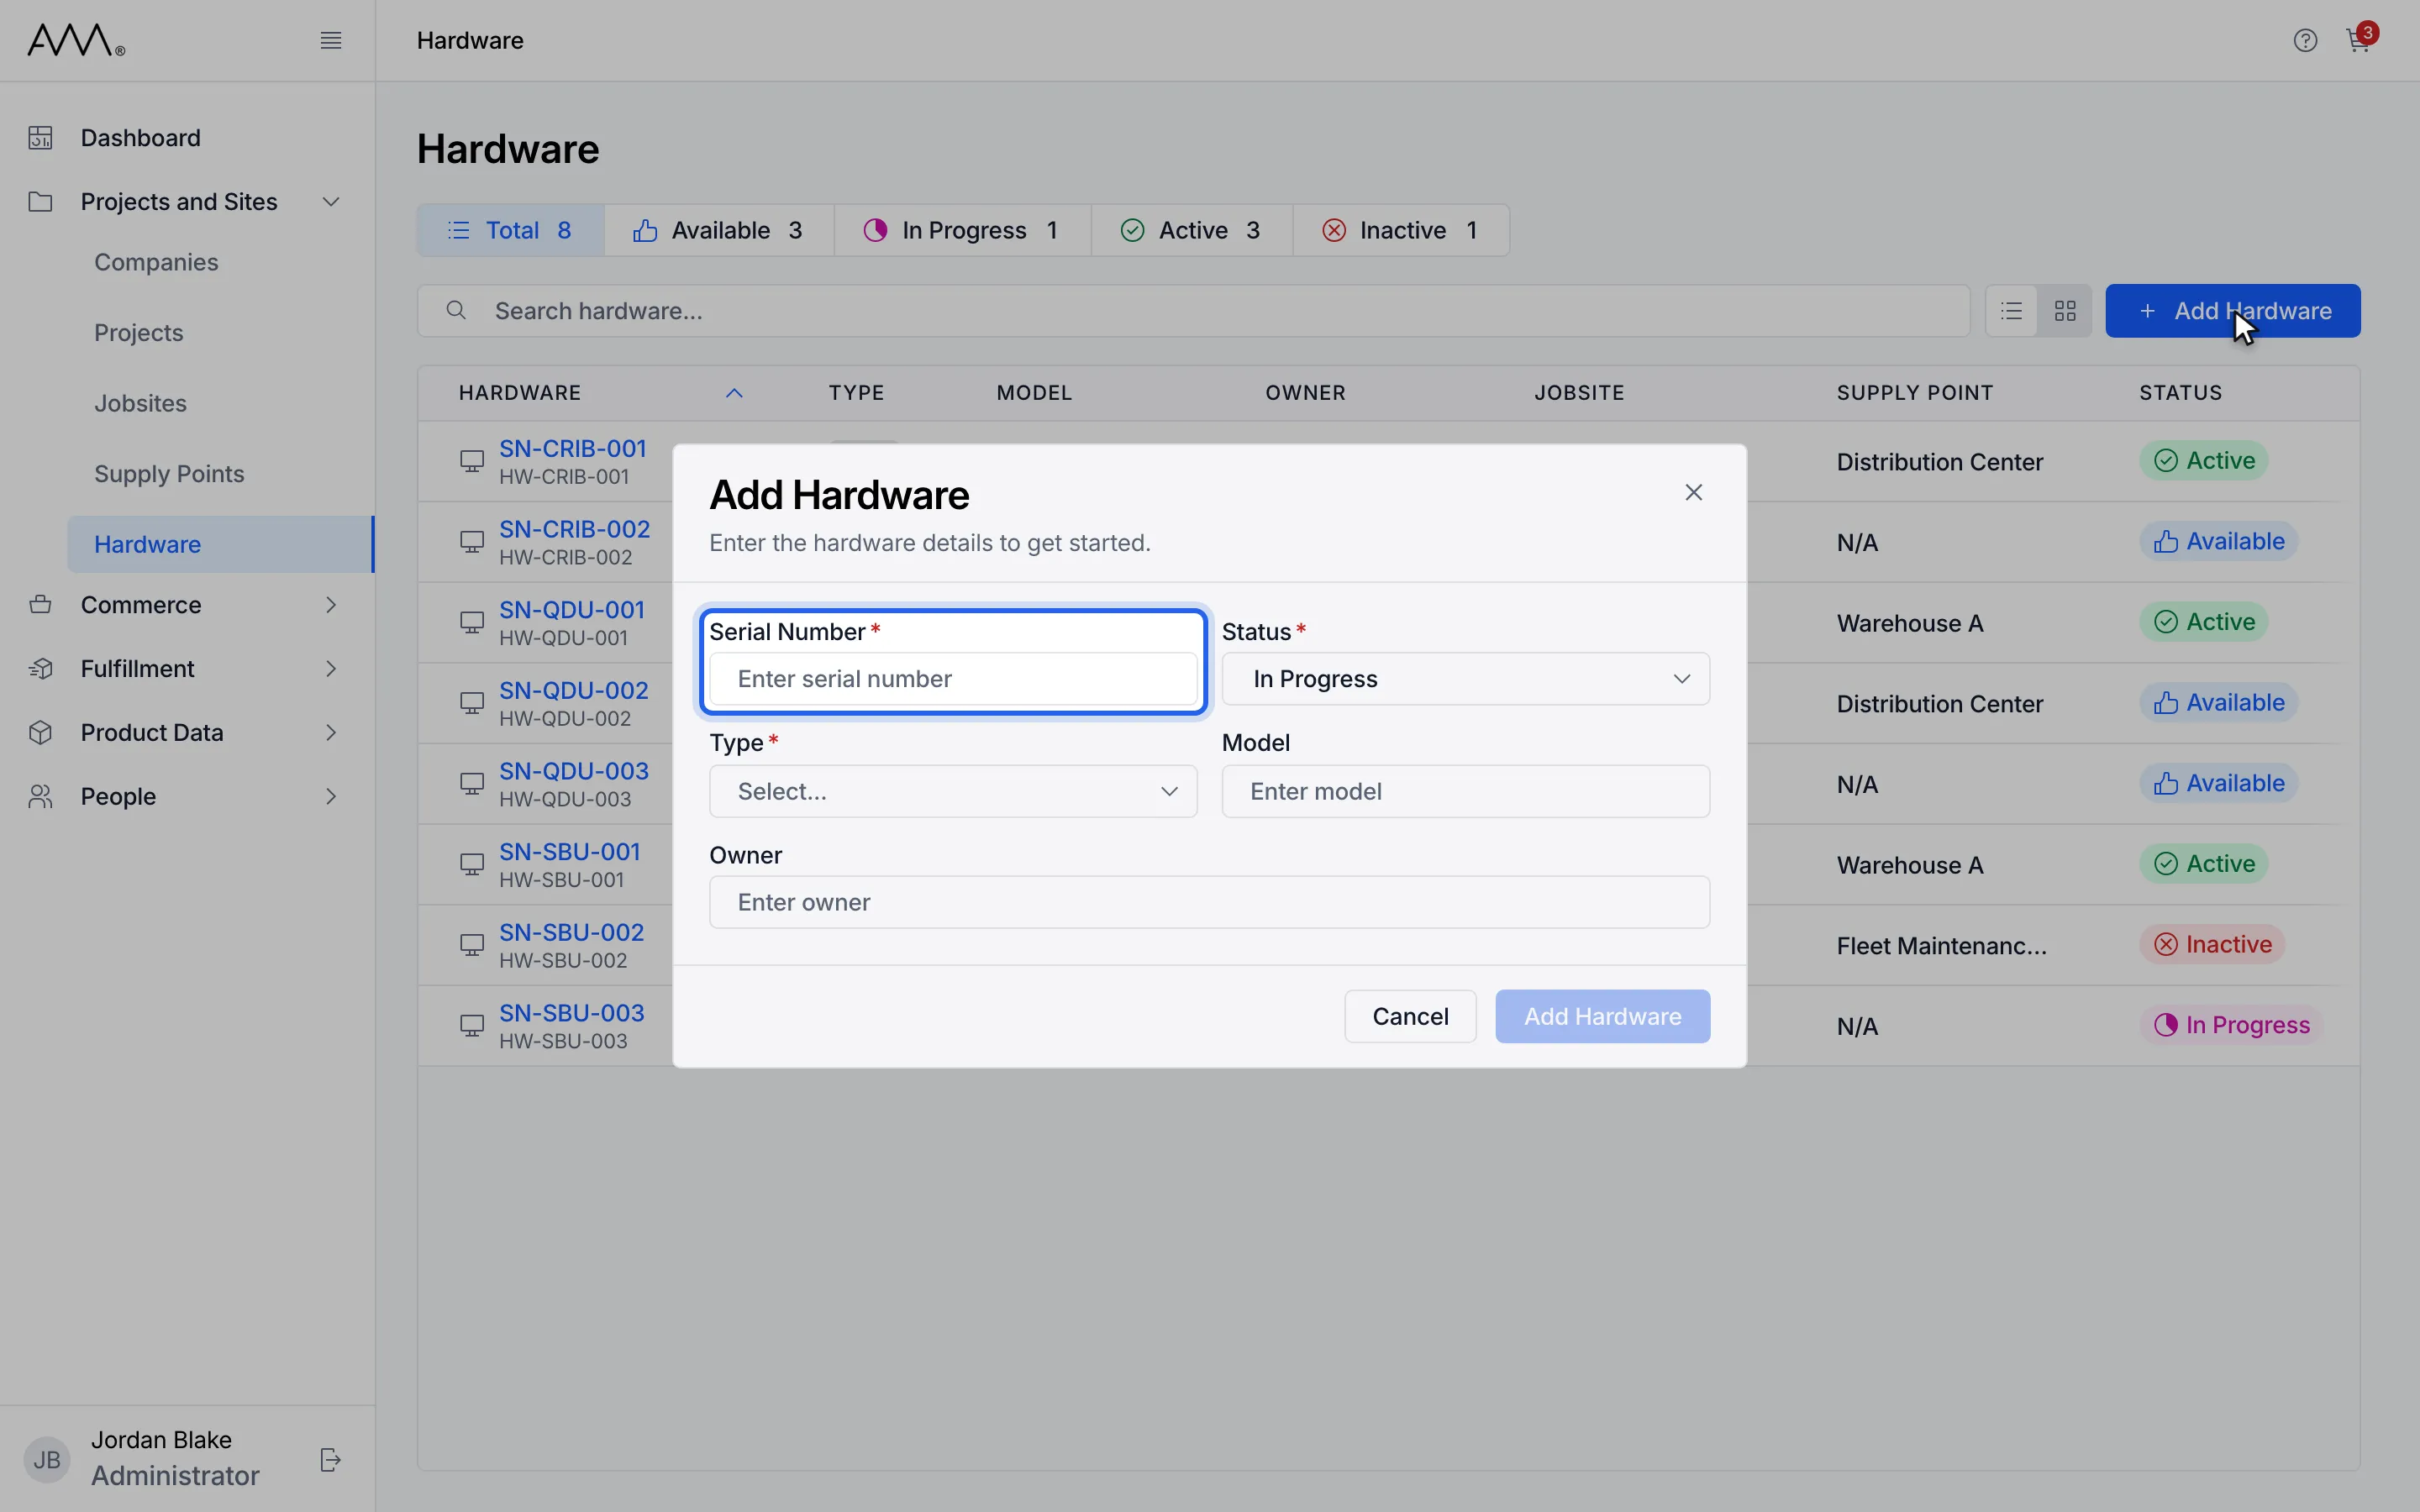
4Enter the Serial Number.
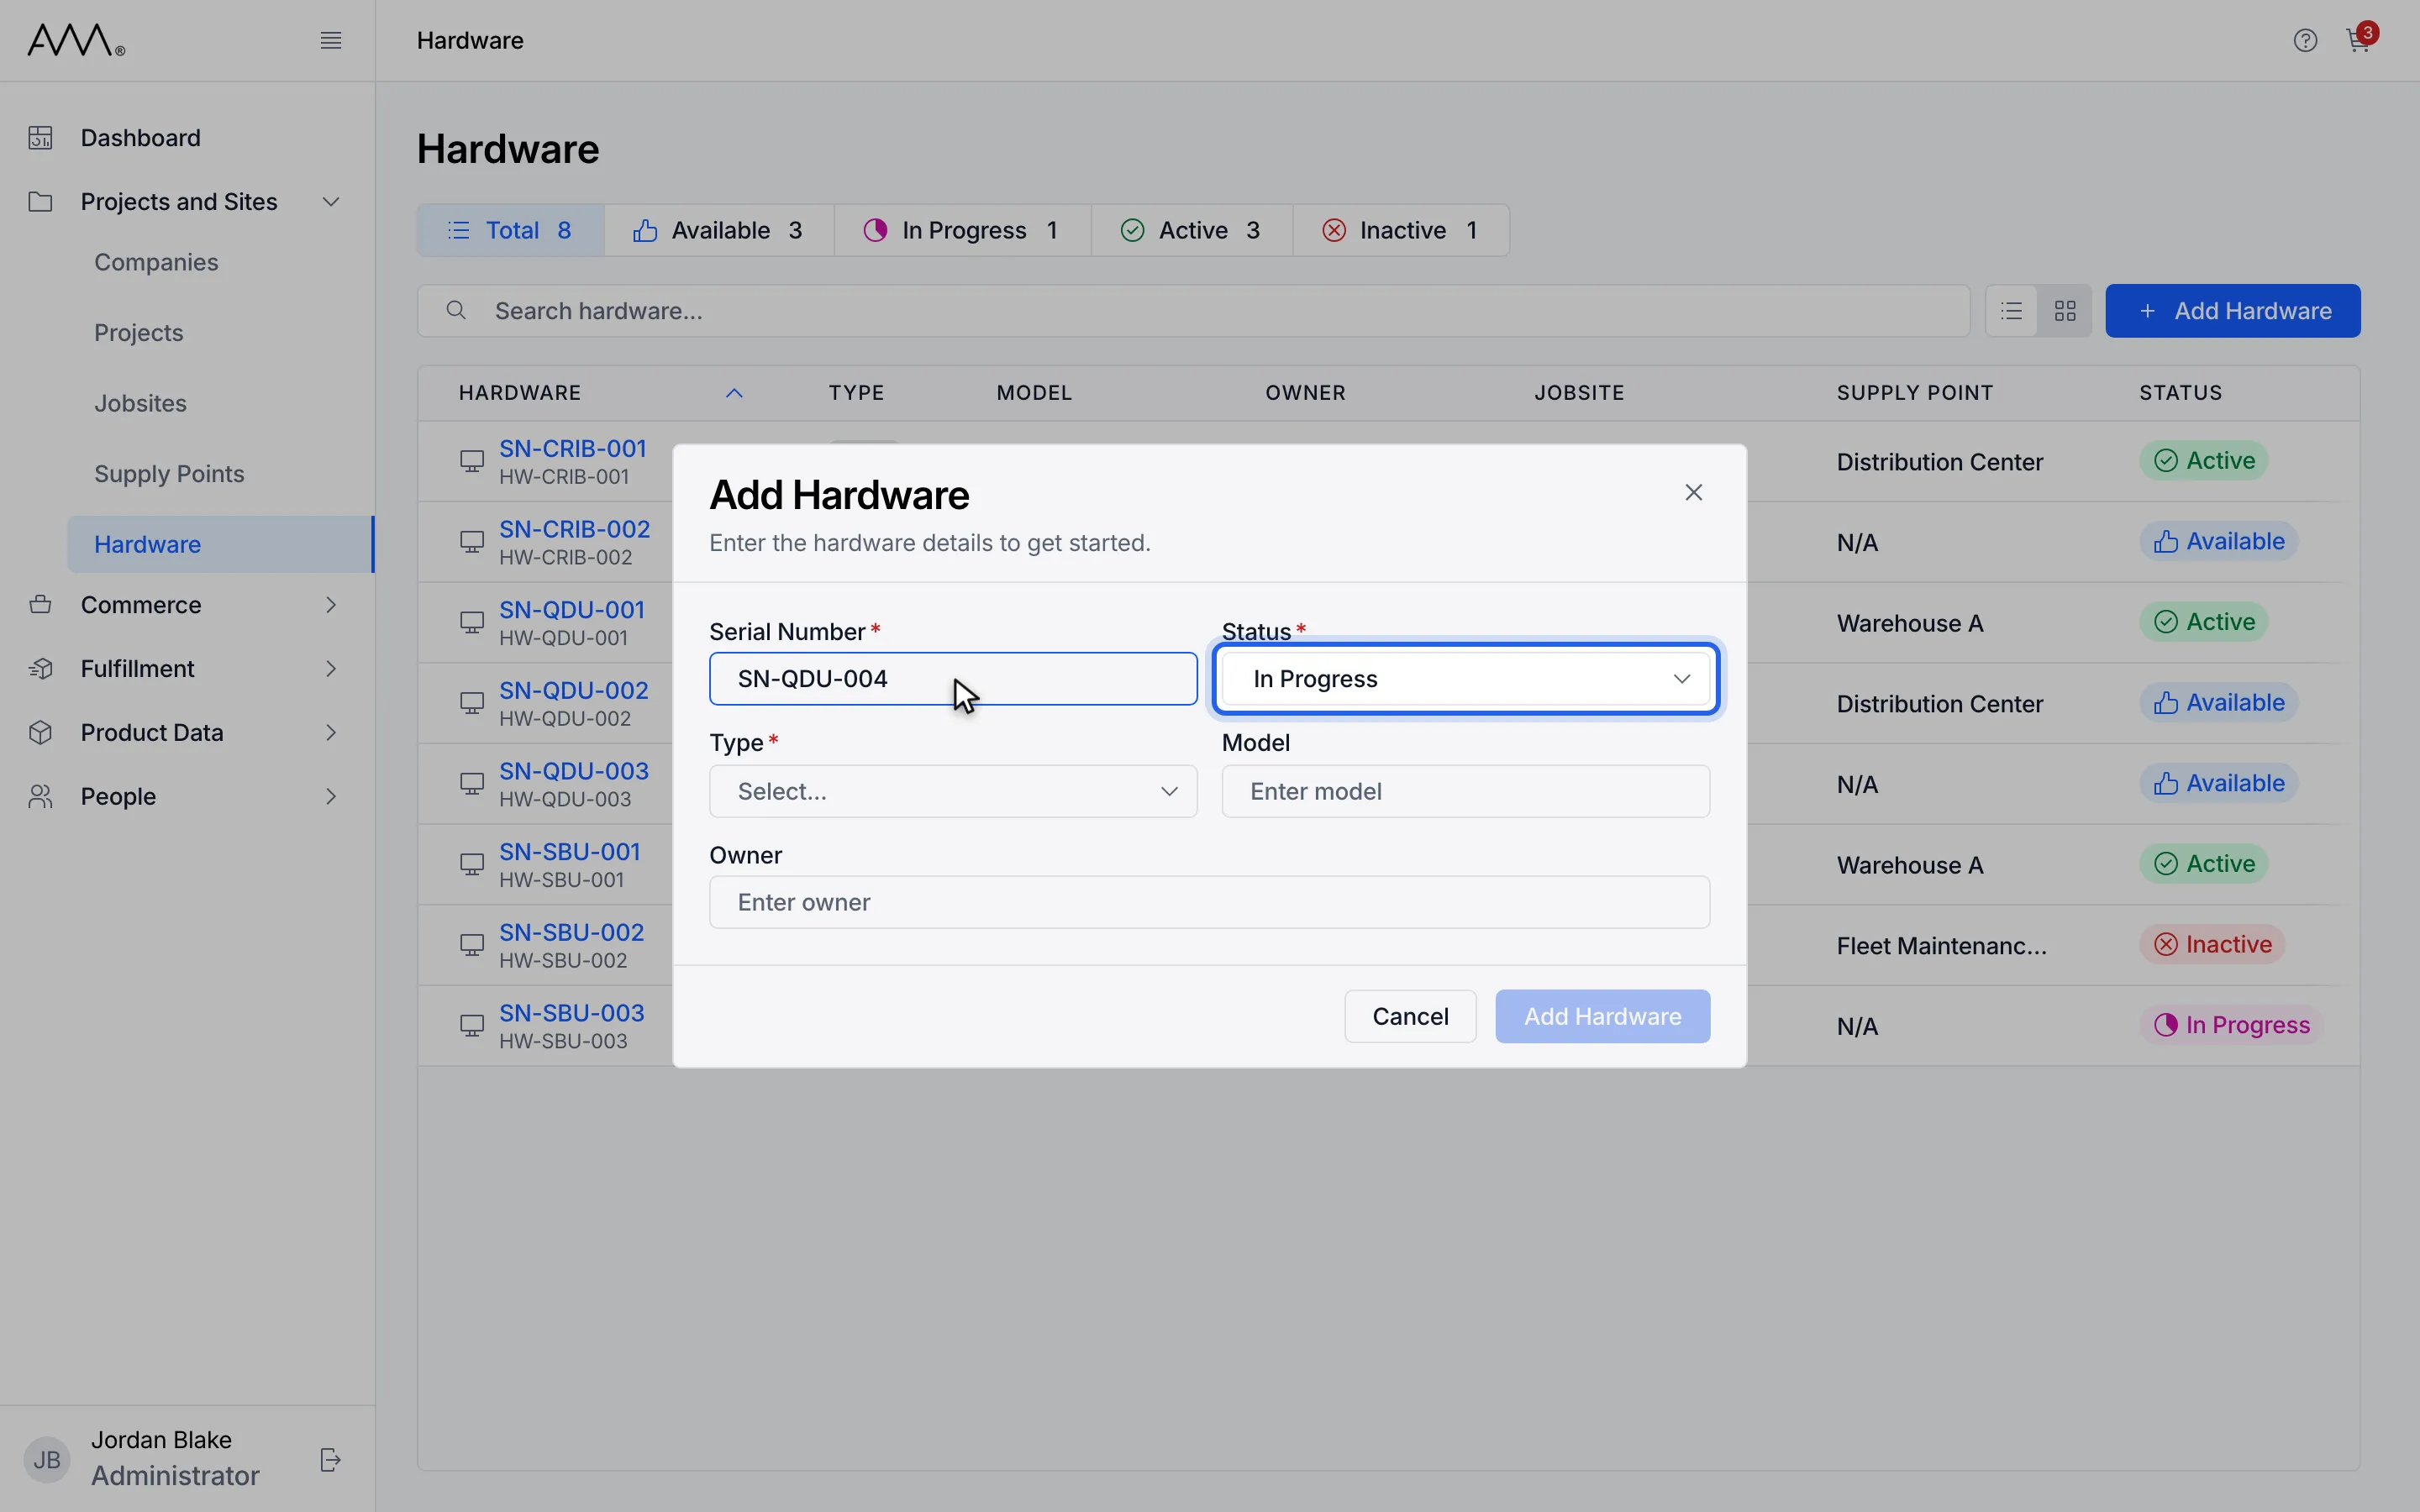
5Open Status. New units start as In Progress.
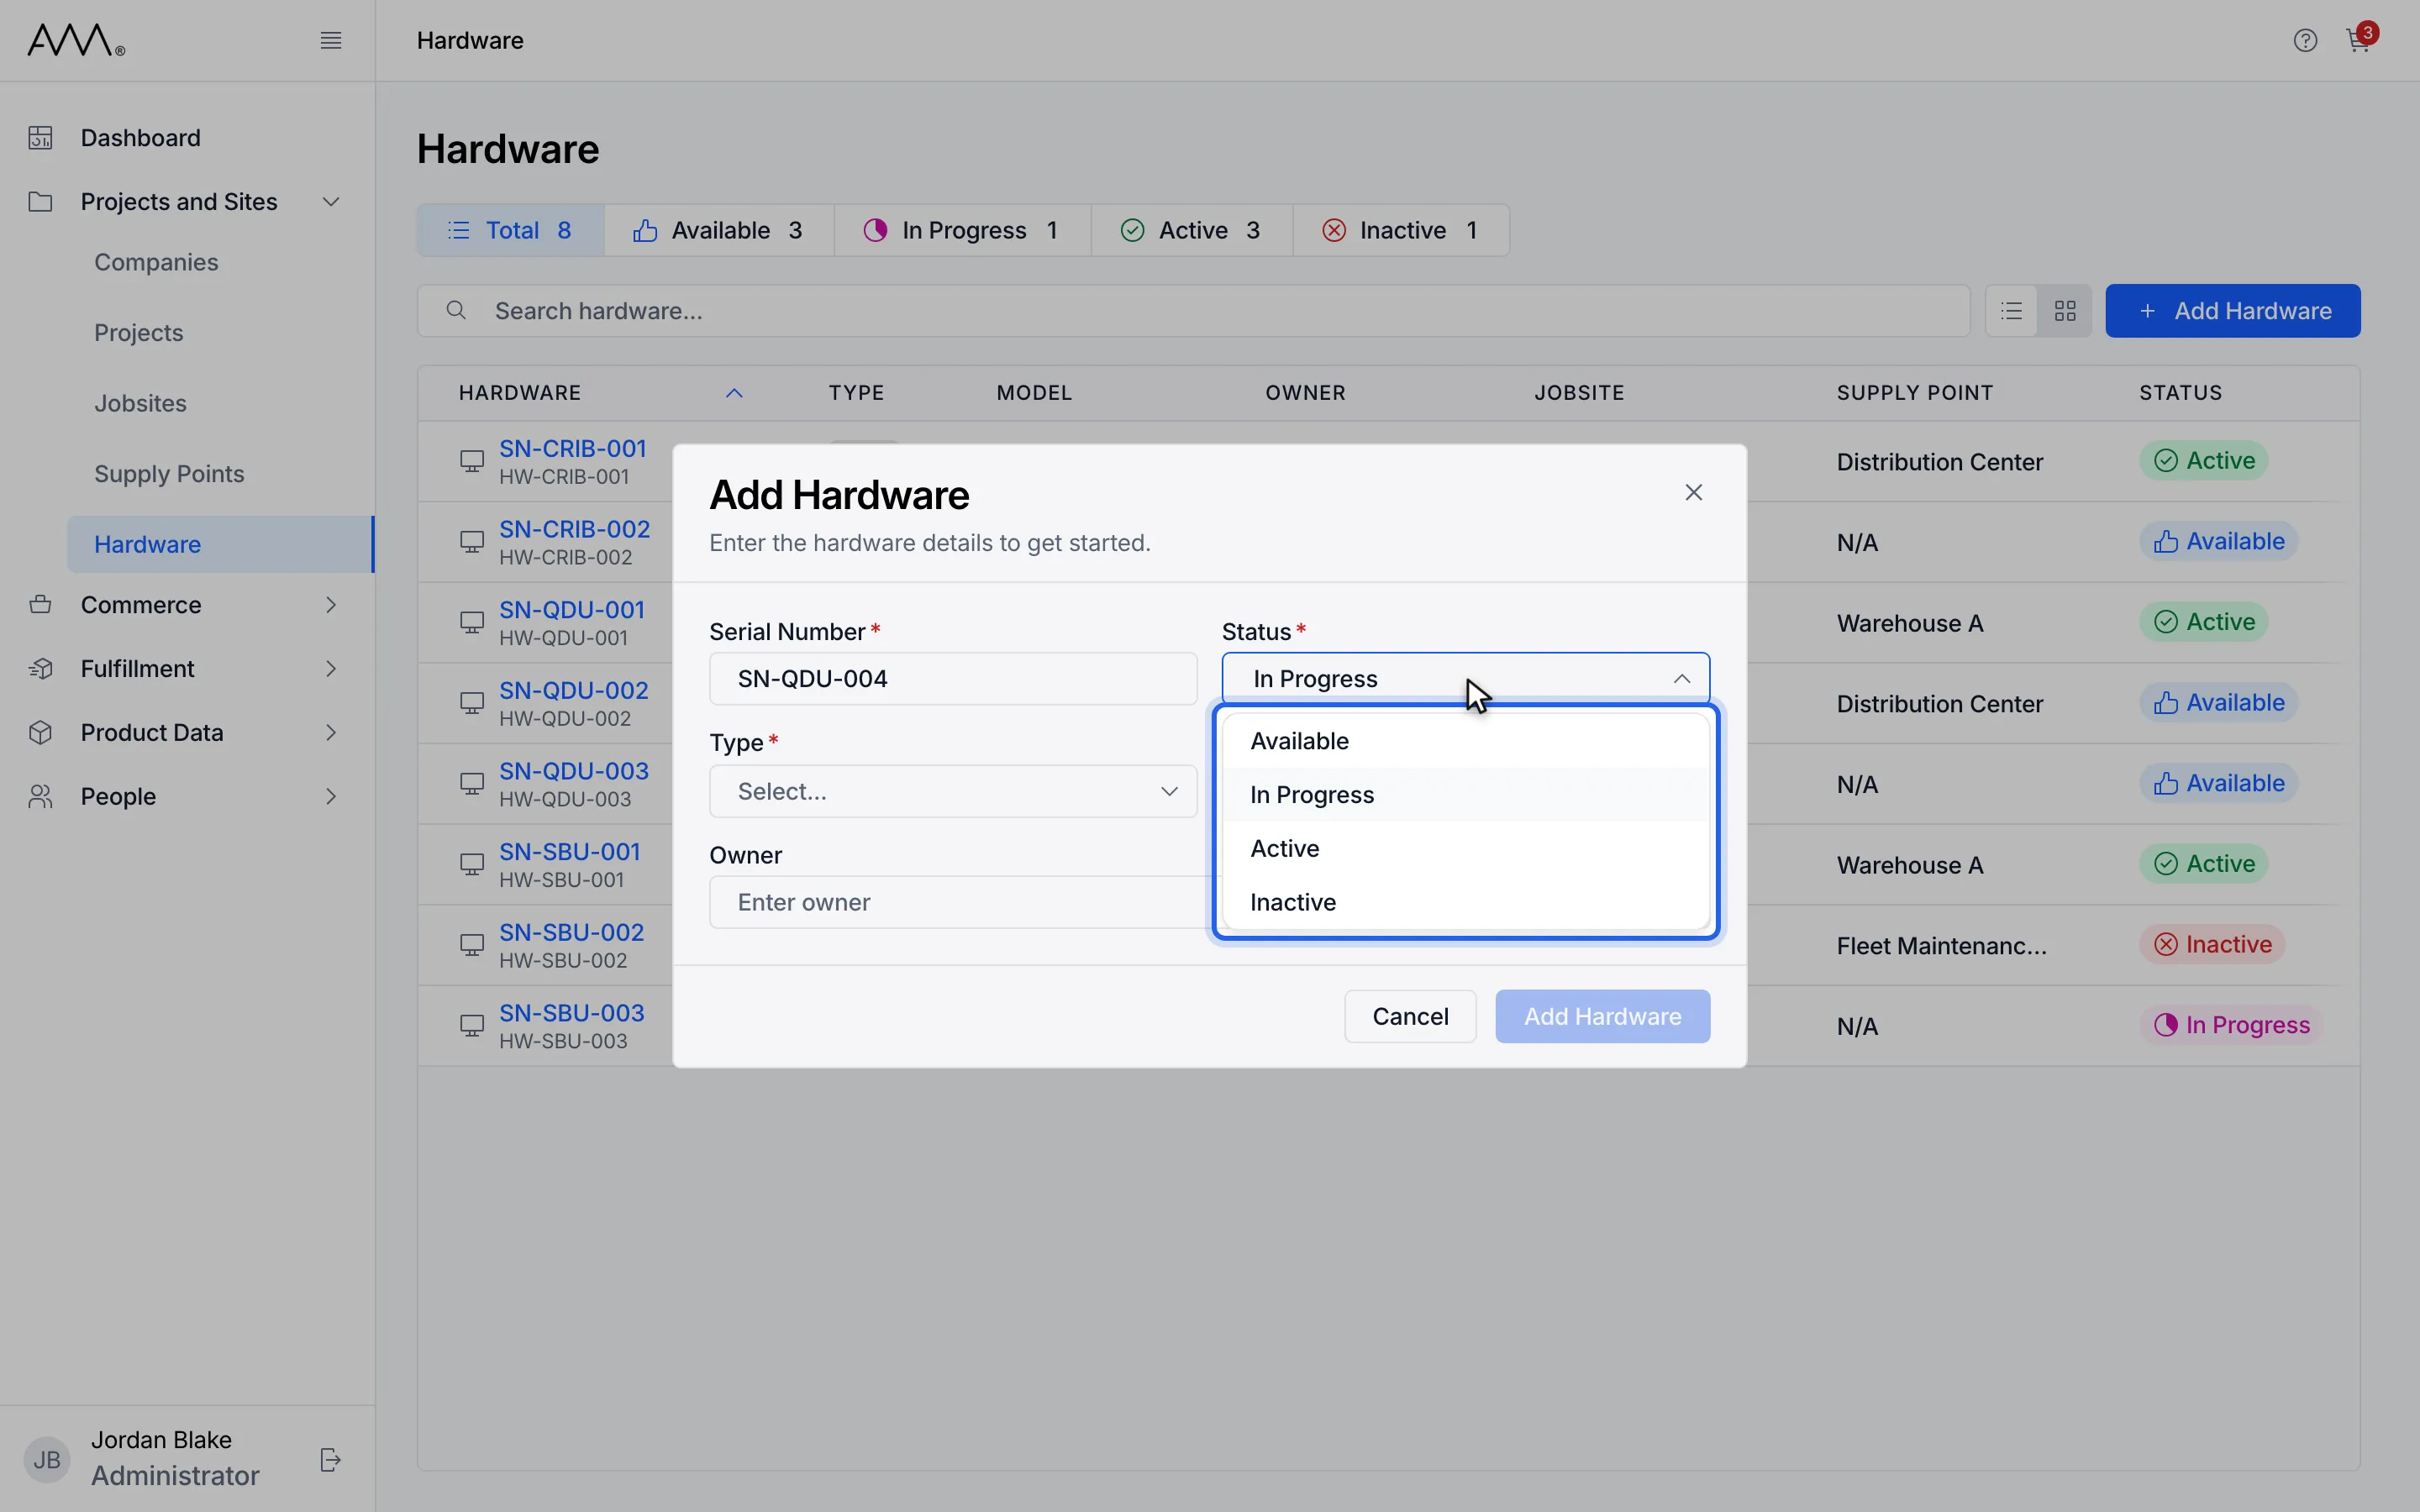
6Choose a status.
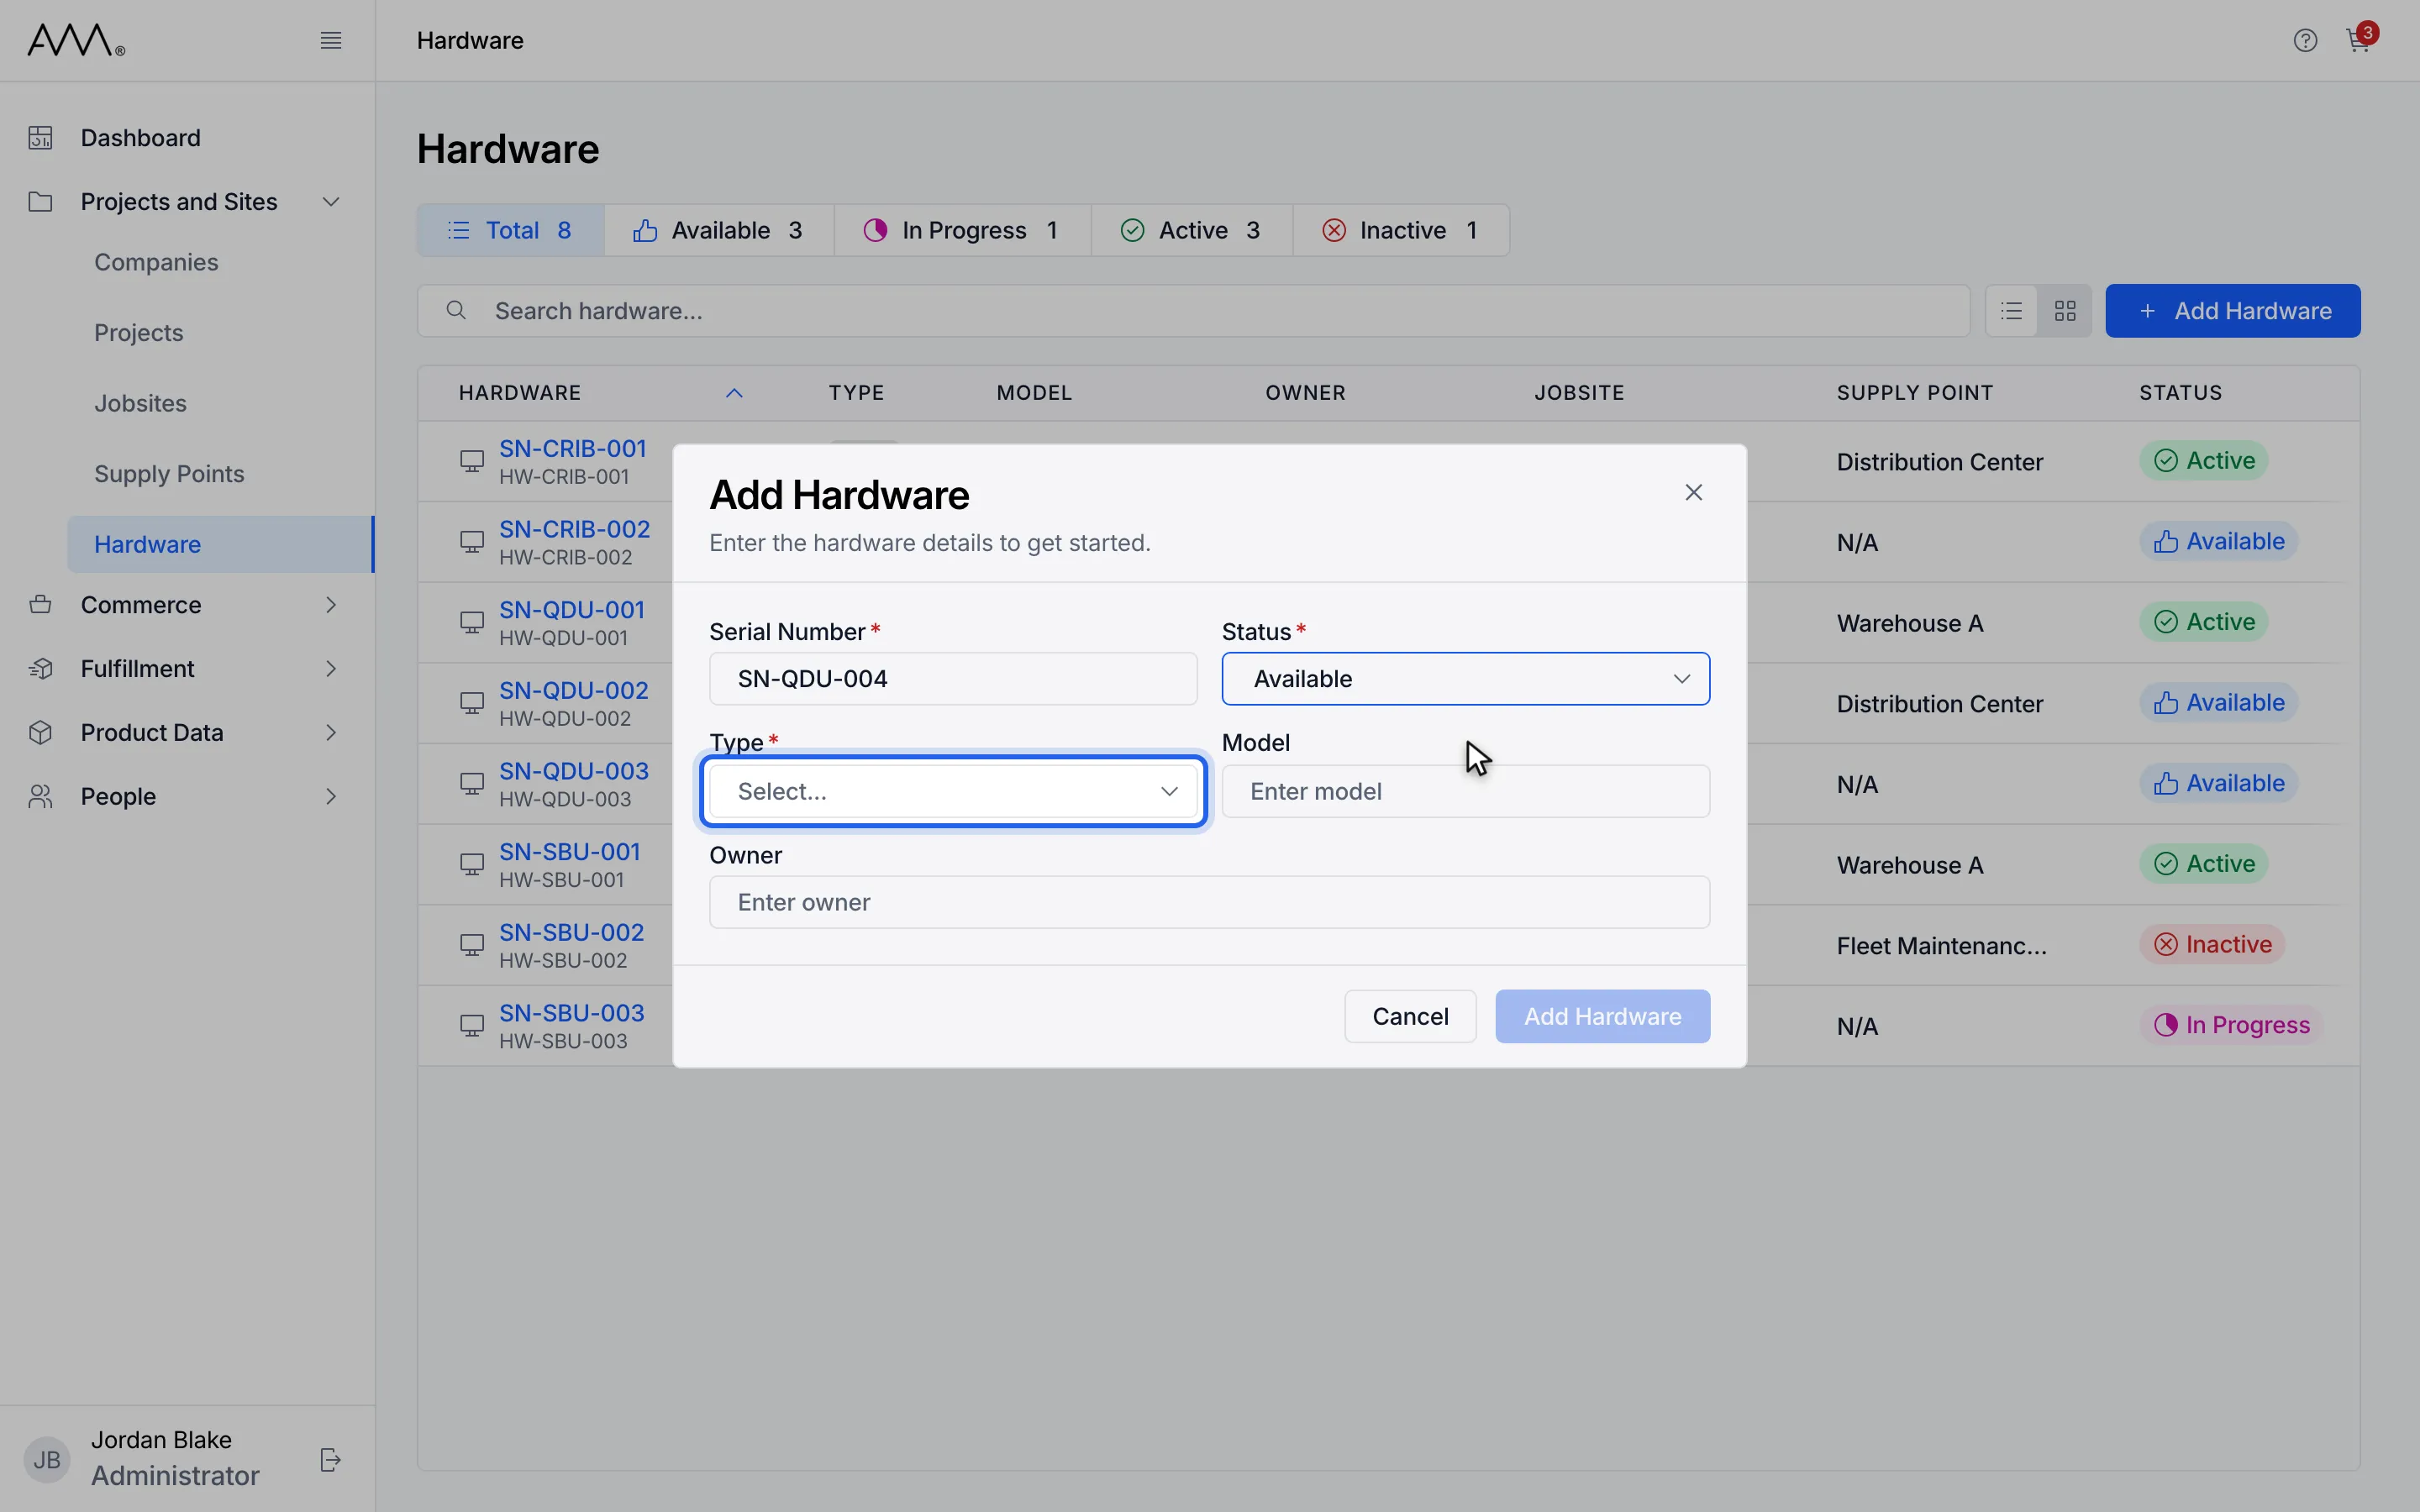
7Open Type.
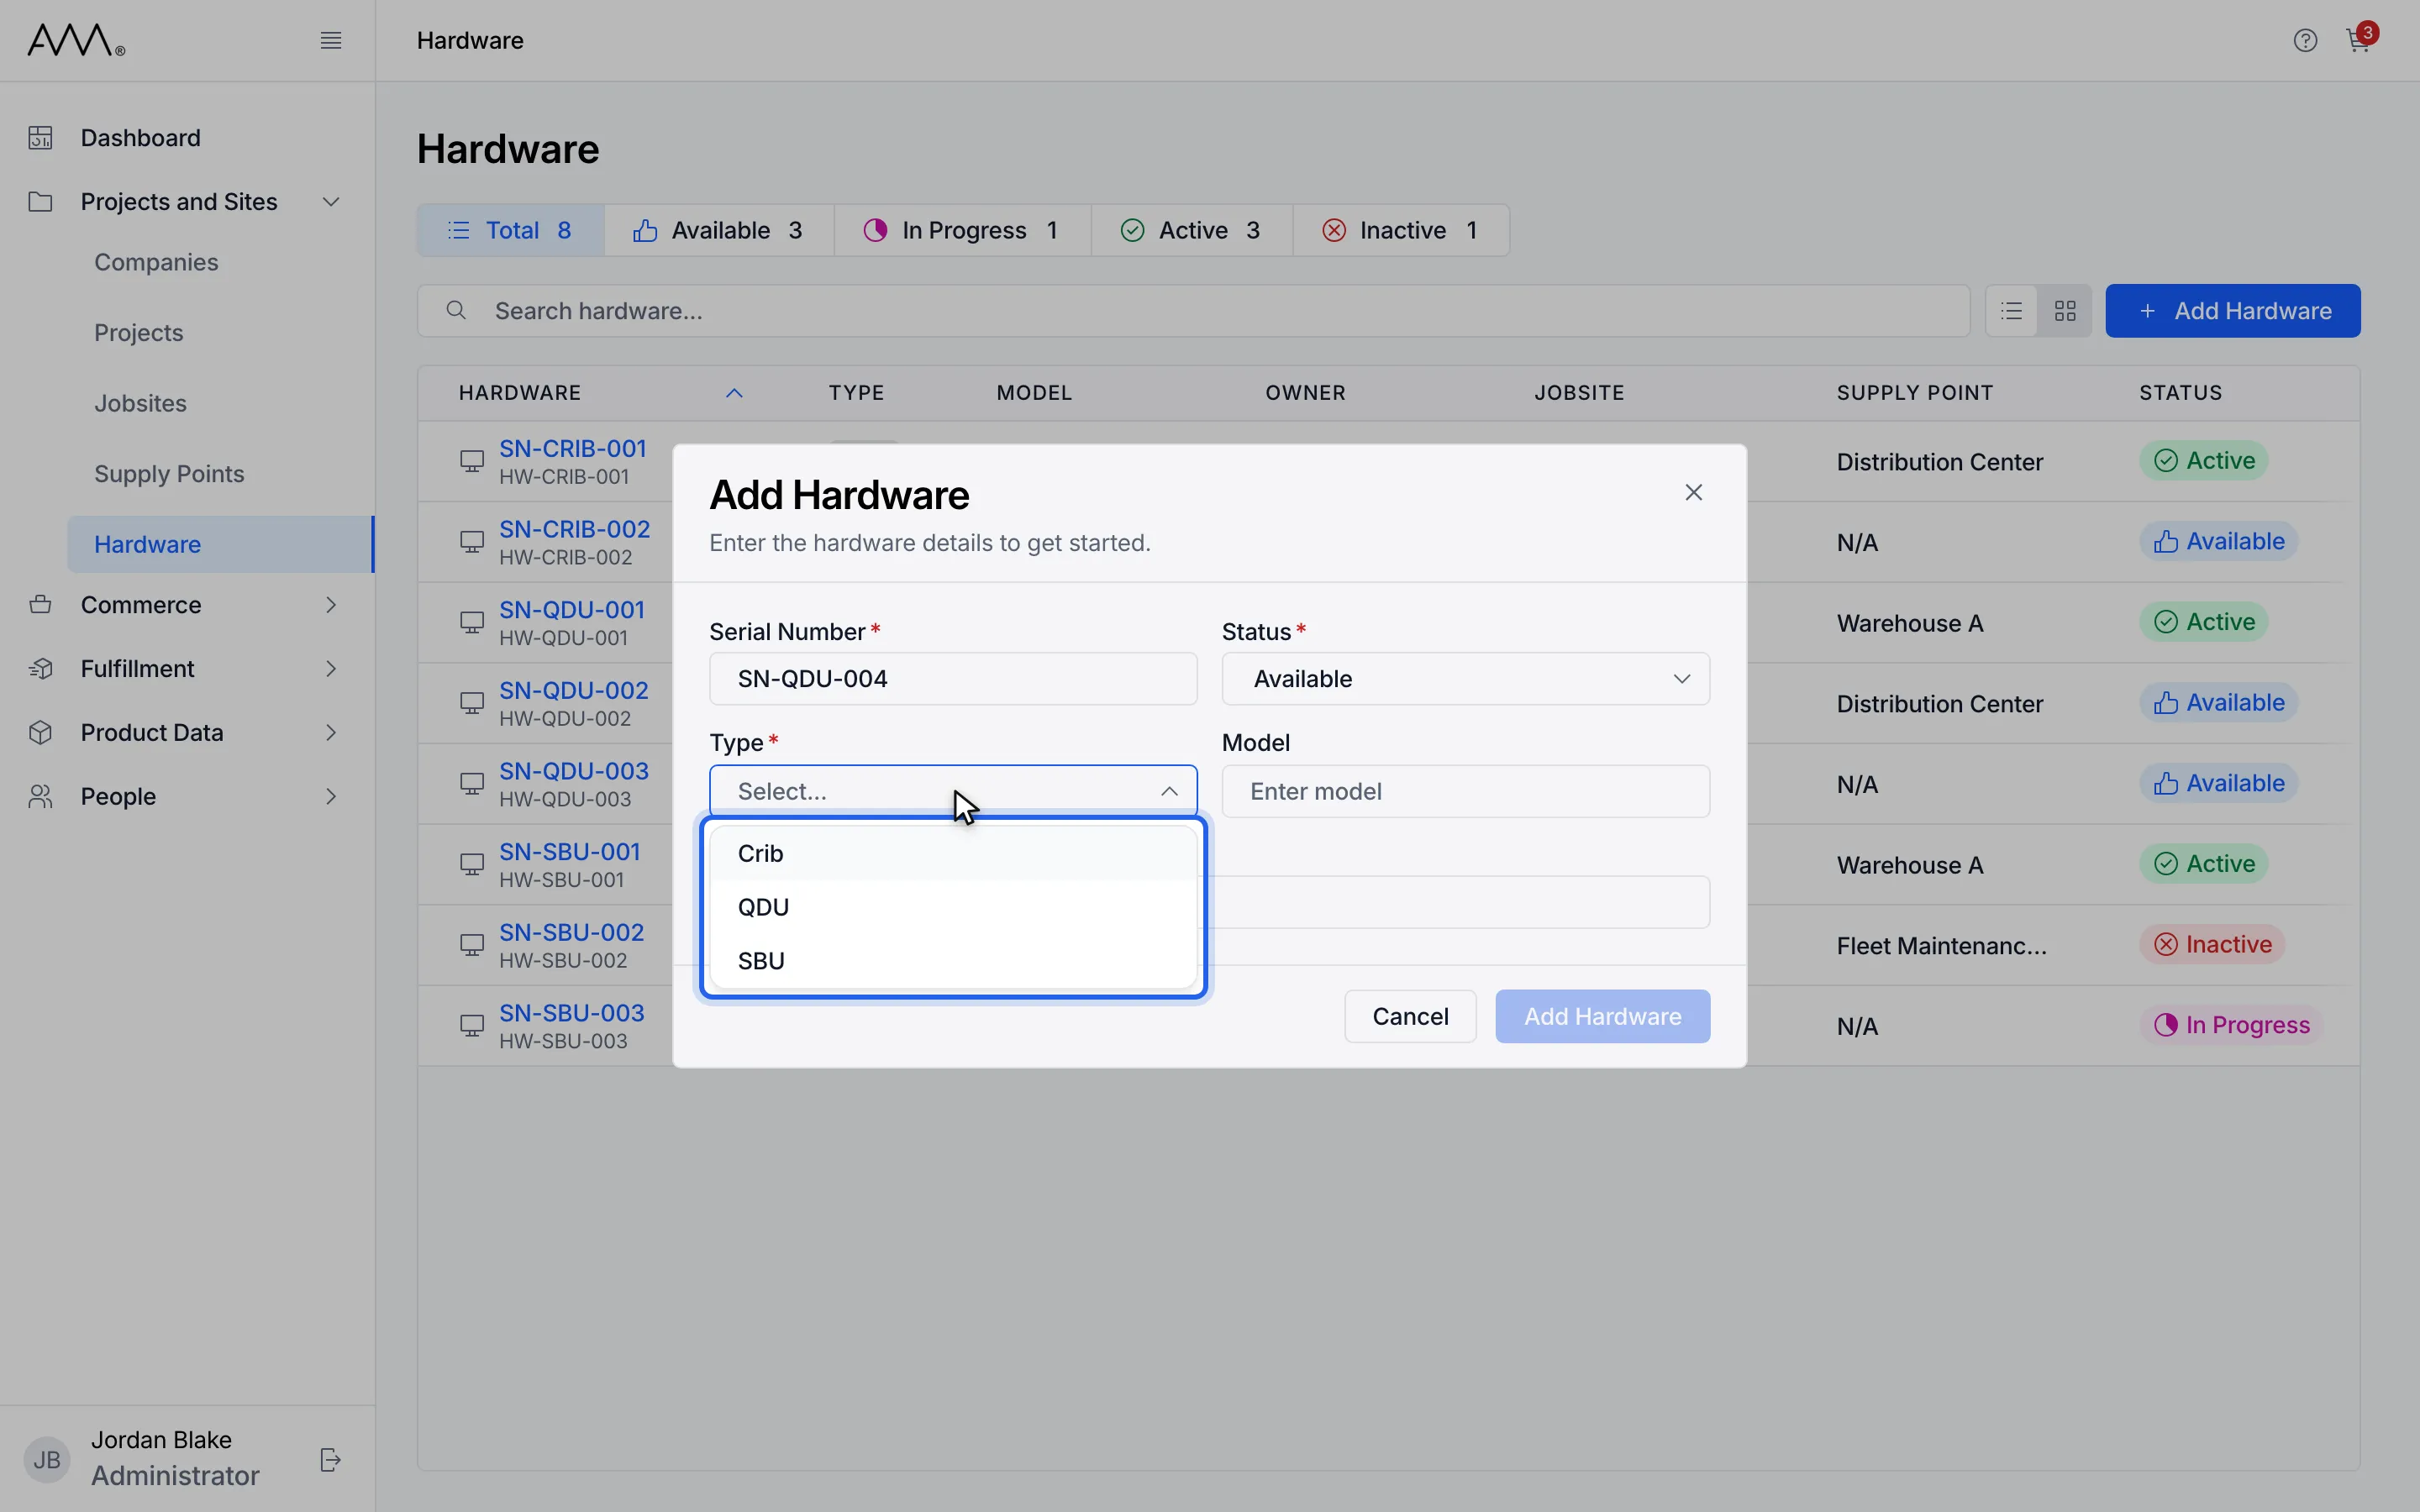
8Choose Crib, QDU or SBU.
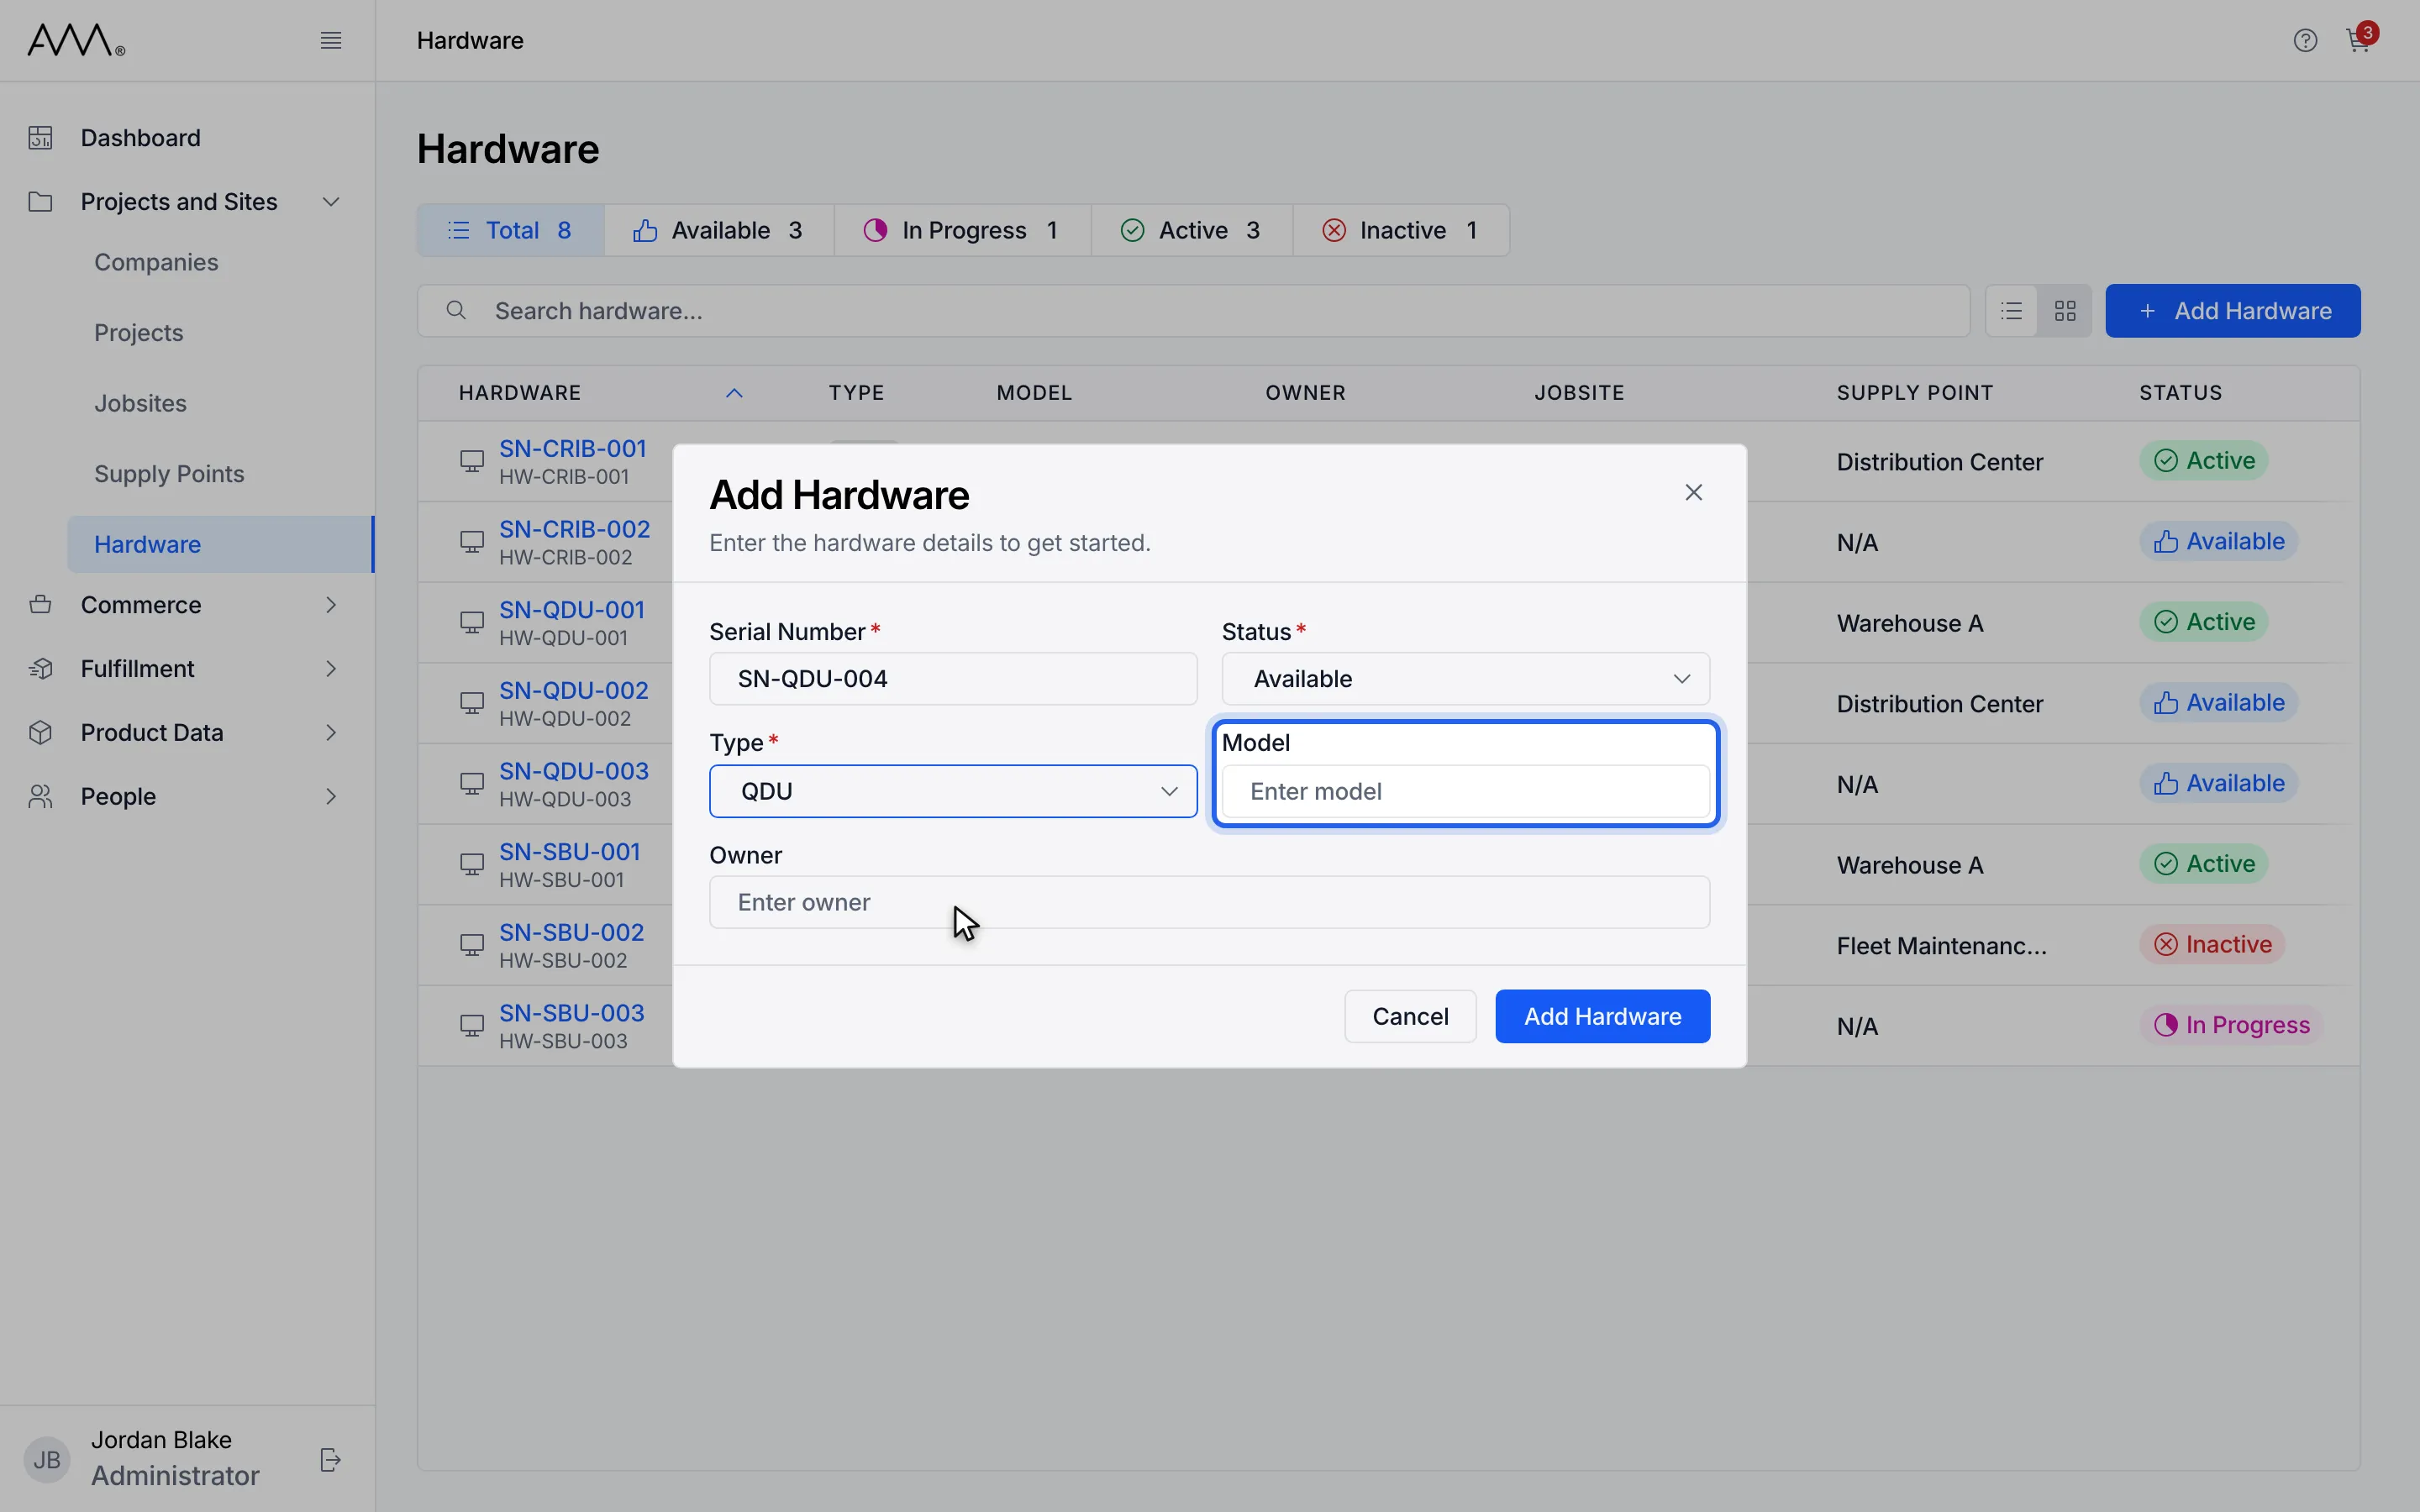
9Enter the Model if you know it.
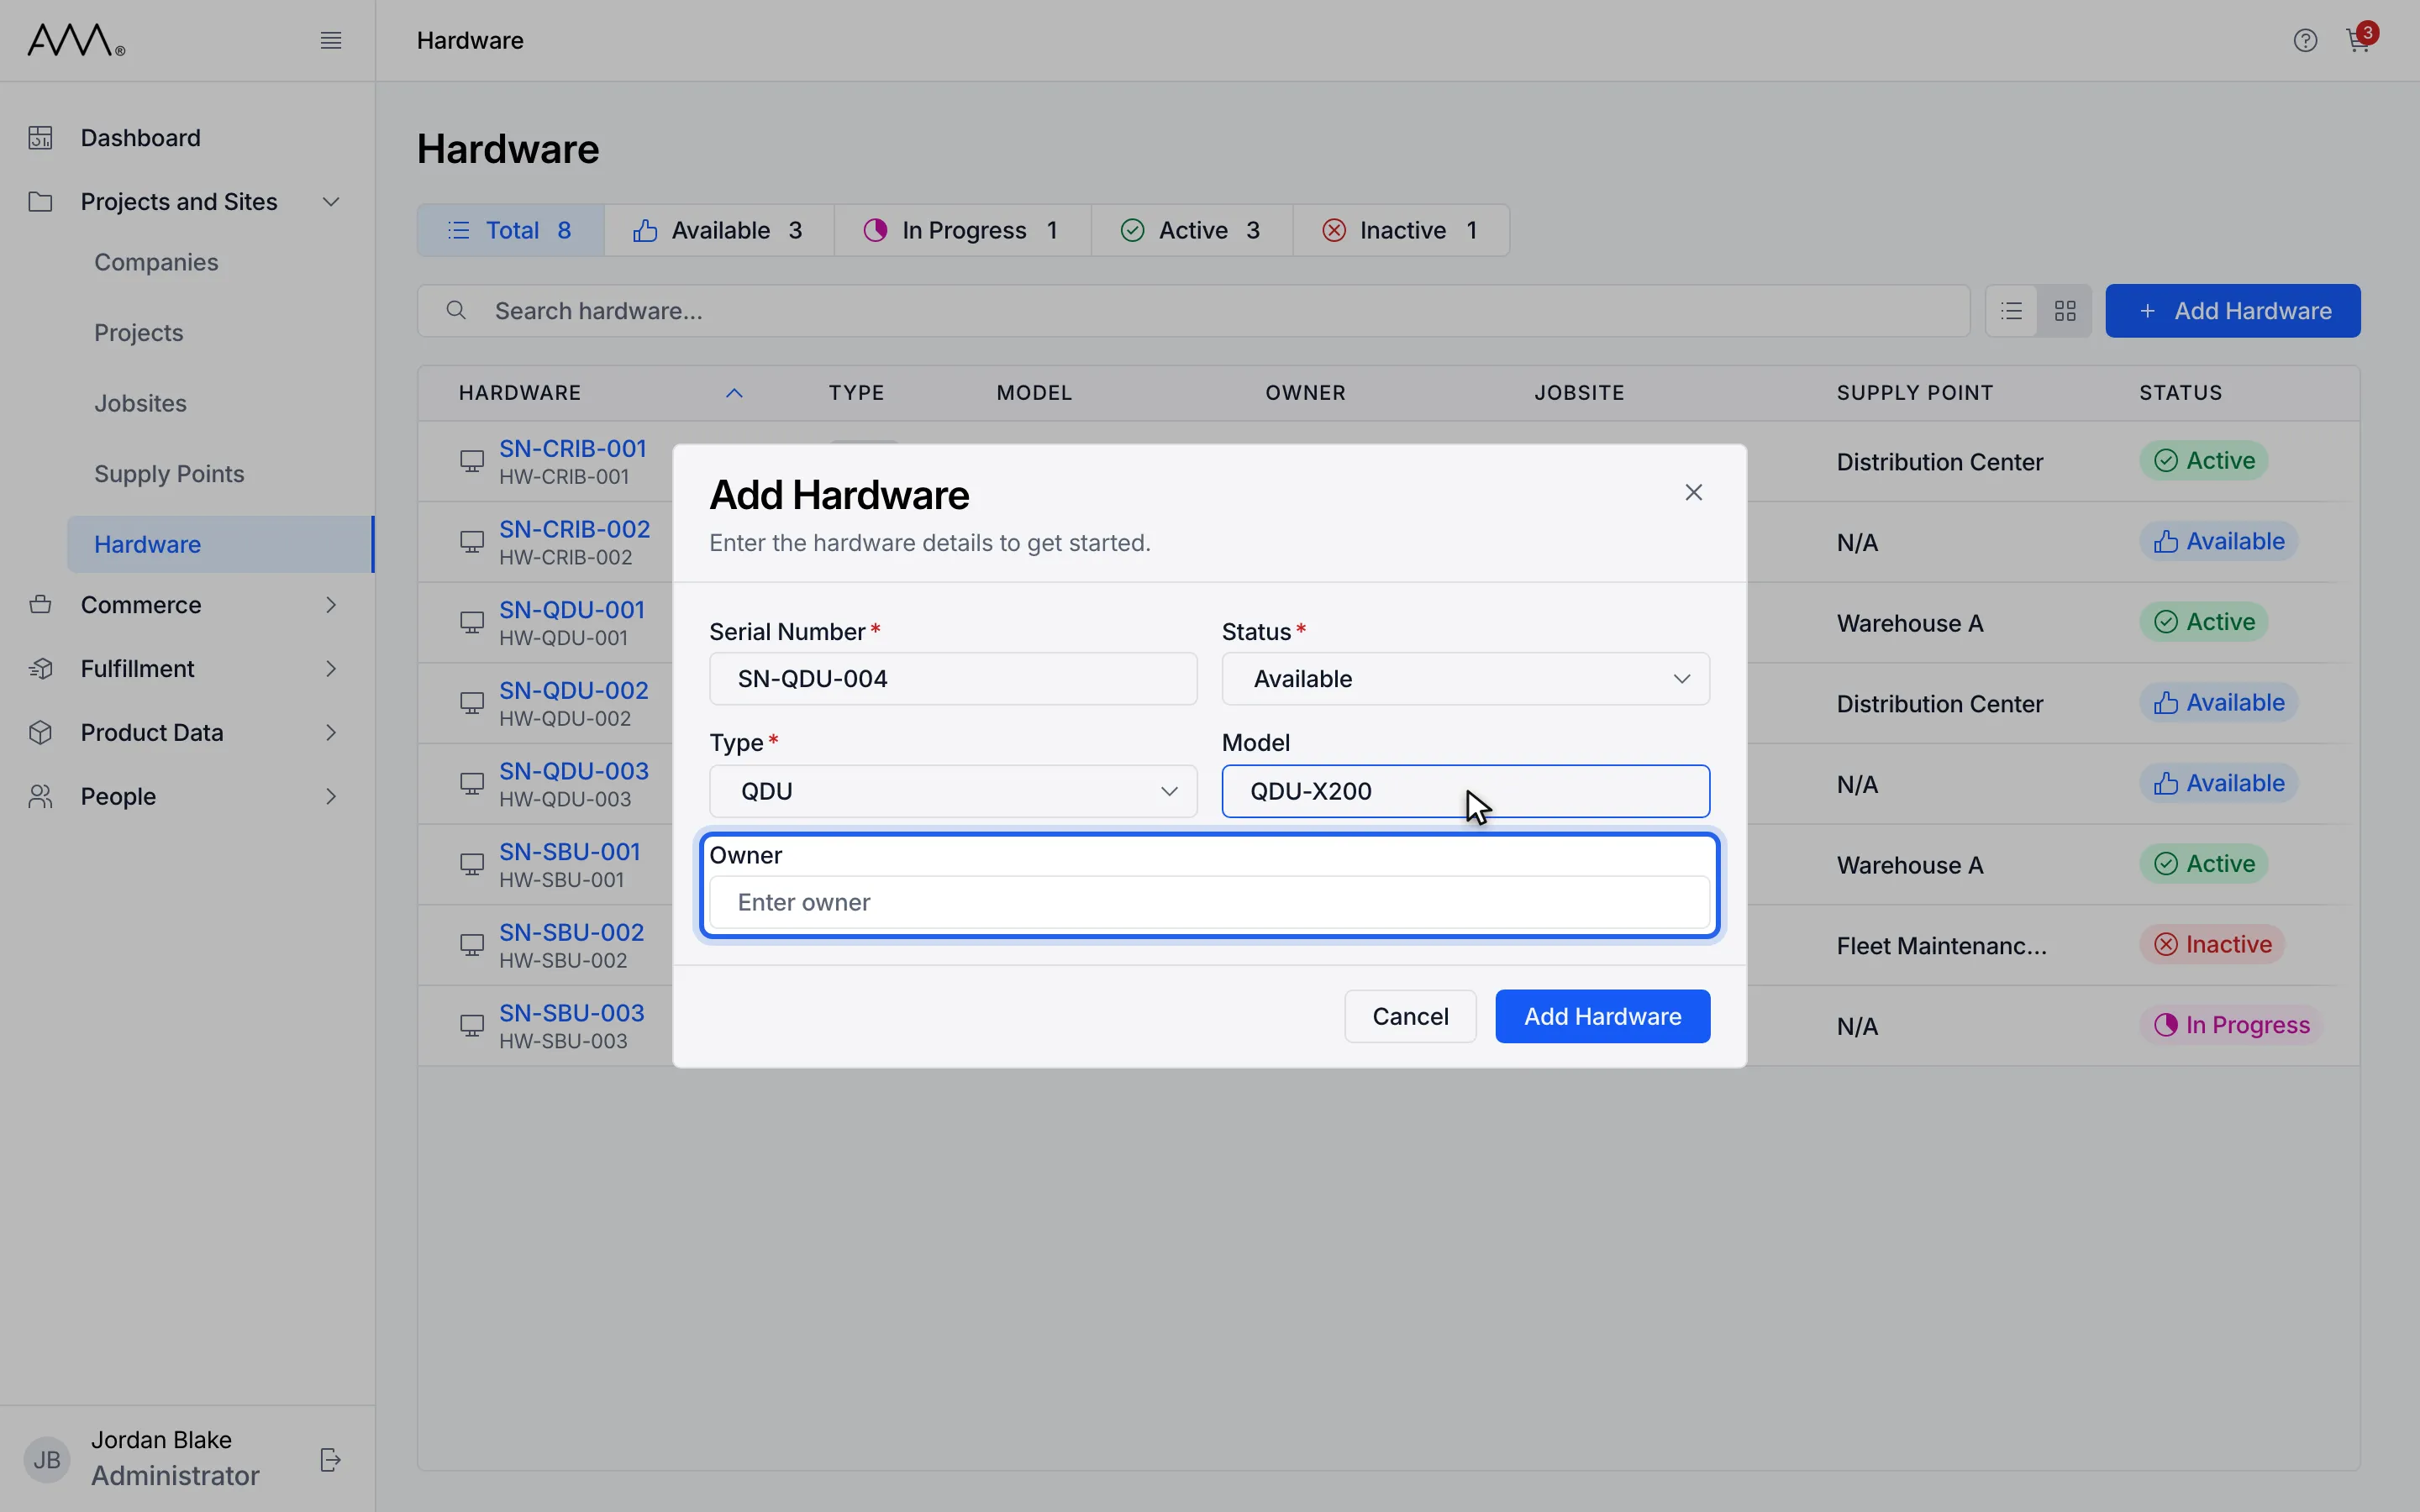
10Enter the Owner if you know it.
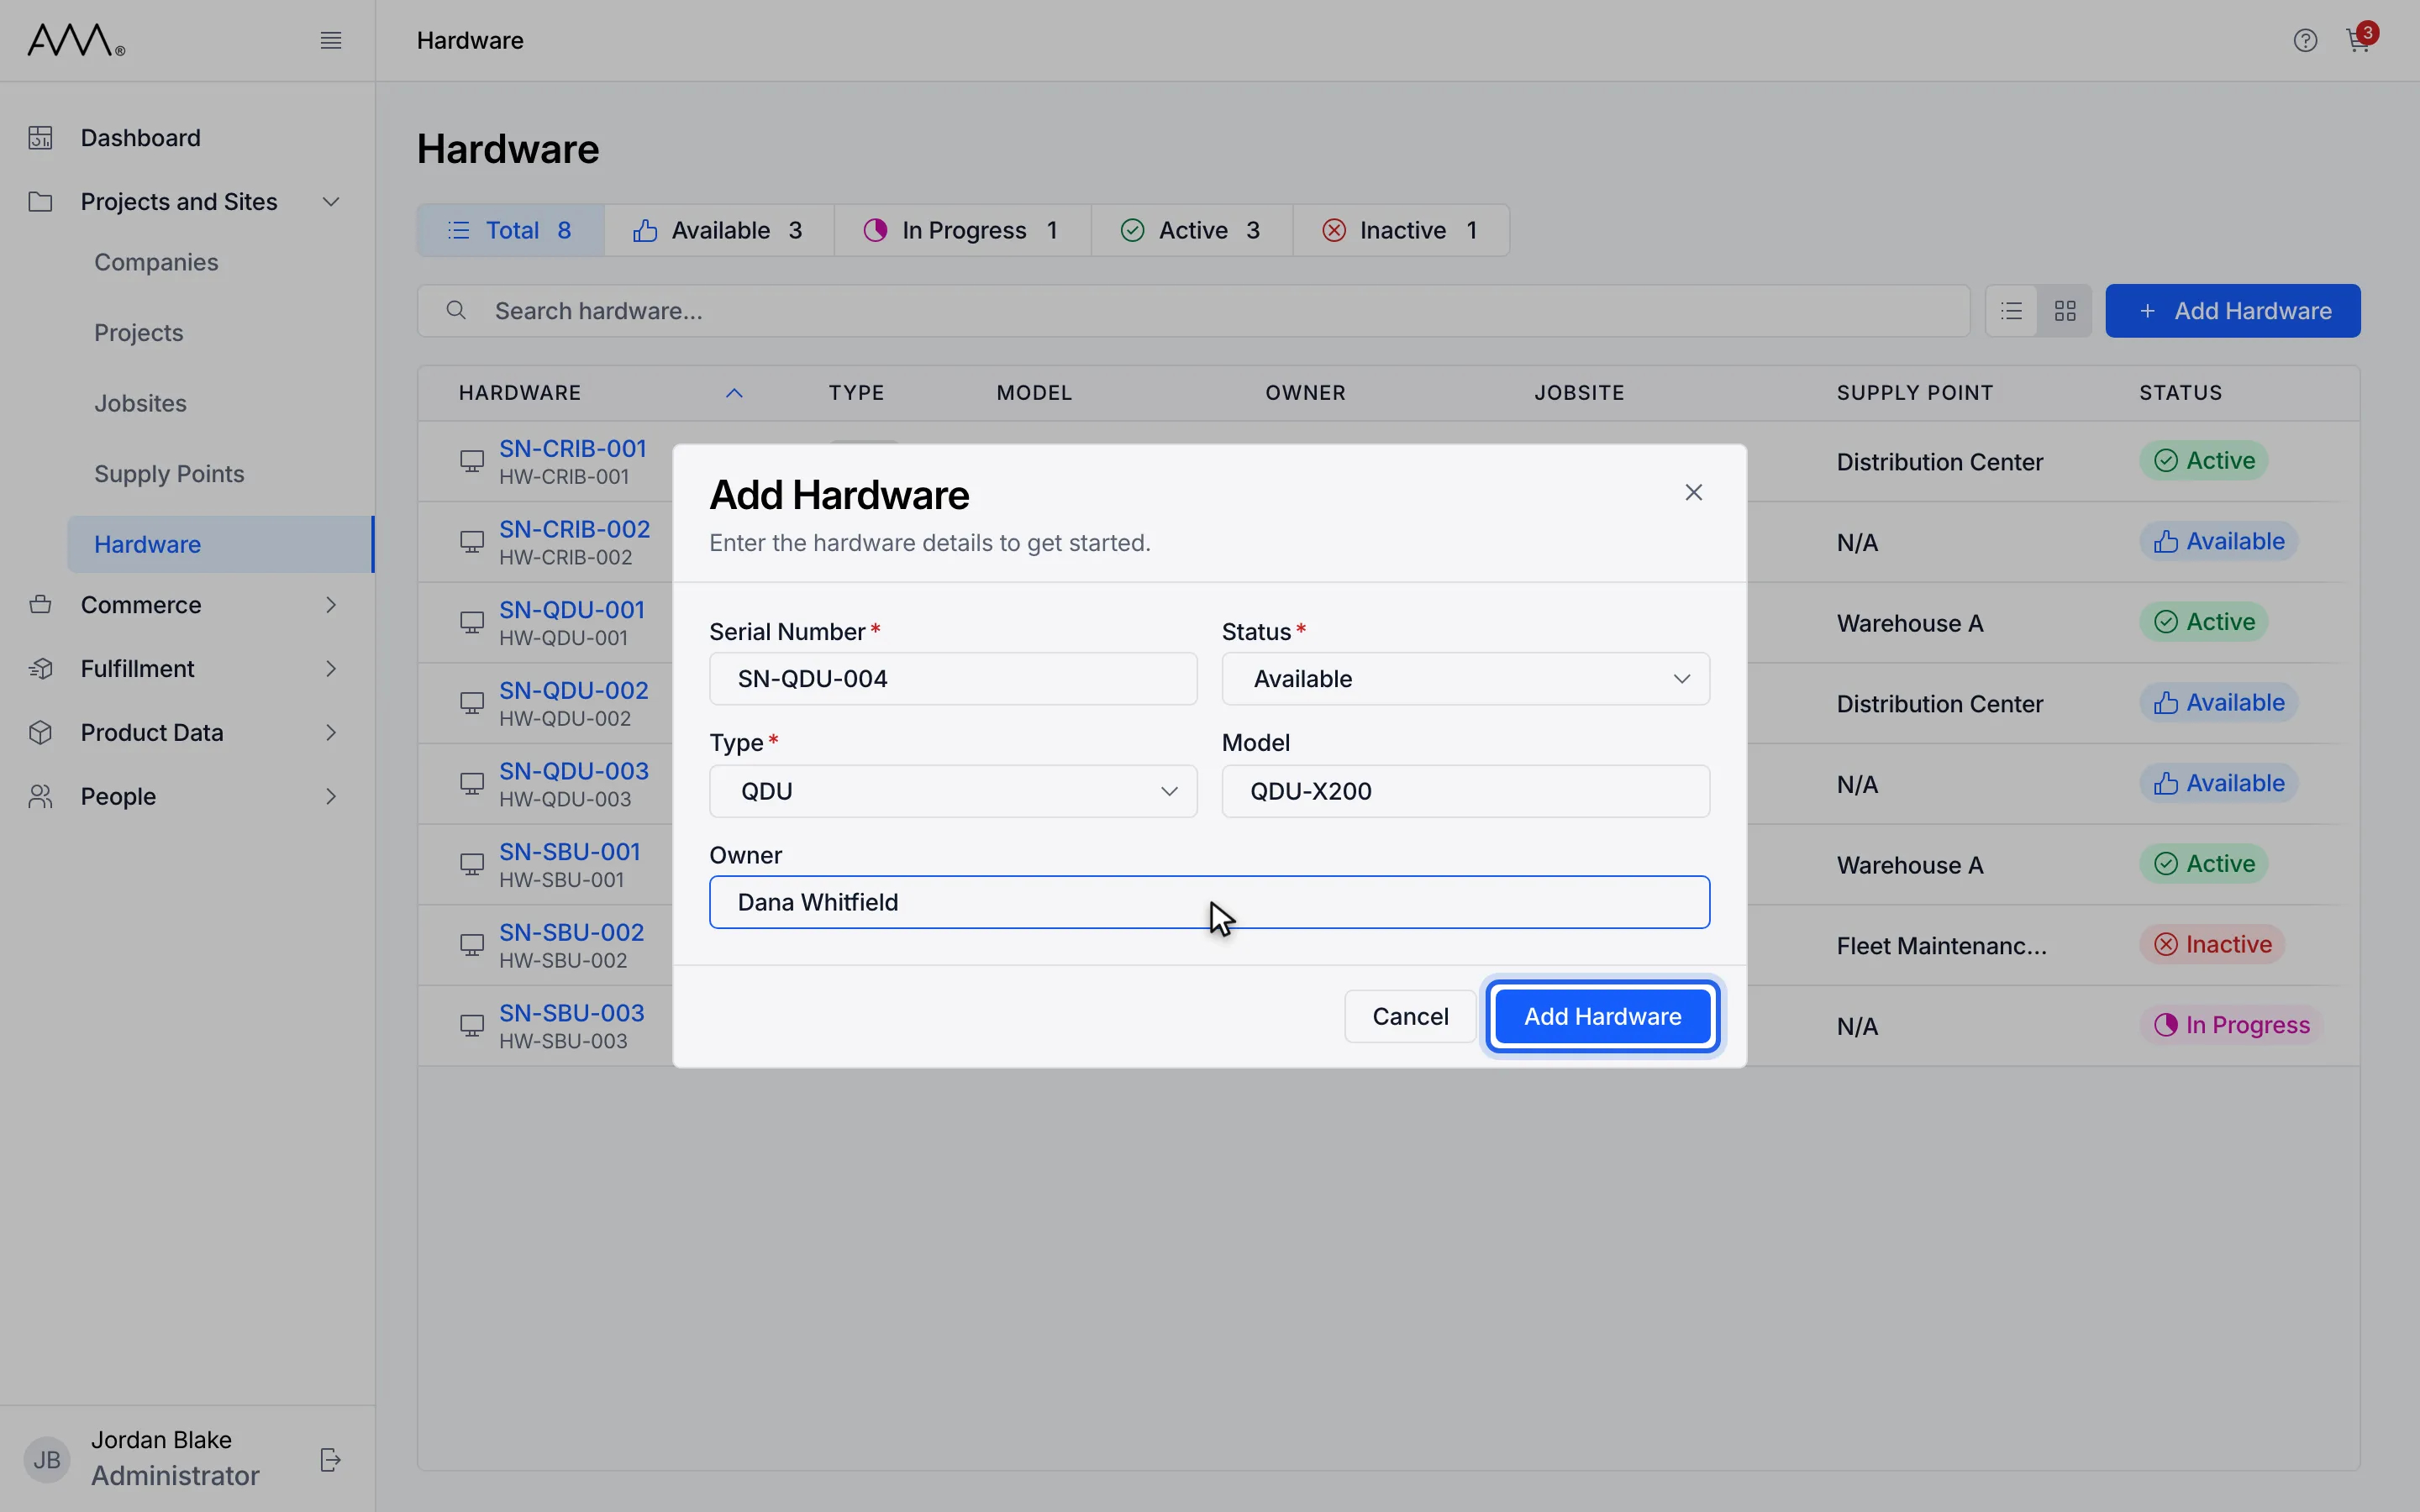
11Click Add Hardware.
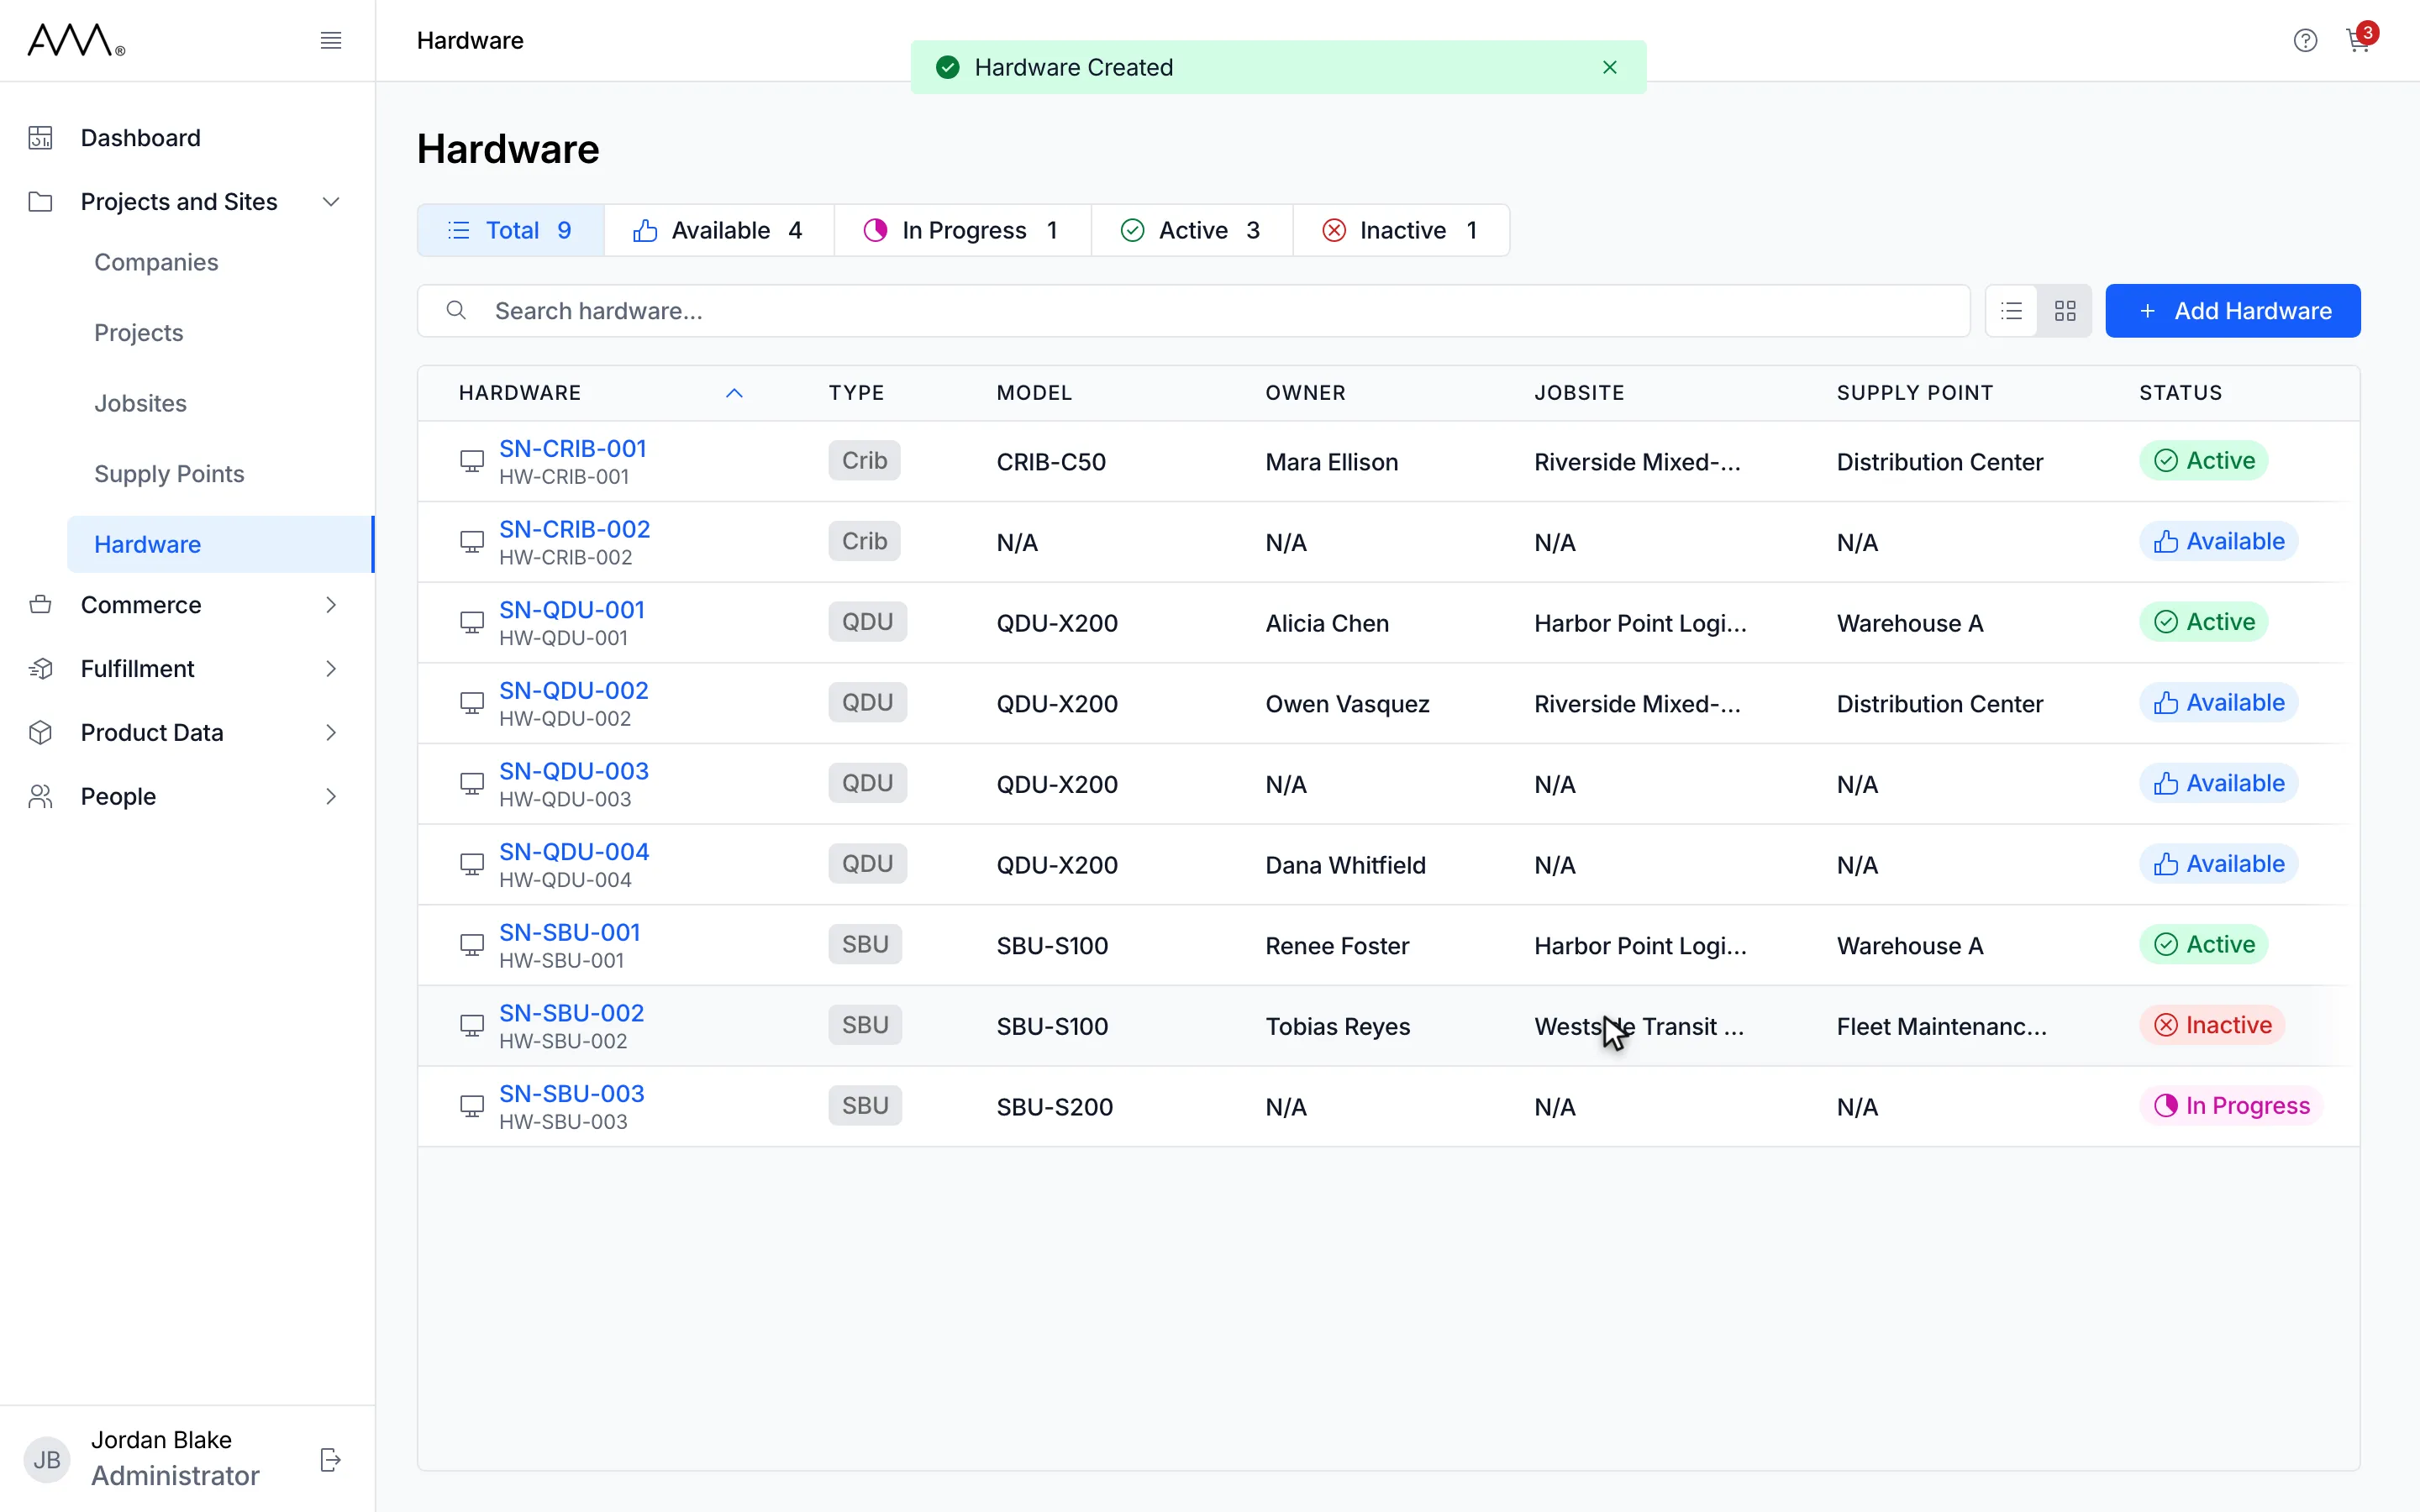
12A Hardware Created message appears and the new unit joins the list, unassigned.
Watch this as a video (add hardware)
What happens next
Section titled “What happens next”- A Hardware Created message appears, the dialog closes and the new unit shows in the list. It is unassigned until you put it on a supply point.
- If you leave a required field and it is empty, it shows Serial number is required, Status is required or Type is required.
- If the serial number is already registered, the message from the server appears under Serial Number and the dialog stays open so you can correct it. Any other problem shows as an error message.
- If you close the dialog with unsaved changes, Omni asks Discard unsaved changes? and explains Your changes will be lost if you leave without saving. Click Discard to close without saving.