Assign or replace hardware on a supply point
A supply point holds one unit at a time. You assign a unit from the supply point, not from the Hardware pages: open the supply point, go to its Hardware tab and pick a unit that is not assigned anywhere. If the supply point already has a unit, the same flow replaces it.
Assign a unit to an empty supply point
Section titled “Assign a unit to an empty supply point”- In the sidebar, open Projects and Sites and choose Supply Points.
- Type part of the supply point’s name in Search Supply Points….
- Click the supply point’s name to open it.
- Click the Hardware tab.
- Click Assign Hardware. The dialog lists every unit that is not assigned anywhere, as cards, and loads more as you scroll.
- Type in Search hardware… to narrow the units by serial number, type, model or owner.
- Select the unit’s card.
- Click Assign Hardware.
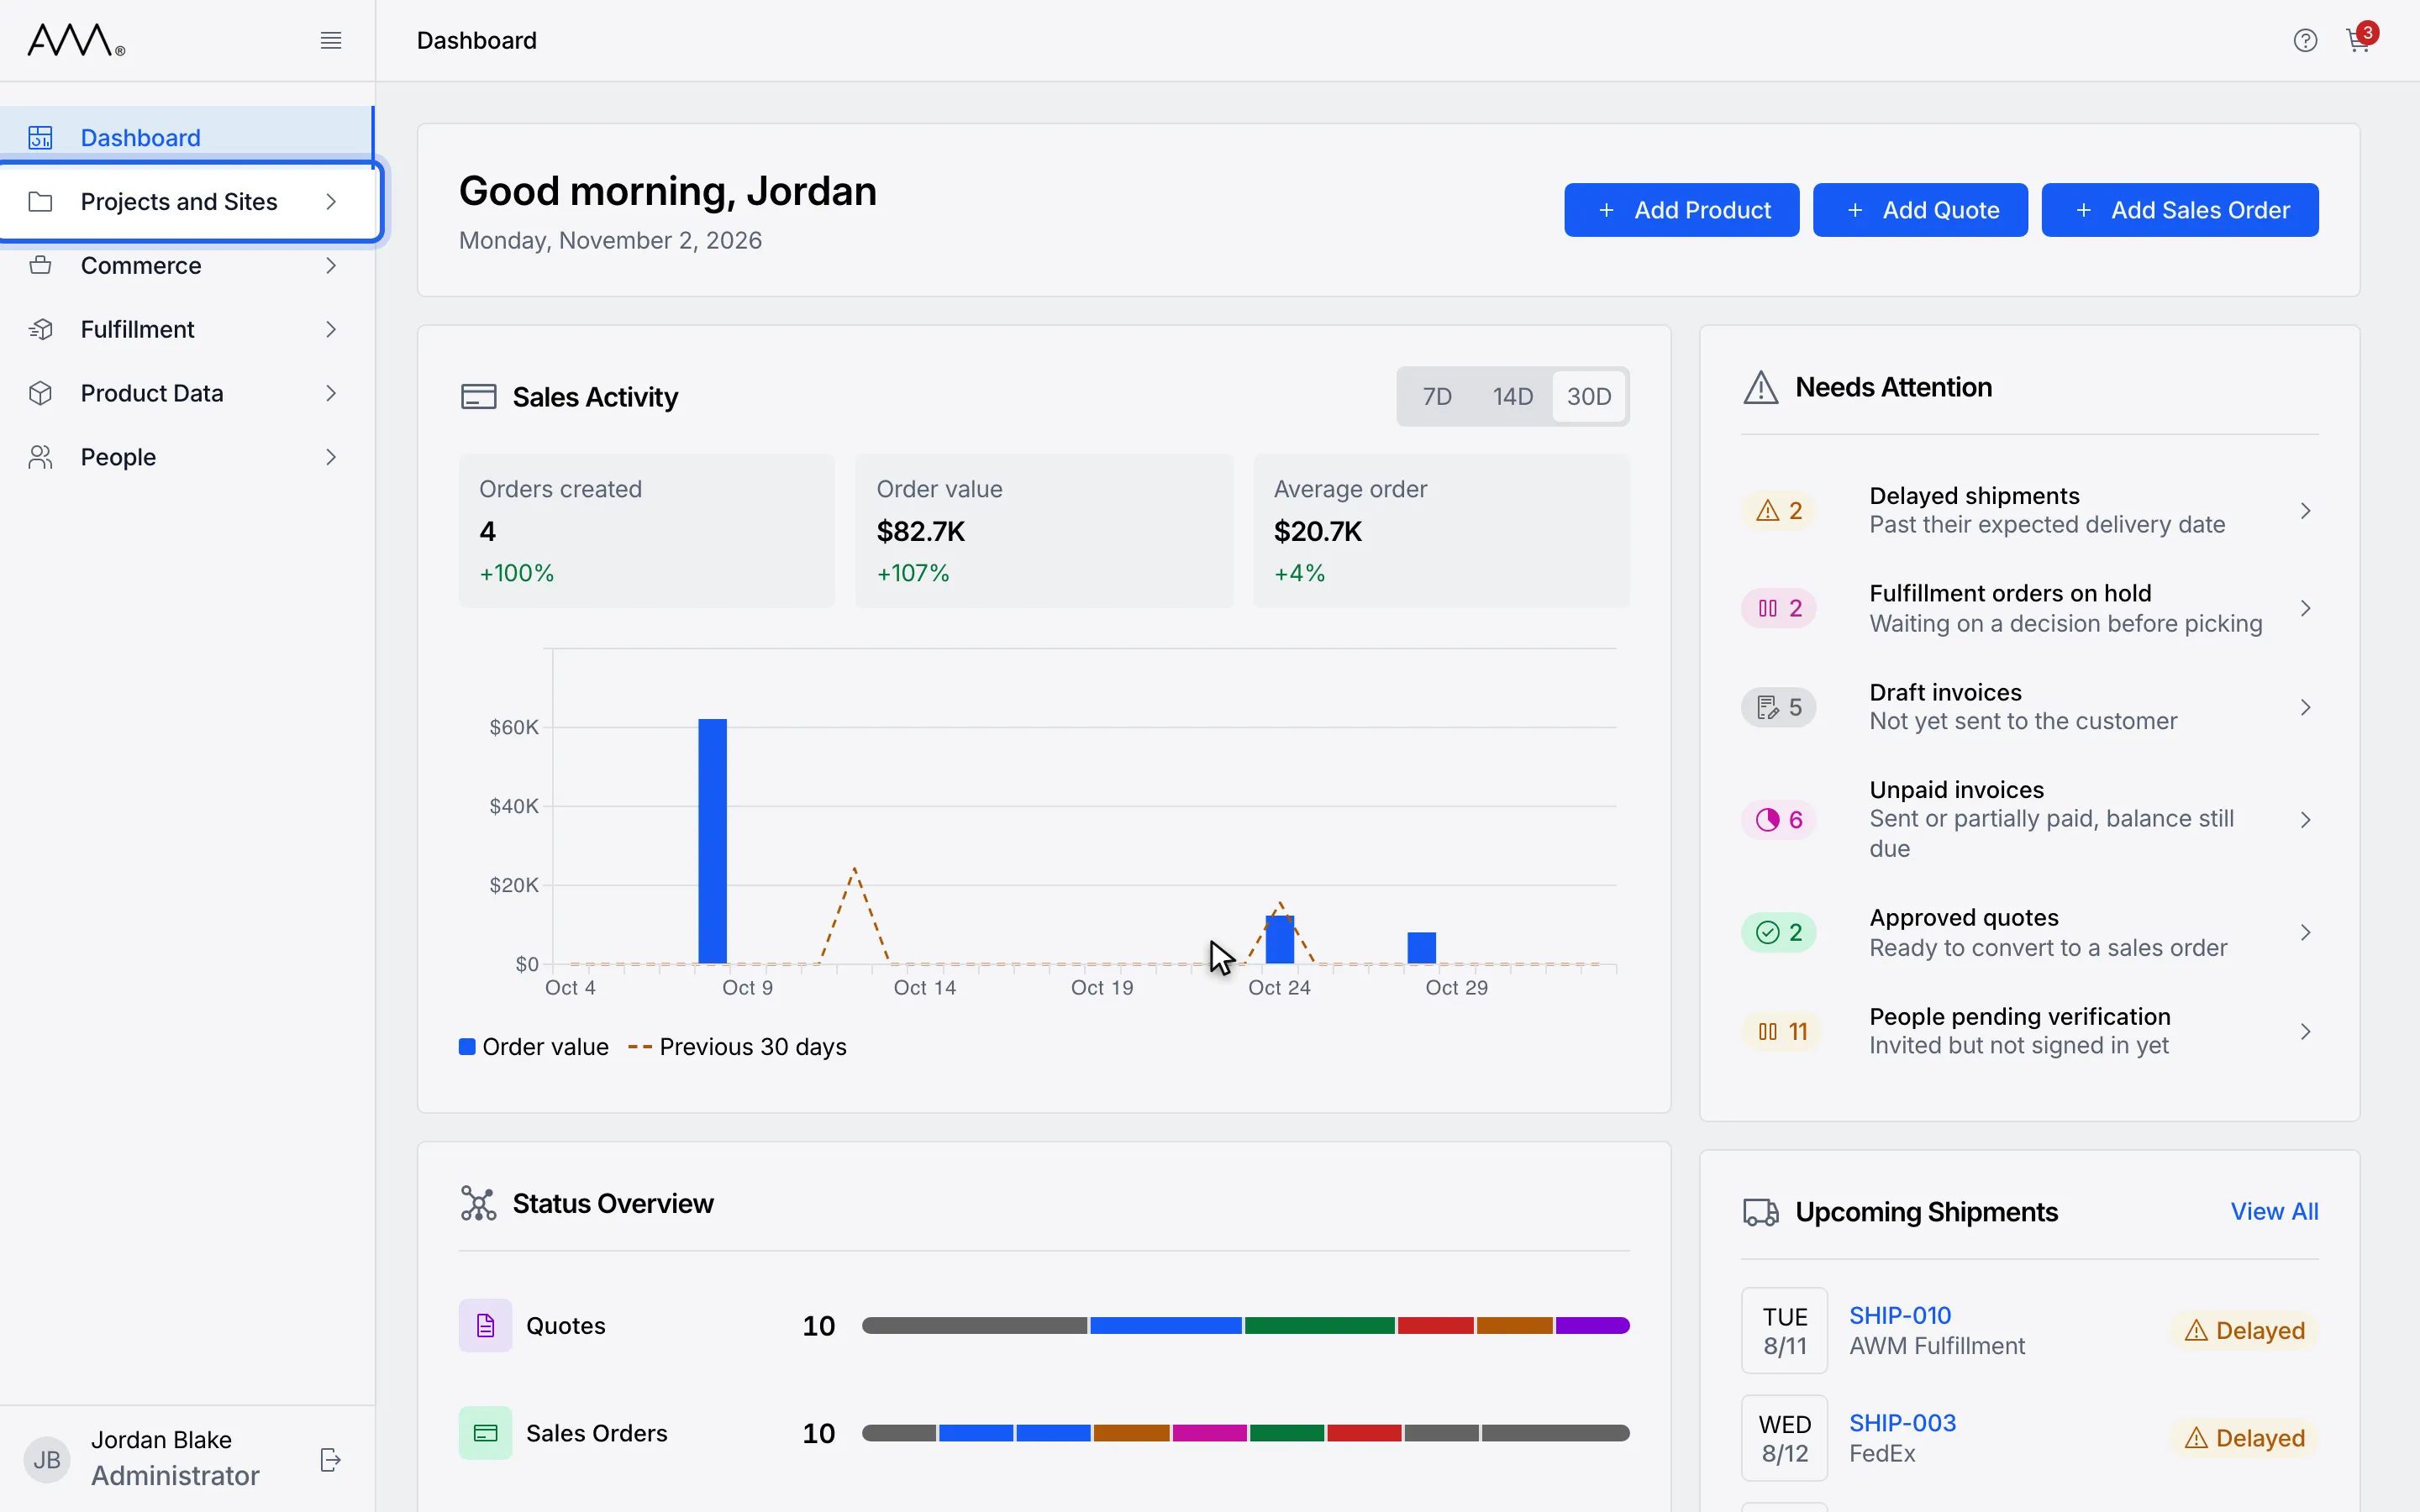
1In the sidebar, open Projects and Sites.
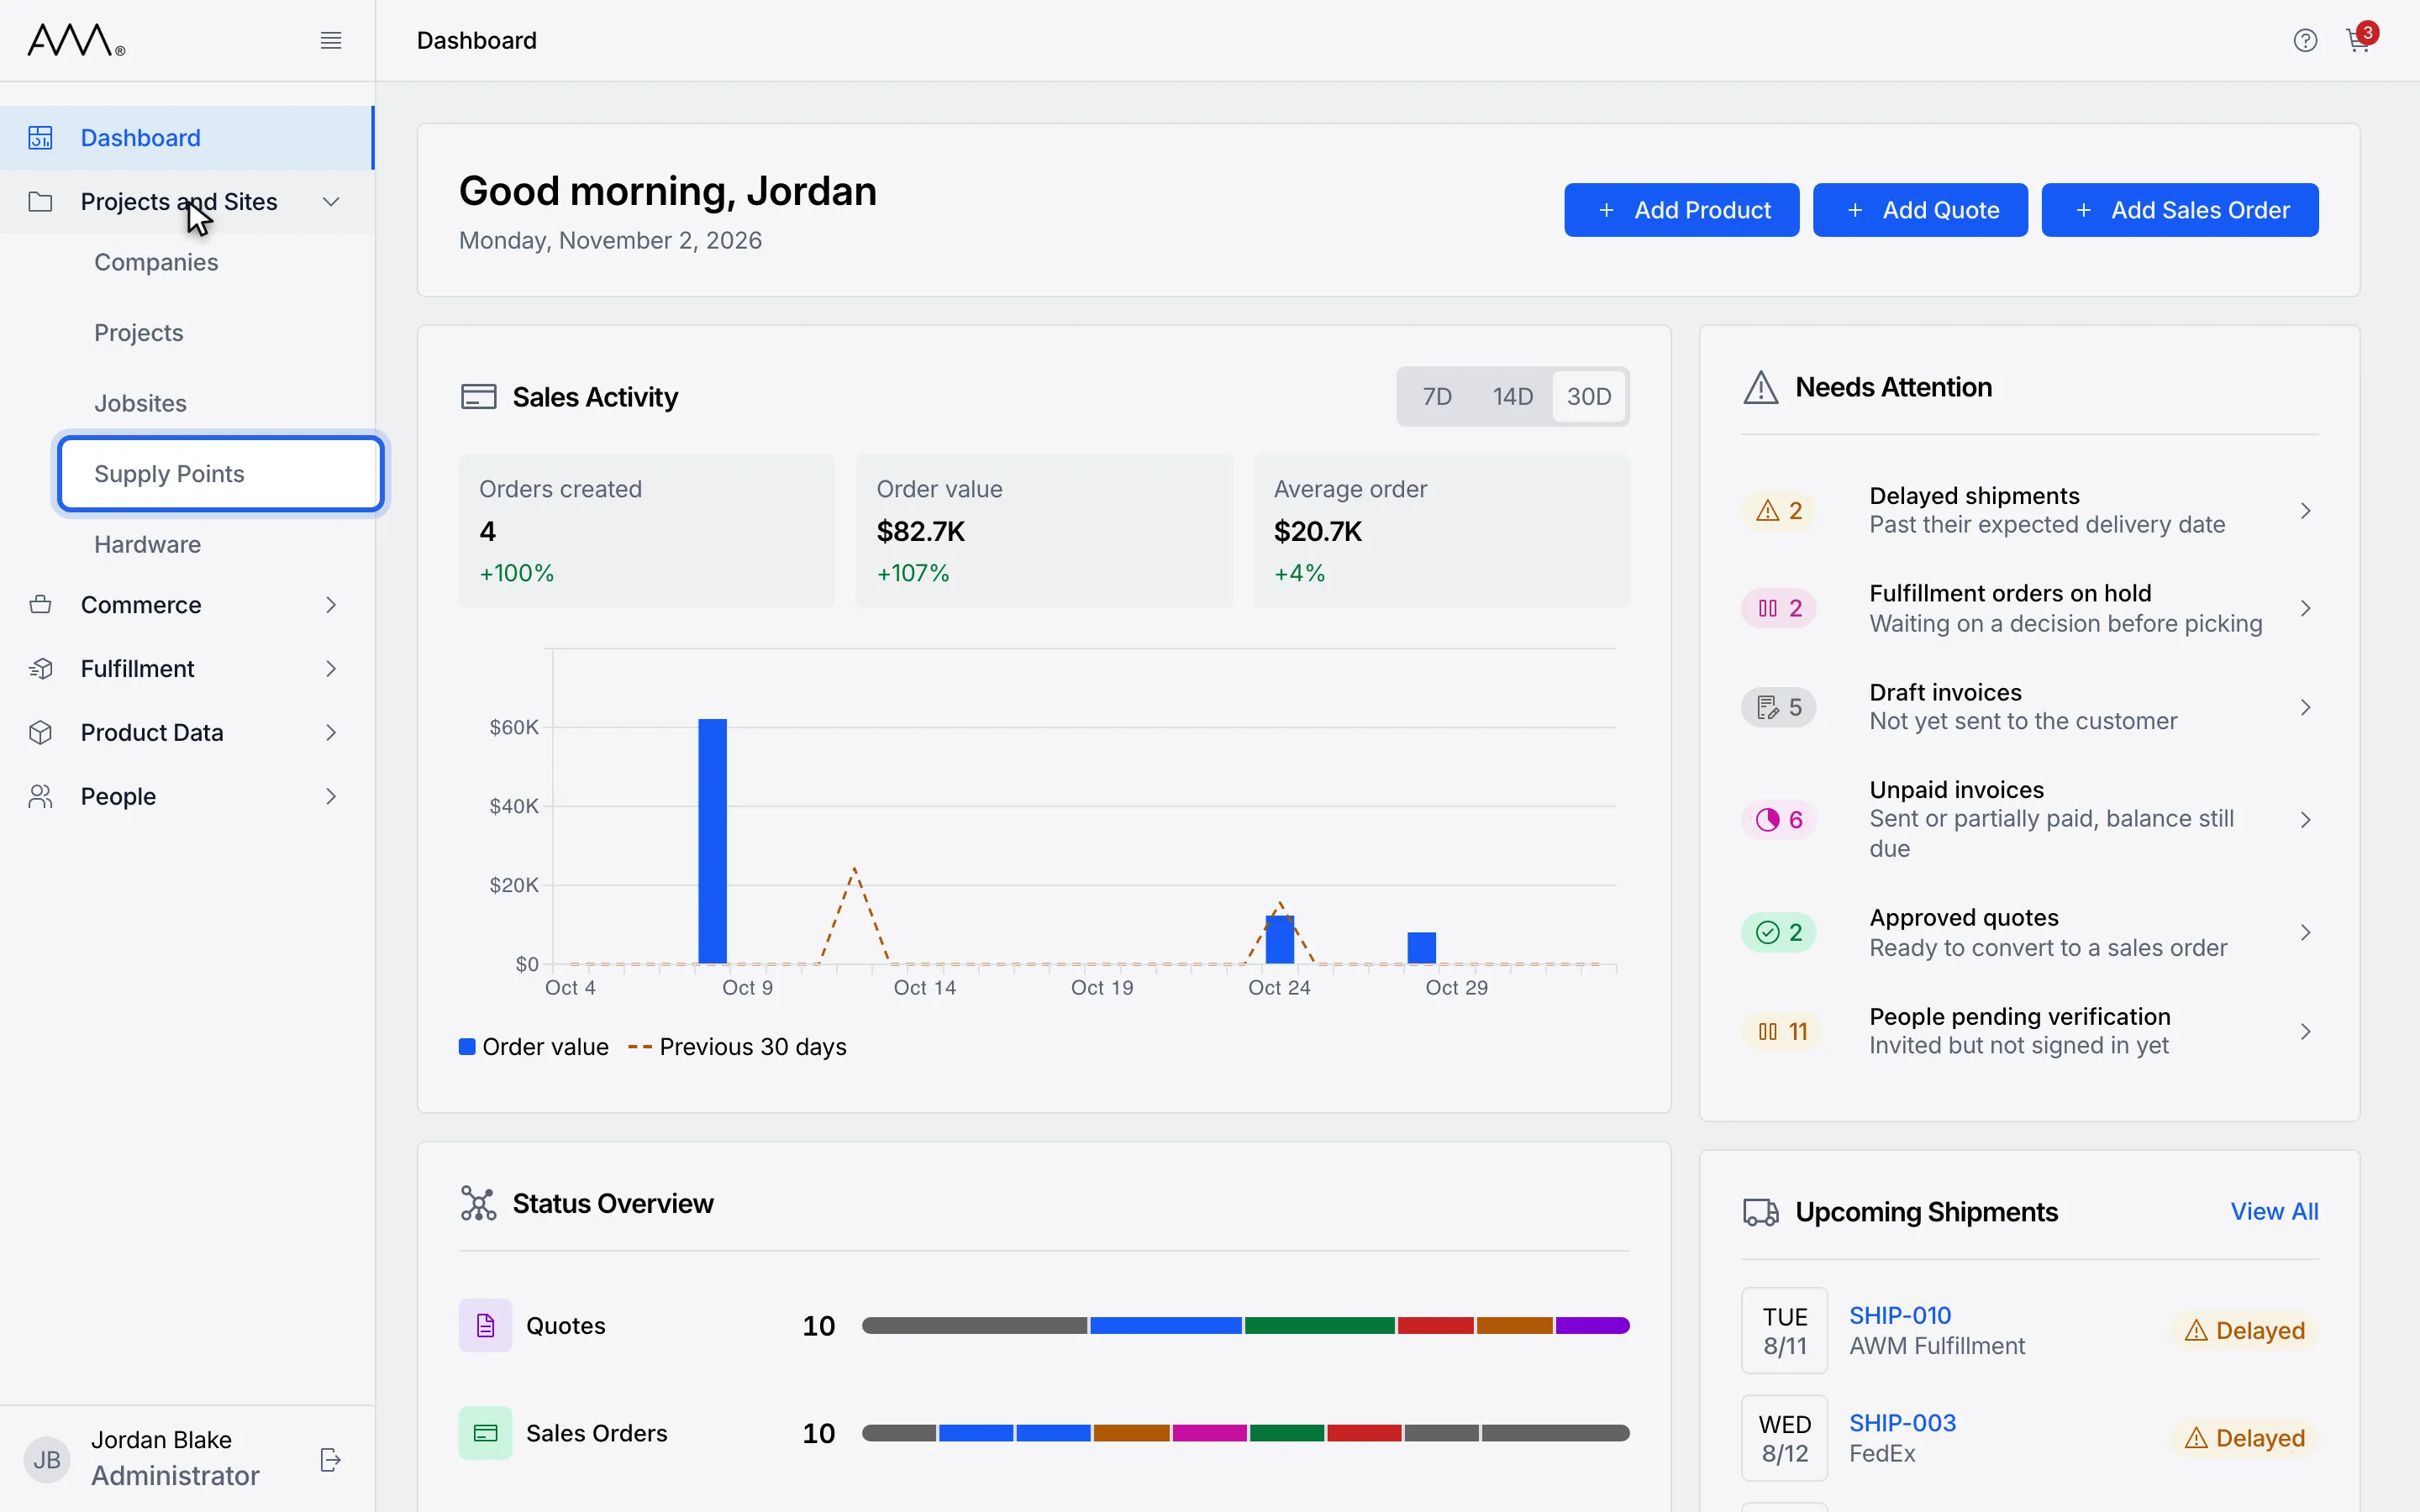
2Choose Supply Points.
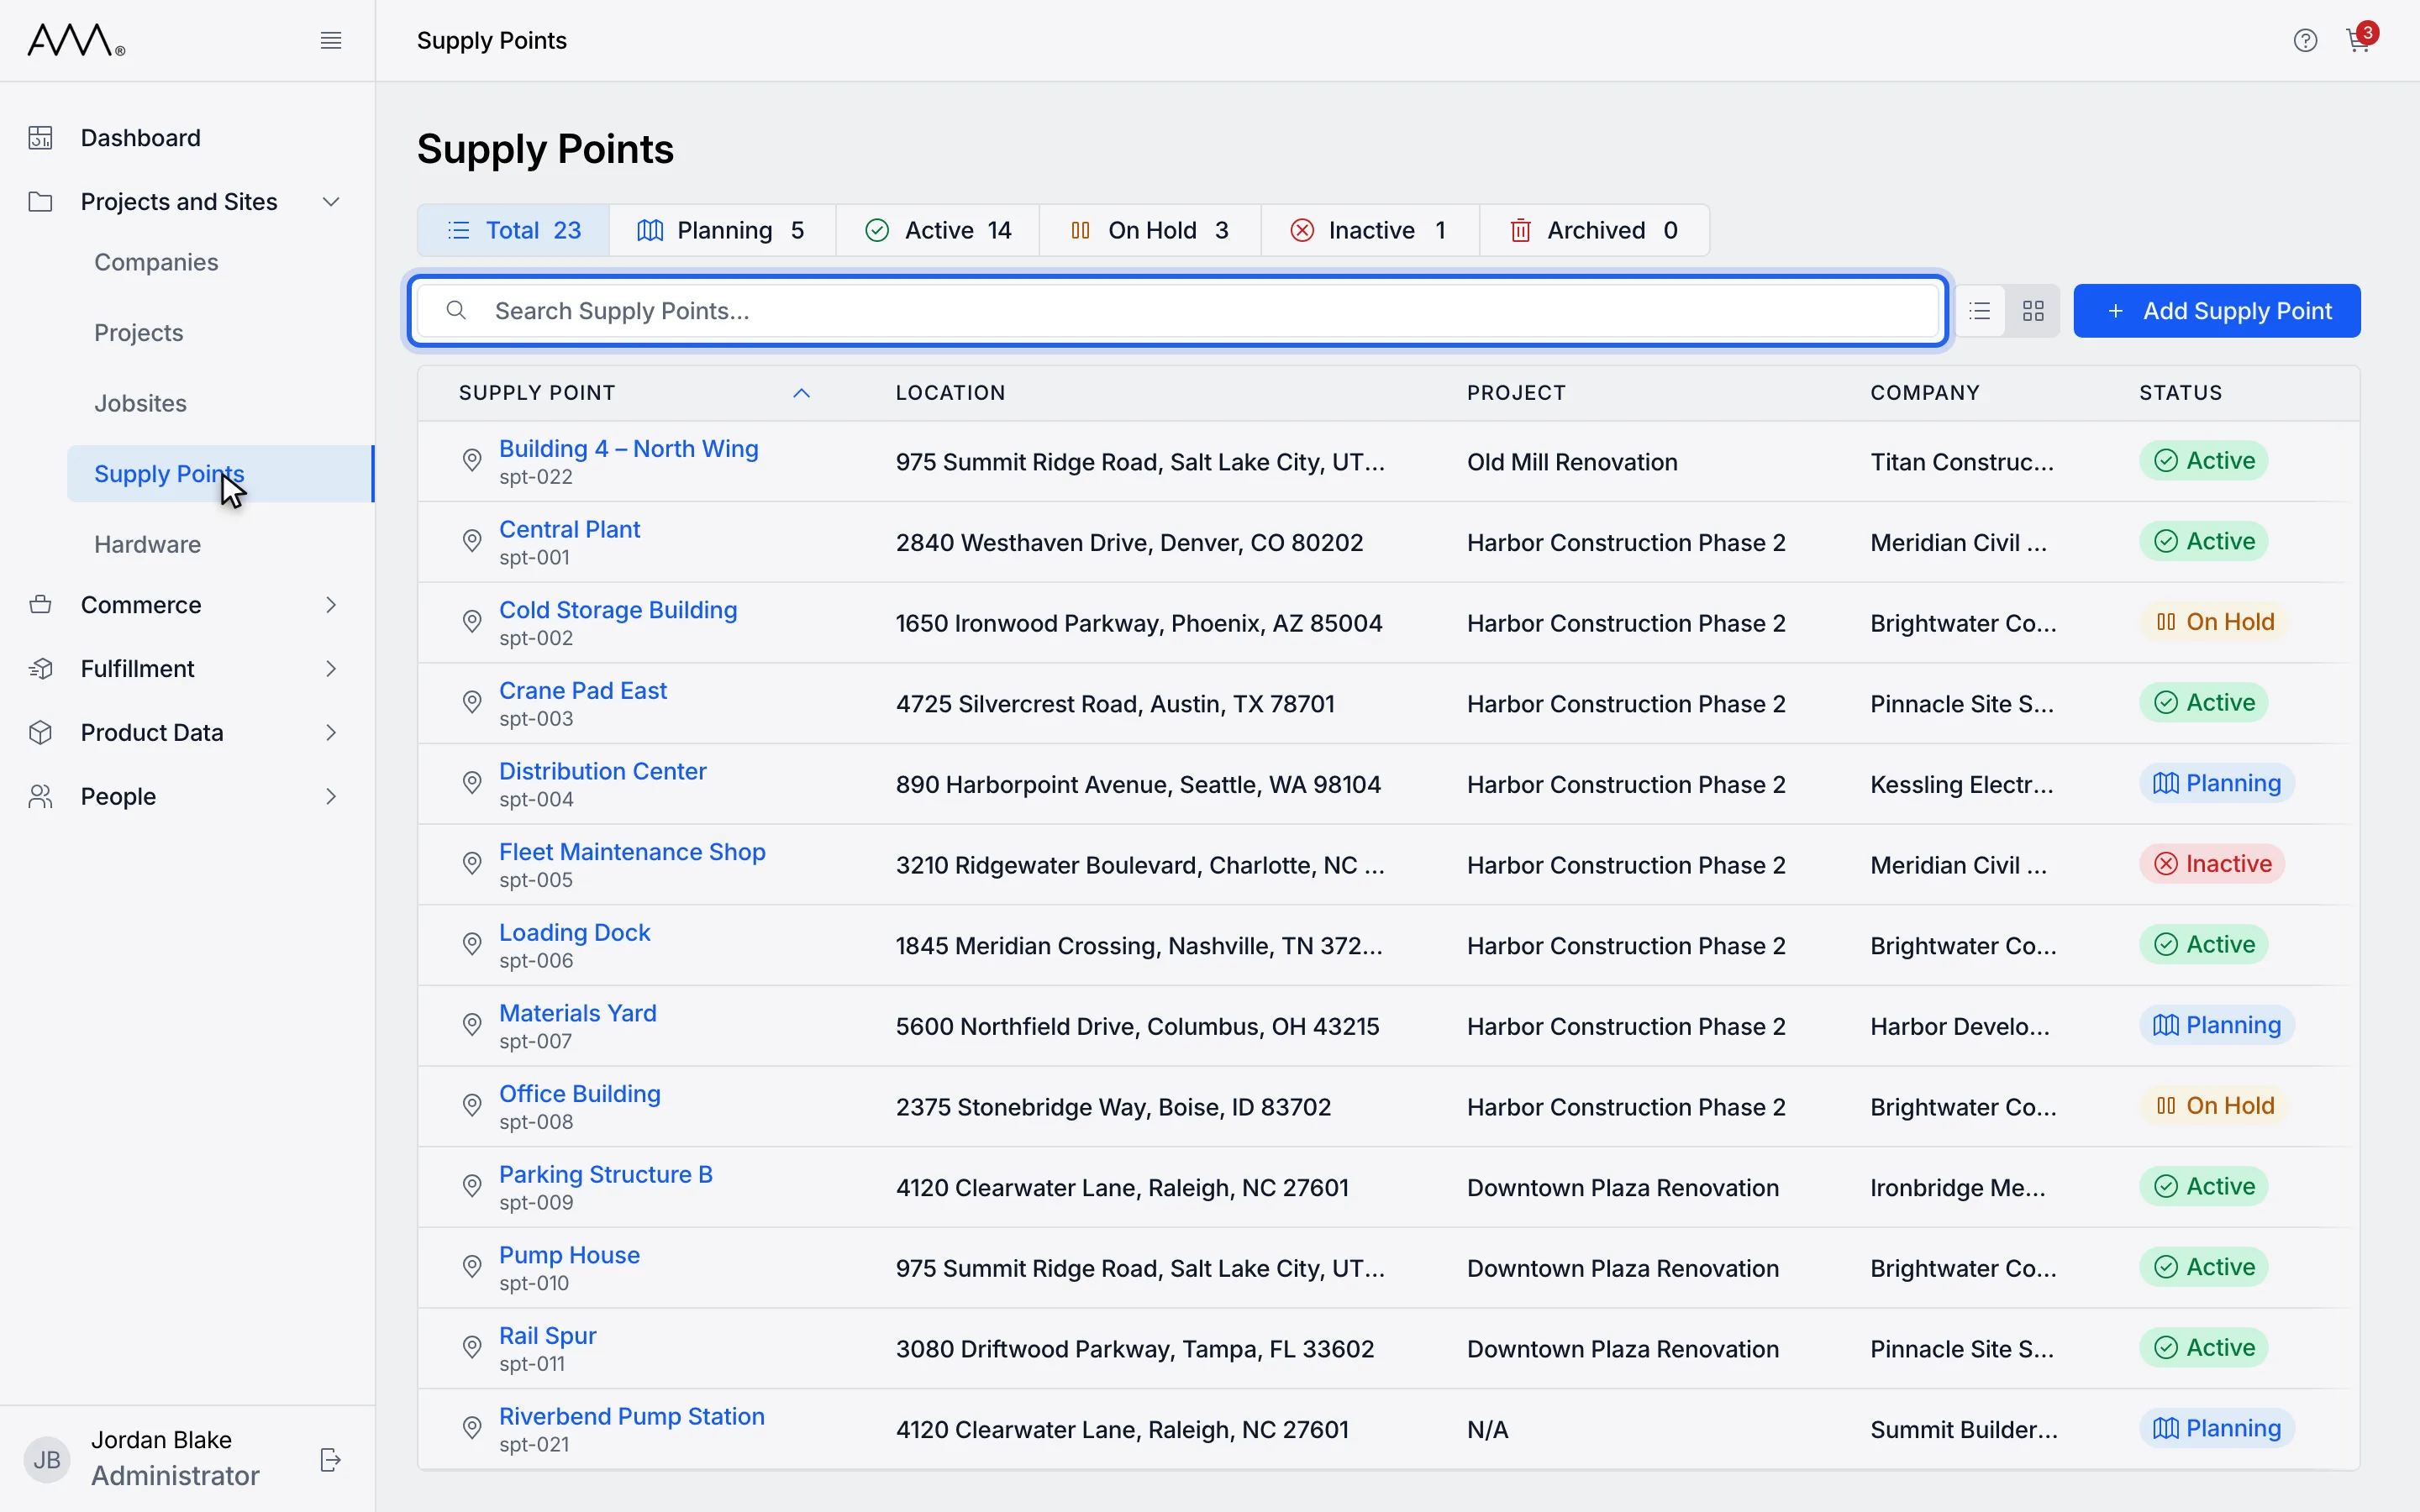
3Type part of the supply point name in Search Supply Points...
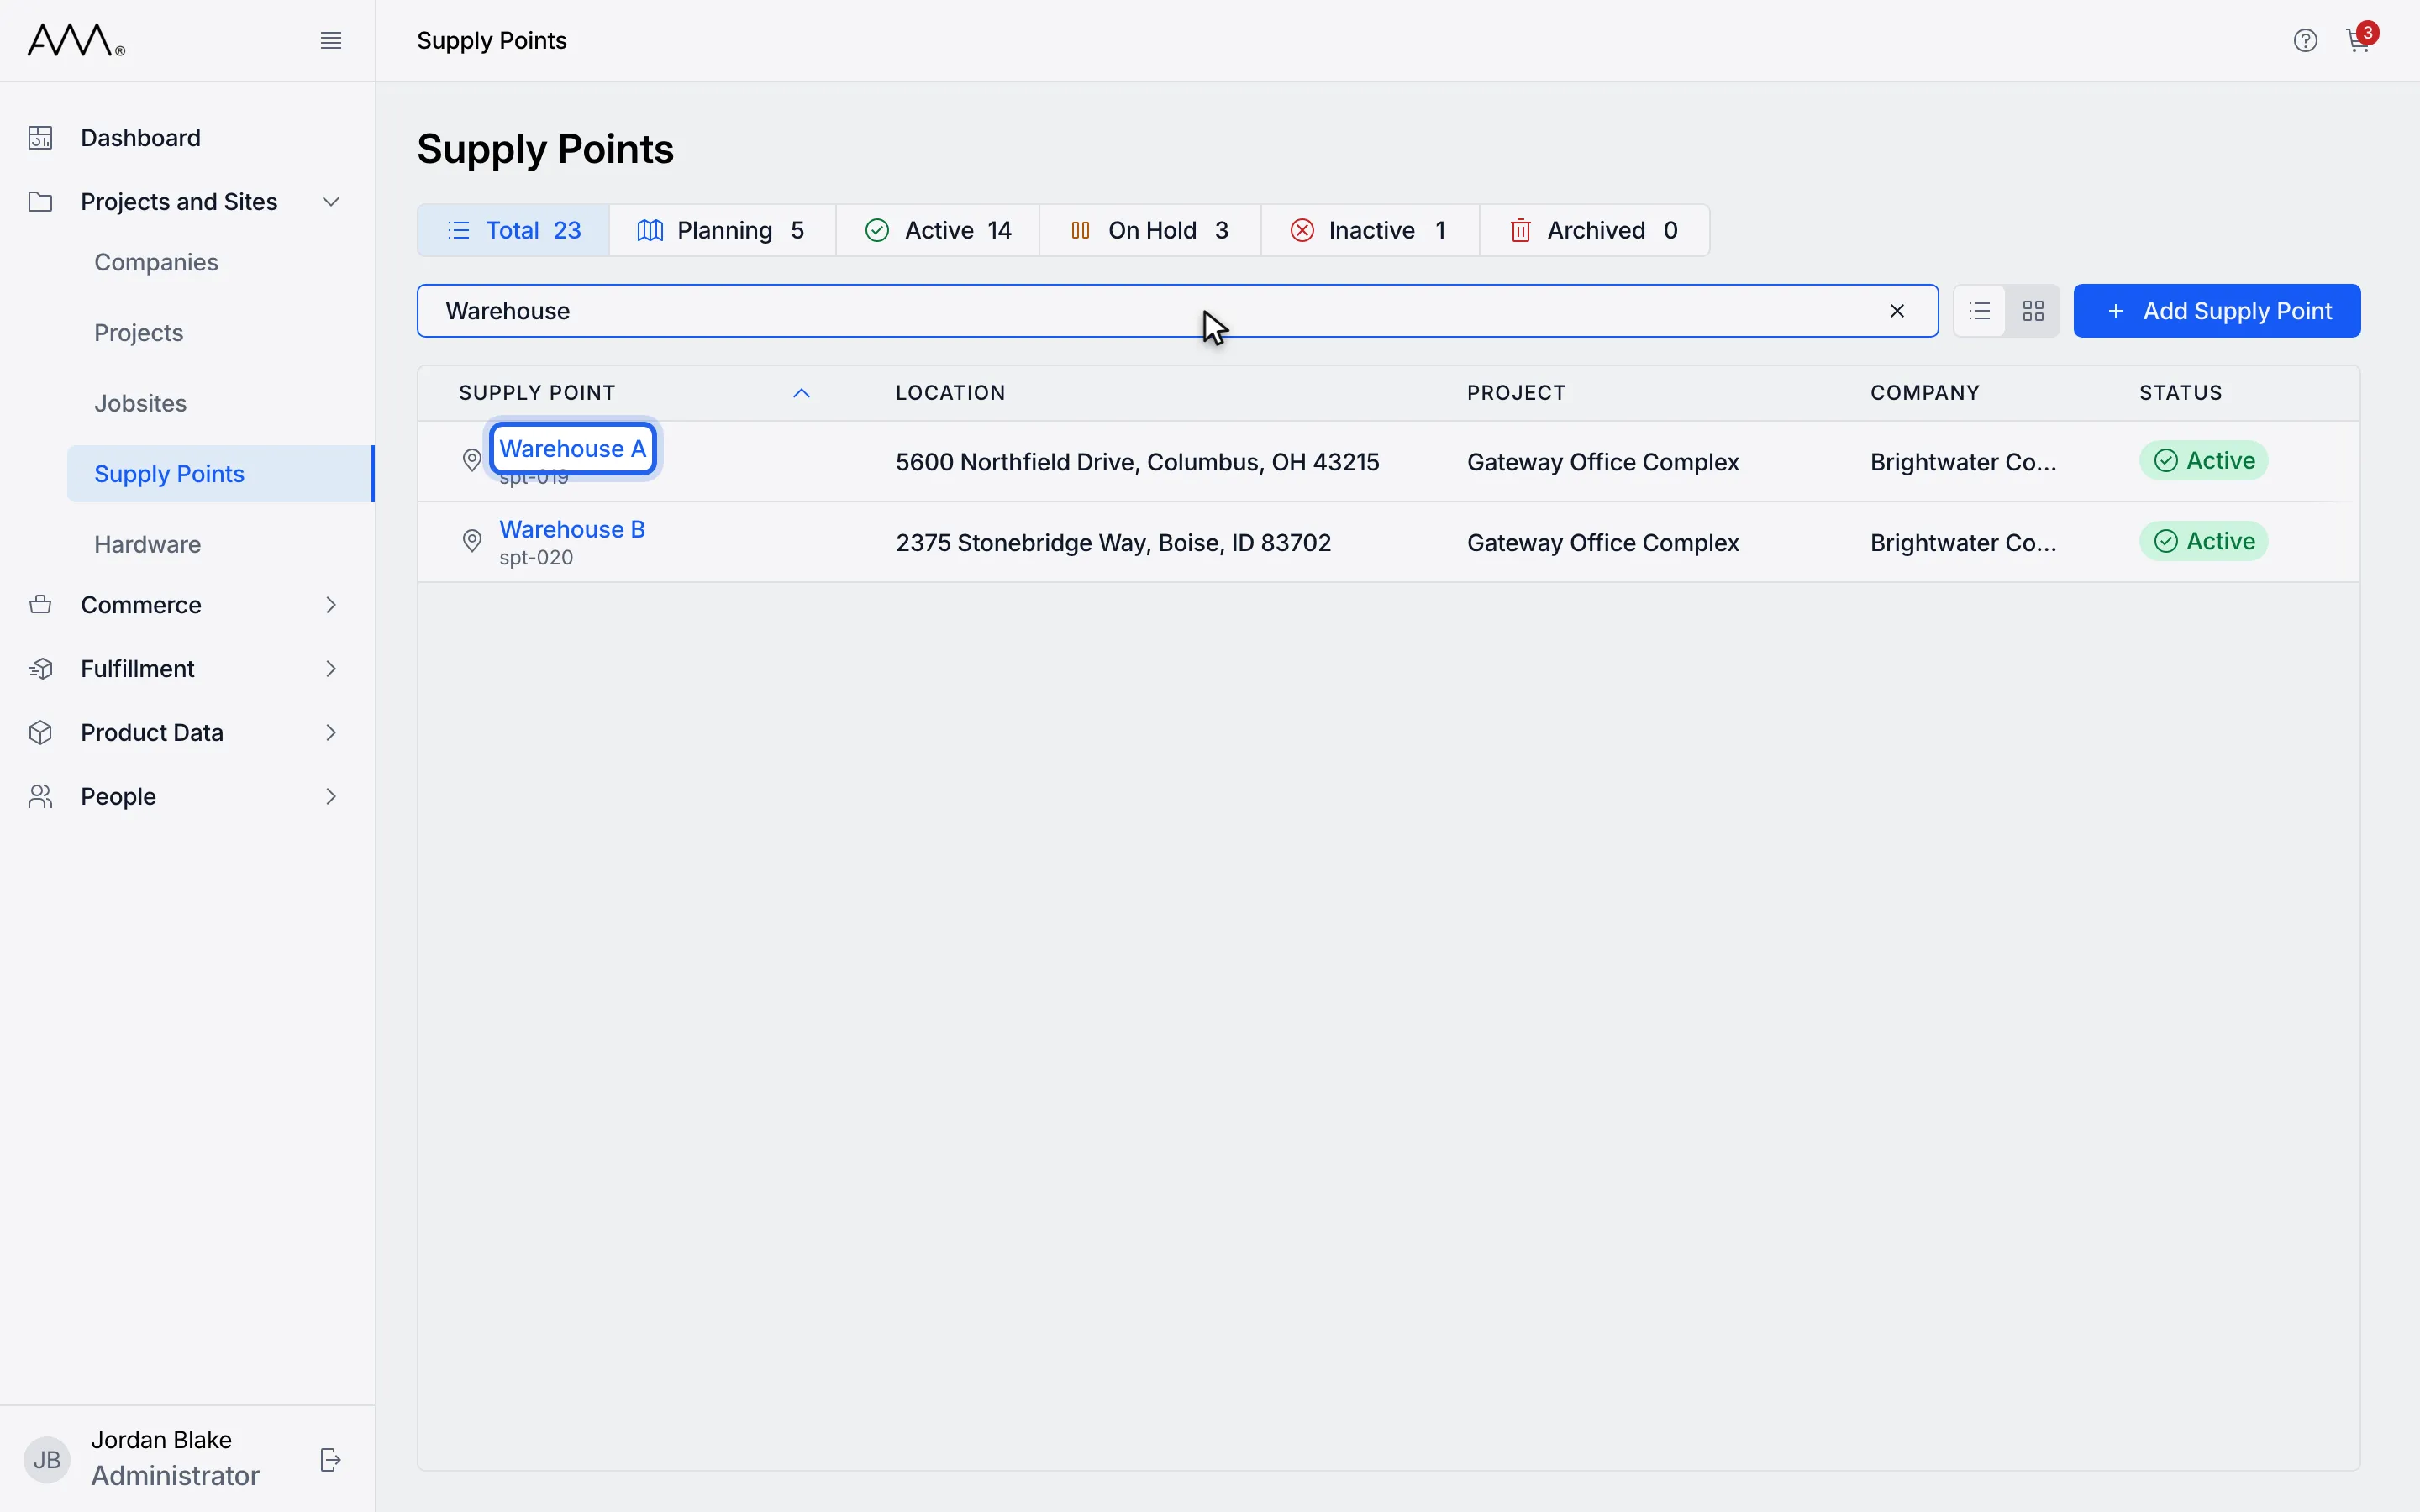
4Open the supply point.
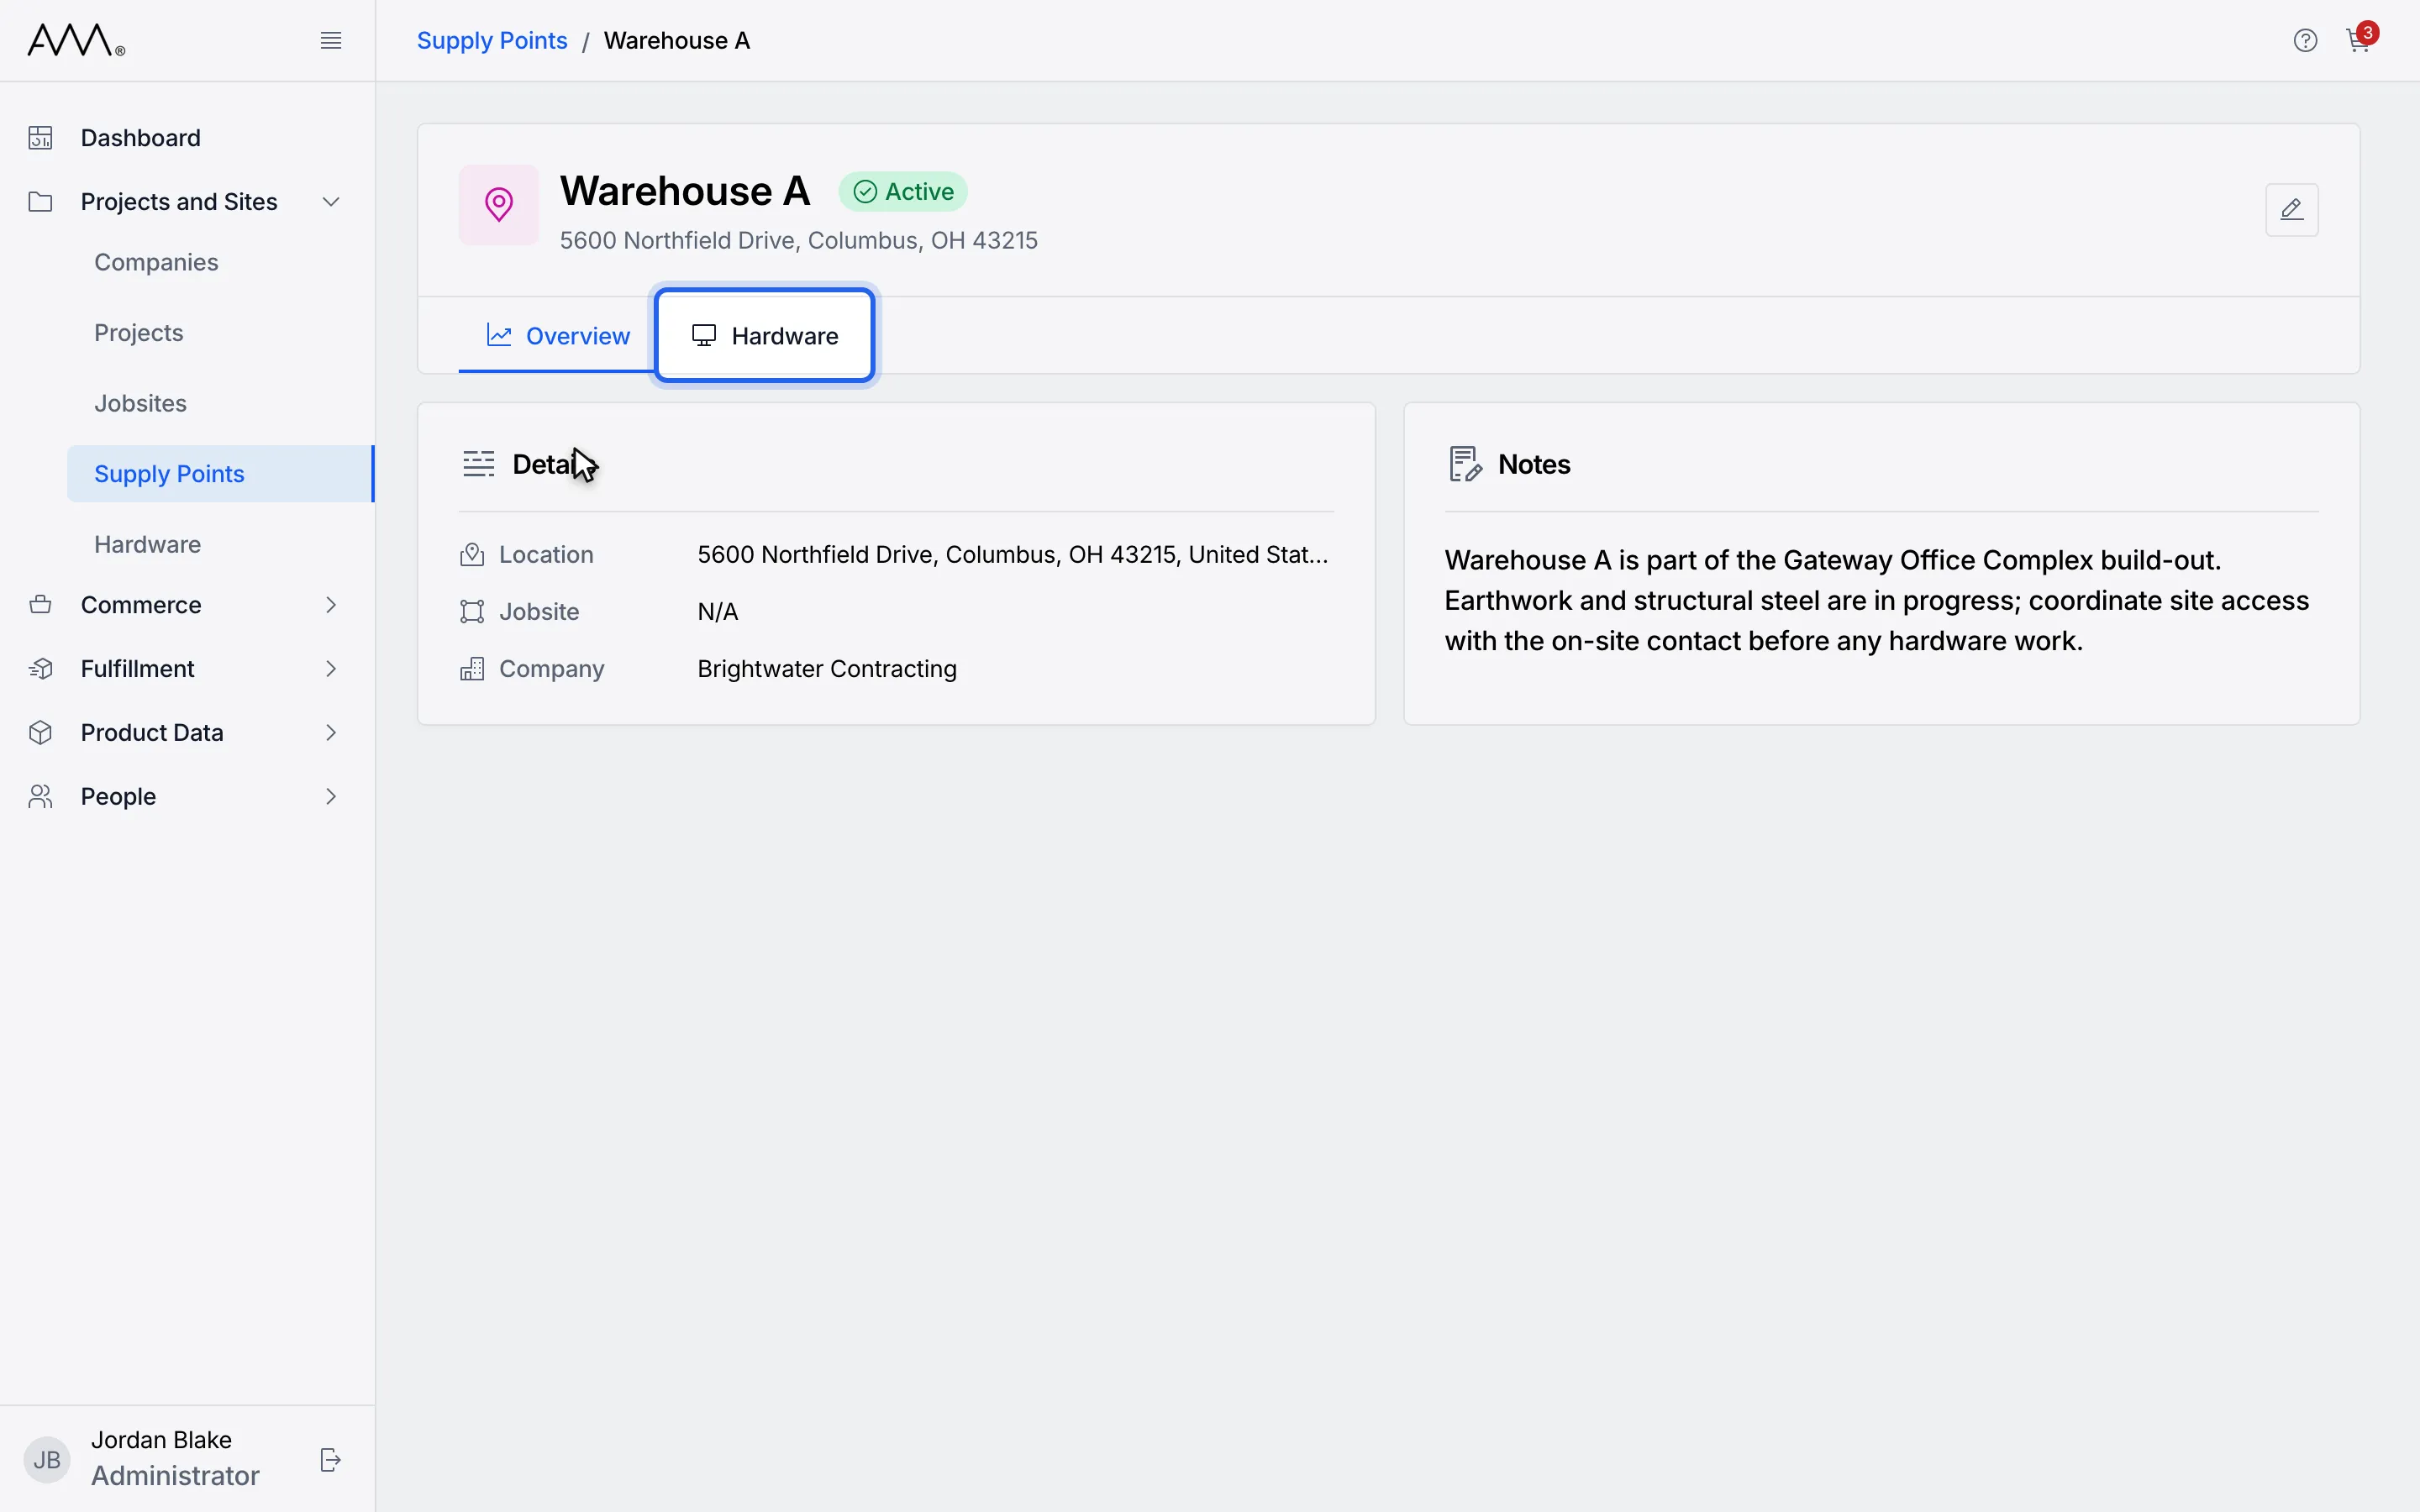
5Click the Hardware tab.
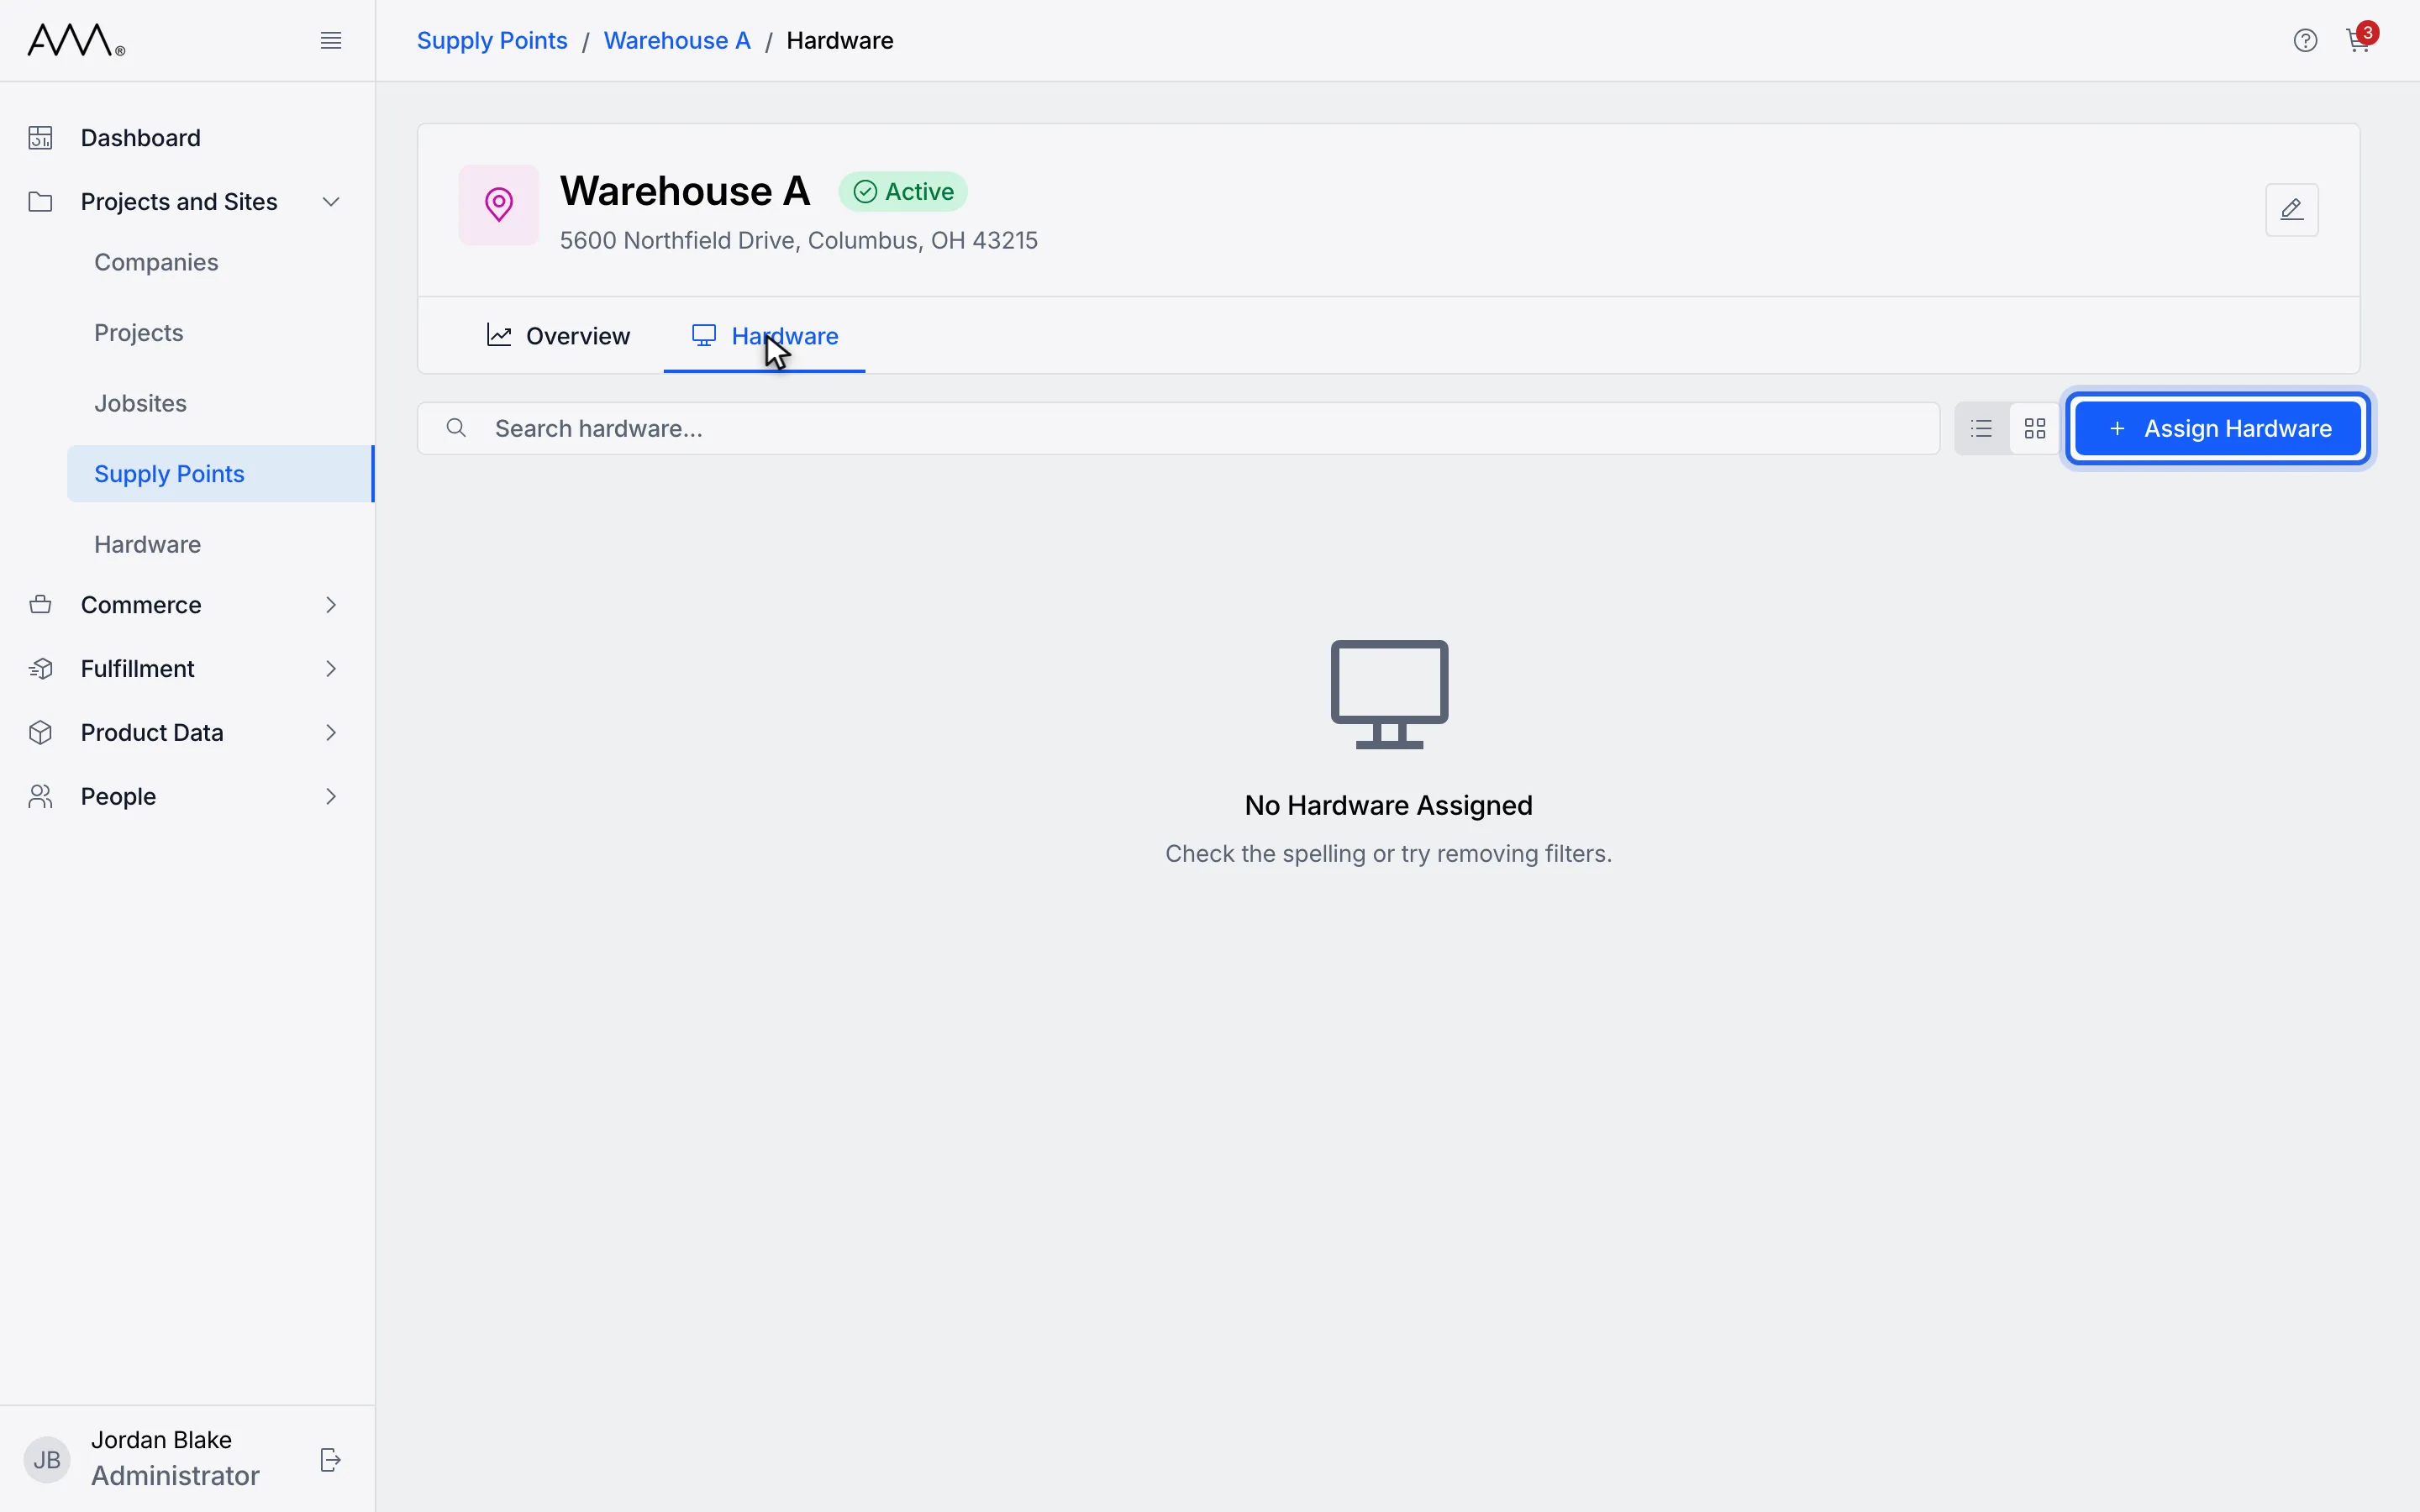
6Click Assign Hardware. The dialog lists every unit not assigned anywhere.
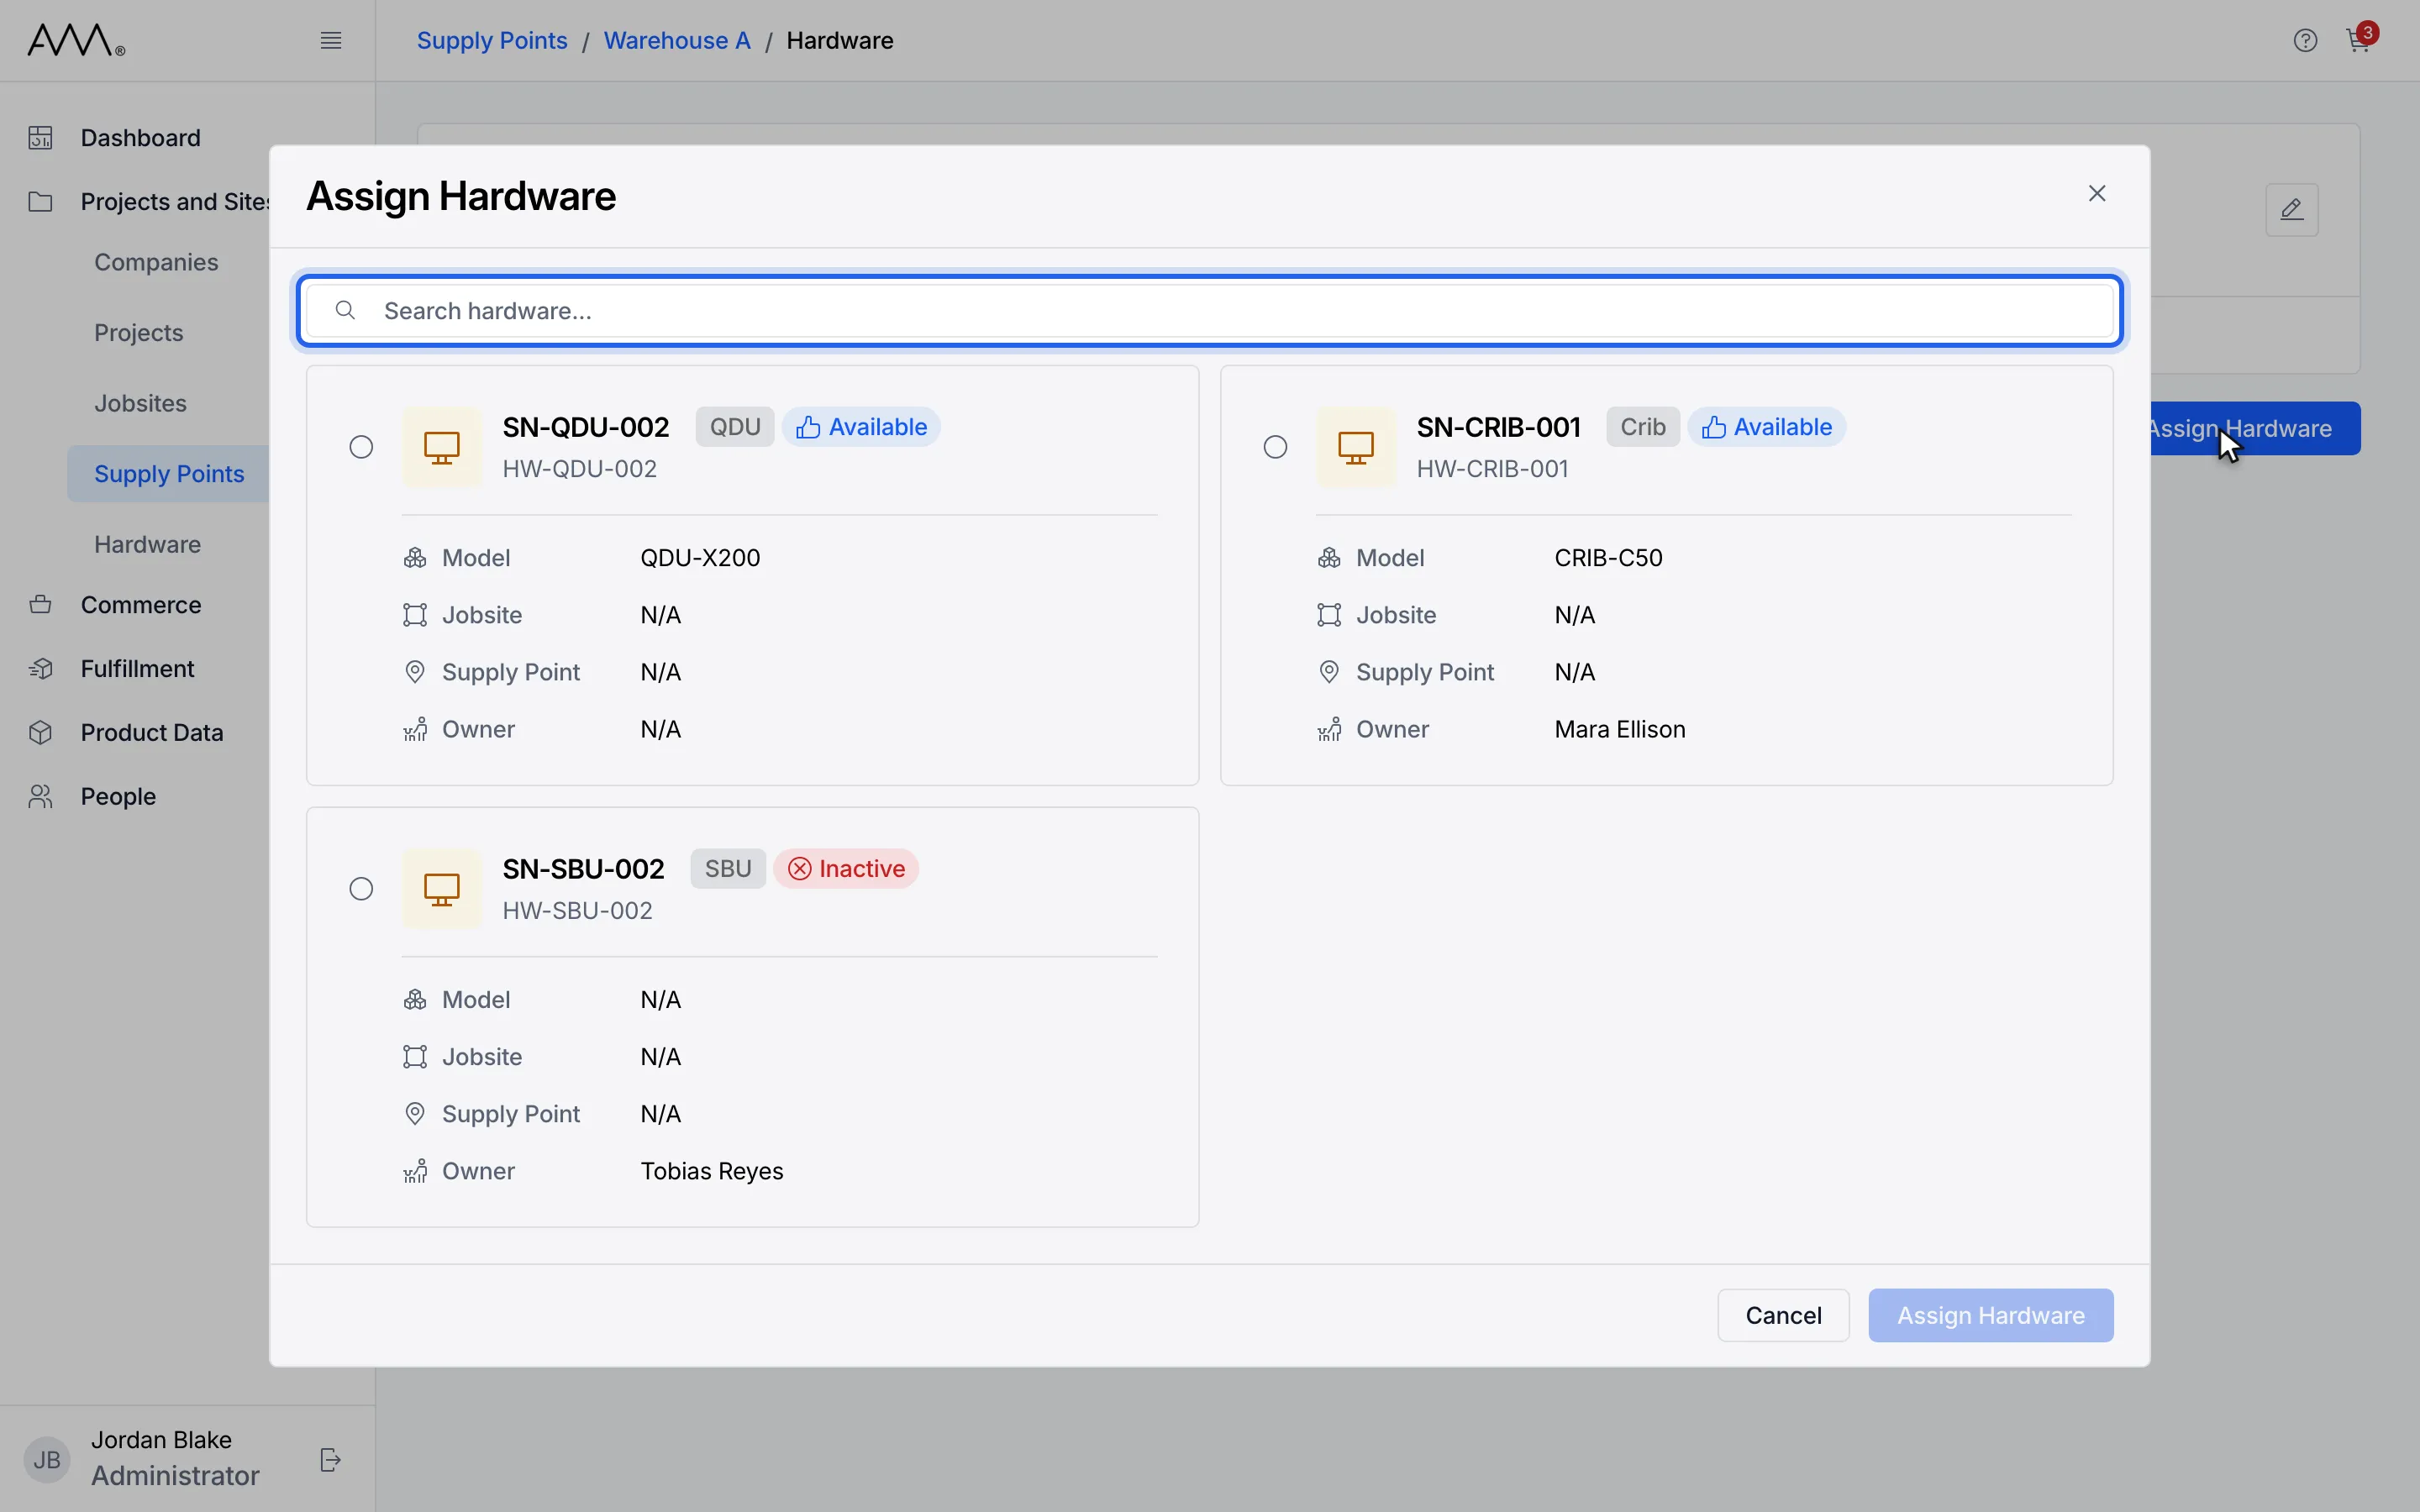
7Type in Search hardware... to narrow the units.
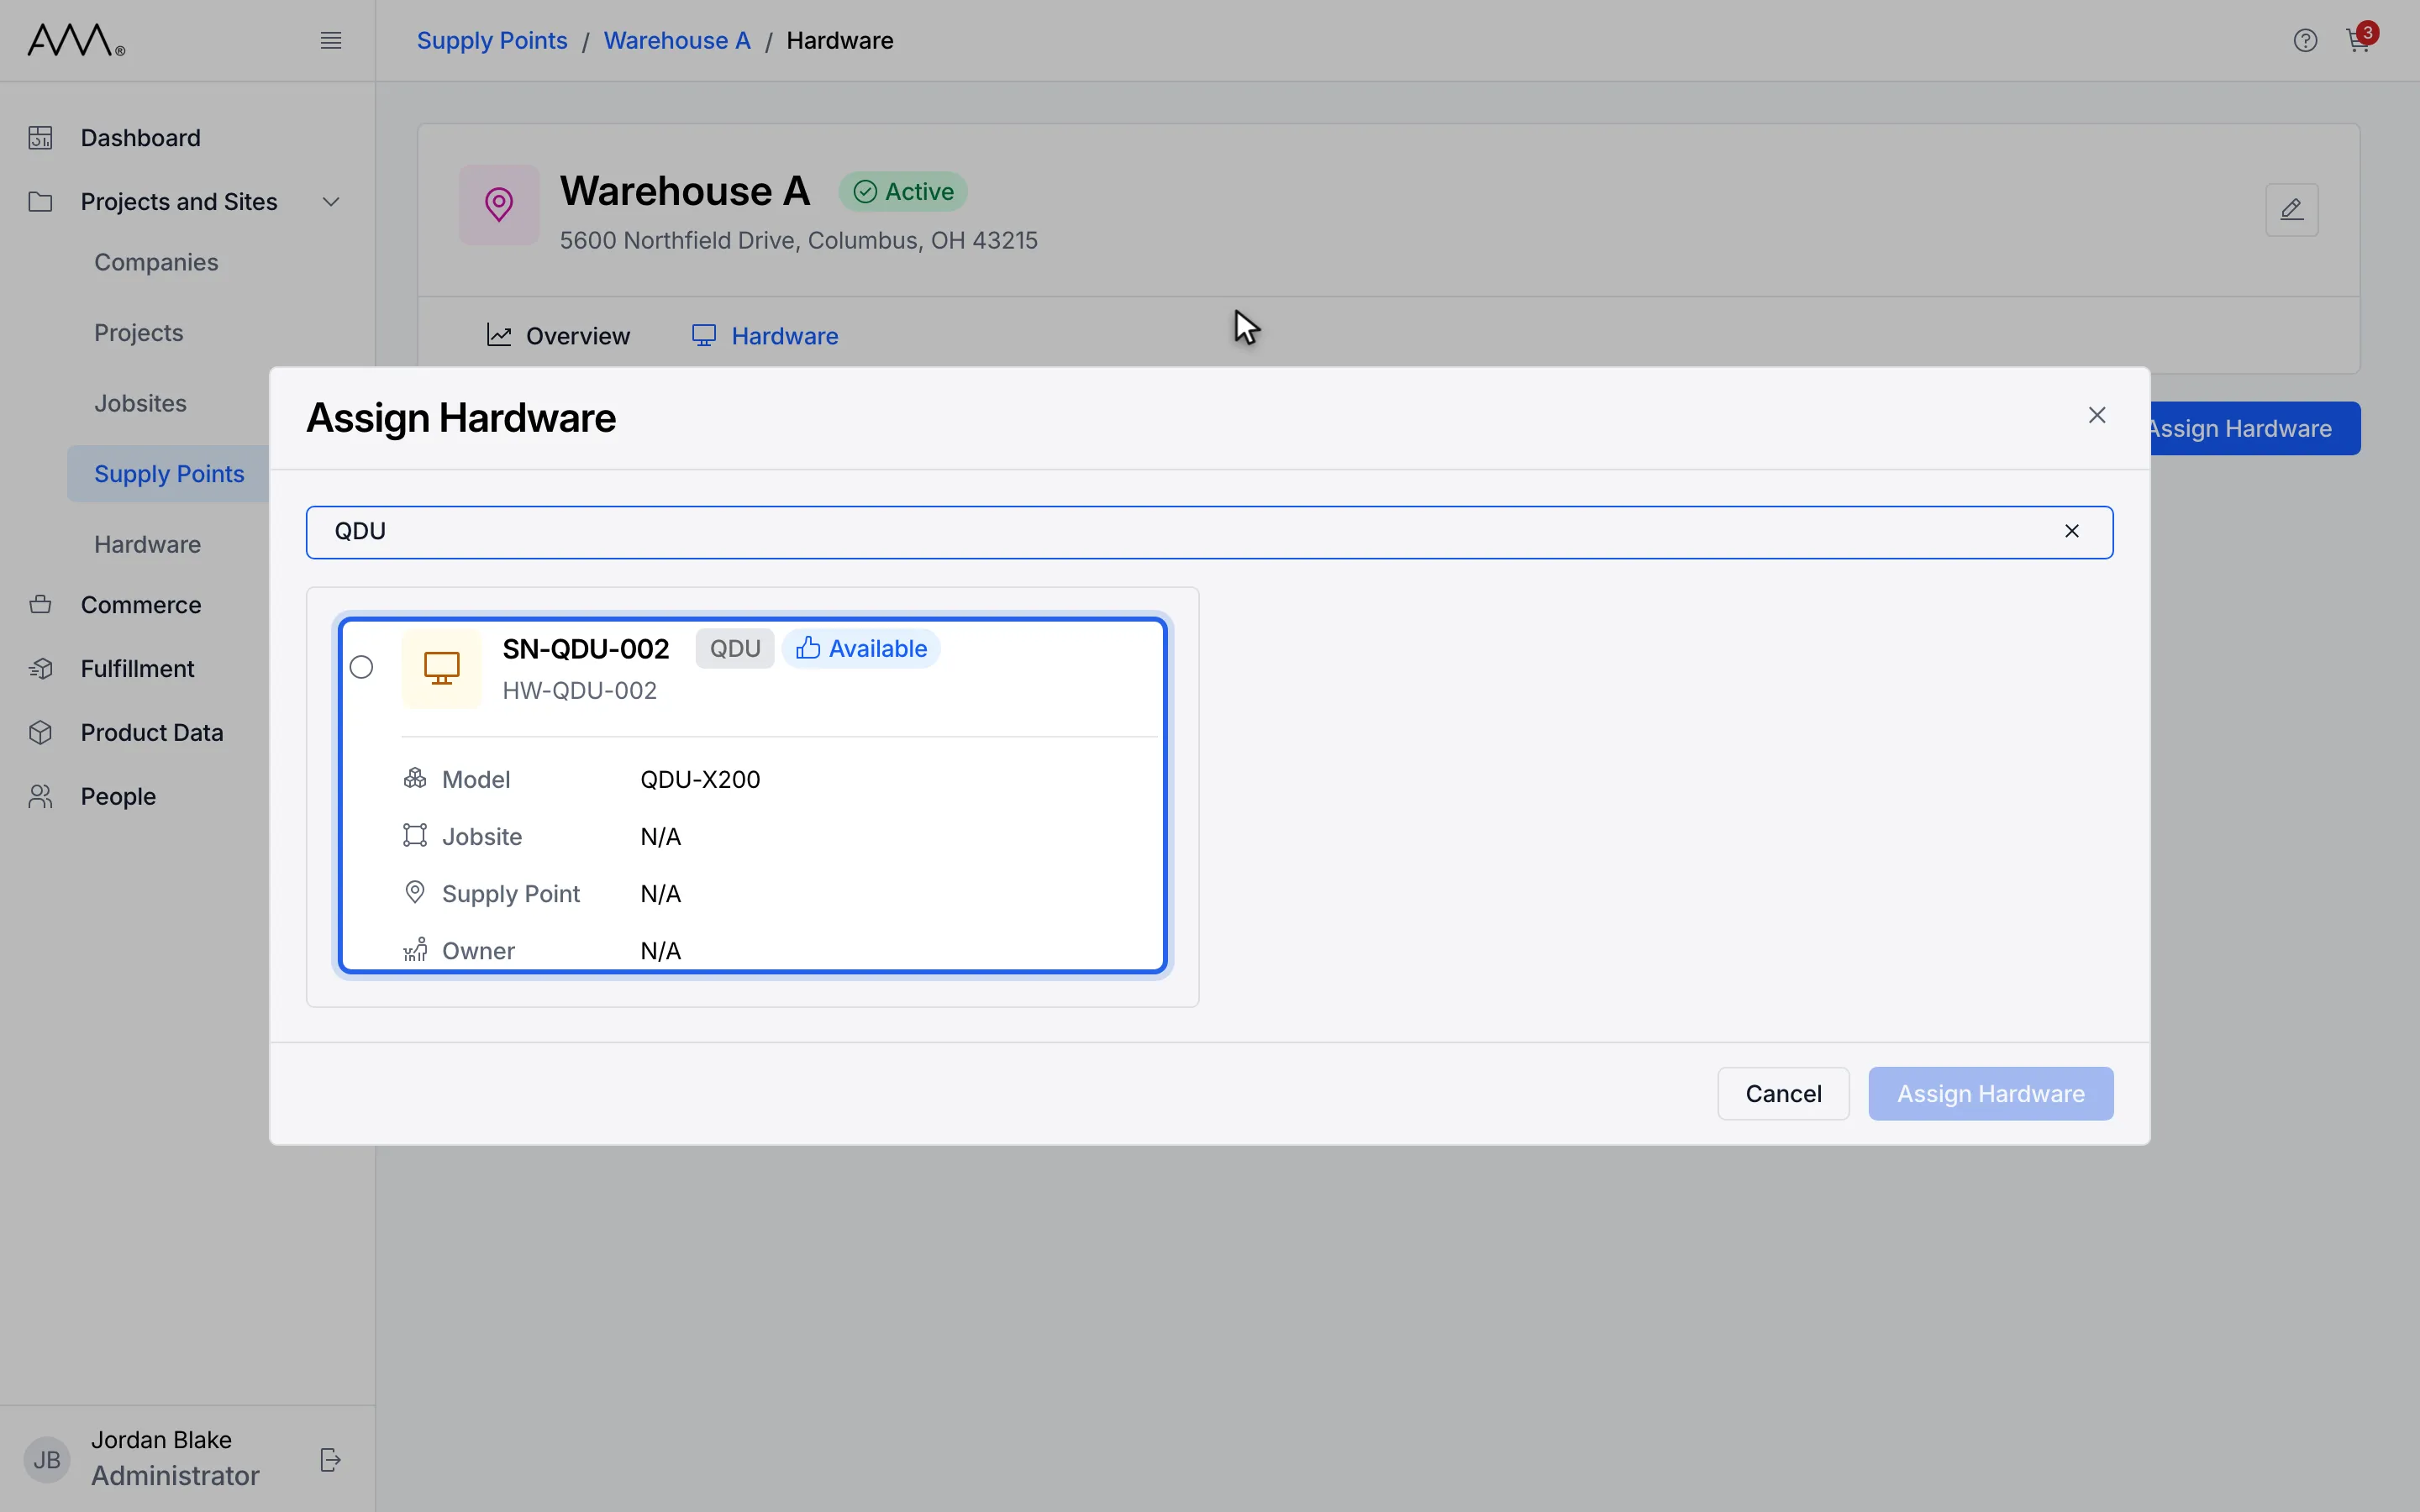
8Select the unit's card.
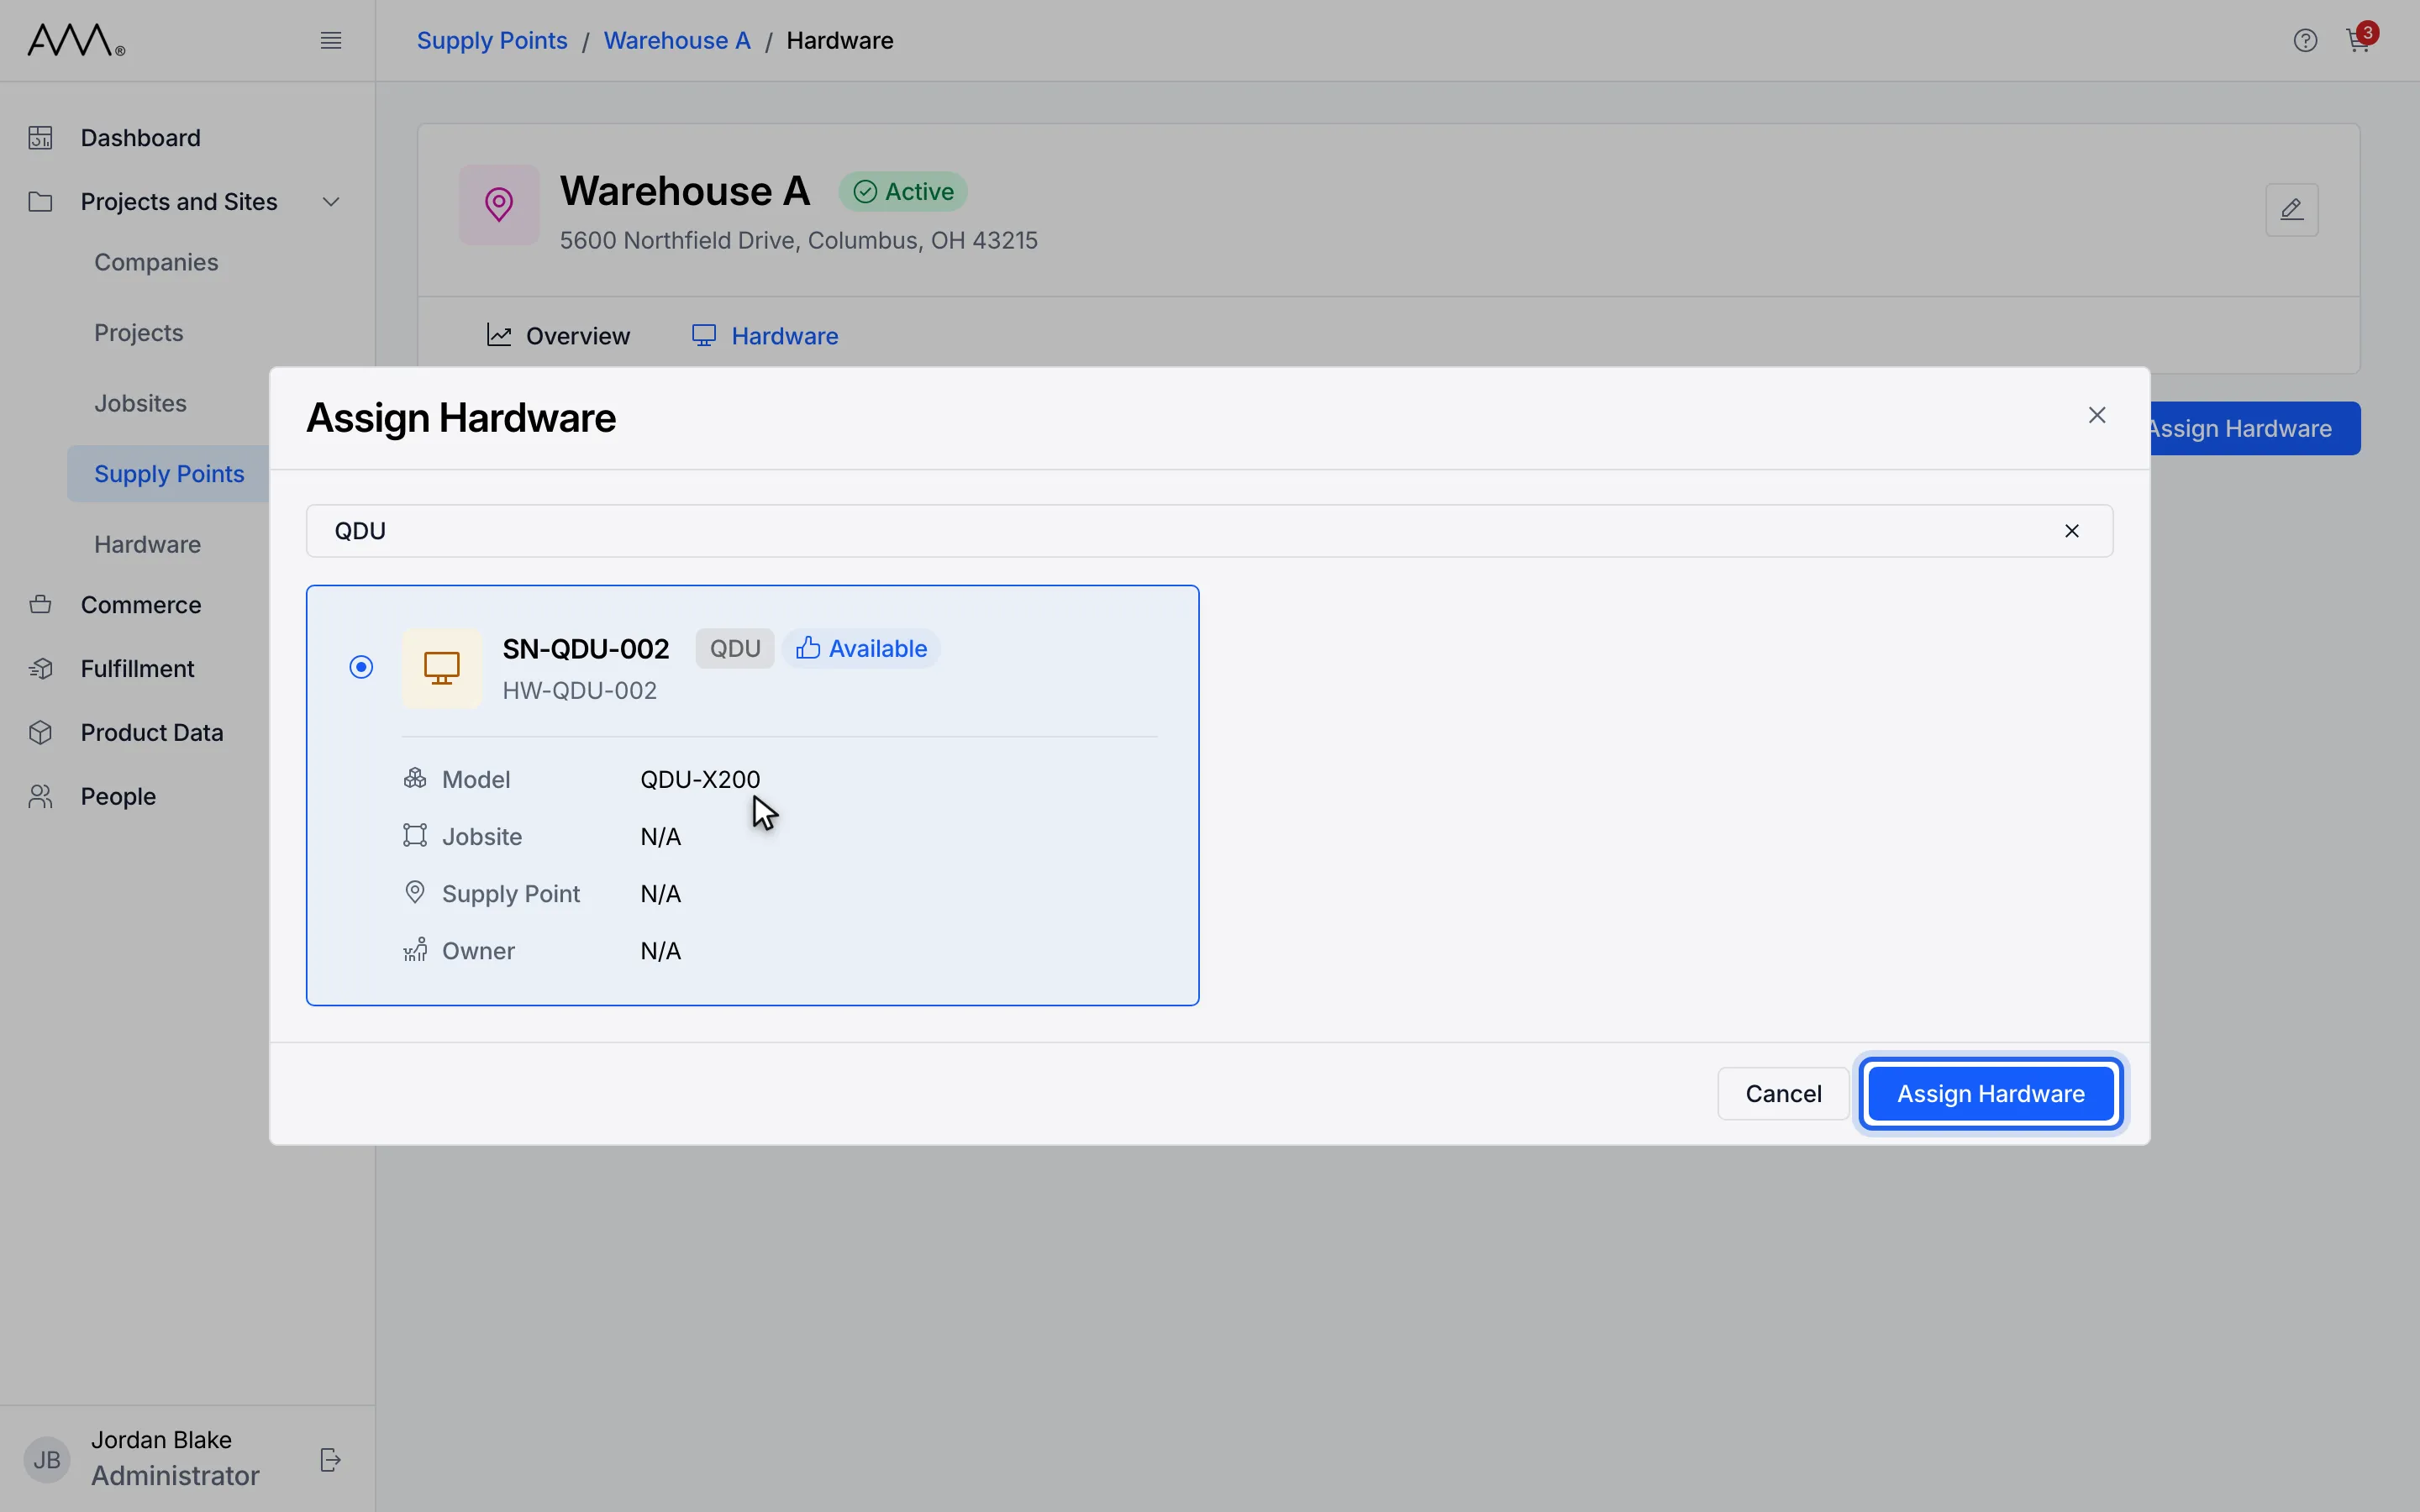
9Click Assign Hardware.
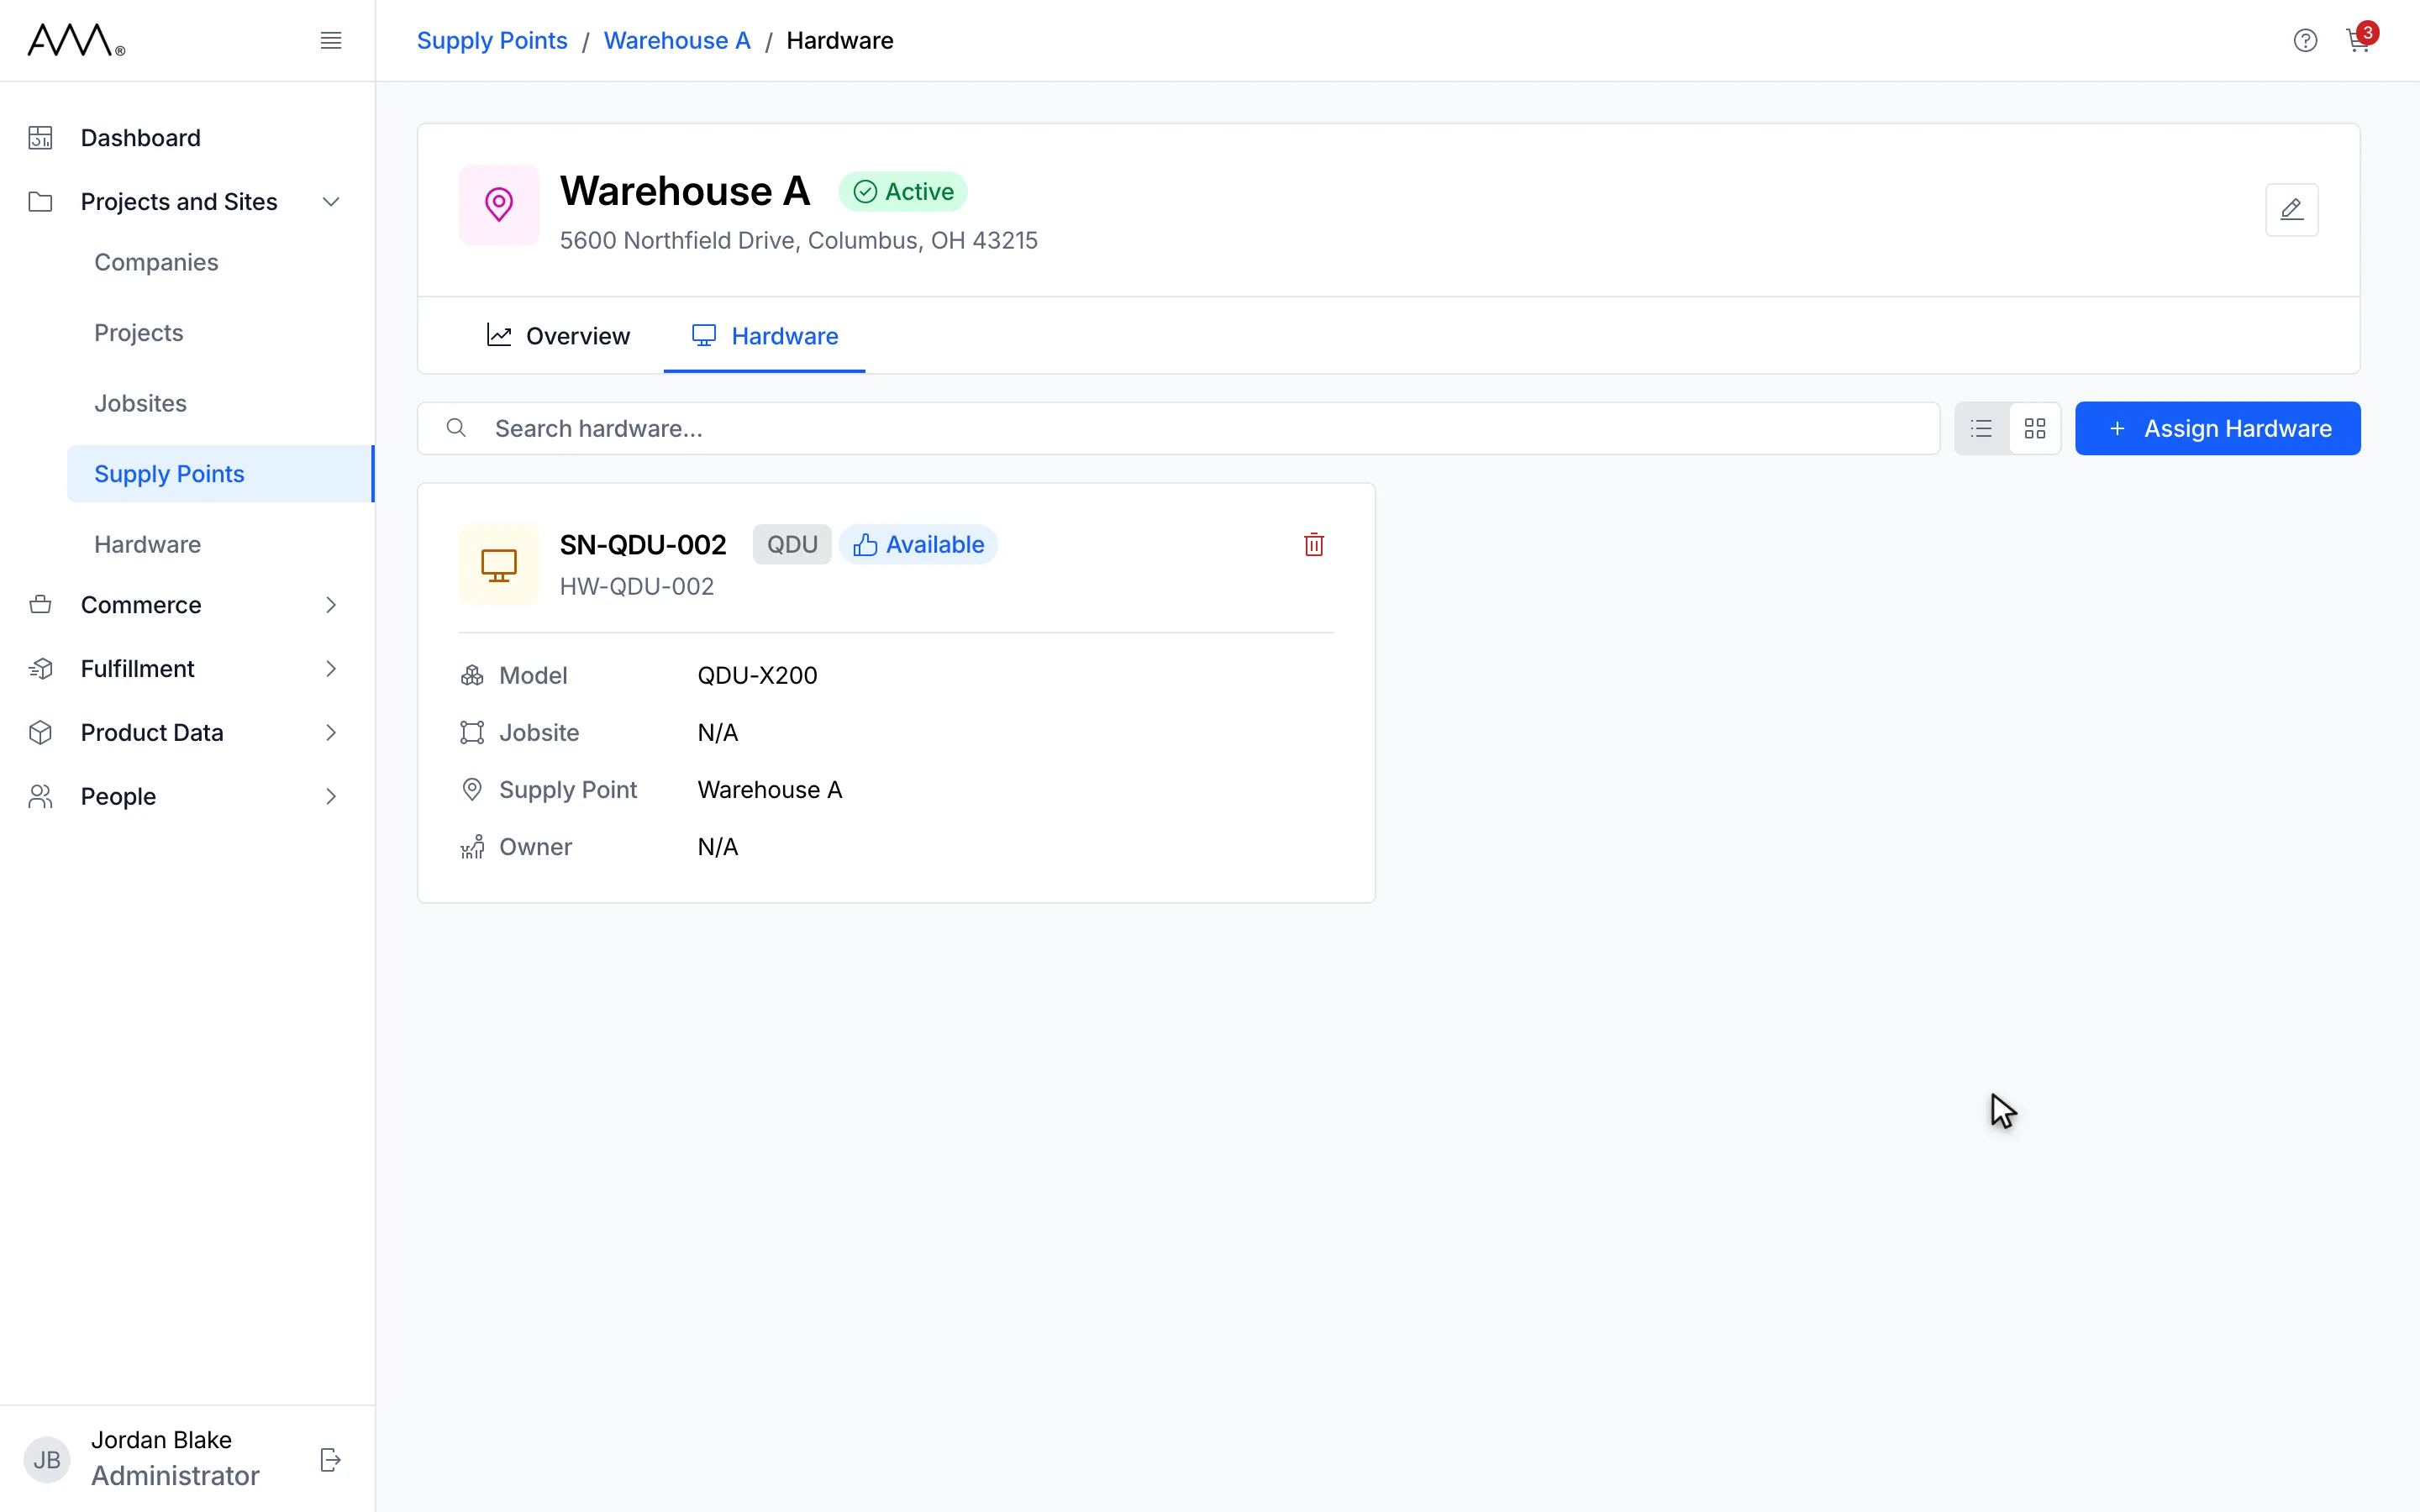
10The dialog closes and the unit now shows on the supply point's Hardware tab.
Watch this as a video (assign hardware to a supply point)
The dialog closes and the unit appears on the tab; there is no separate confirmation message. The tab shows cards by default; switch to List view for a table with Serial, Type, Model, Jobsite, Owner, Status and Actions.
- If no unit is free, the dialog shows No hardware available to assign.
- While more units load, the dialog shows Loading more…. If they cannot be loaded, it shows Couldn’t load more. with a Retry link.
- If you search after selecting a card and the search hides it, the unit stays selected and the dialog says Selected but not shown by this search: followed by its serial number.
- If the assignment fails, an error message explains why.
Replace the unit on a supply point
Section titled “Replace the unit on a supply point”- In the sidebar, open Projects and Sites and choose Supply Points.
- Click the name of the supply point that already has a unit.
- Click the Hardware tab.
- Click Assign Hardware. Because the supply point already has a unit, the dialog is titled Replace Hardware.
- Select the replacement unit’s card.
- Click Replace Hardware.
- Read the confirmation, which says that the supply point already has hardware assigned and names both units, for example SN-QDU-001 is currently assigned to this supply point. Assigning SN-CRIB-001 will unassign SN-QDU-001. Click Replace Hardware.
1In the sidebar, open Projects and Sites.
2Choose Supply Points.
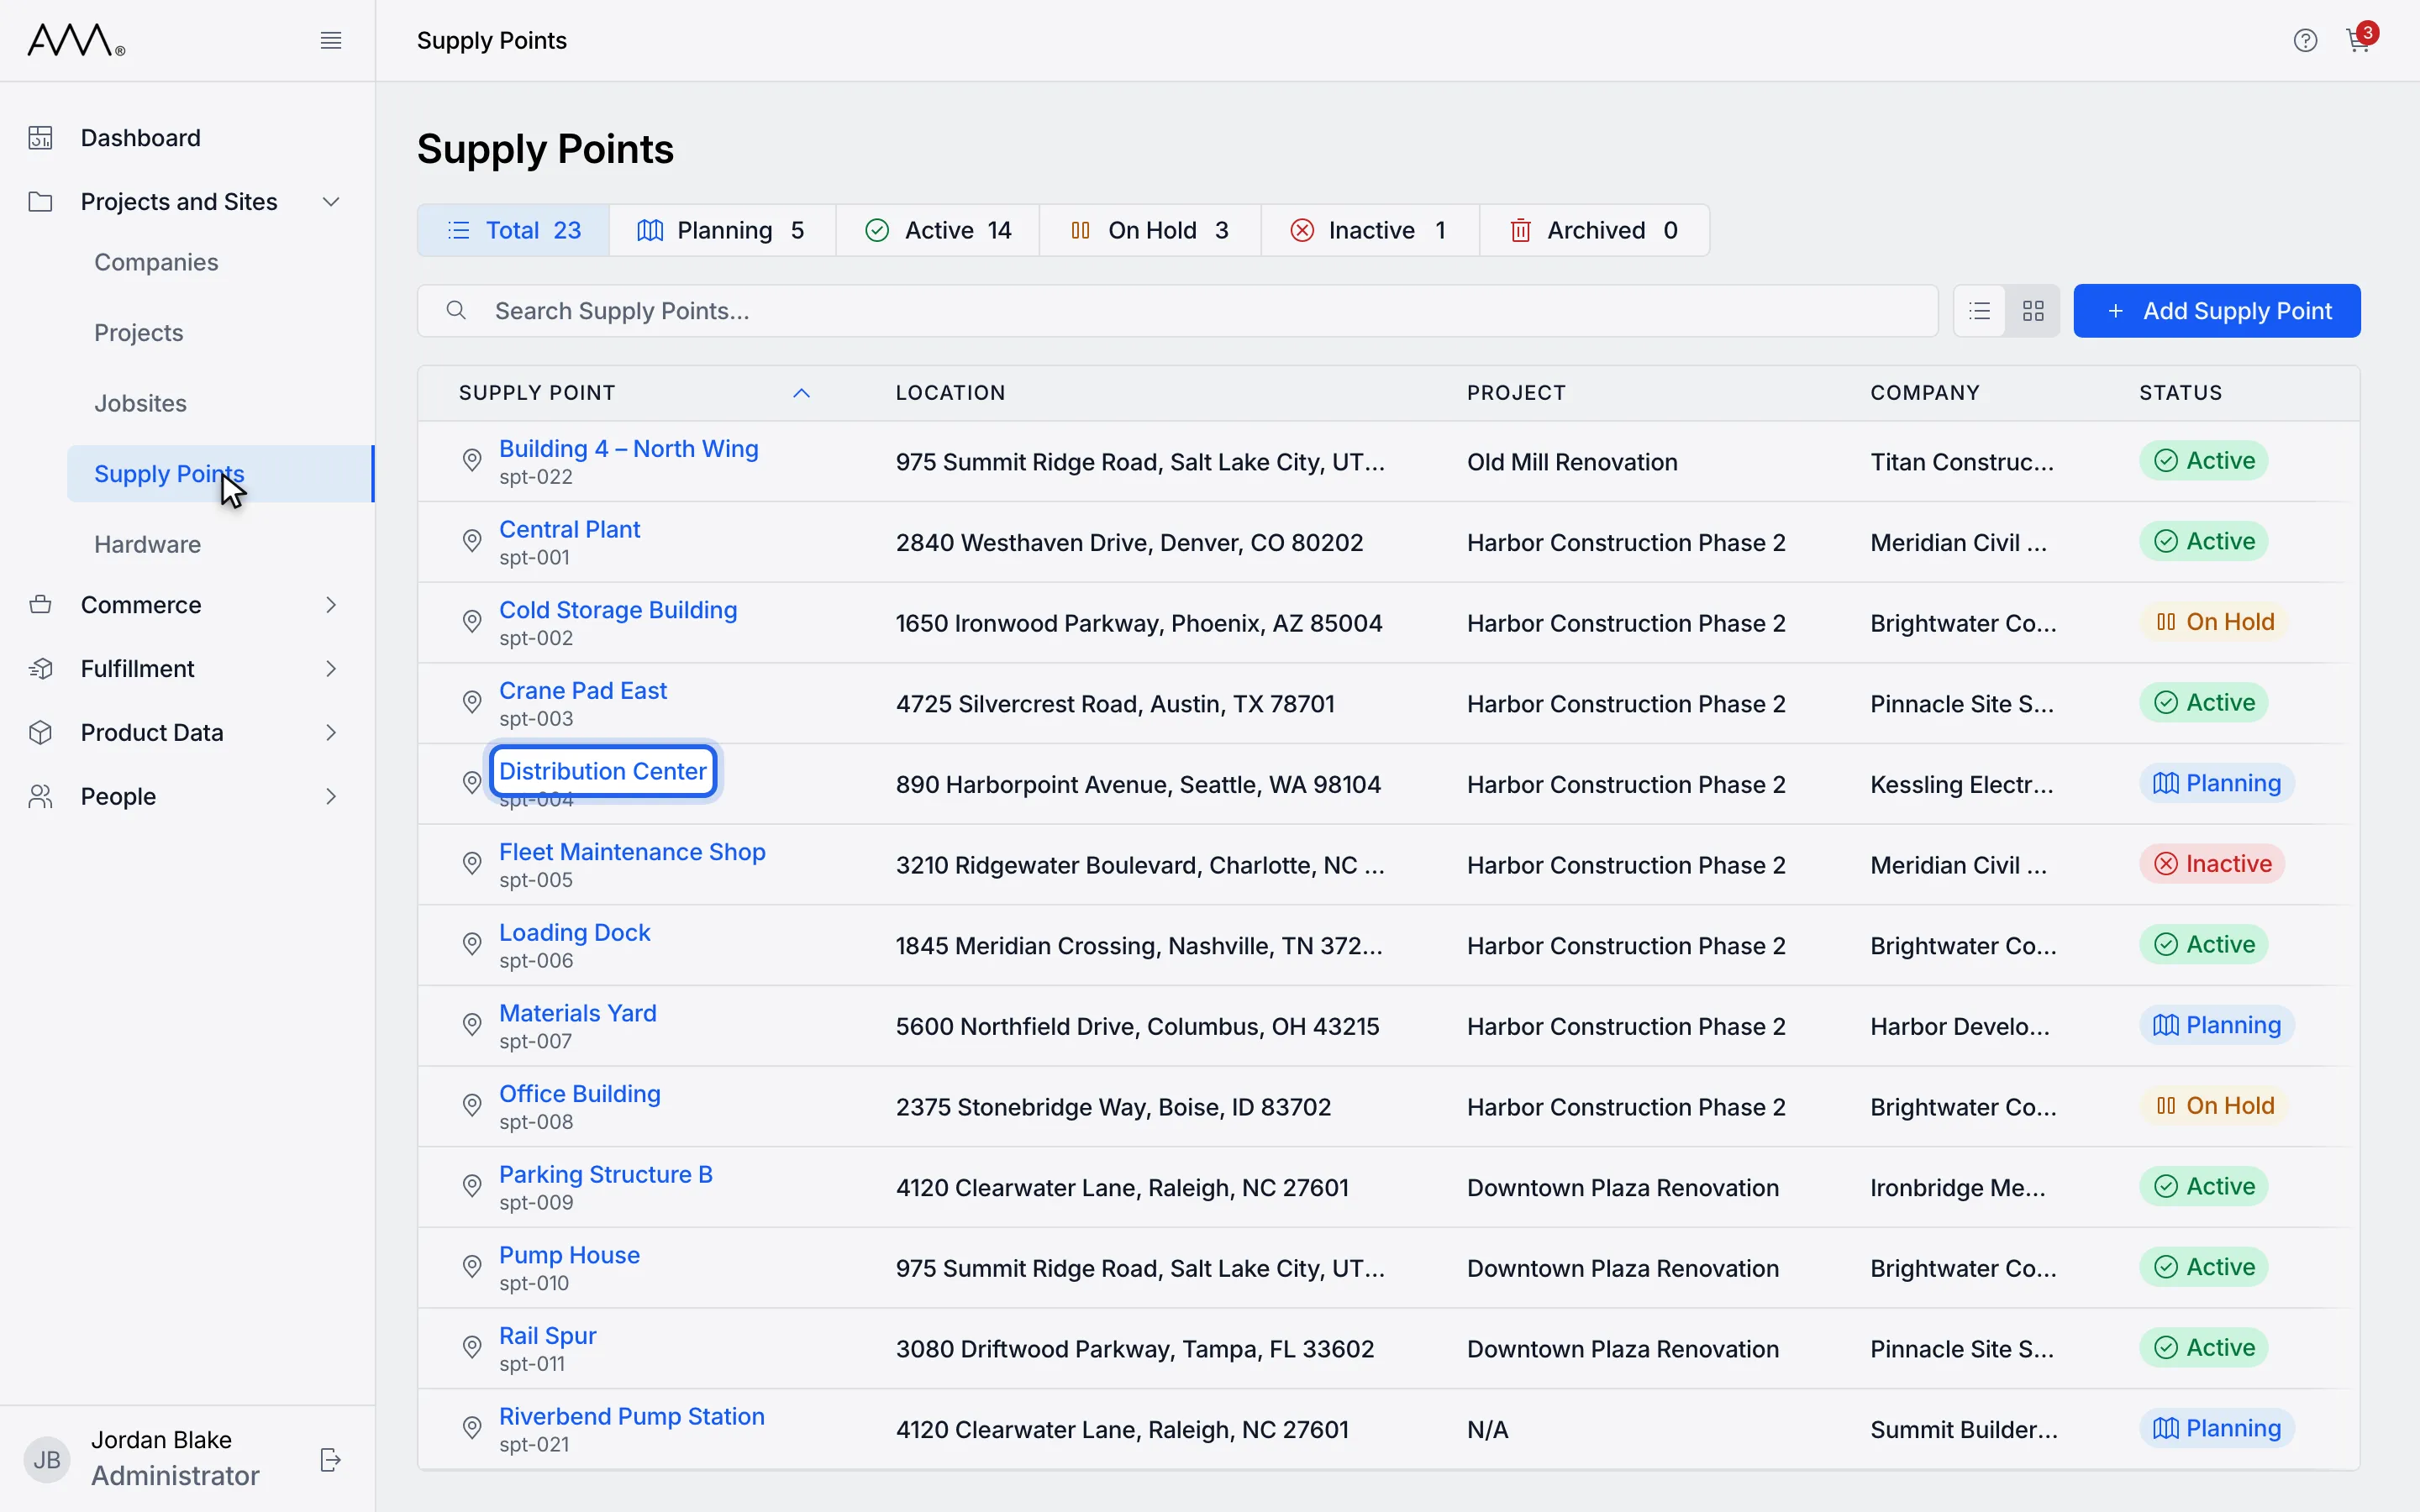
3Open a supply point that already has a unit.
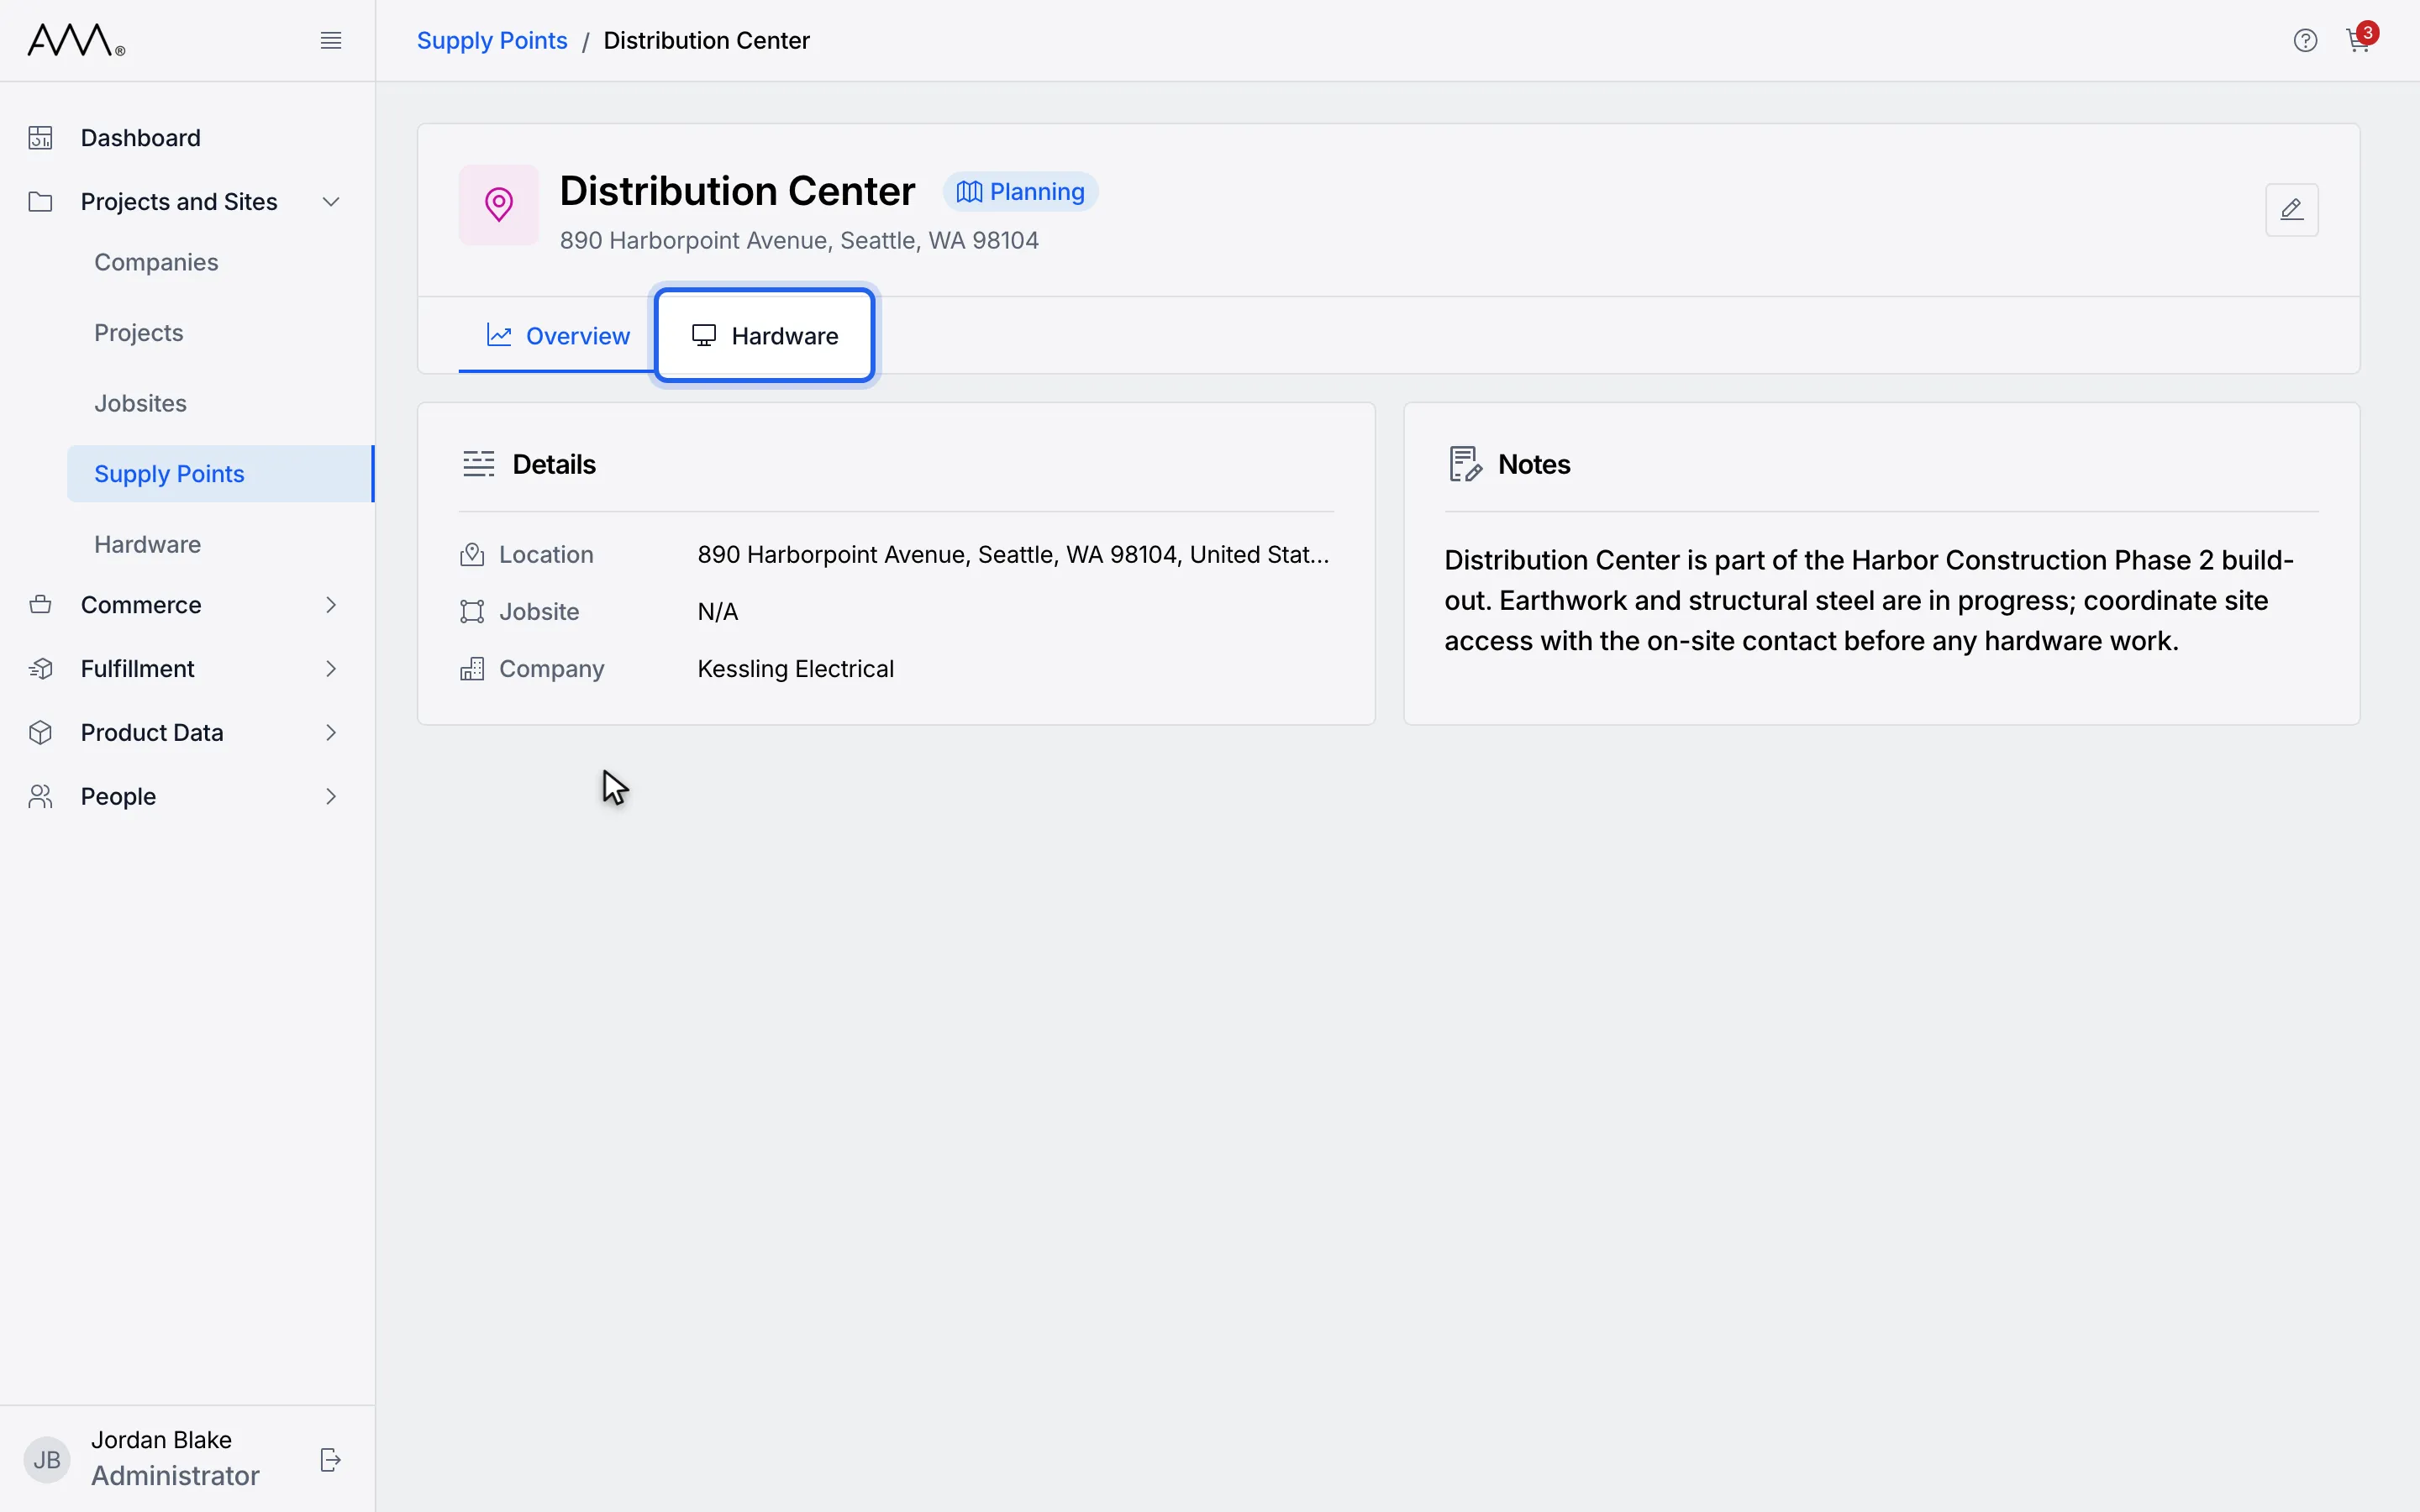
4Click the Hardware tab.
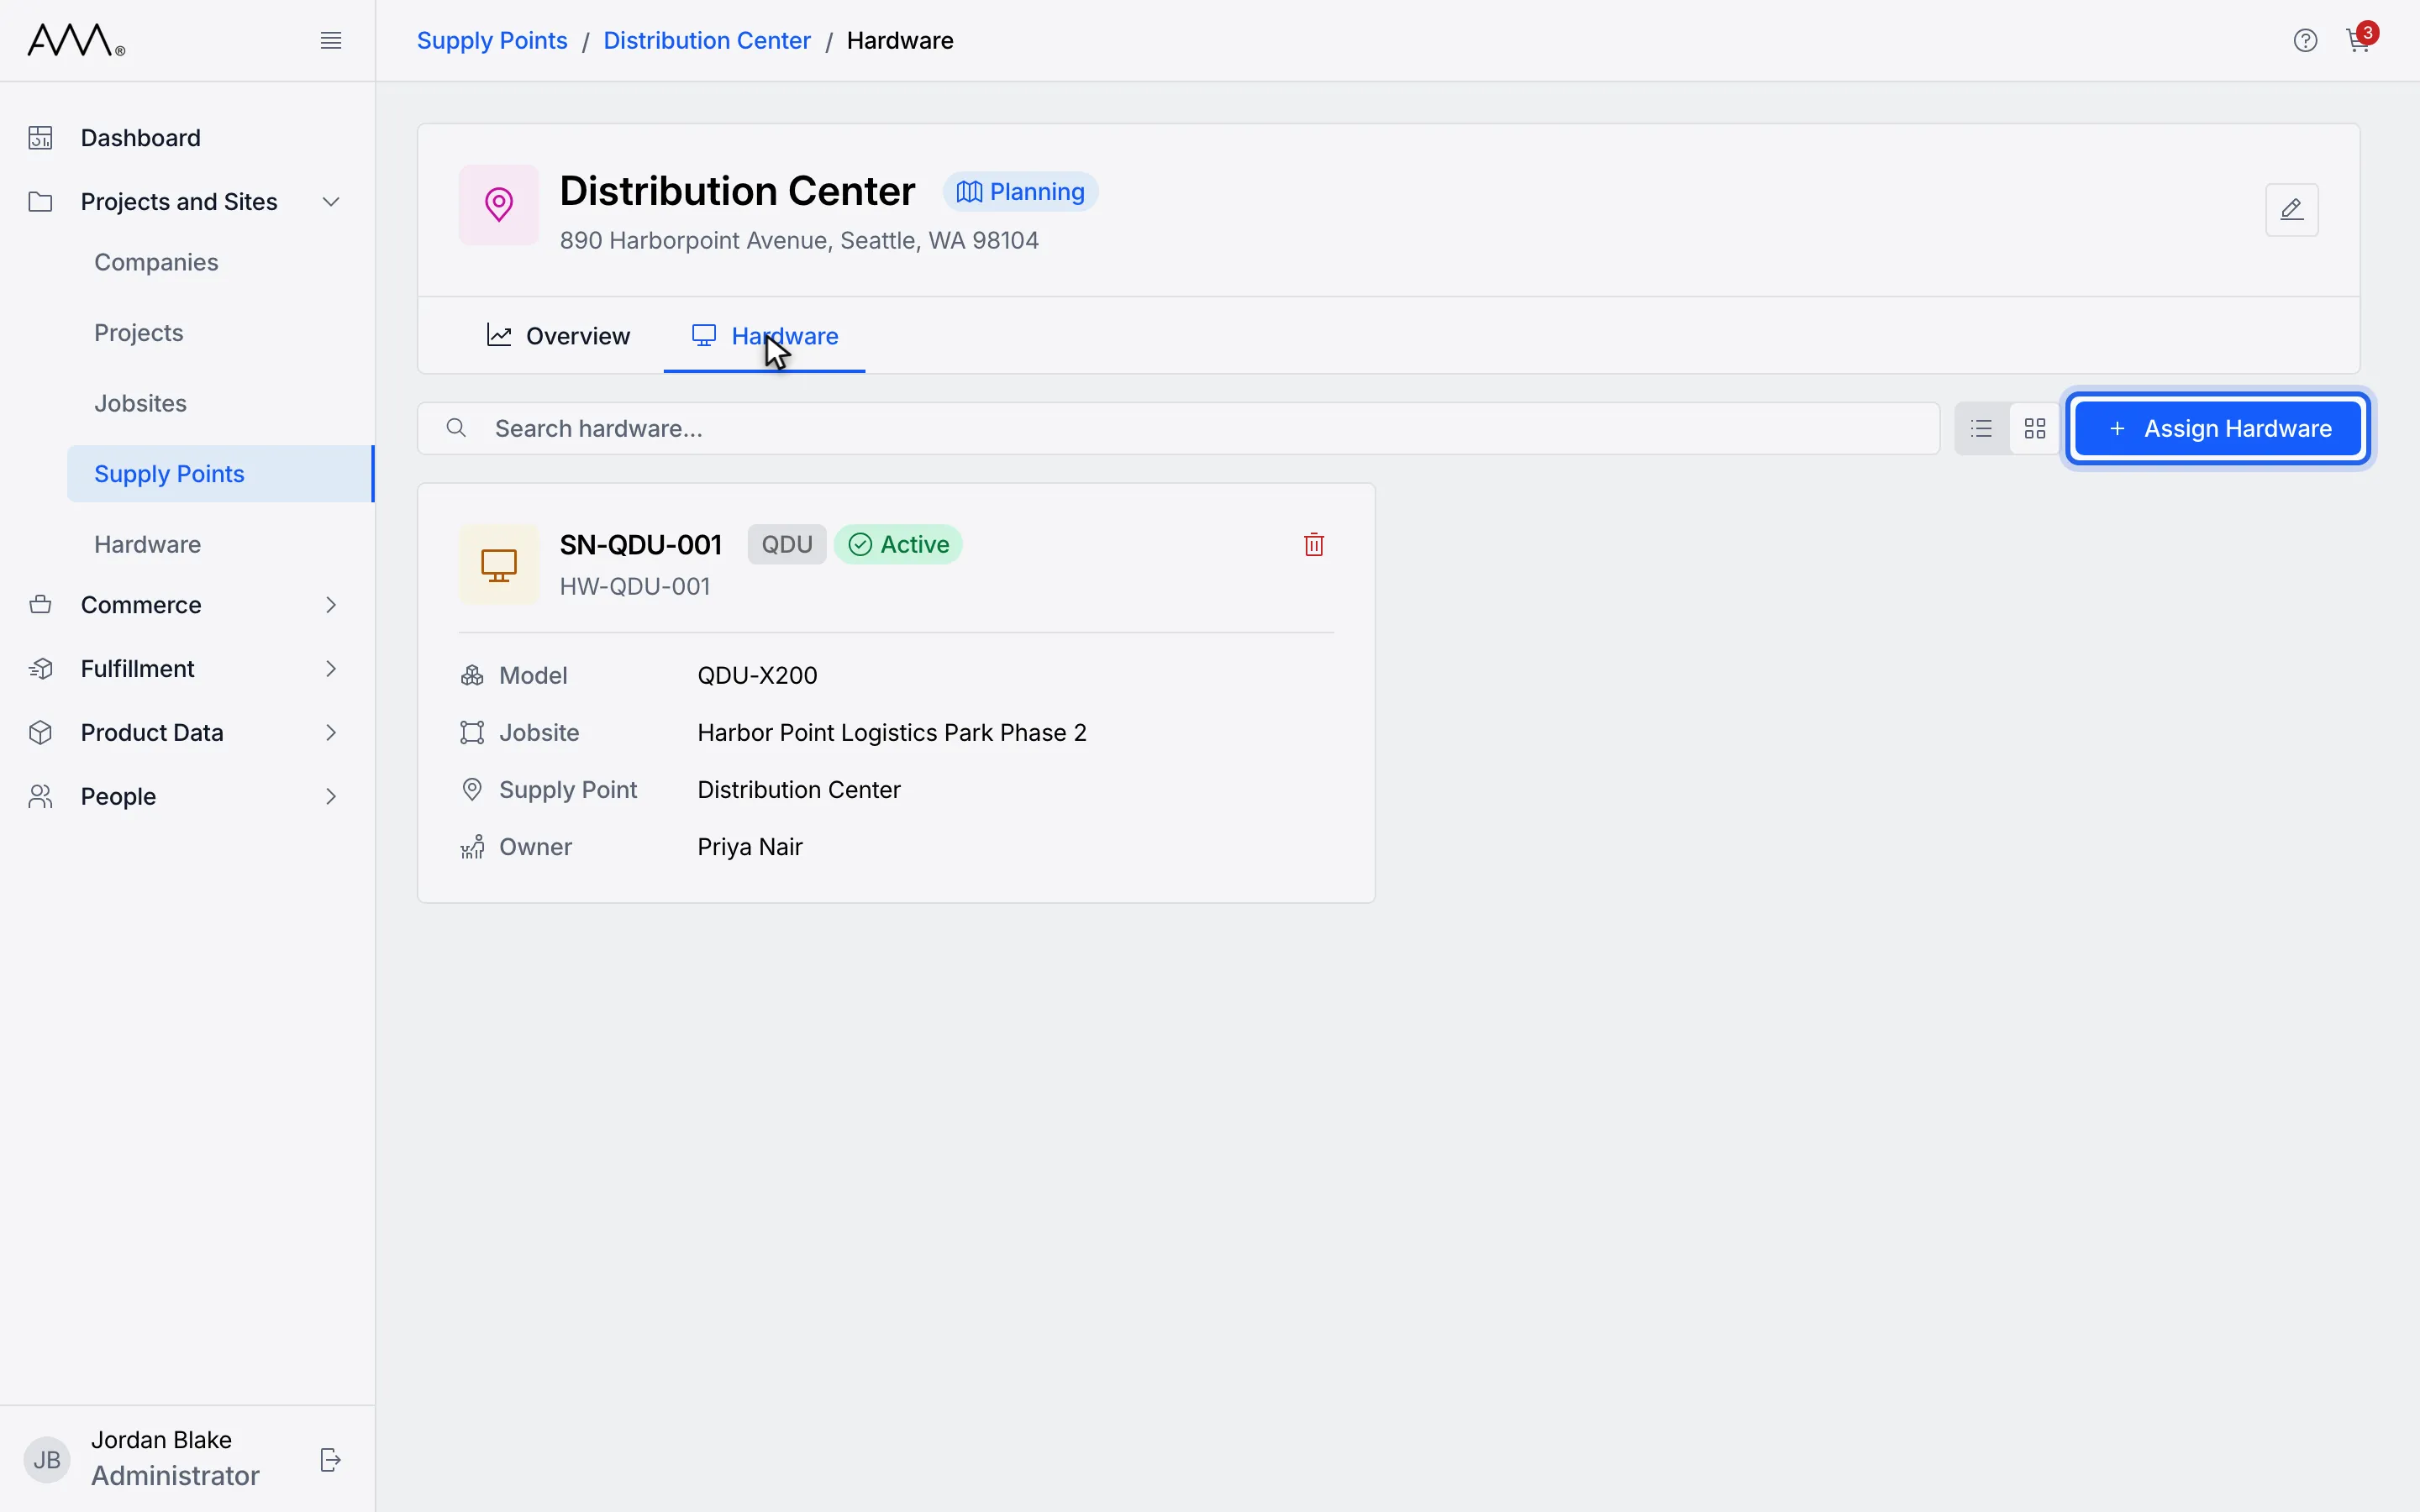
5Click Assign Hardware. The dialog is titled Replace Hardware.
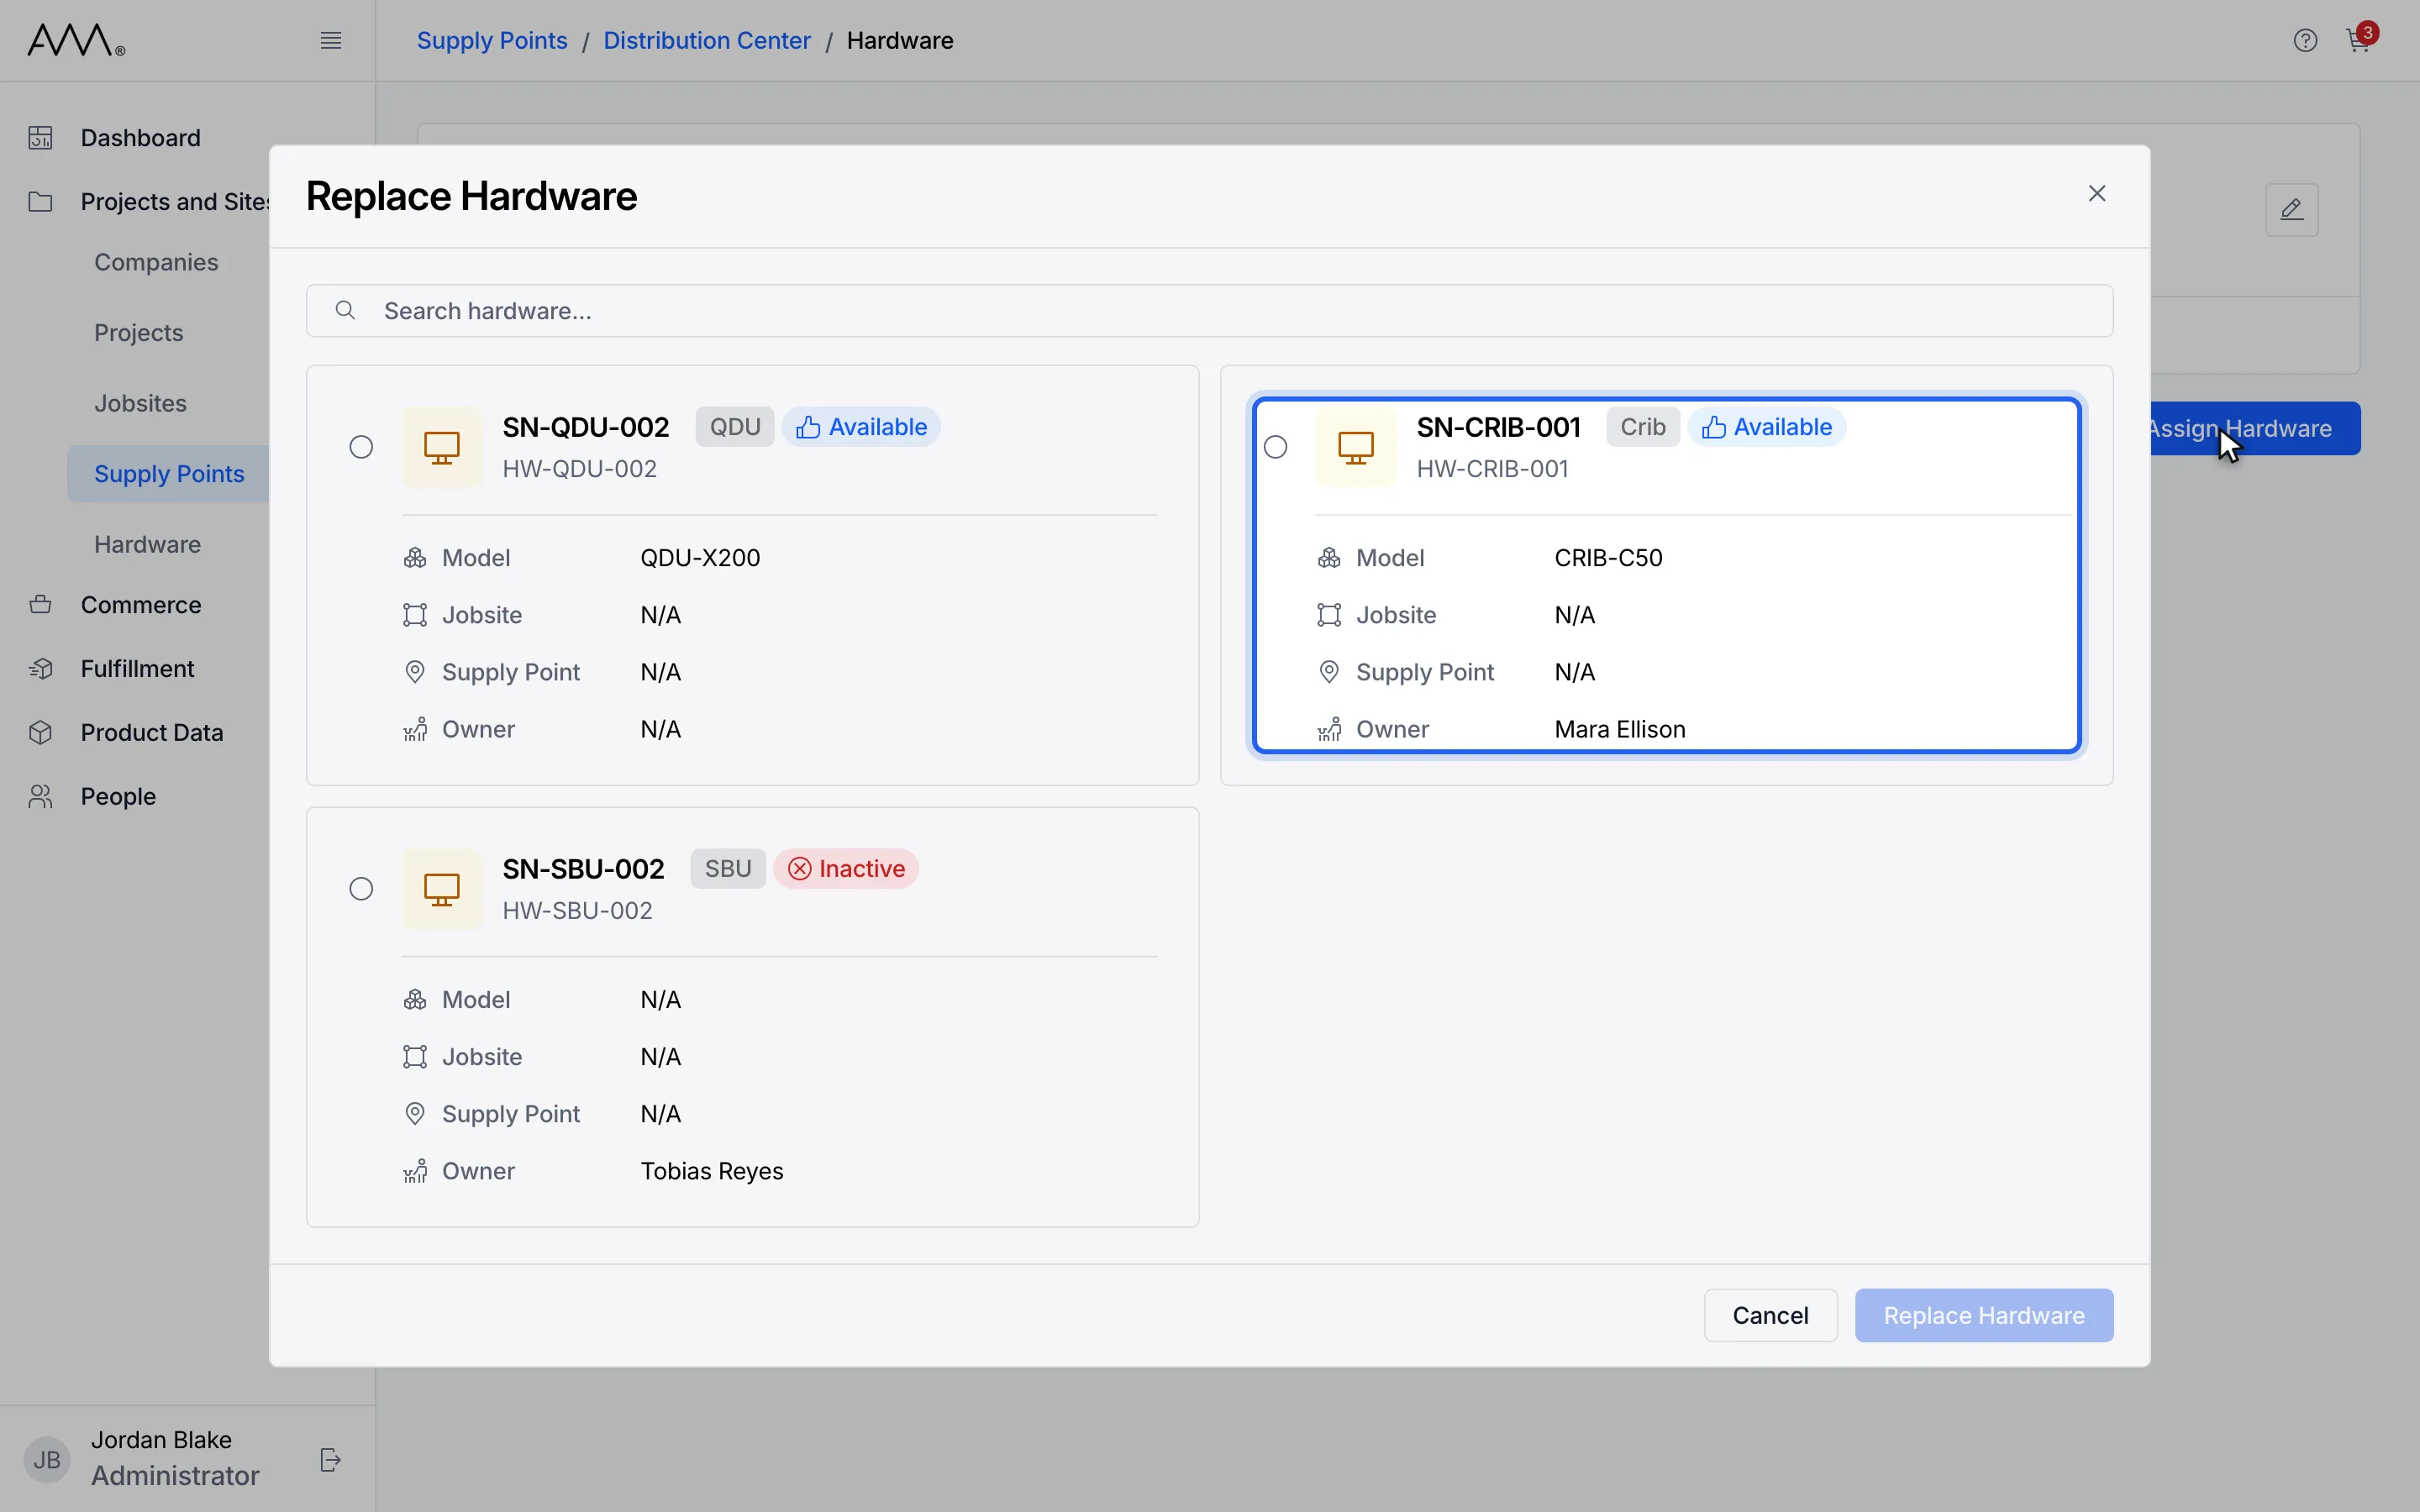
6Select the replacement unit's card.
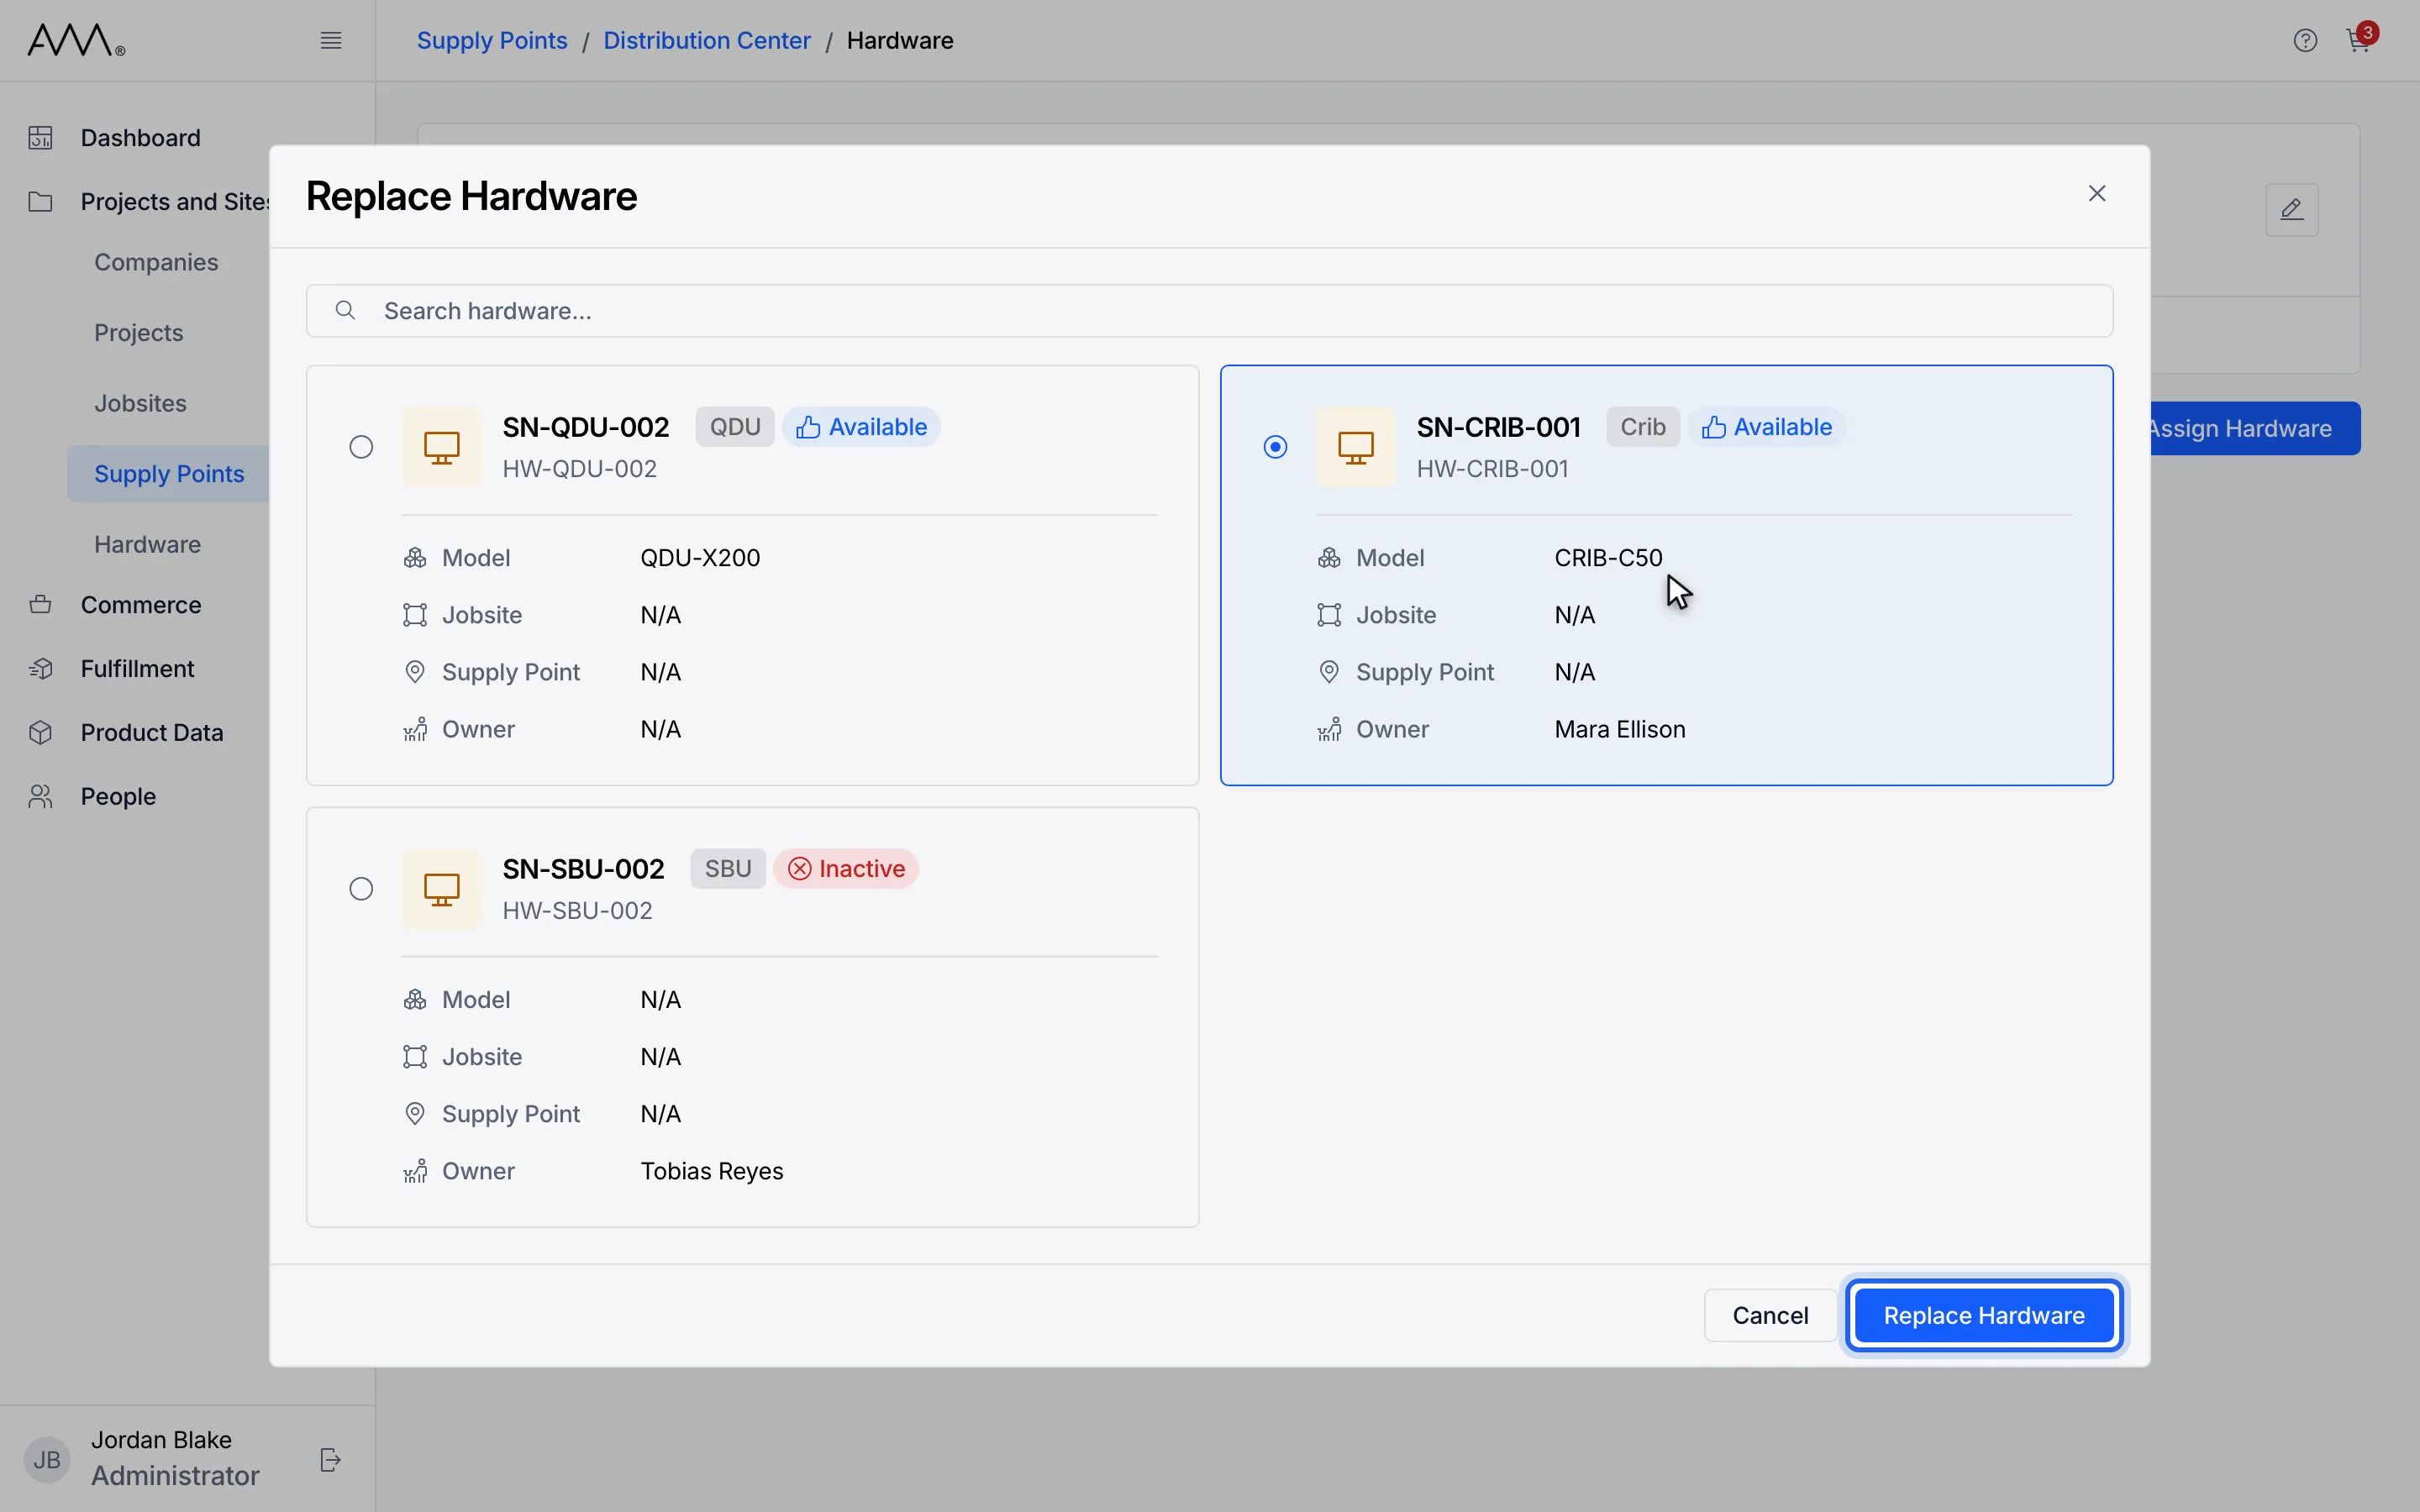
7Click Replace Hardware.
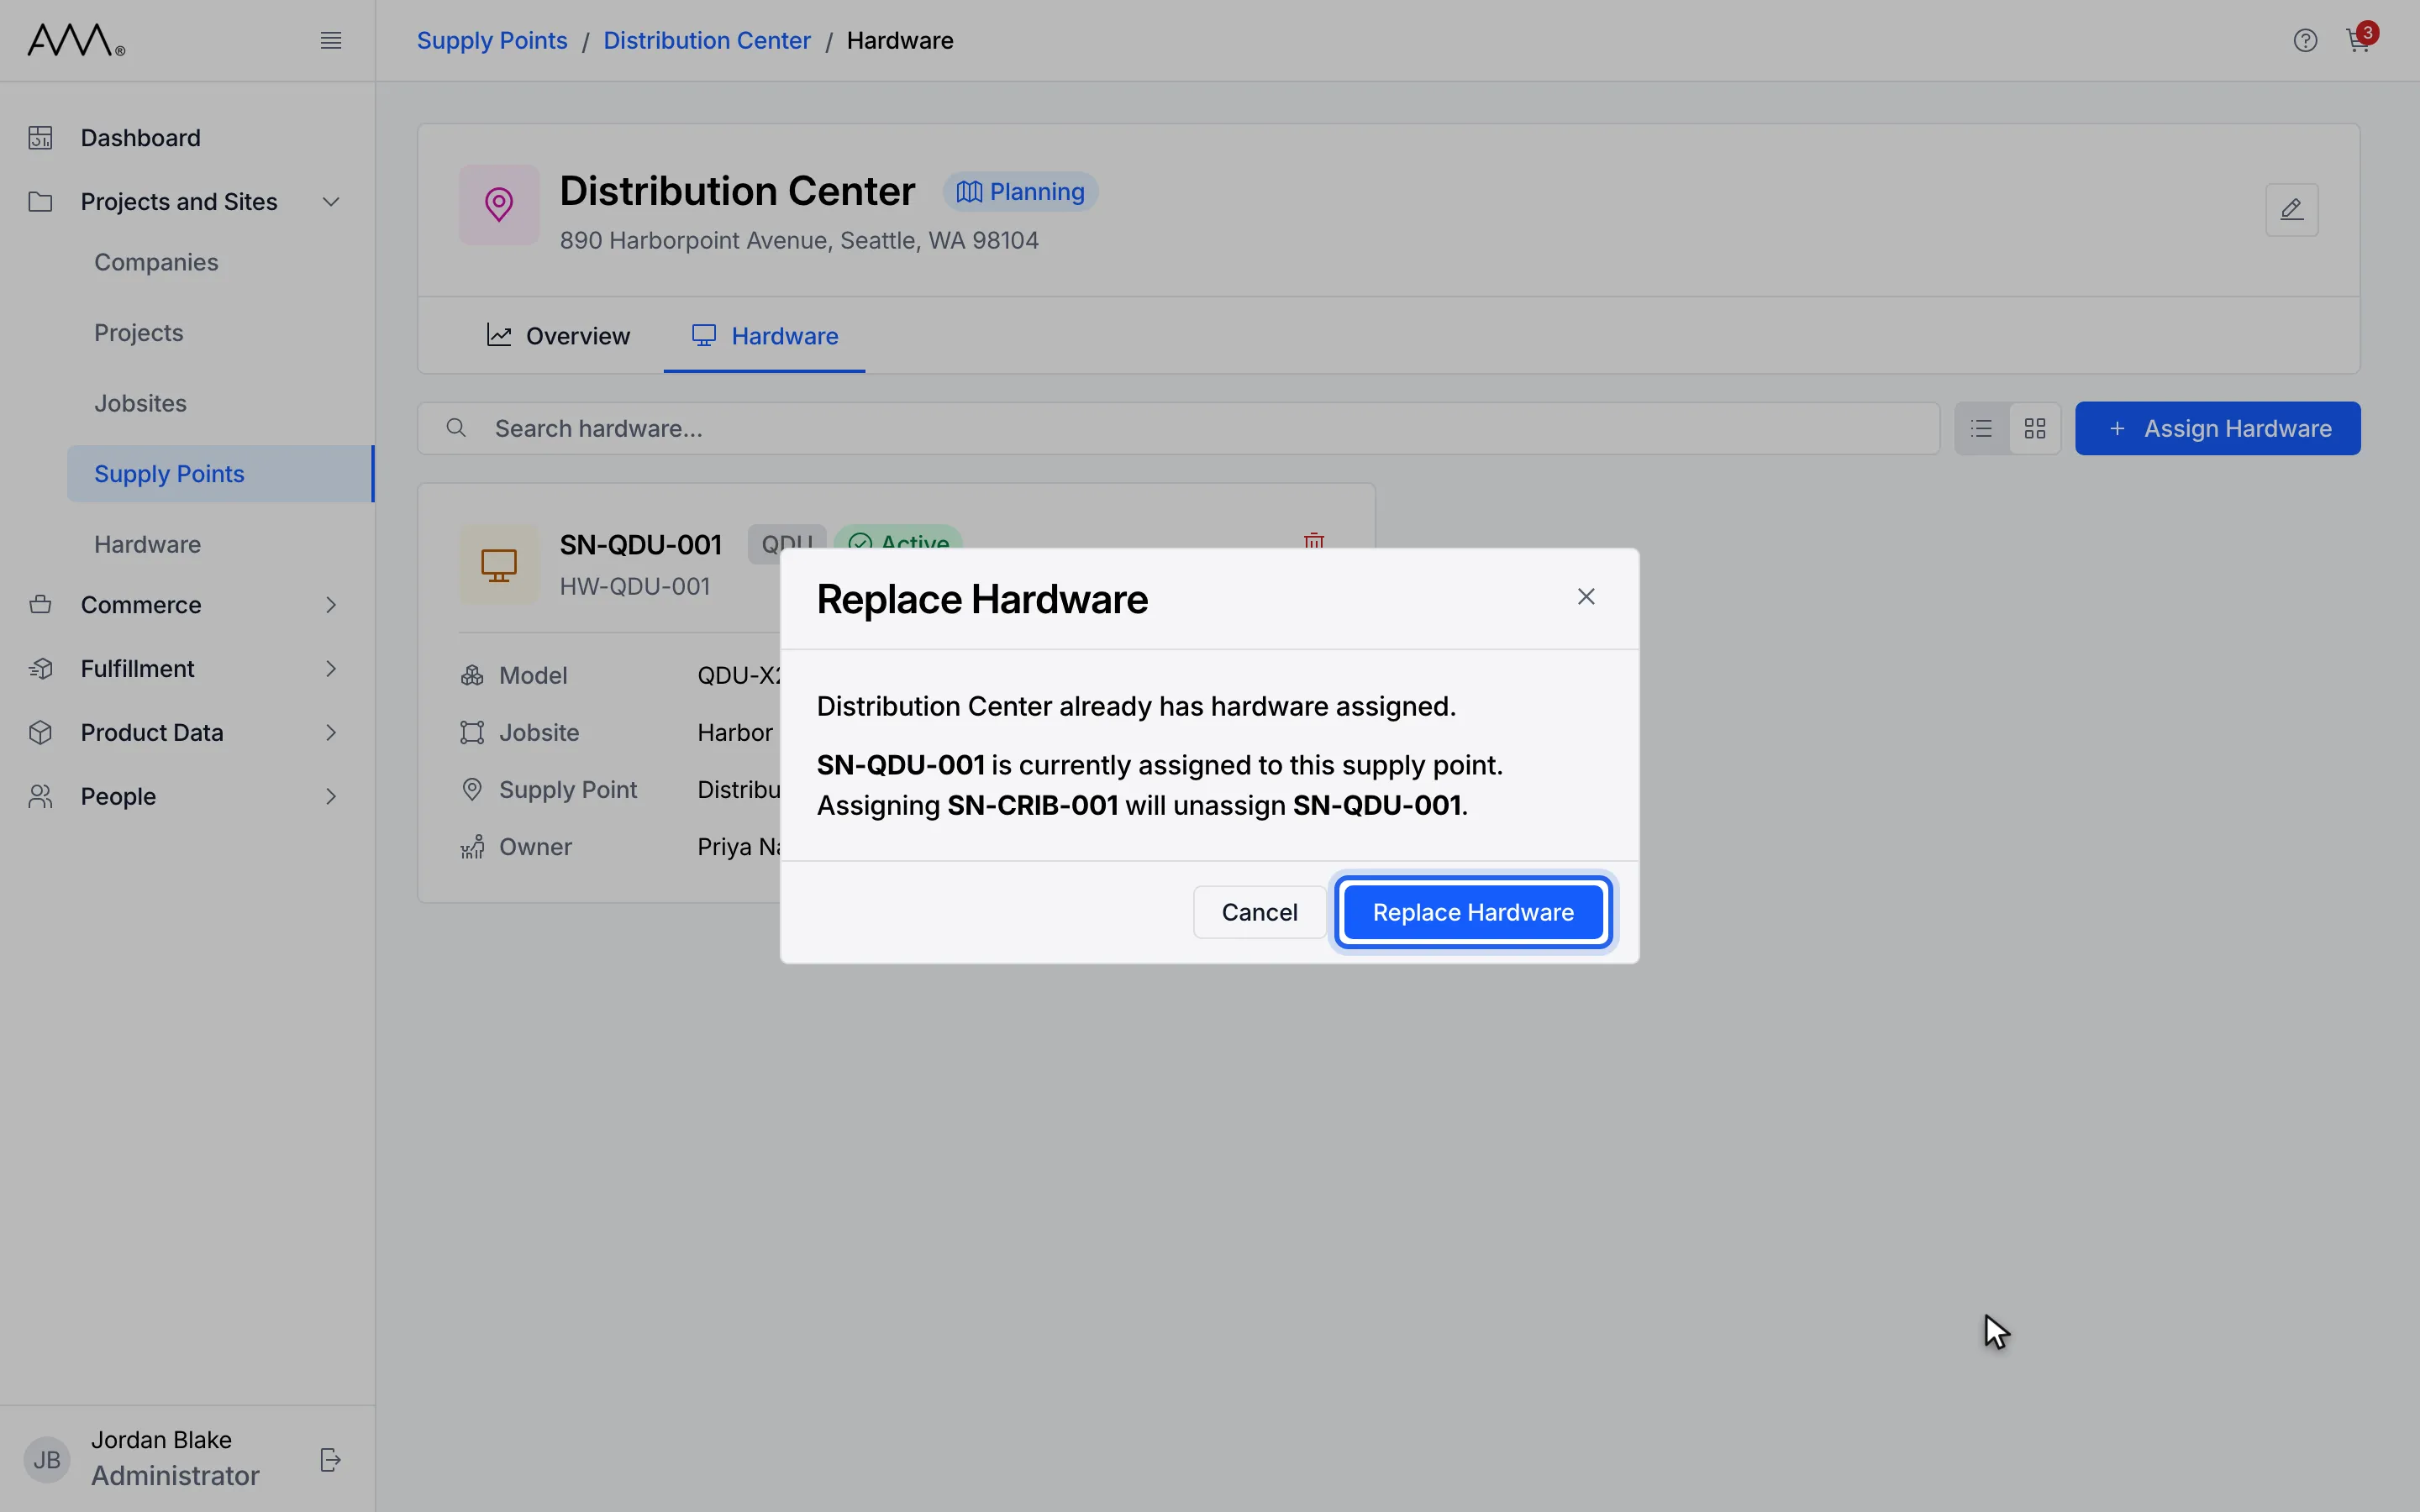
8Read which unit will be unassigned, then click Replace Hardware.
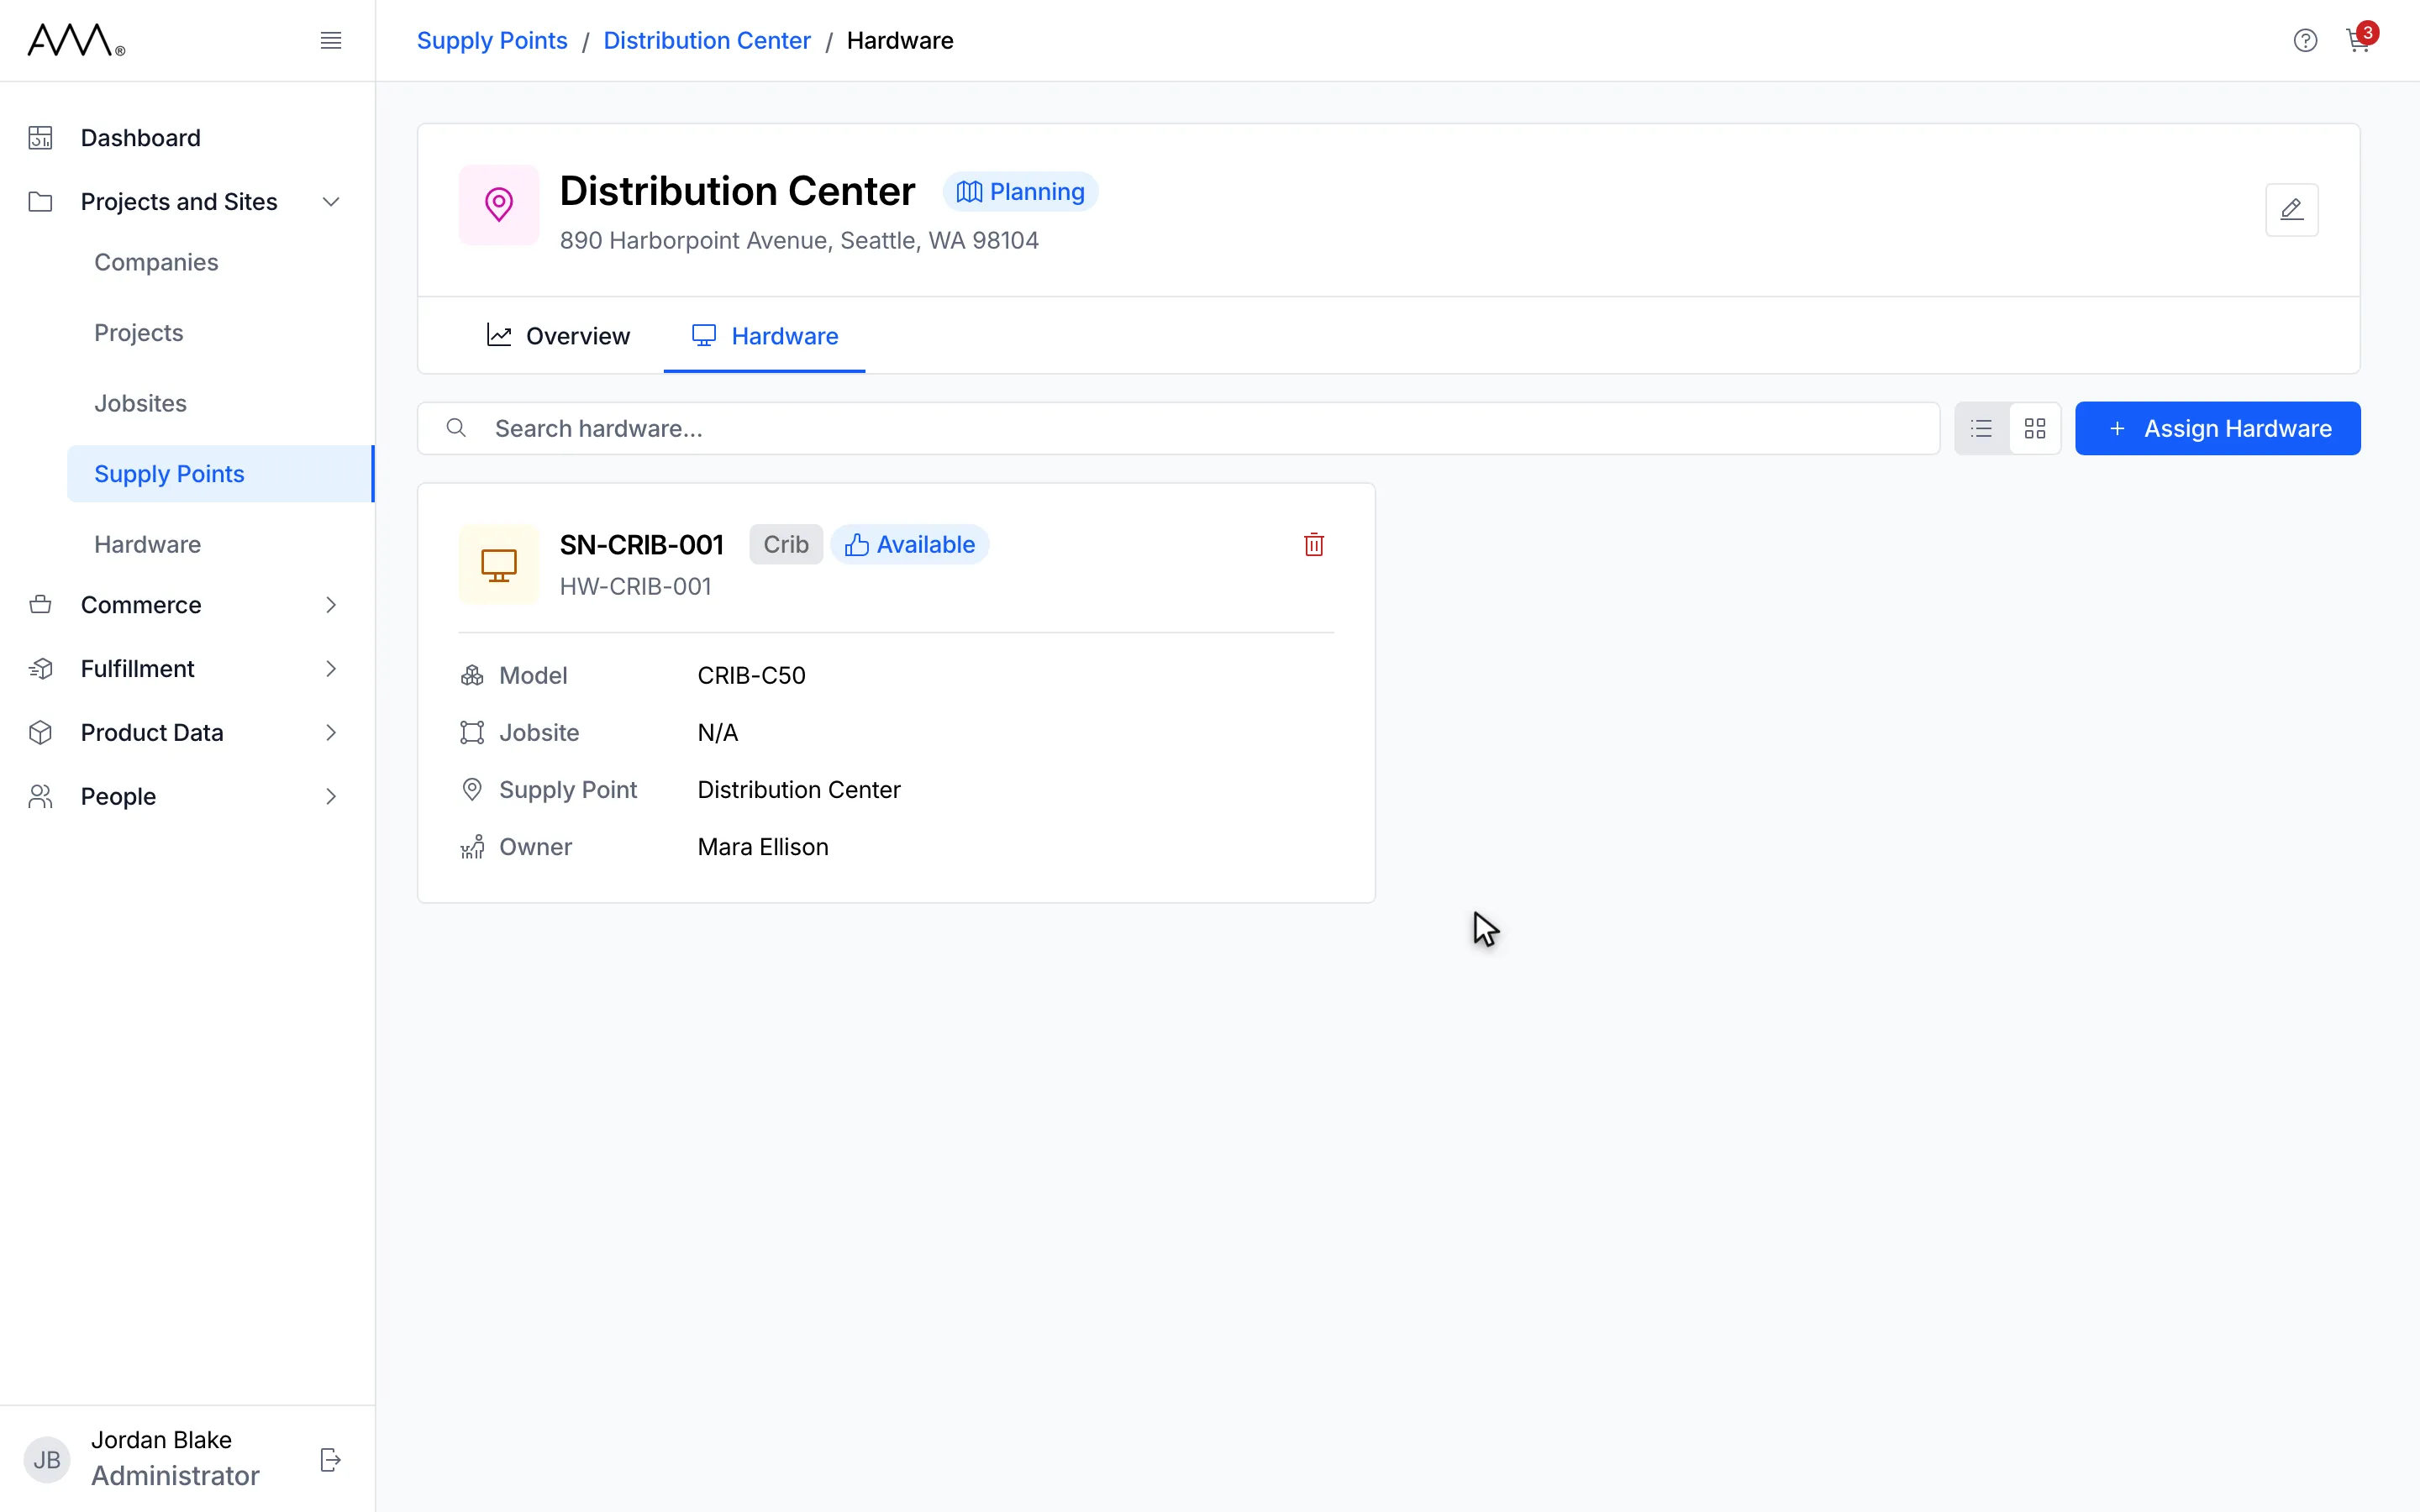
9The supply point's Hardware tab shows the replacement unit.
Watch this as a video (replace hardware on a supply point)
Omni unassigns the old unit, assigns the new one and closes the dialog. The tab now shows the replacement, and the old unit is free to assign elsewhere.