Add a supply point
Add a supply point for each physical location where hardware will be installed. Once it exists you can assign it to a project or a jobsite and assign a hardware unit to it.
-
In the sidebar, open Projects and Sites and choose Supply Points.
-
Click Add Supply Point. The Add Supply Point dialog opens.
-
Optionally, under Company, type part of the company name.
-
Pick the company from the suggestions.
-
Enter the Supply Point Name.
-
Optionally type the Location. If address suggestions appear as you type, pick one to fill in the full address.
-
Open the Supply Point Status list. New supply points start as Active.
-
Choose a status.
-
Optionally add Notes.
Field Required What to enter Company No Start typing and pick a company from the suggestions. Supply Point Name Yes The name of the location. Location No The street address. Supply Point Status Yes Planning, Active, On Hold or Inactive. Notes No Free text, for example access instructions. -
Click Add Supply Point.
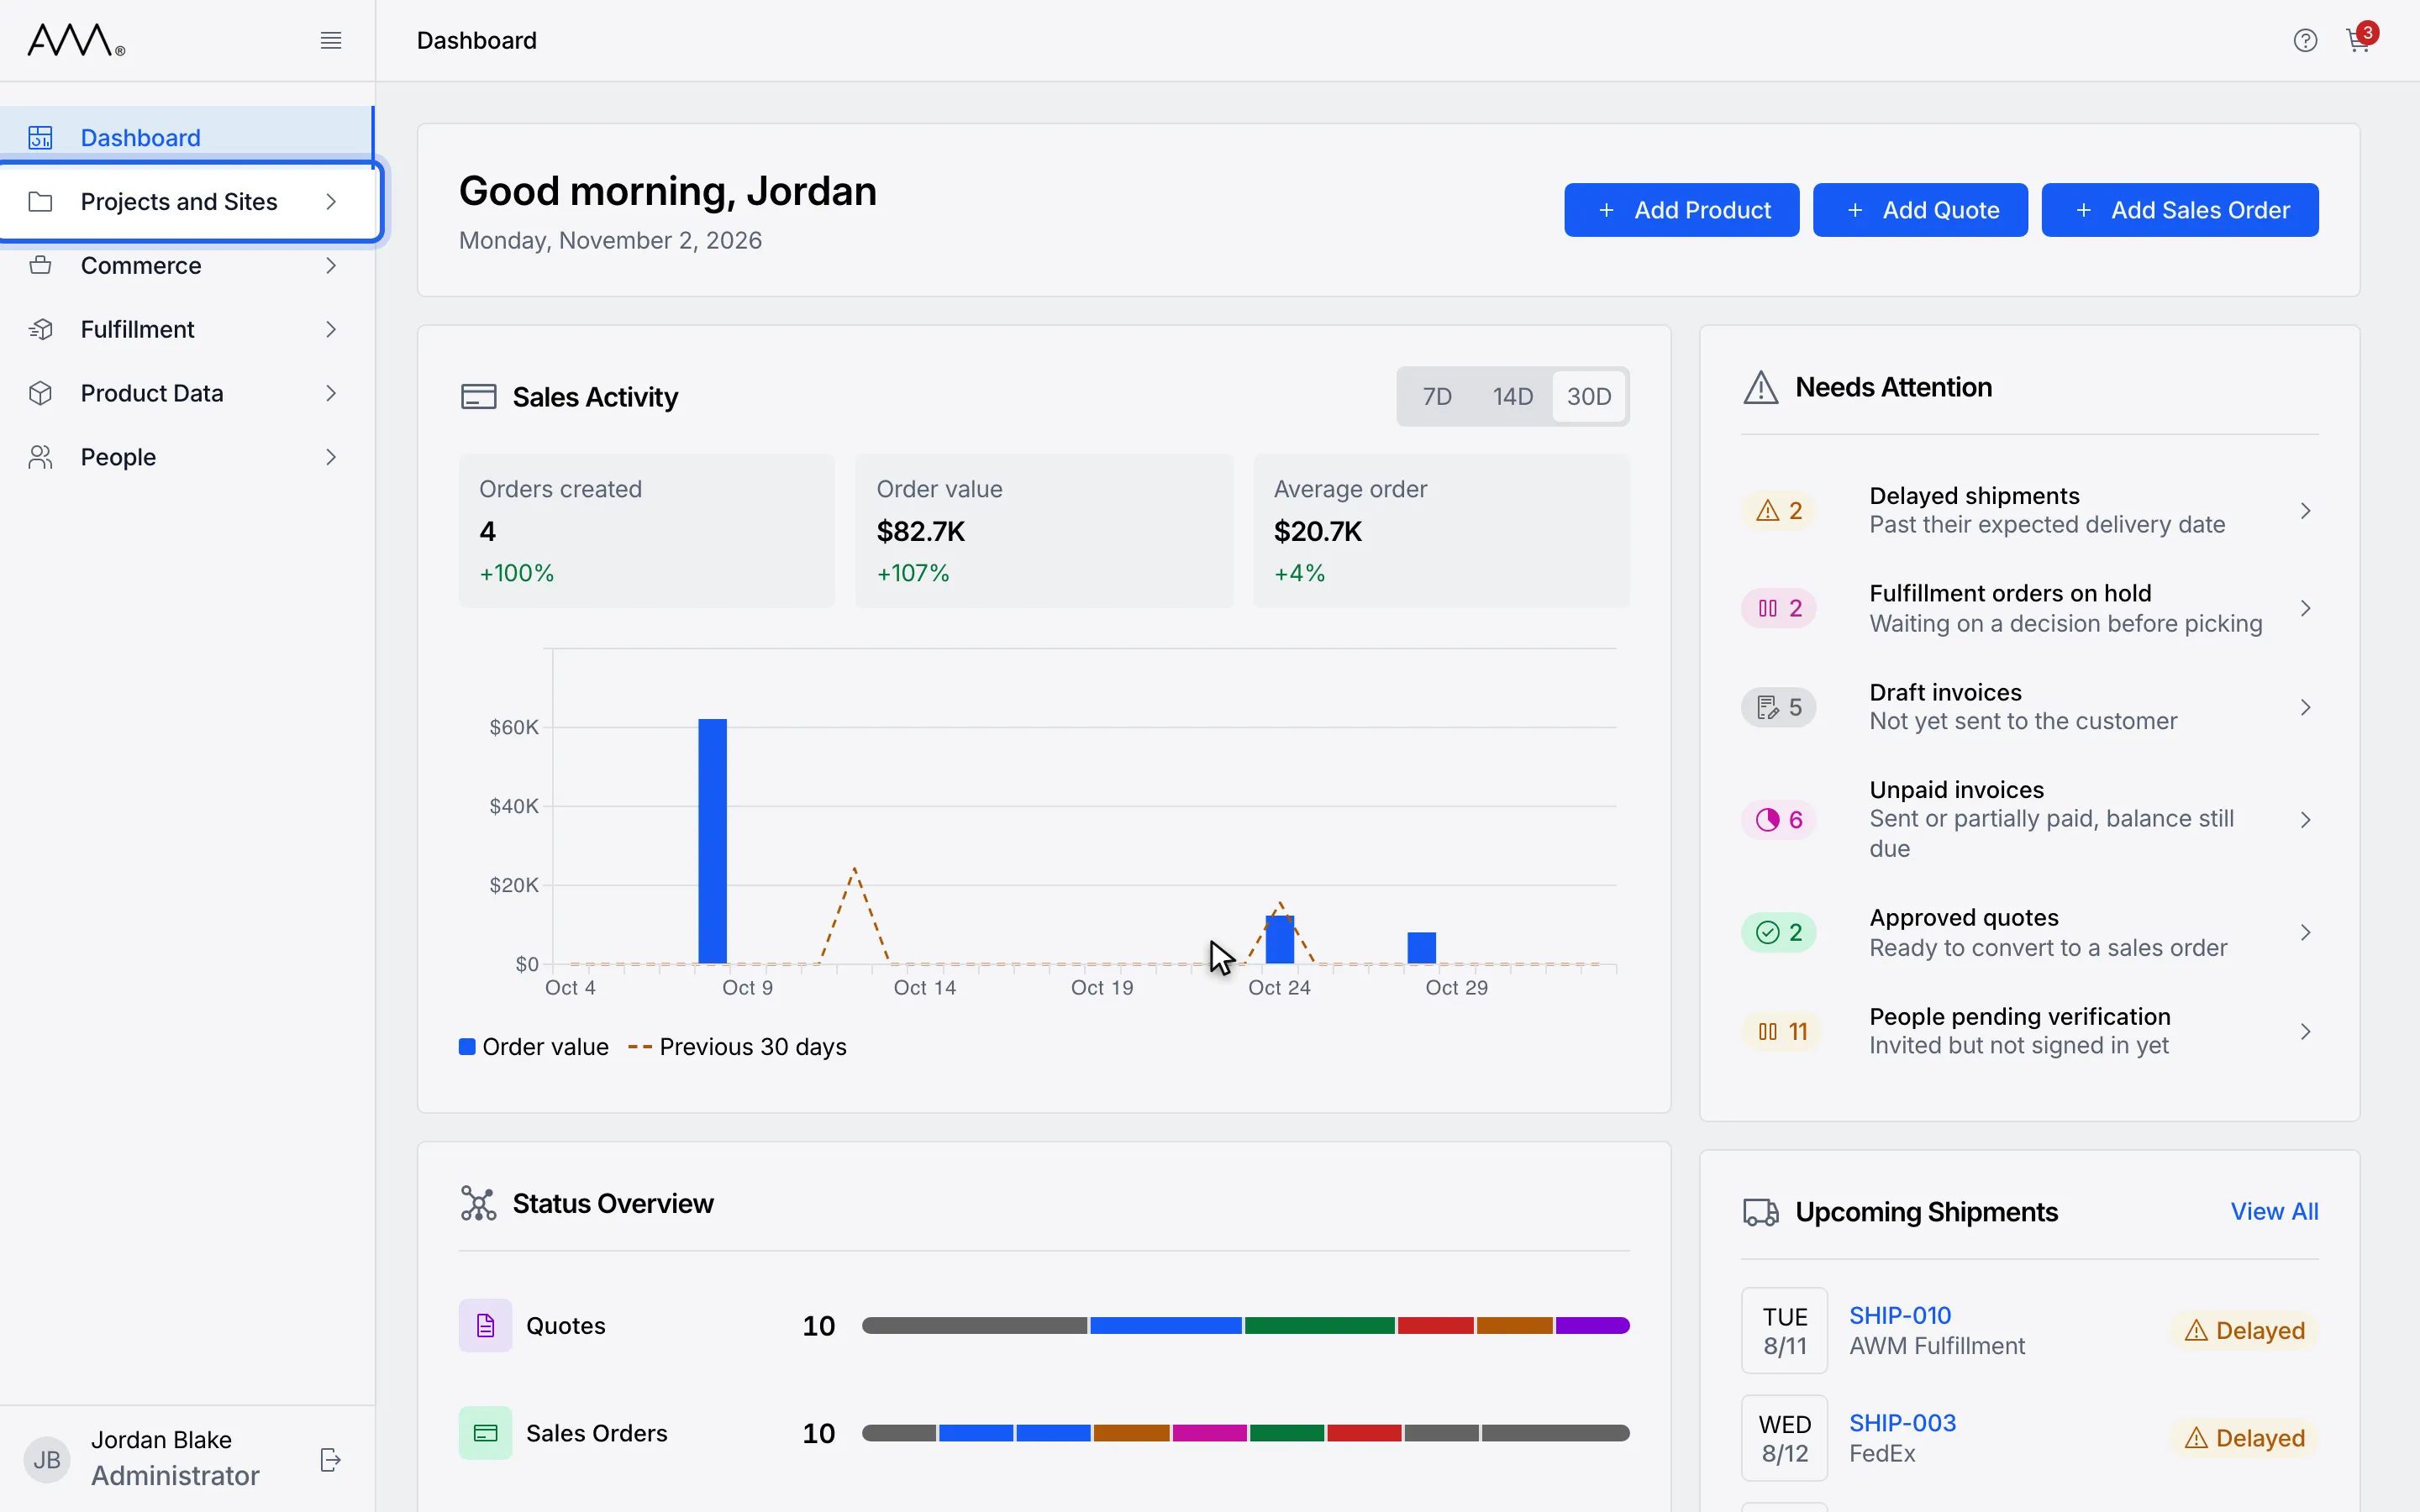
1In the sidebar, open Projects and Sites.
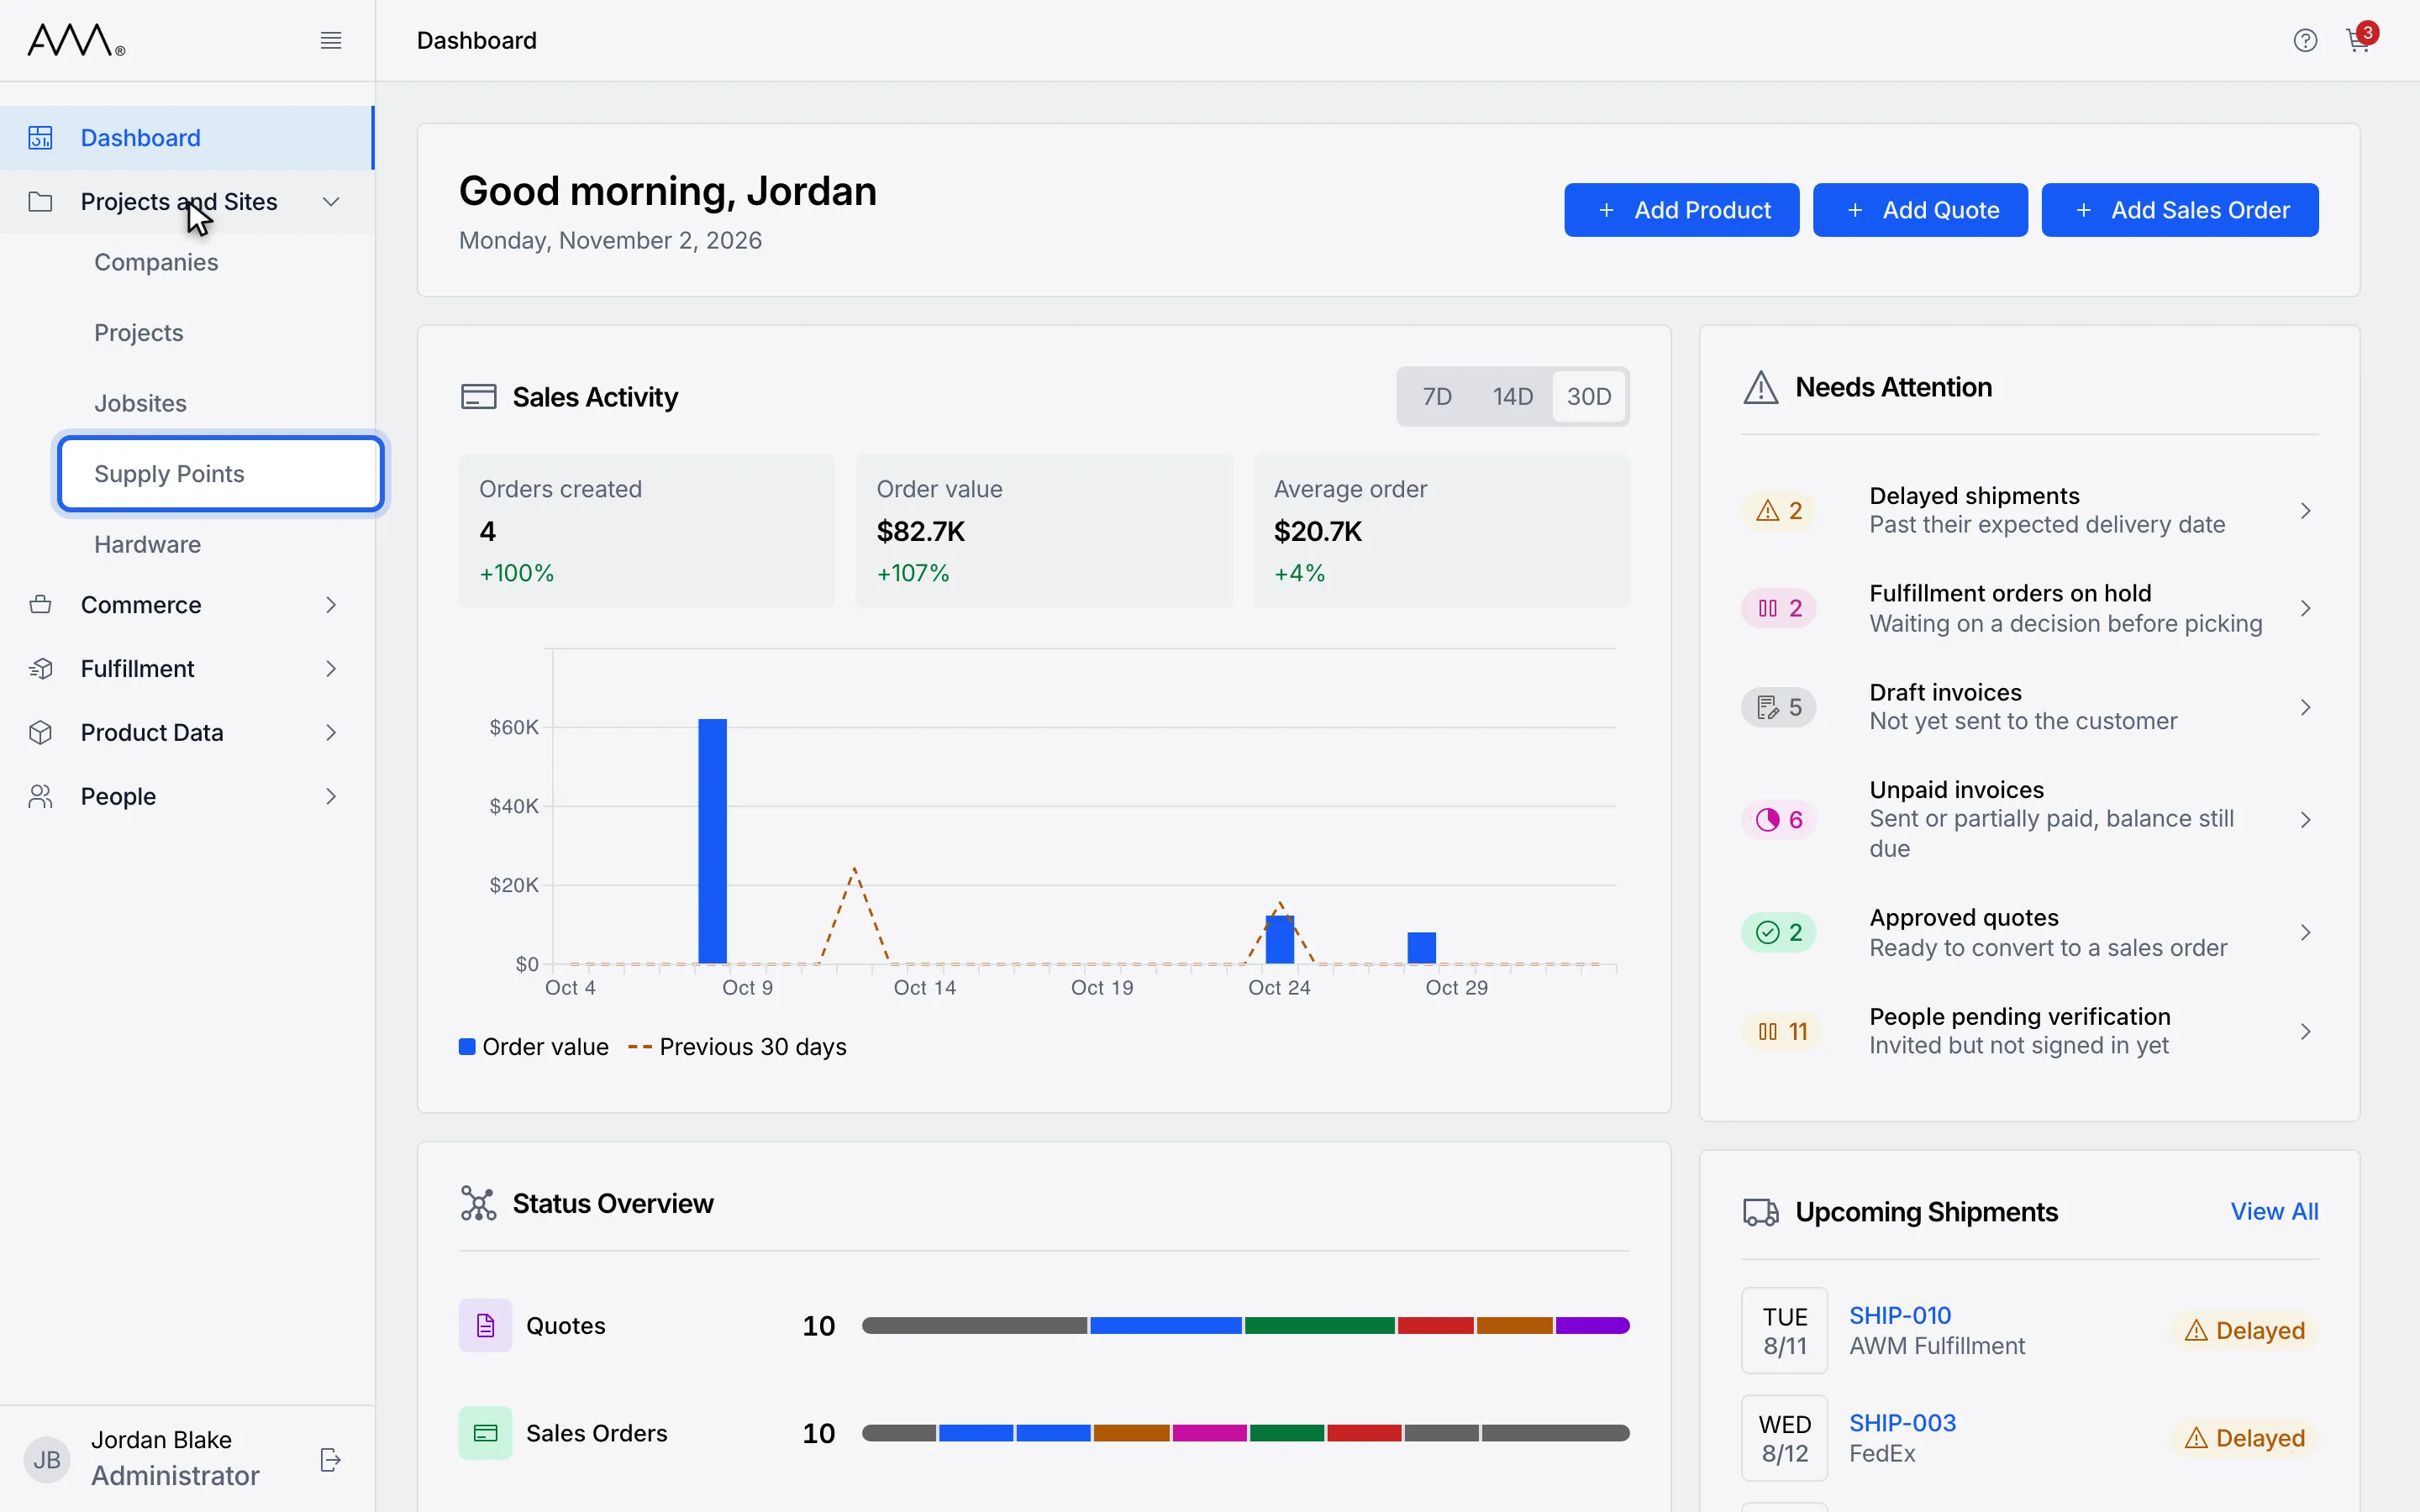
2Choose Supply Points.
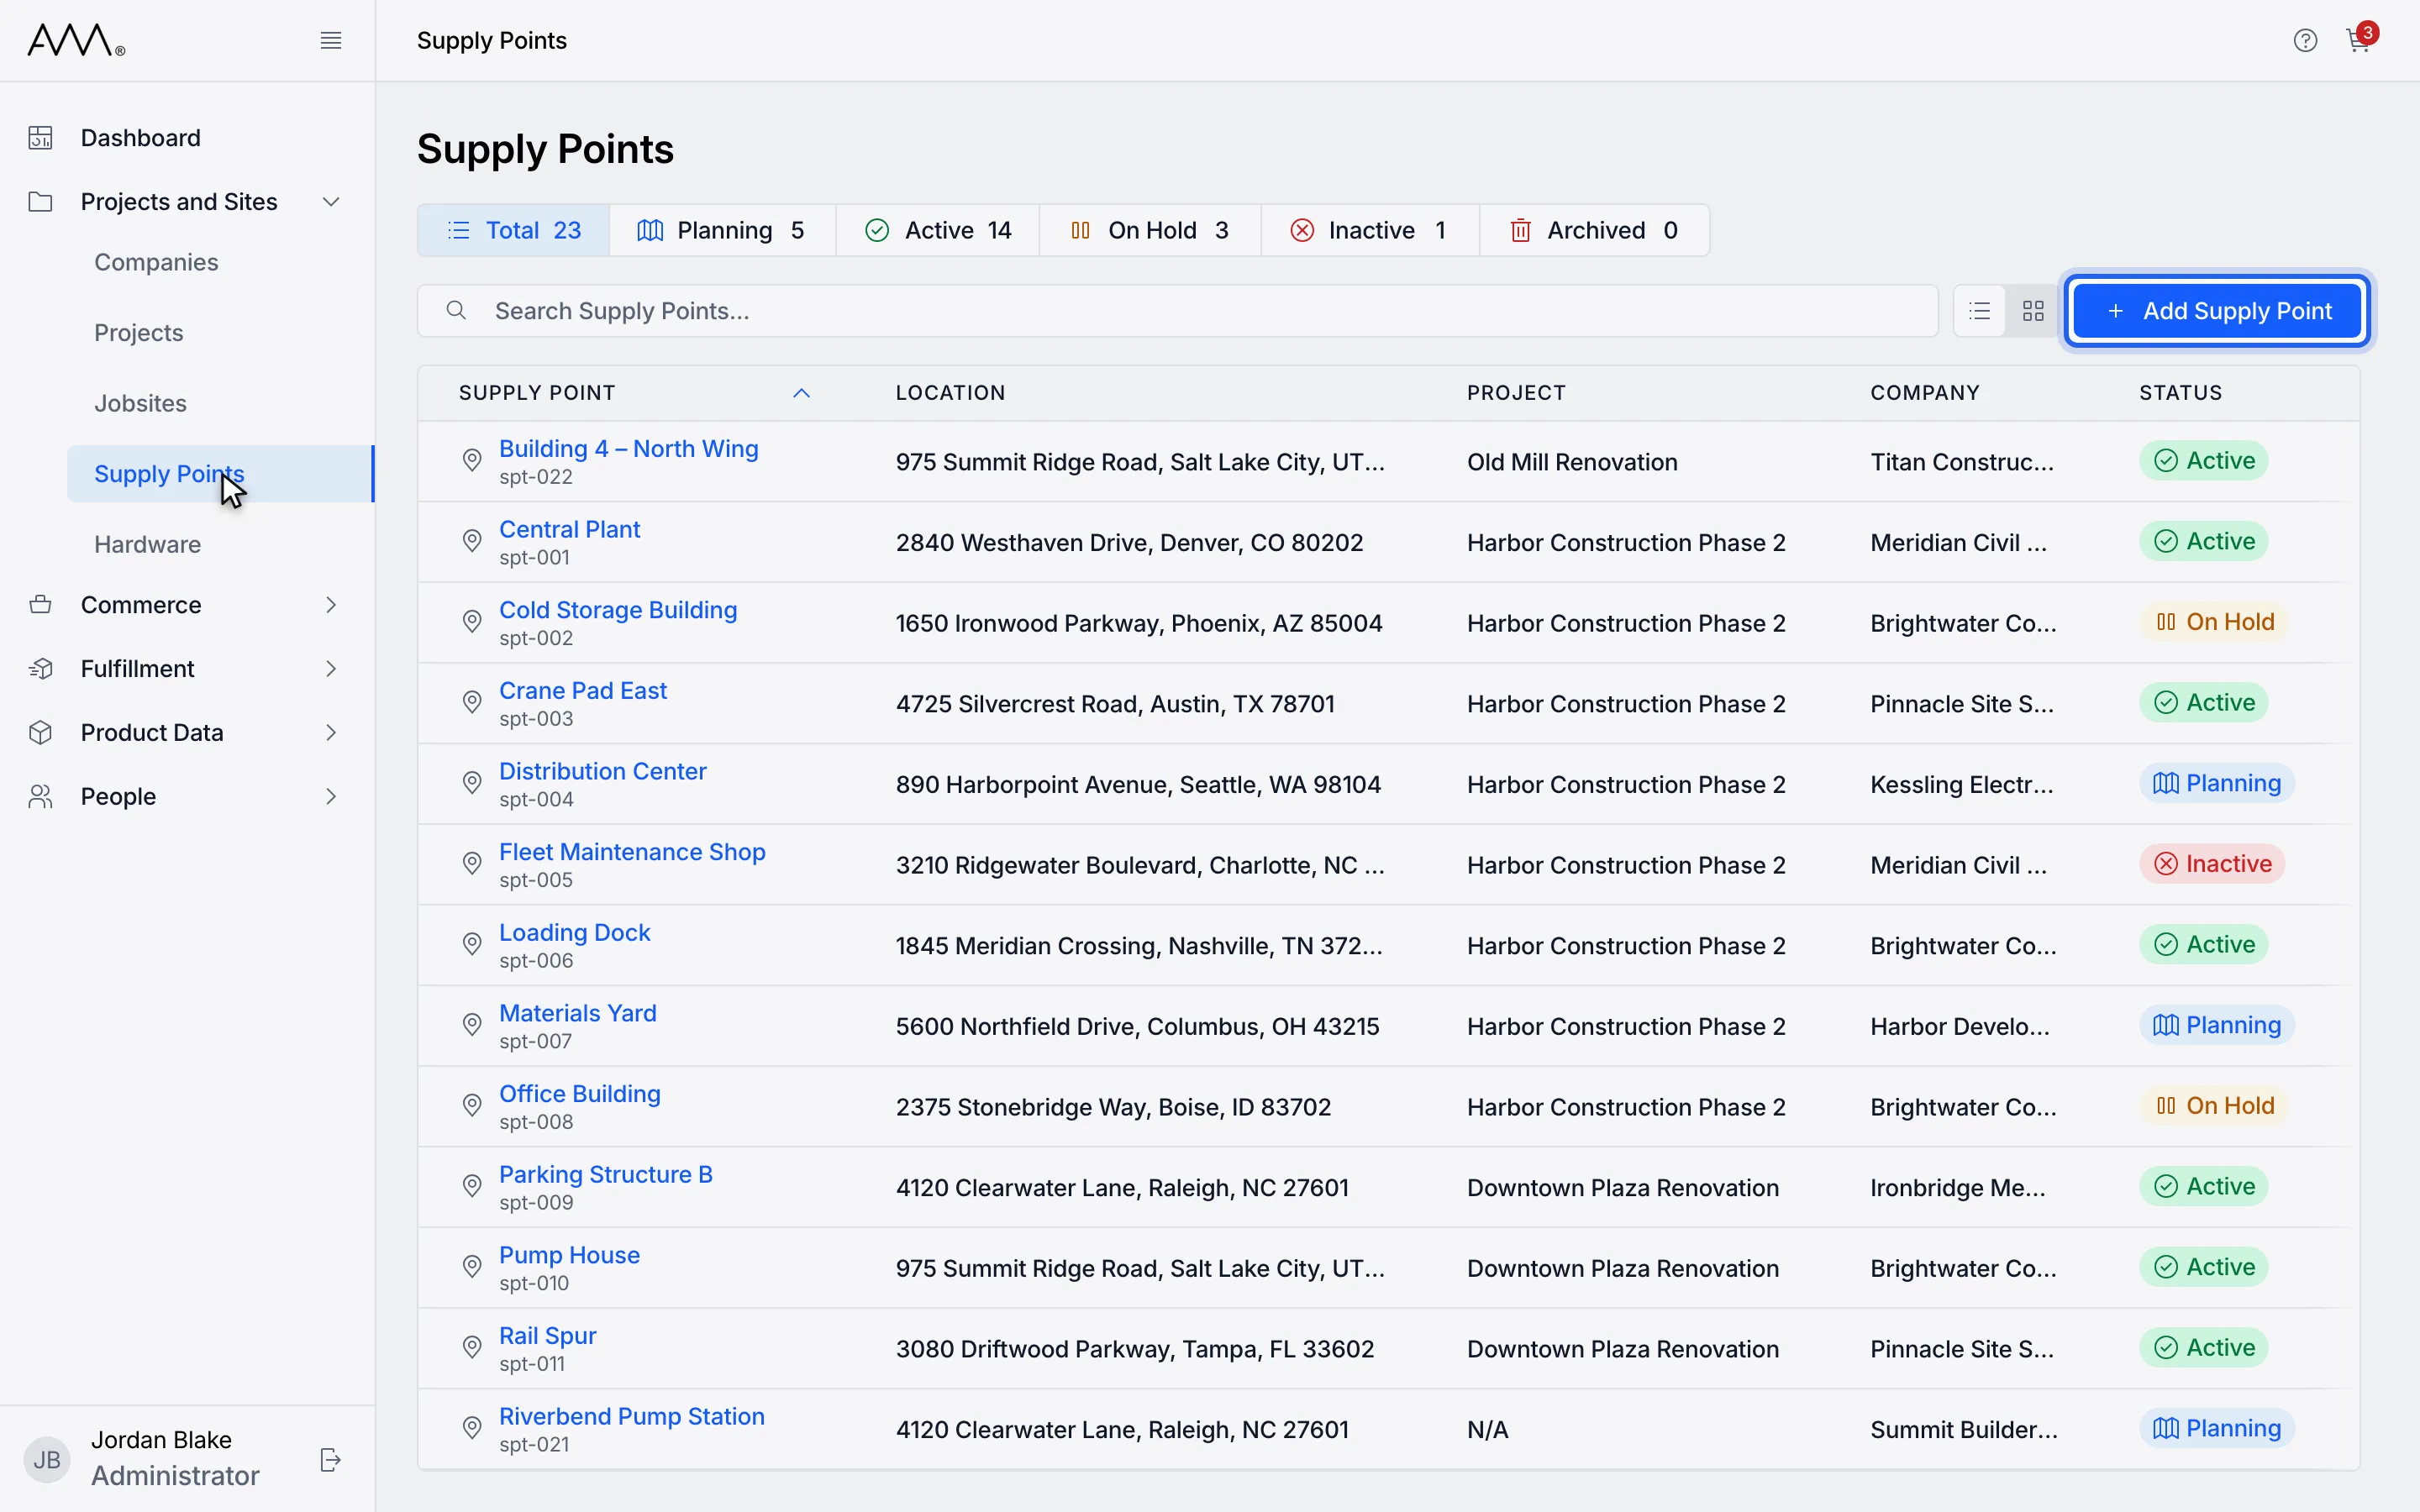
3Click Add Supply Point.
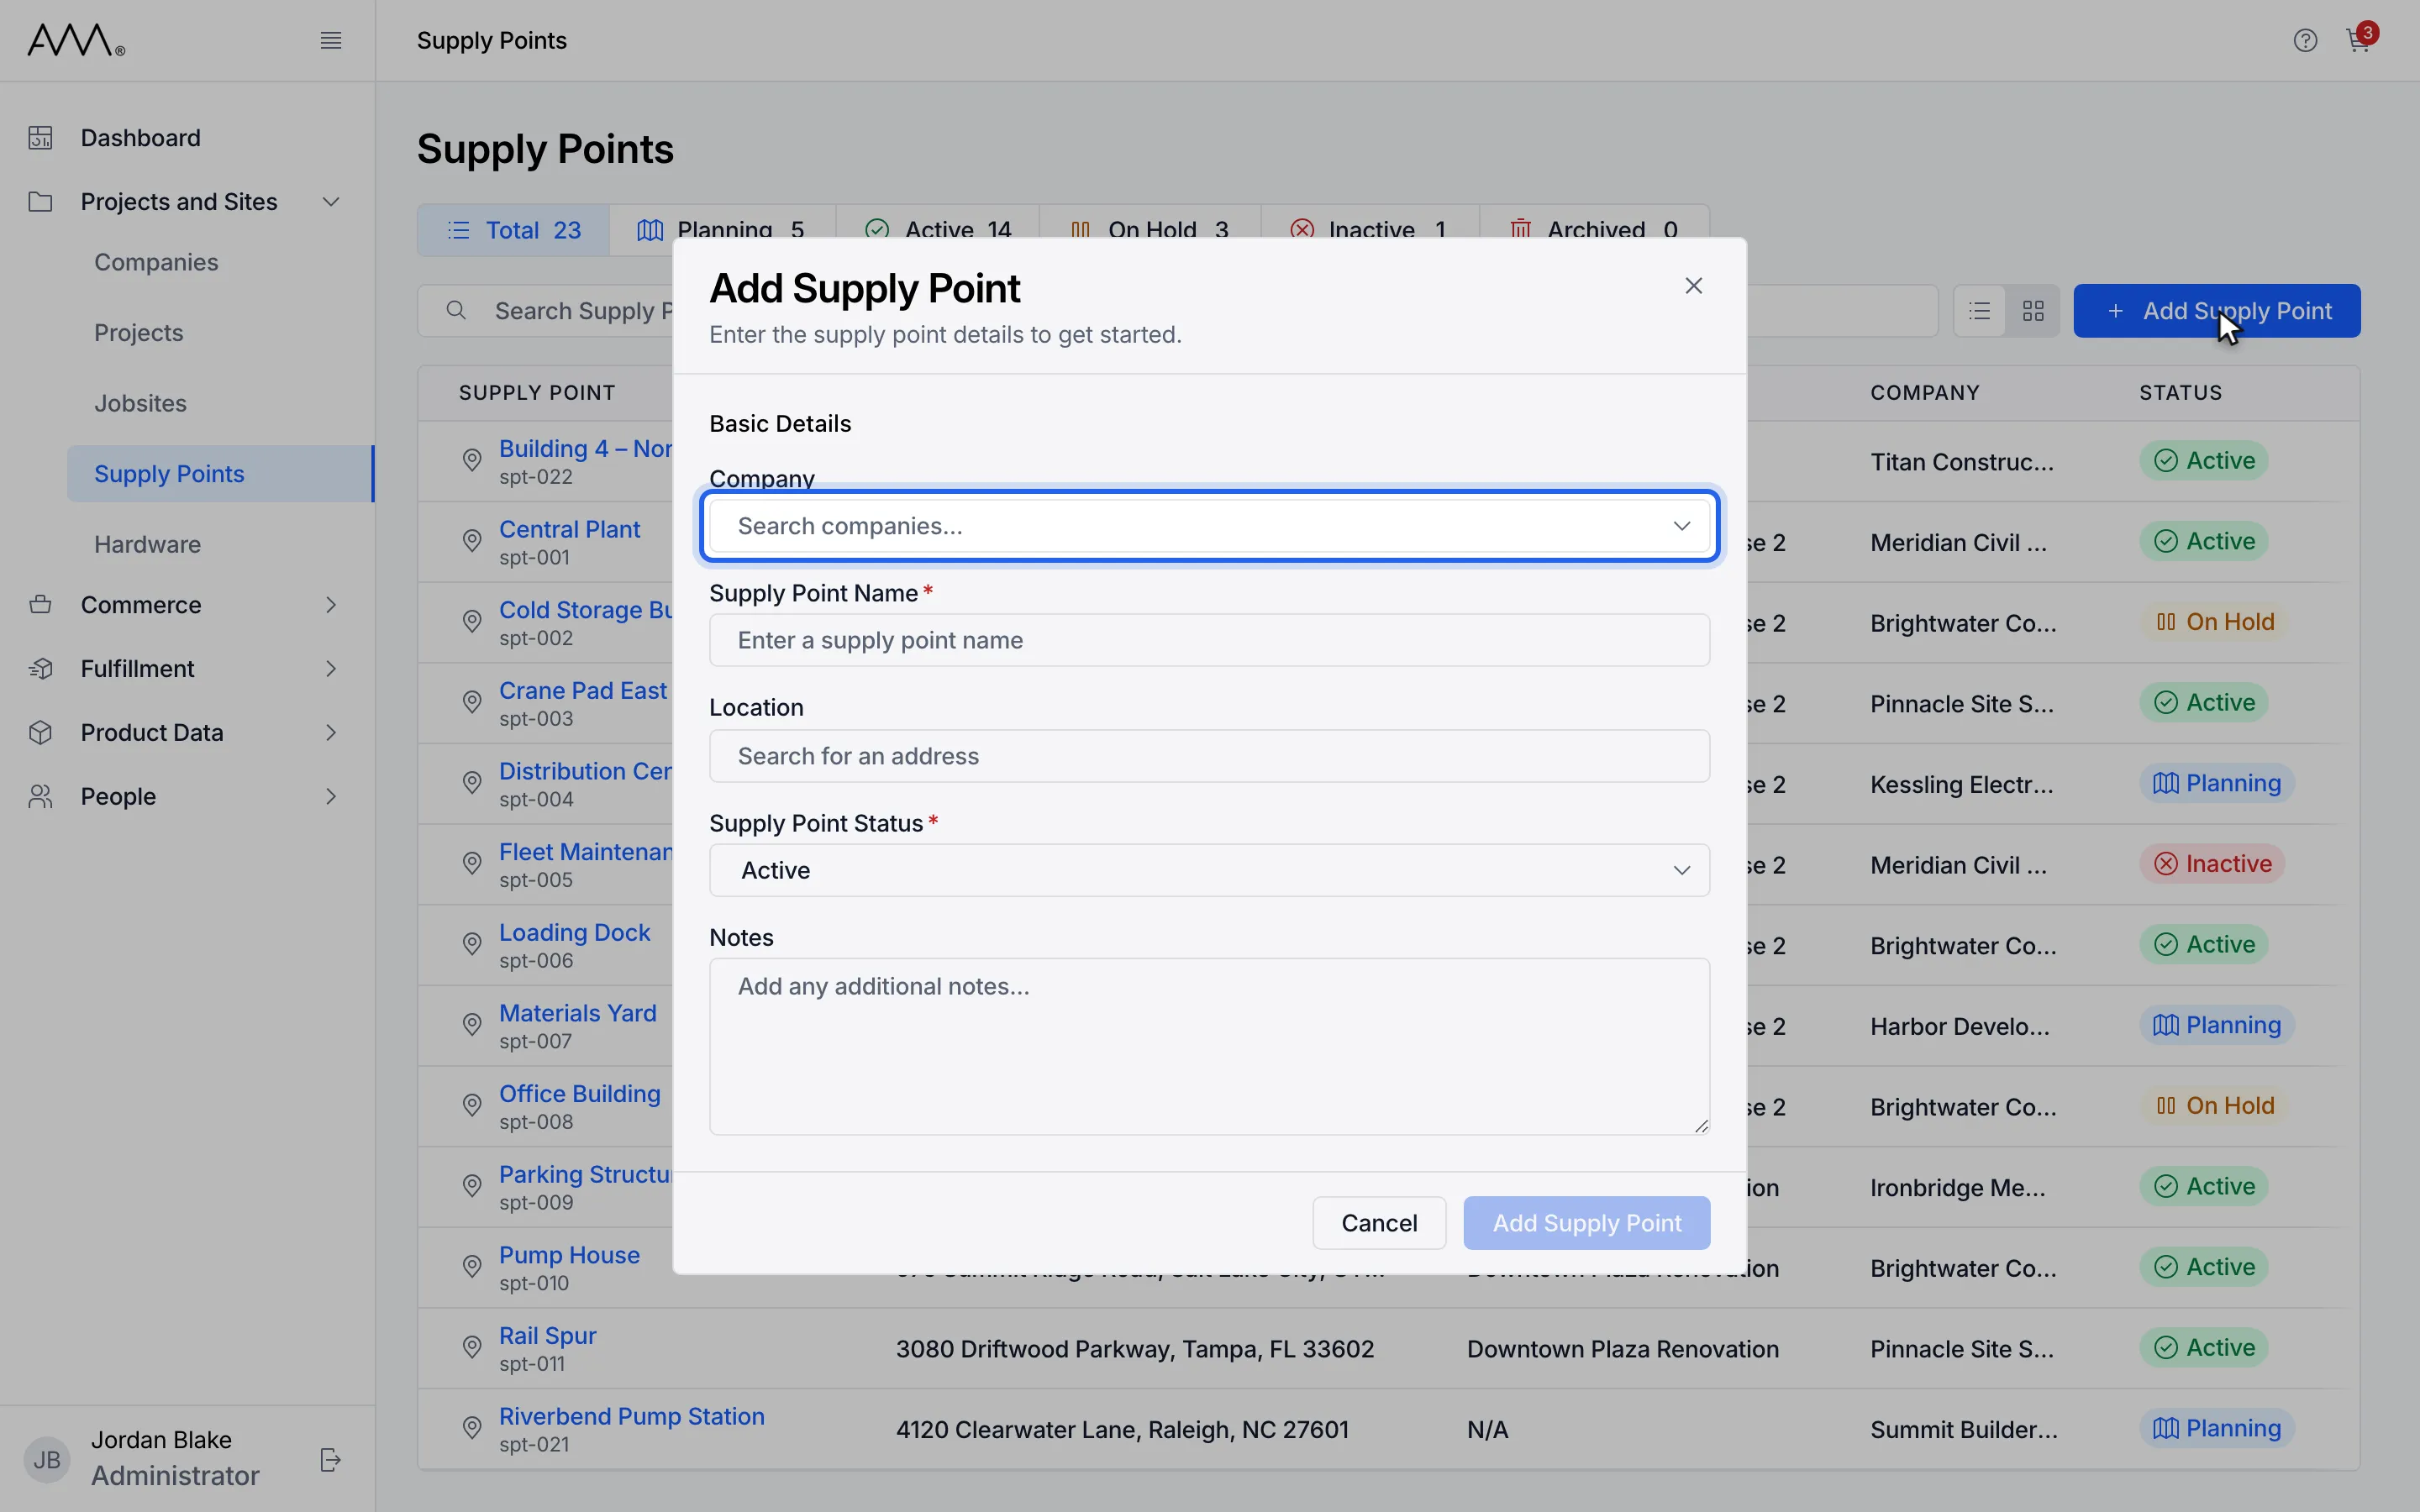
4Optionally, under Company, type part of the company name.
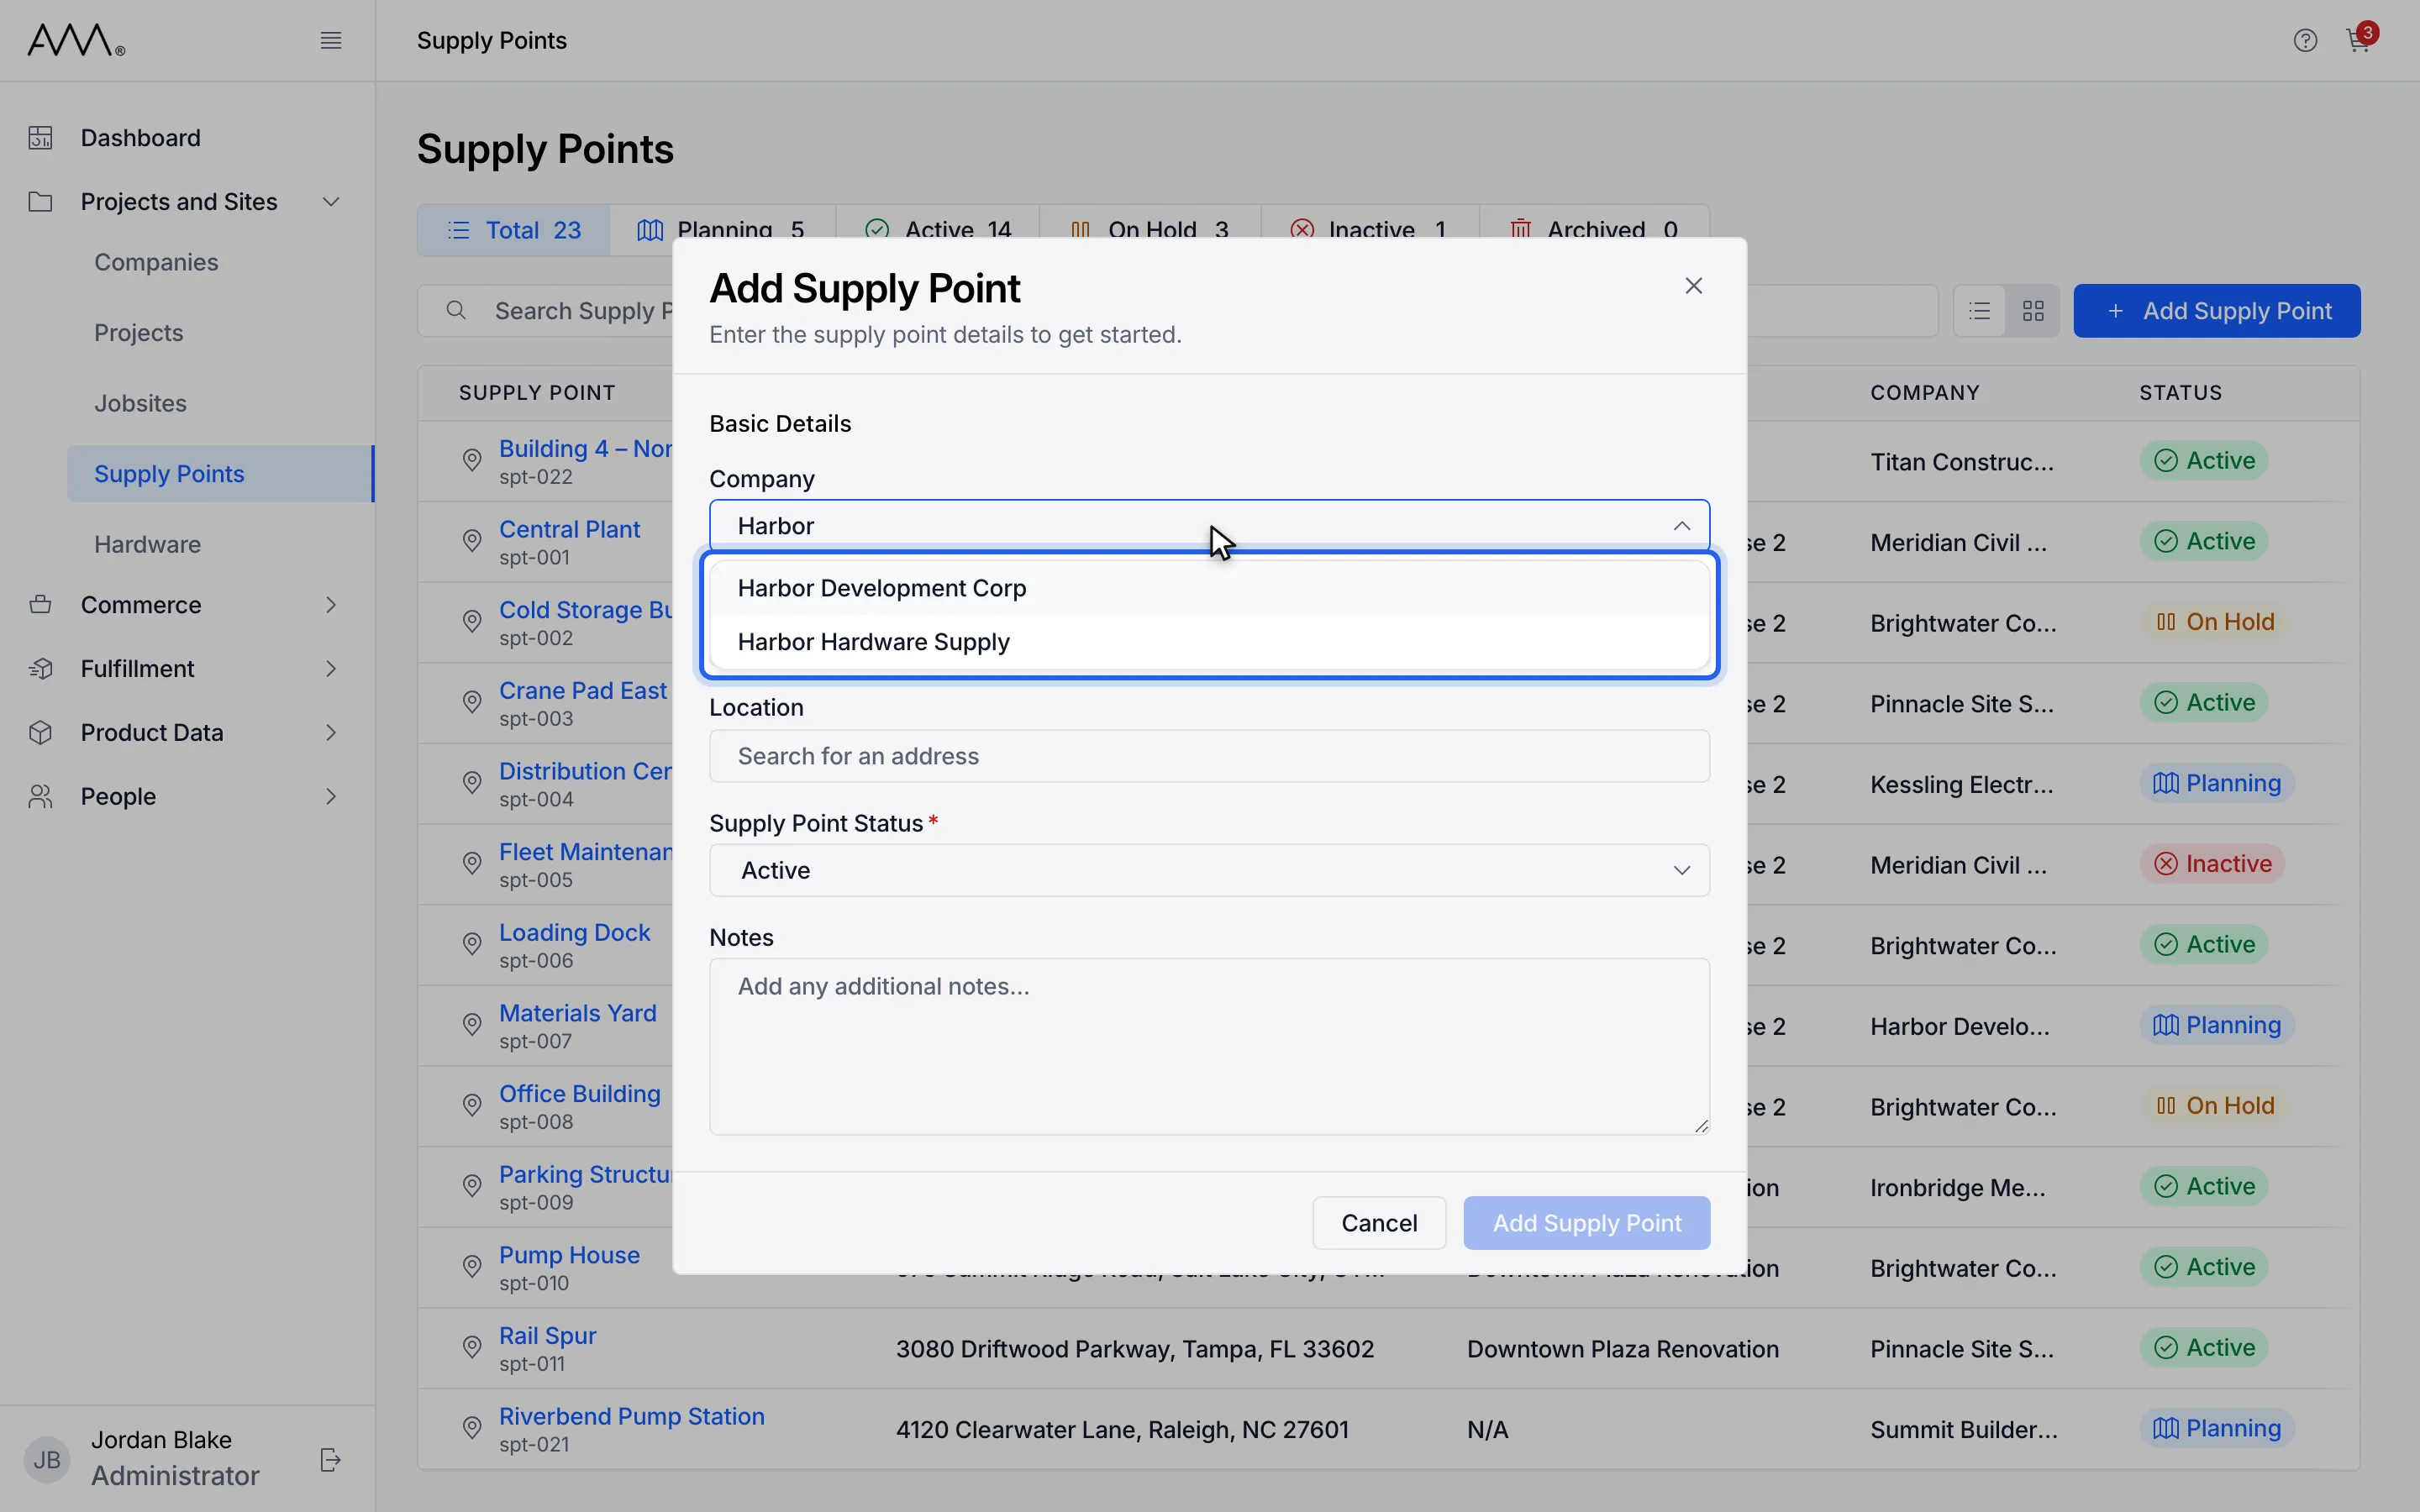
5Pick the company from the suggestions.
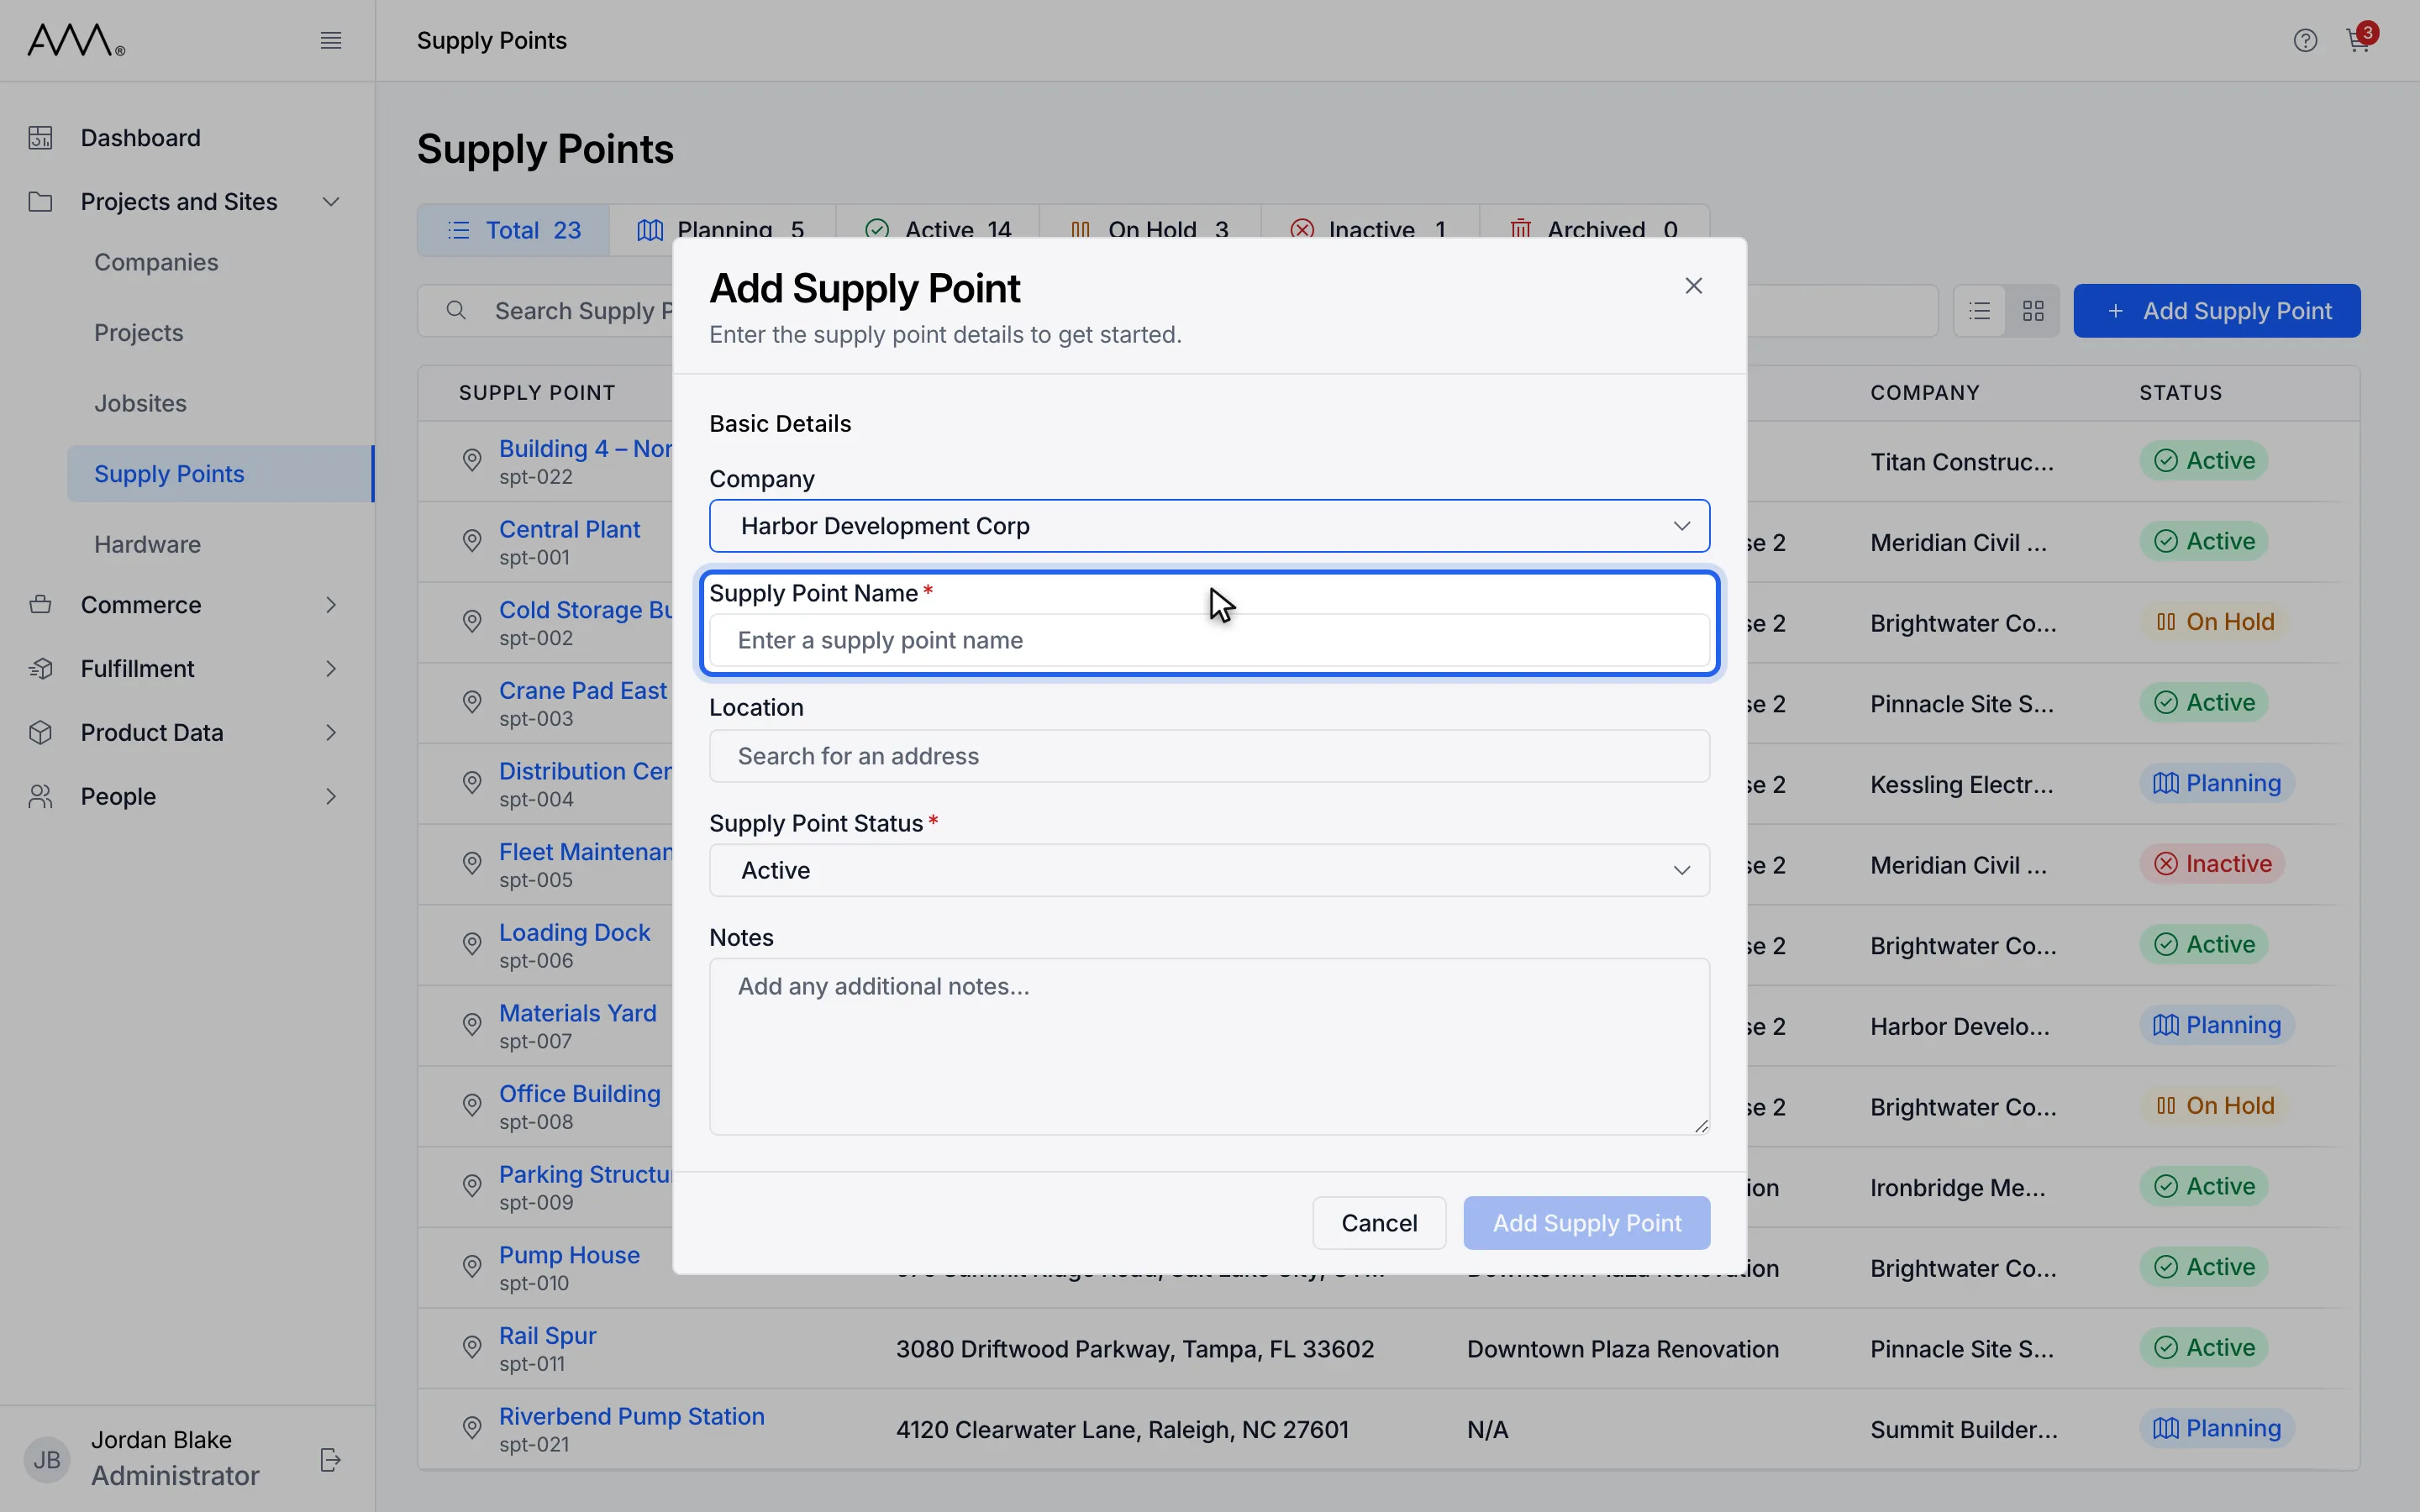
6Enter the Supply Point Name.
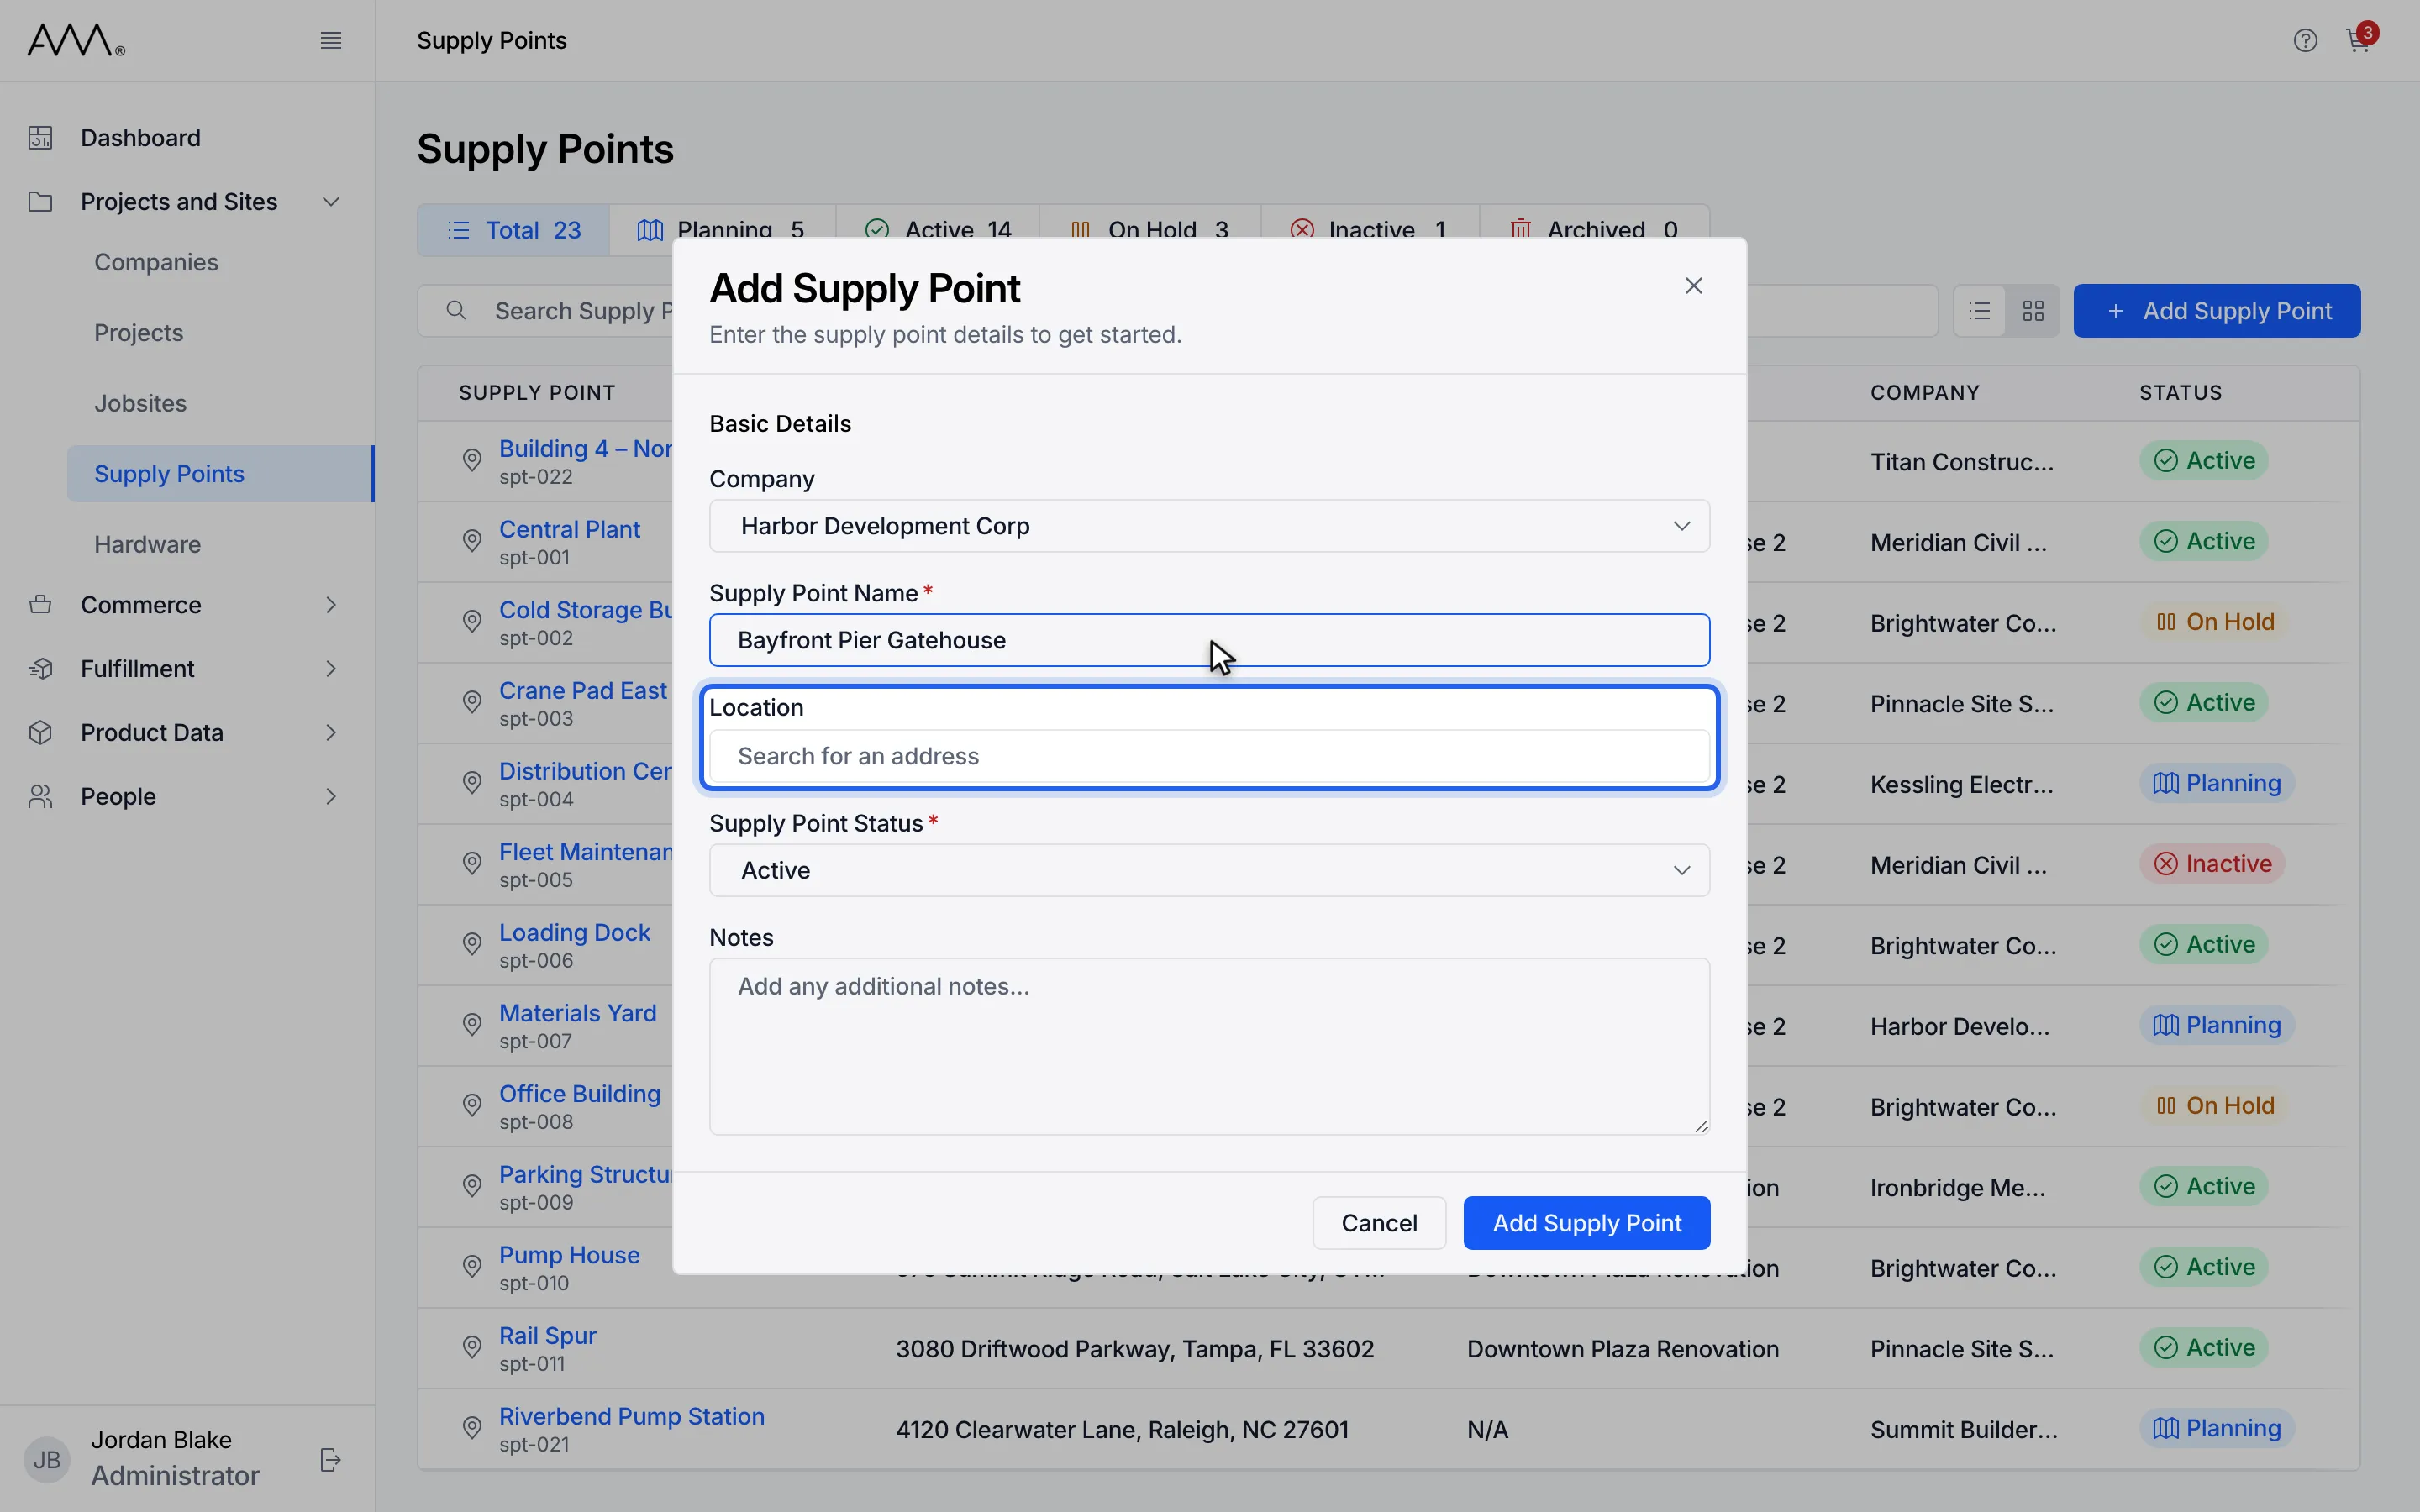
7Optionally type the Location, or pick an address suggestion if one appears.
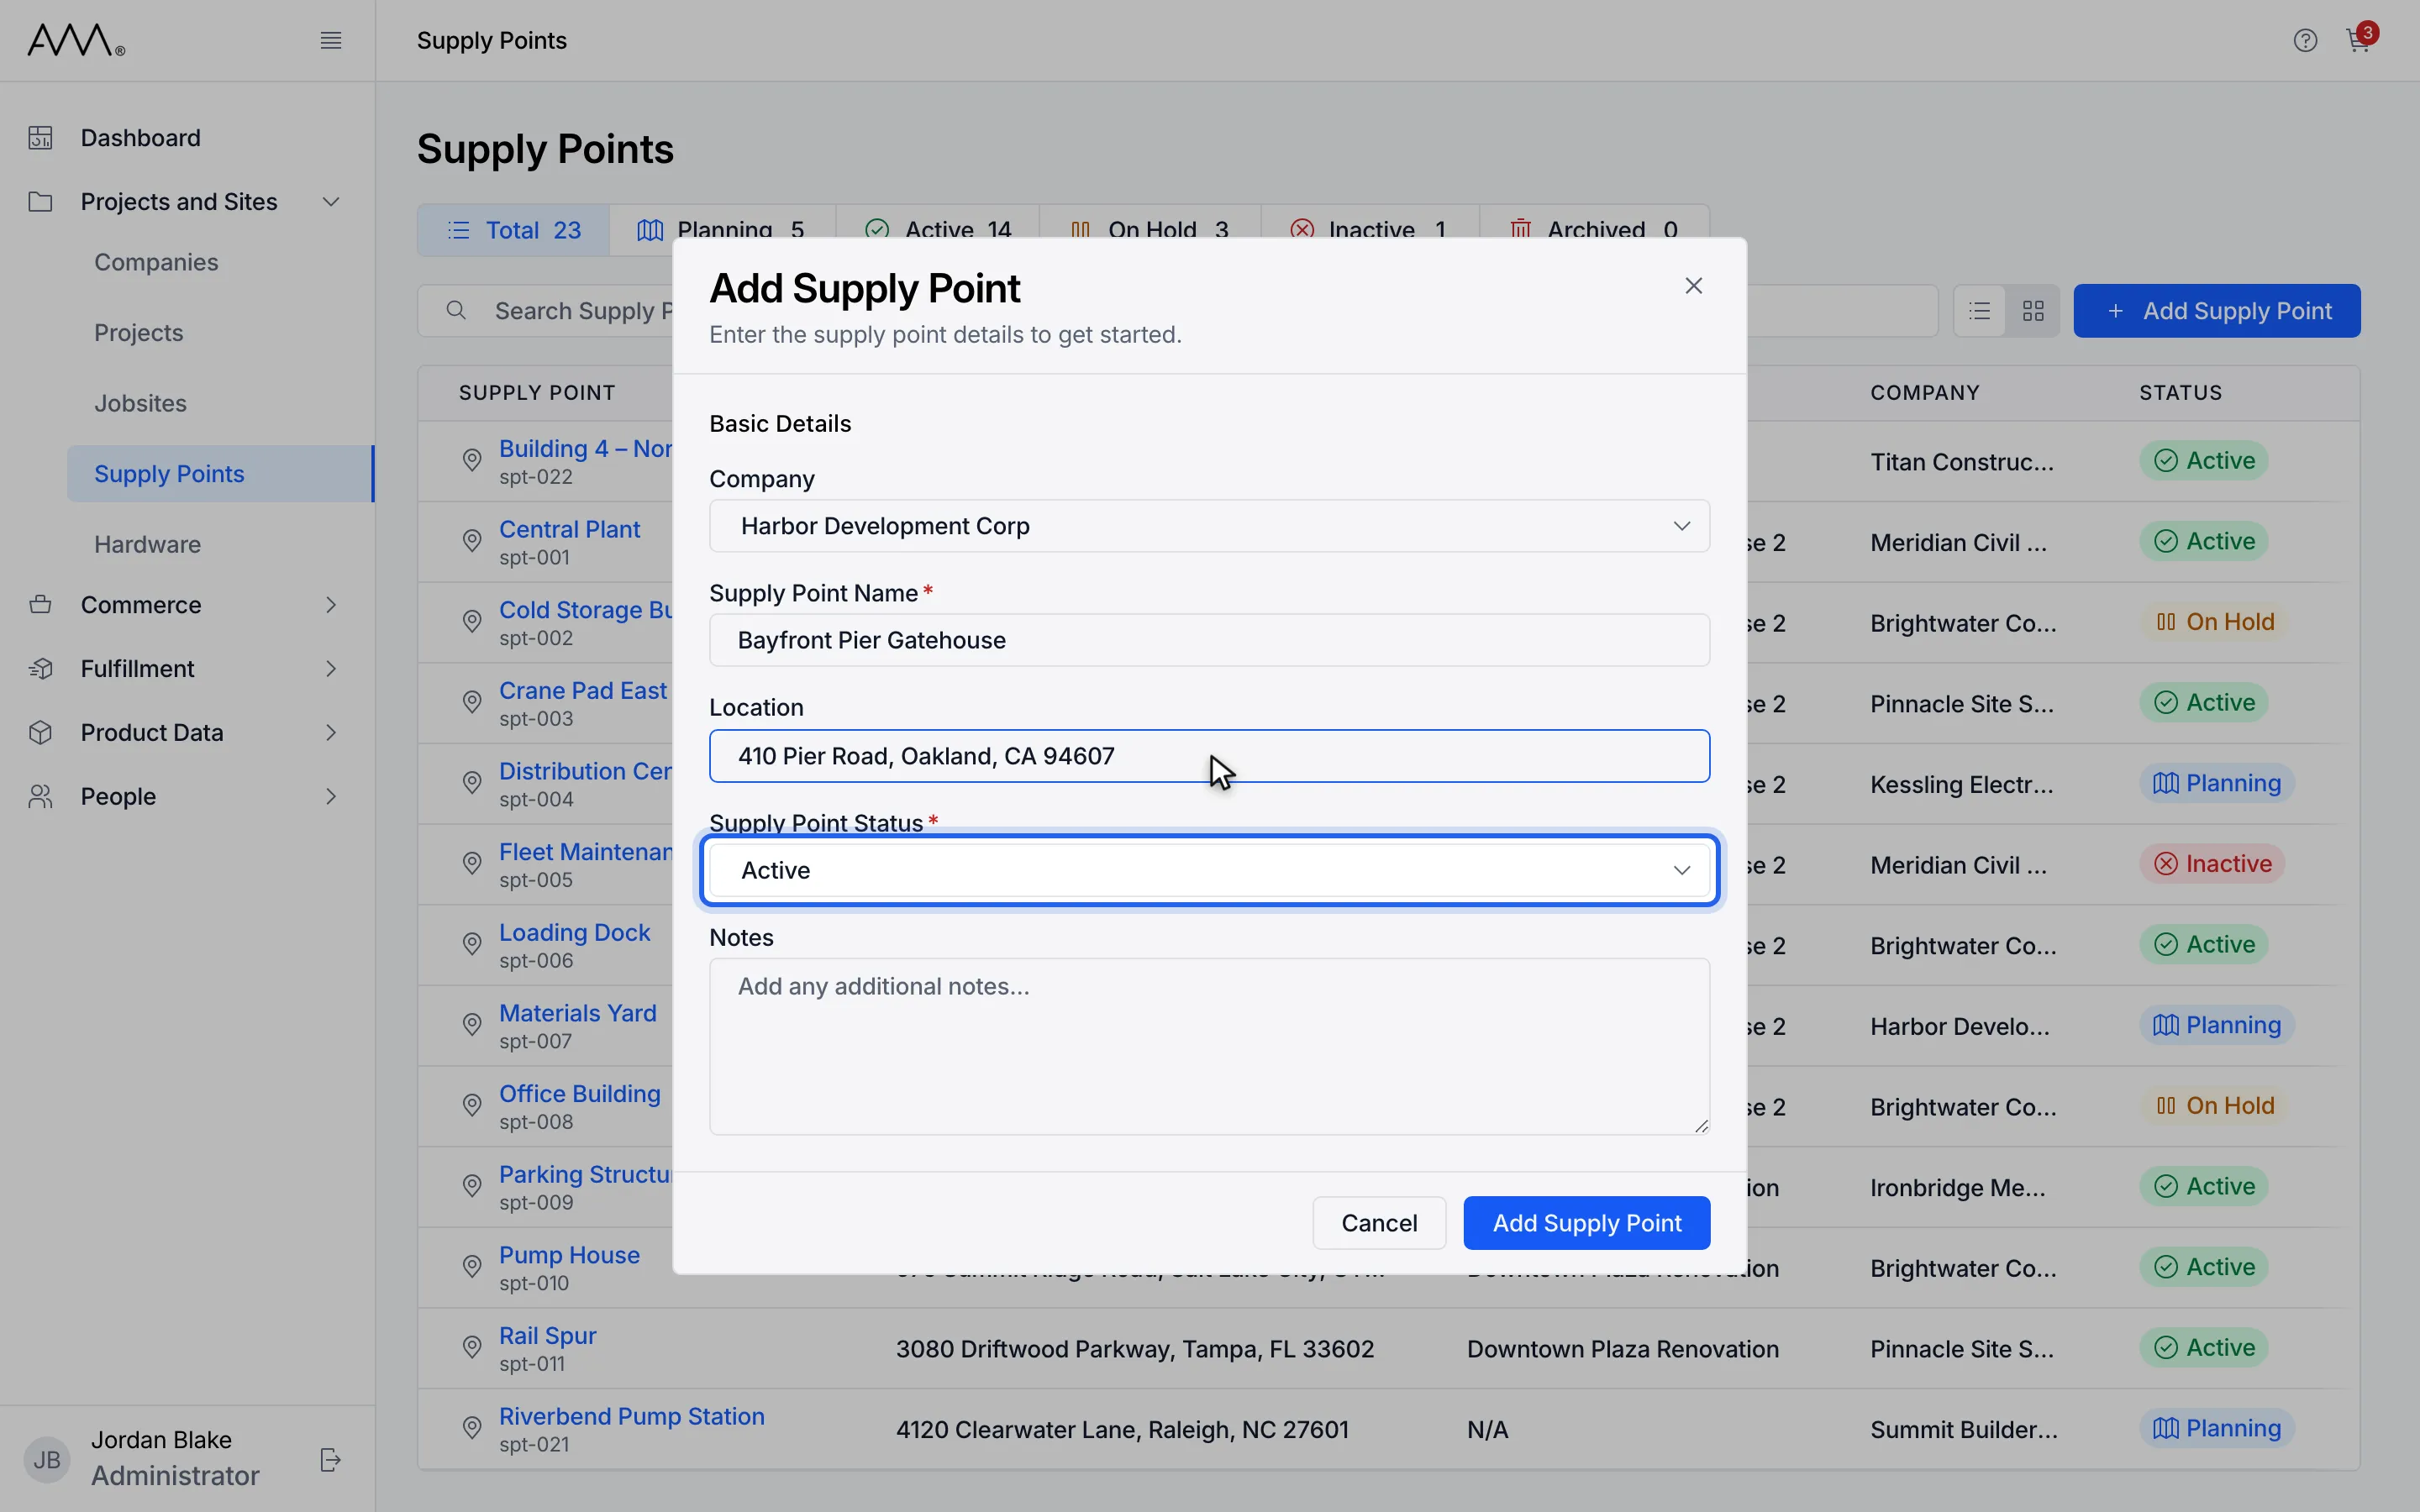
8Open Supply Point Status. New supply points start as Active.
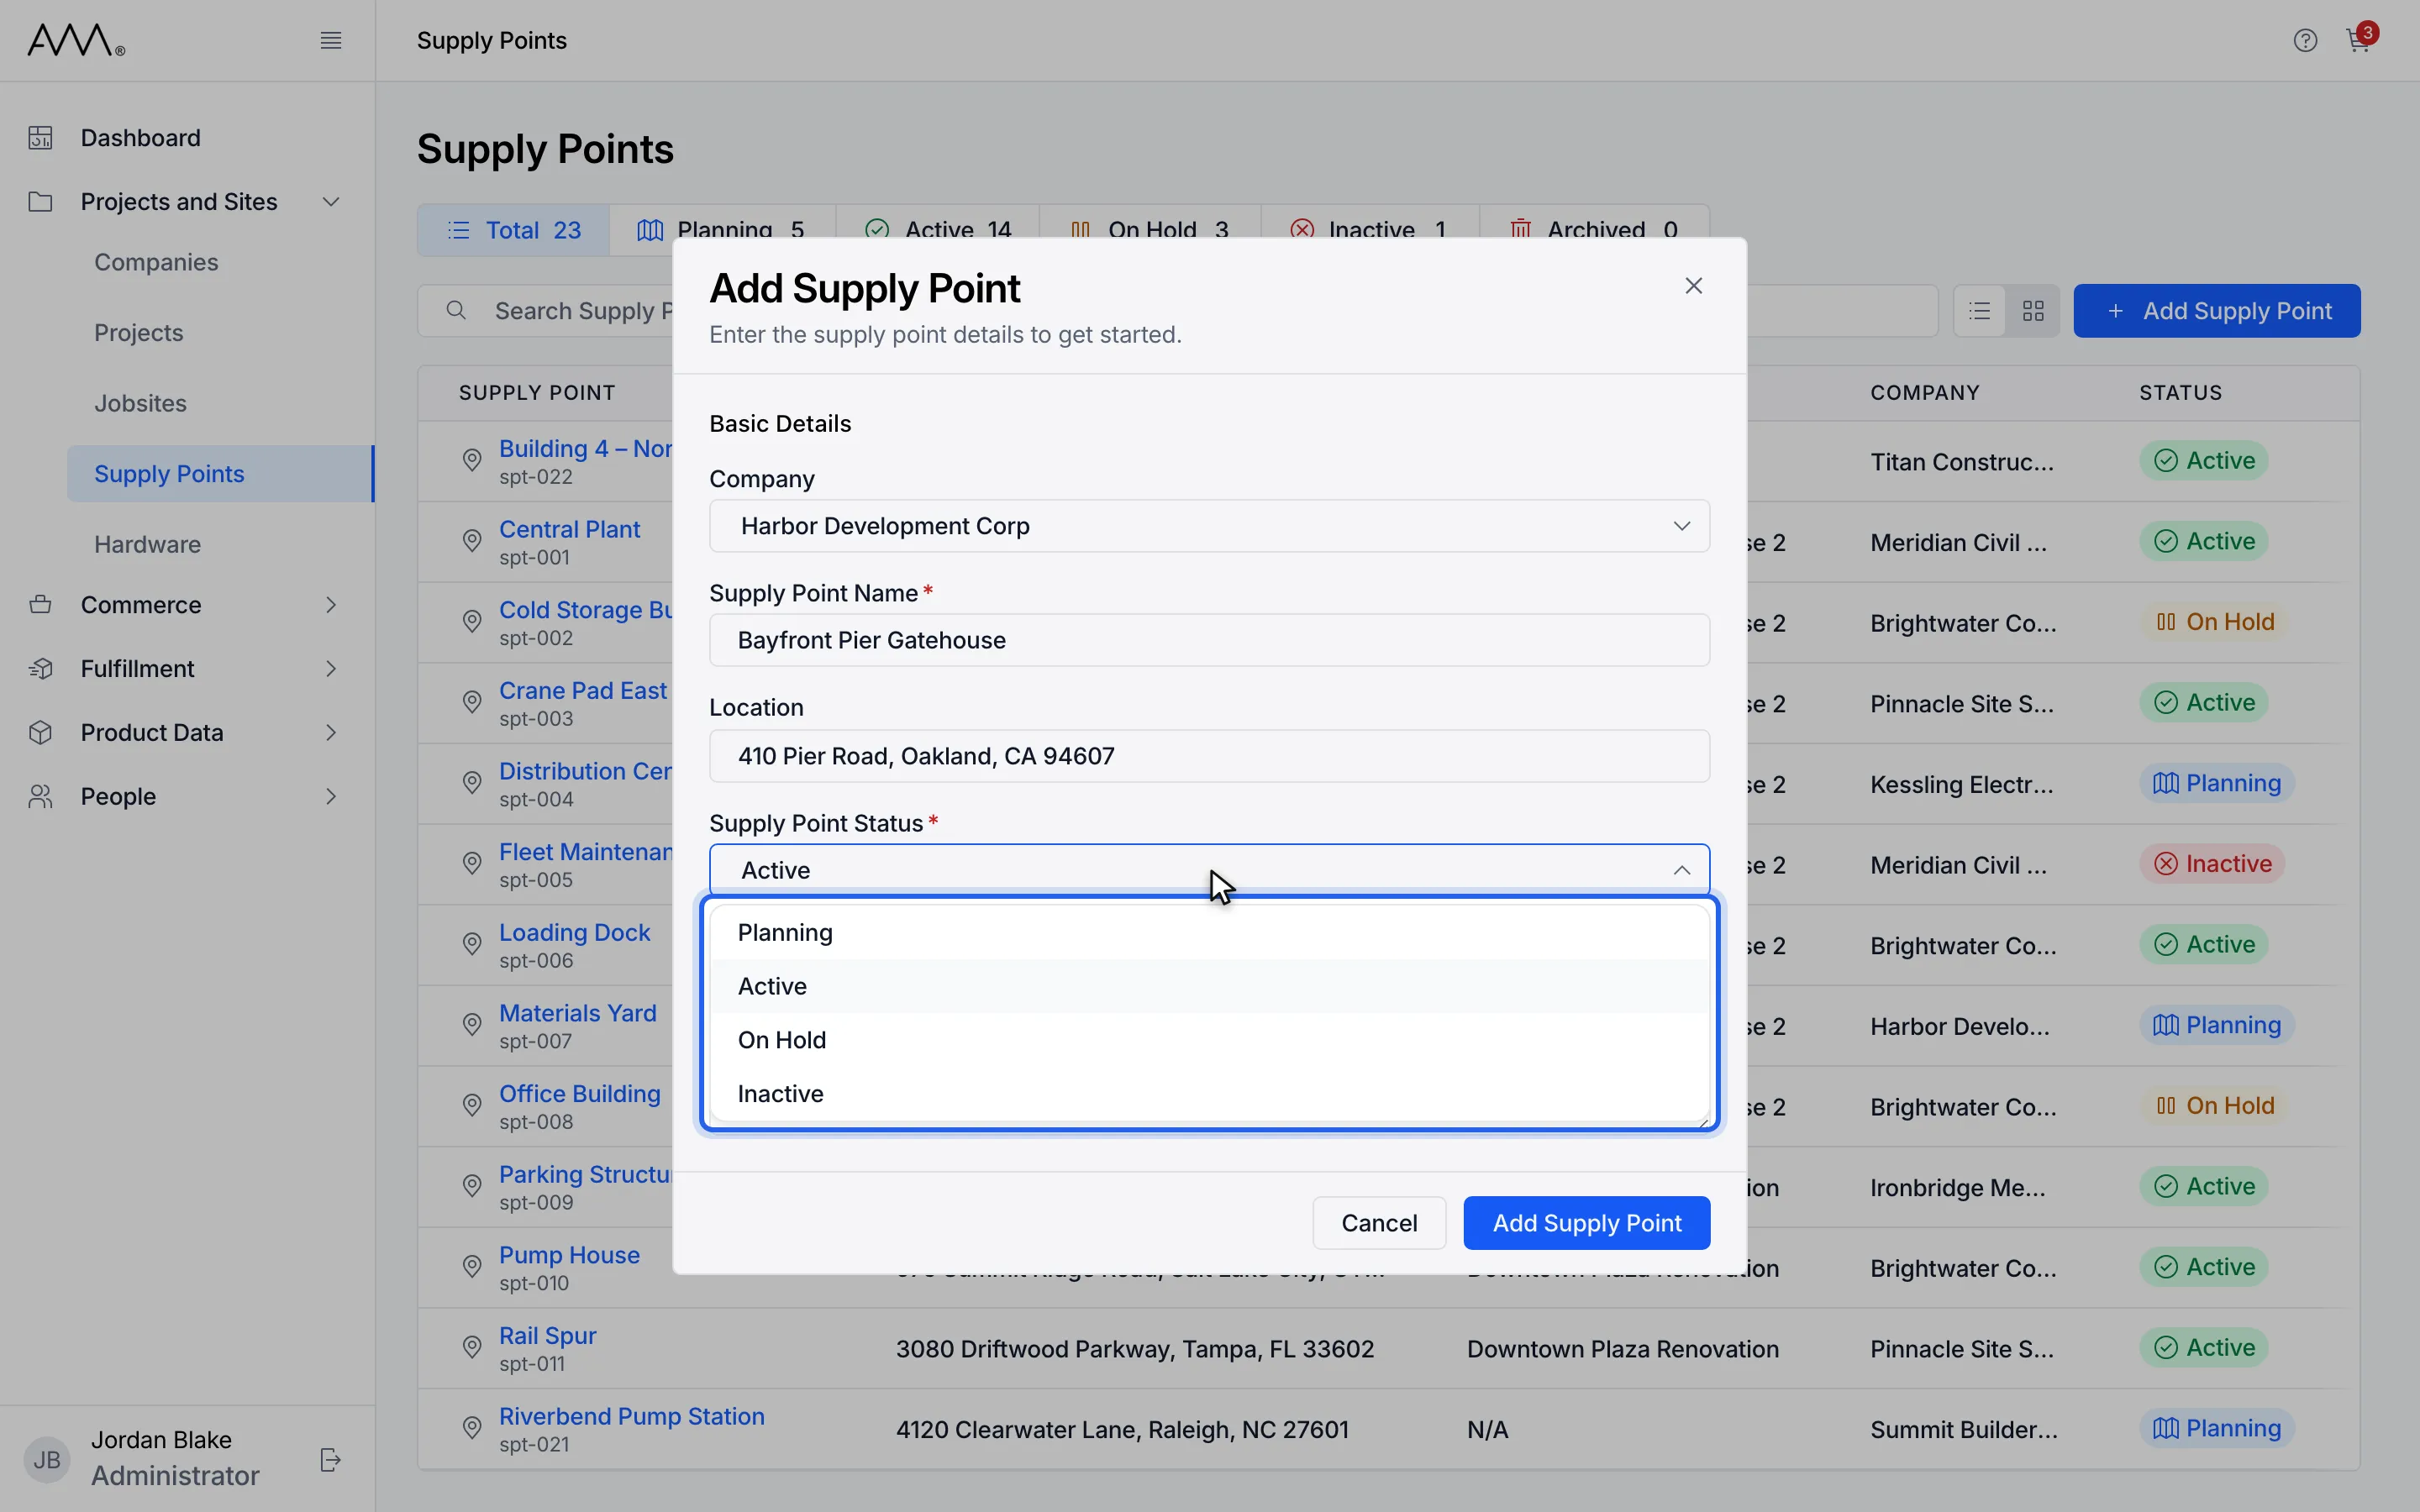
9Choose a status.
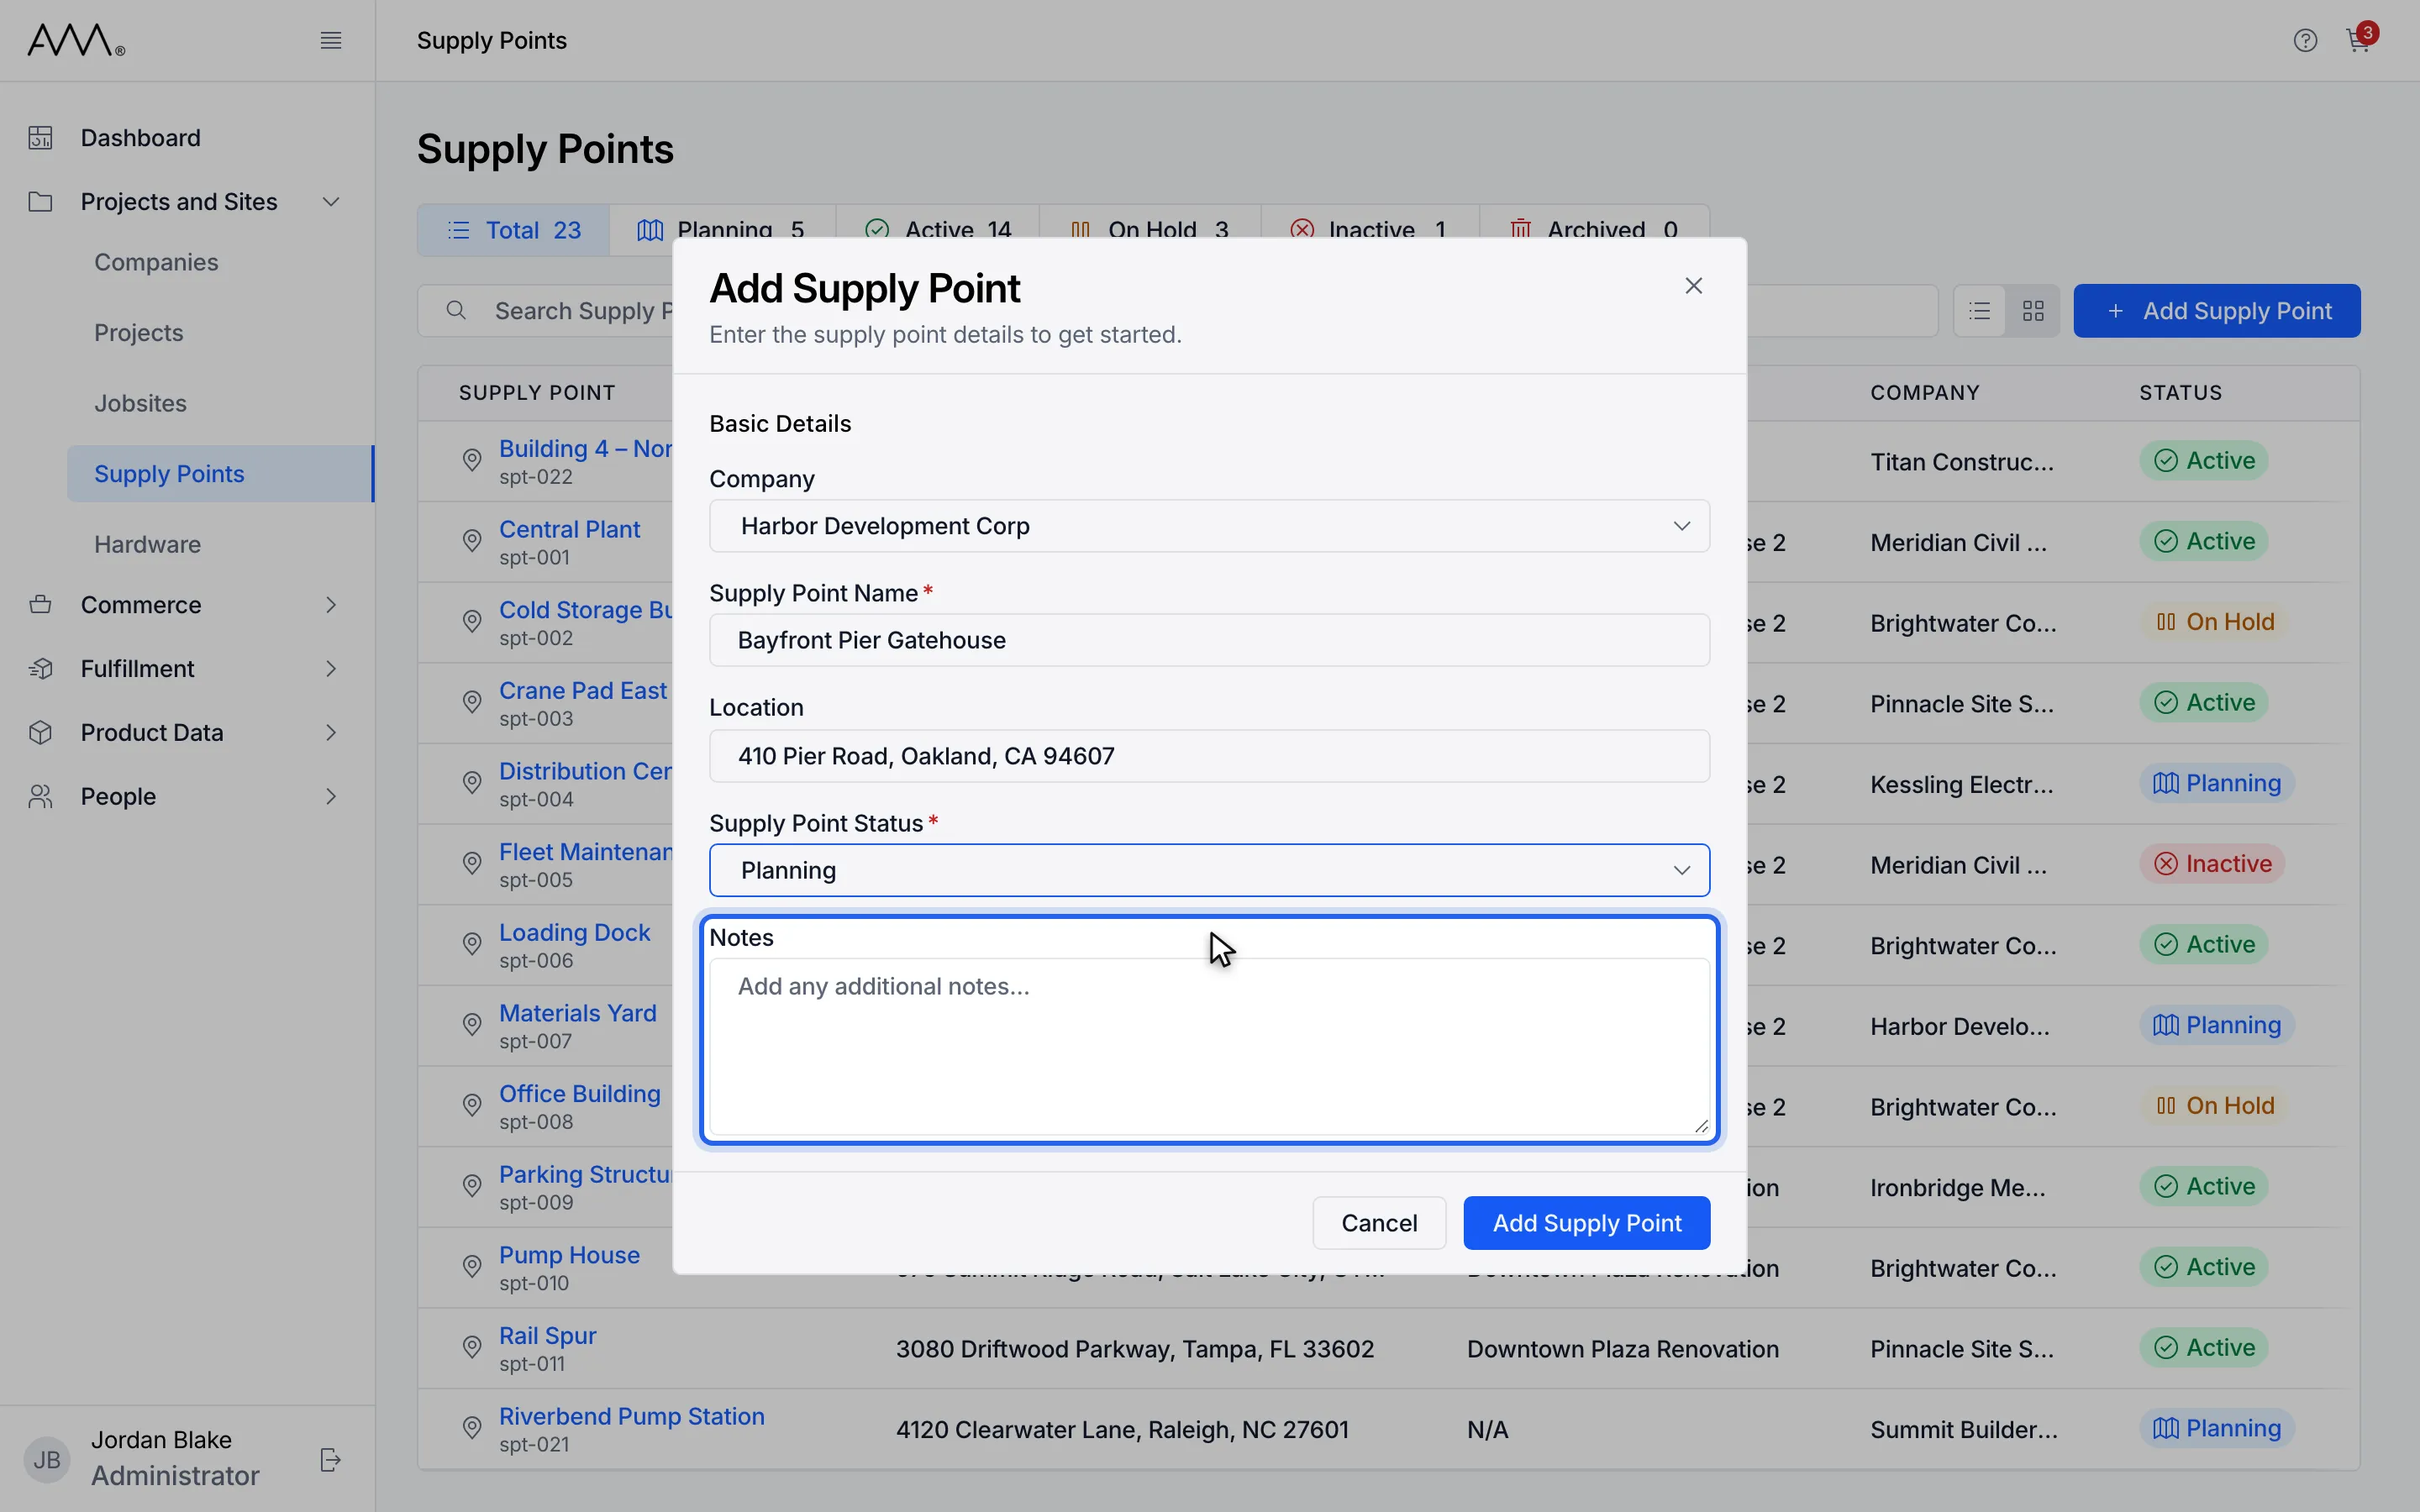
10Optionally add Notes.
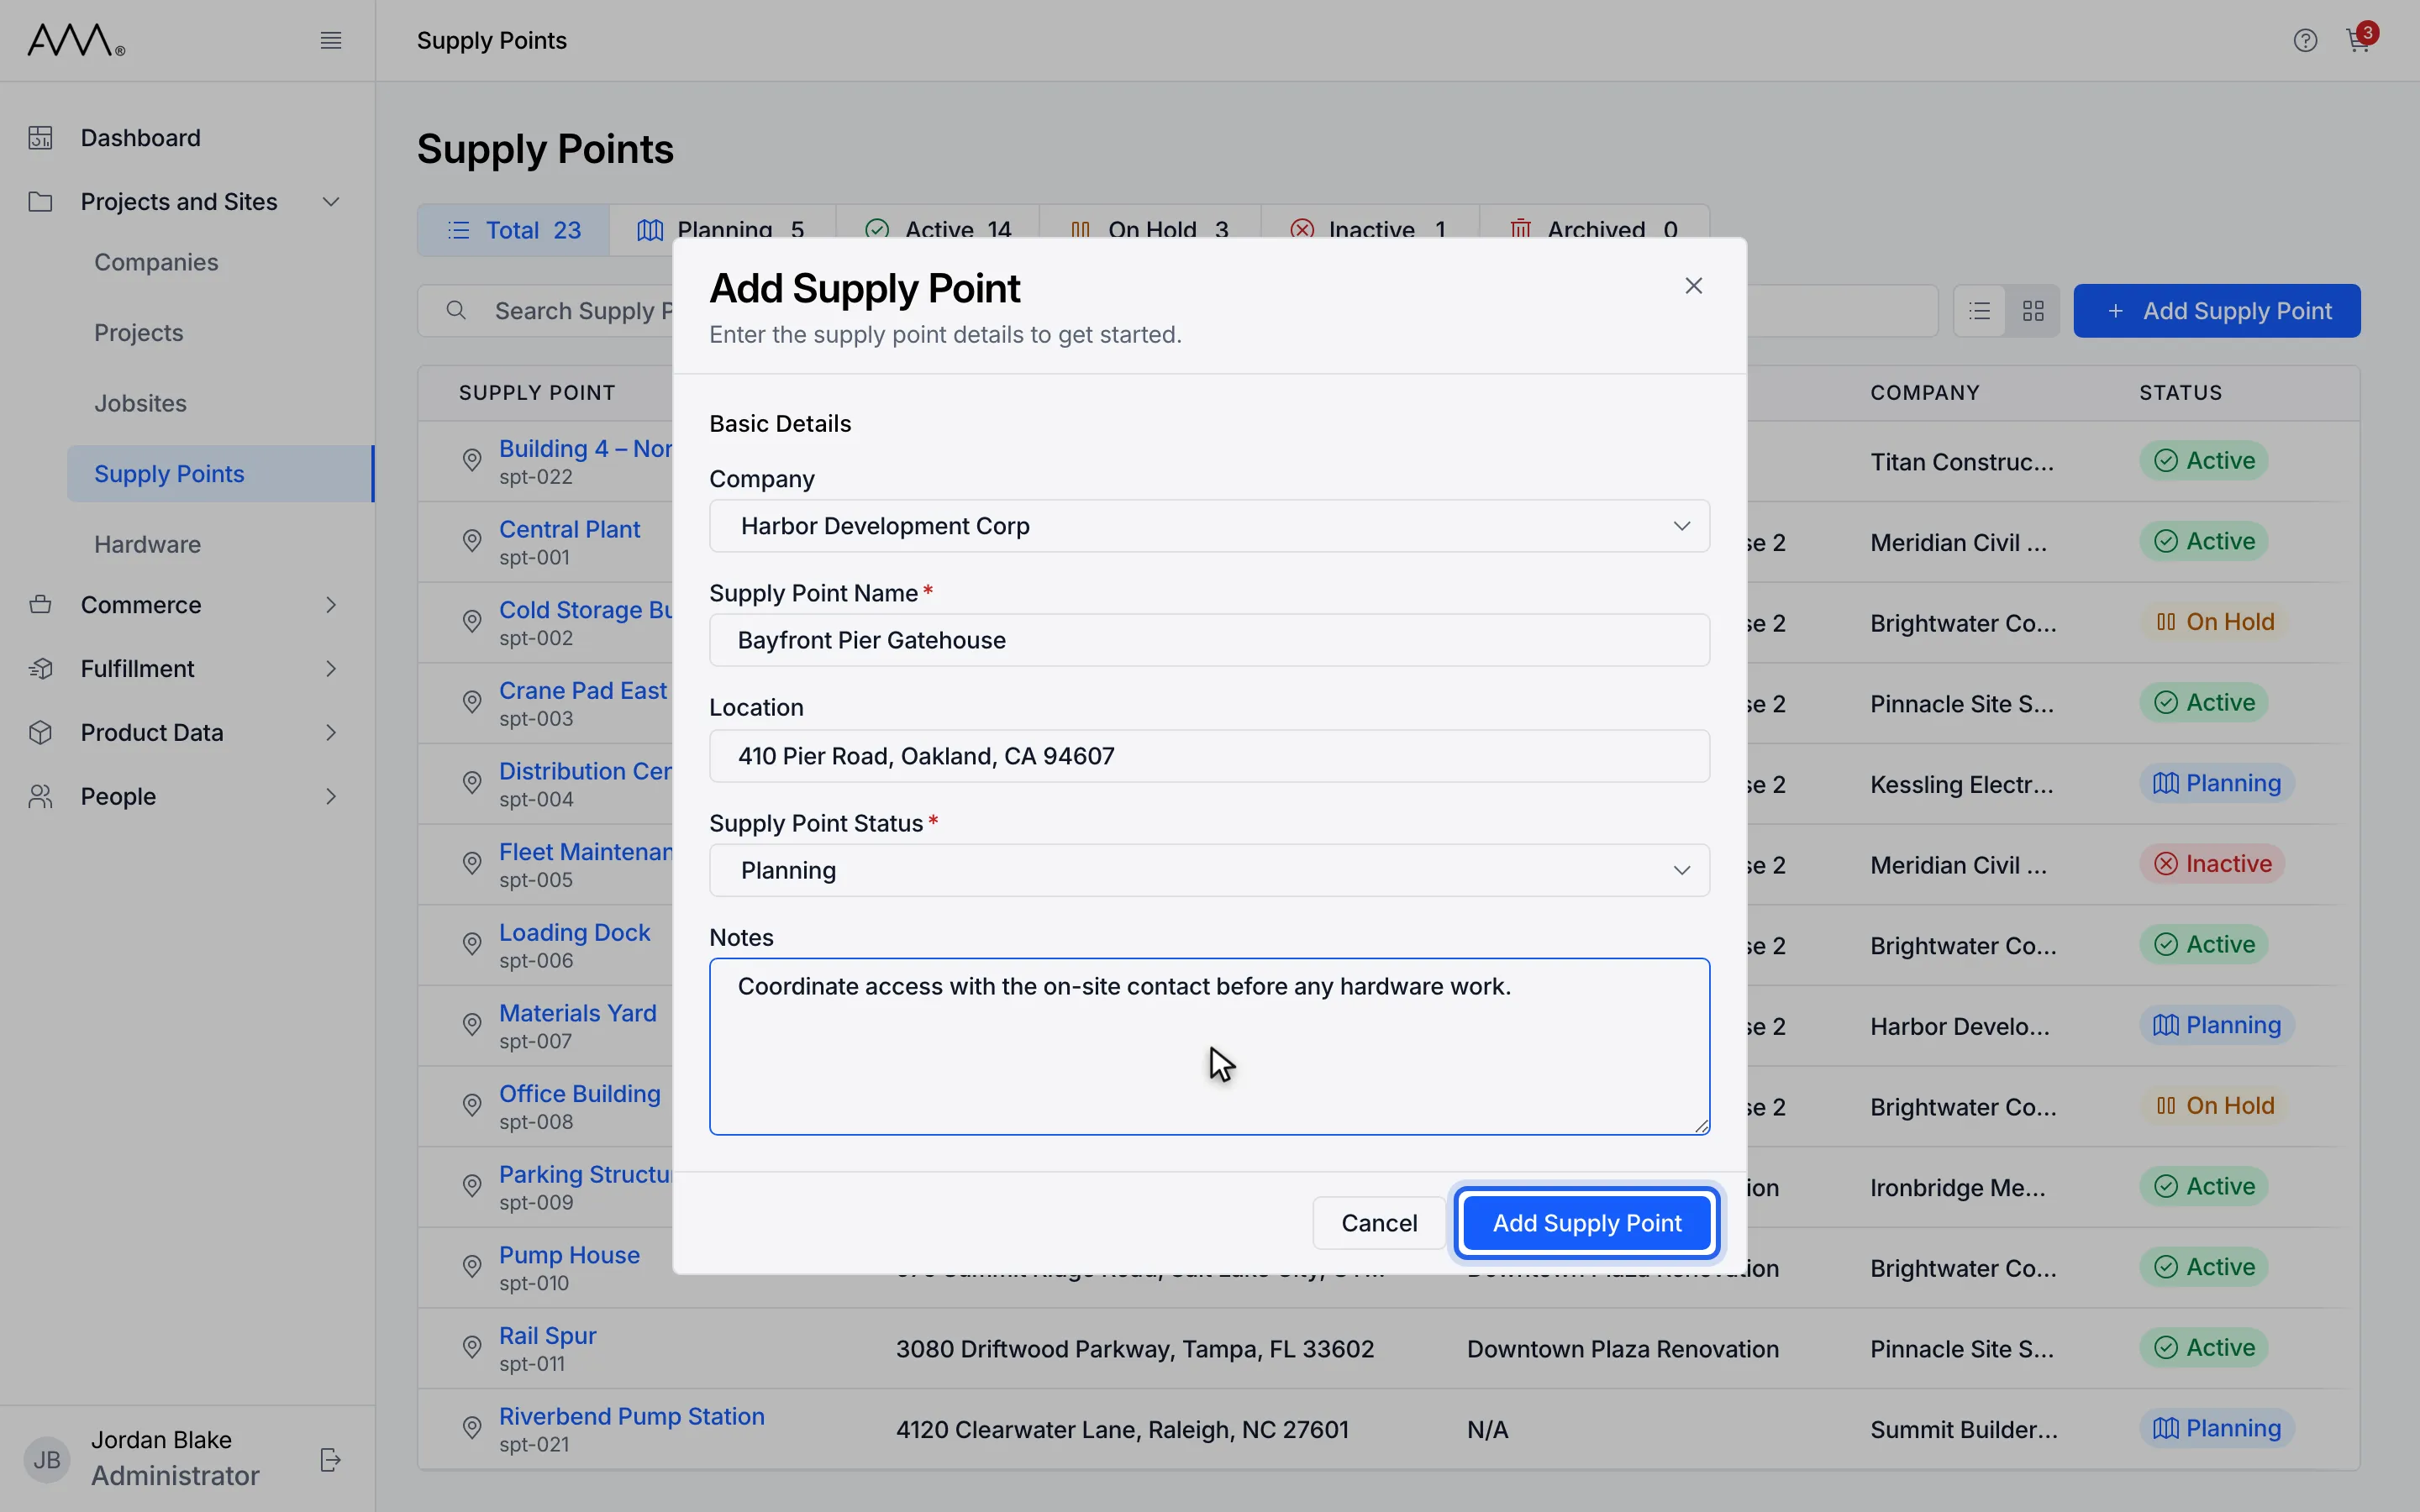
11Click Add Supply Point to save.
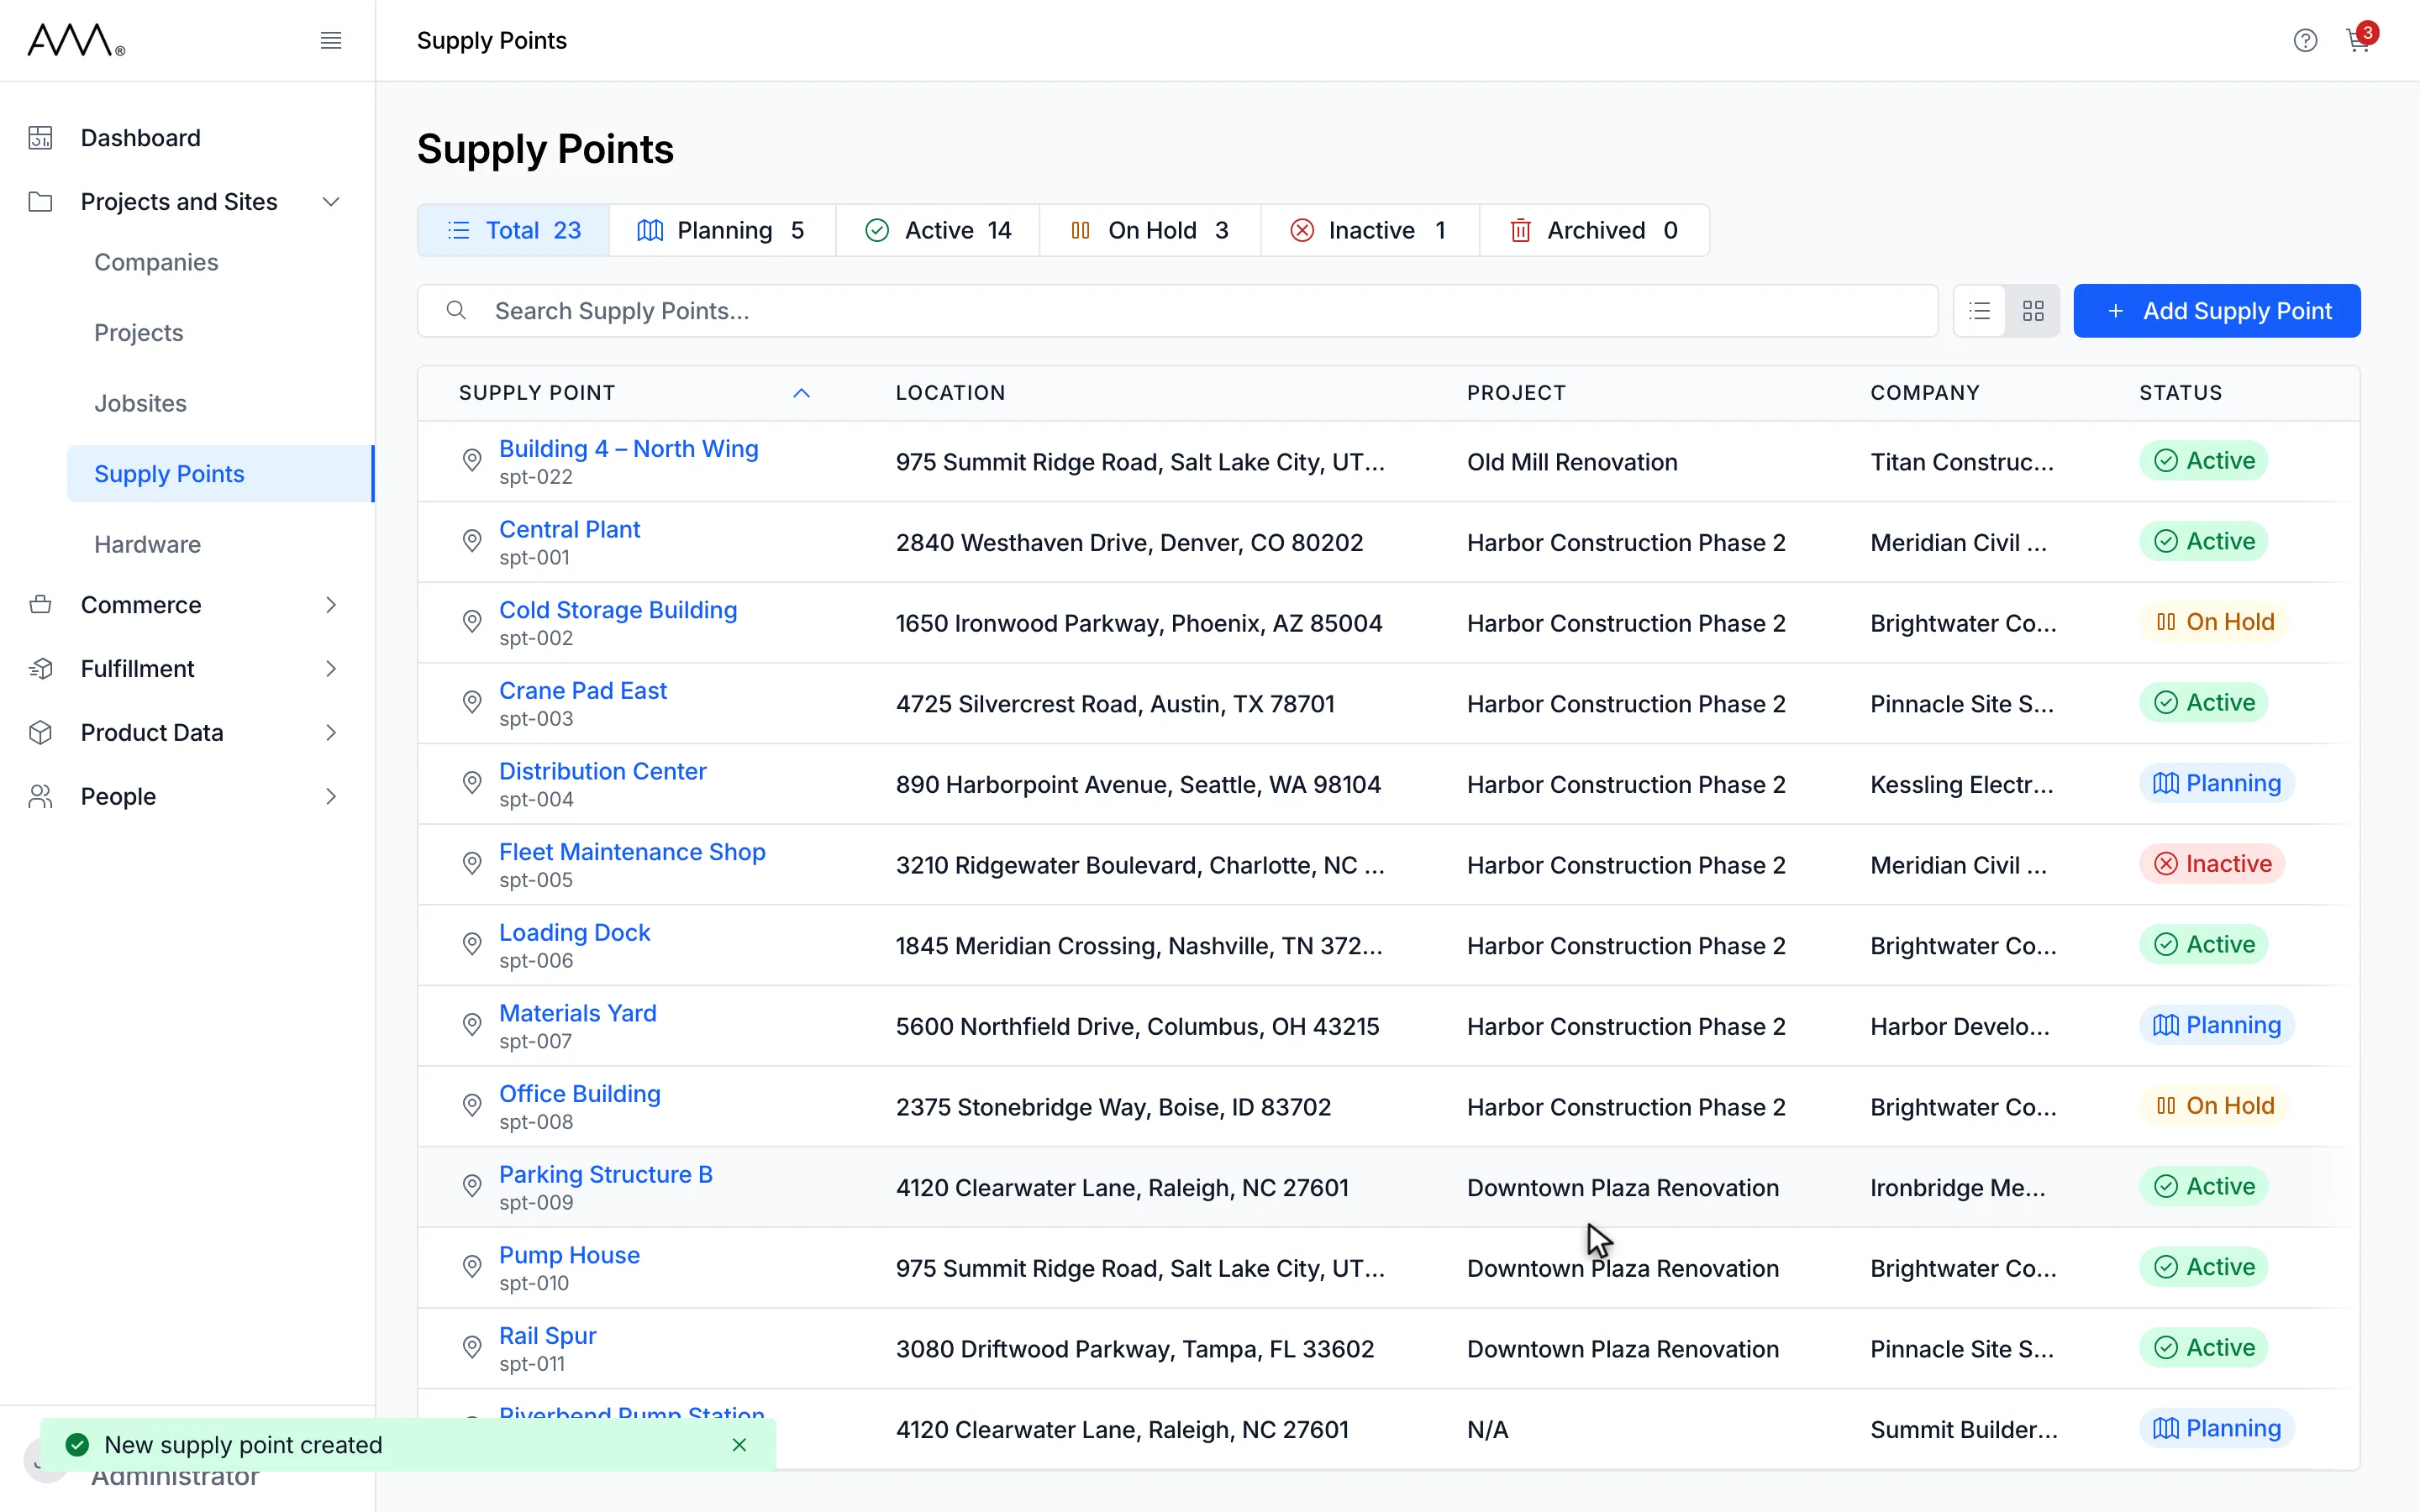
12A New supply point created message appears and you stay on the Supply Points list.
Watch this as a video (add a supply point)
What happens next
Section titled “What happens next”A New supply point created message appears, the dialog closes and you stay on the Supply Points list. To put the new supply point on a project or a jobsite, open that record’s Supply Points tab.
Add Supply Point stays disabled until Supply Point Name and Supply Point Status are filled. Leaving them empty shows Supply point name is required or Status is required. If saving fails, a message with the reason appears and the dialog stays open. If you close the dialog with unsaved changes, Omni asks Discard unsaved changes?