Assign and unassign supply points
A project’s Supply Points tab lists the supply points that belong to it. Assign existing supply points from there, and unassign one when it no longer belongs to the project.
- In the sidebar, open Projects and Sites and choose Projects.
- Click the project name to open it.
- Click the Supply Points tab.
- Click Assign Supply Point. The Assign Supply Points dialog lists the supply points you can assign, unassigned ones first. Each card shows the supply point’s Location, its current Project (or Unassigned) and its Contact. Type in Search supply points… to narrow the list by name; more load as you scroll.
- Click a supply point’s card to tick it. Greyed-out cards are supply points on another project.
- Click Assign Supply Points.
- To unassign a supply point, click the remove icon on its card, or in the Actions column in list view.
- Read the warning, then click Unassign Supply Point to confirm.
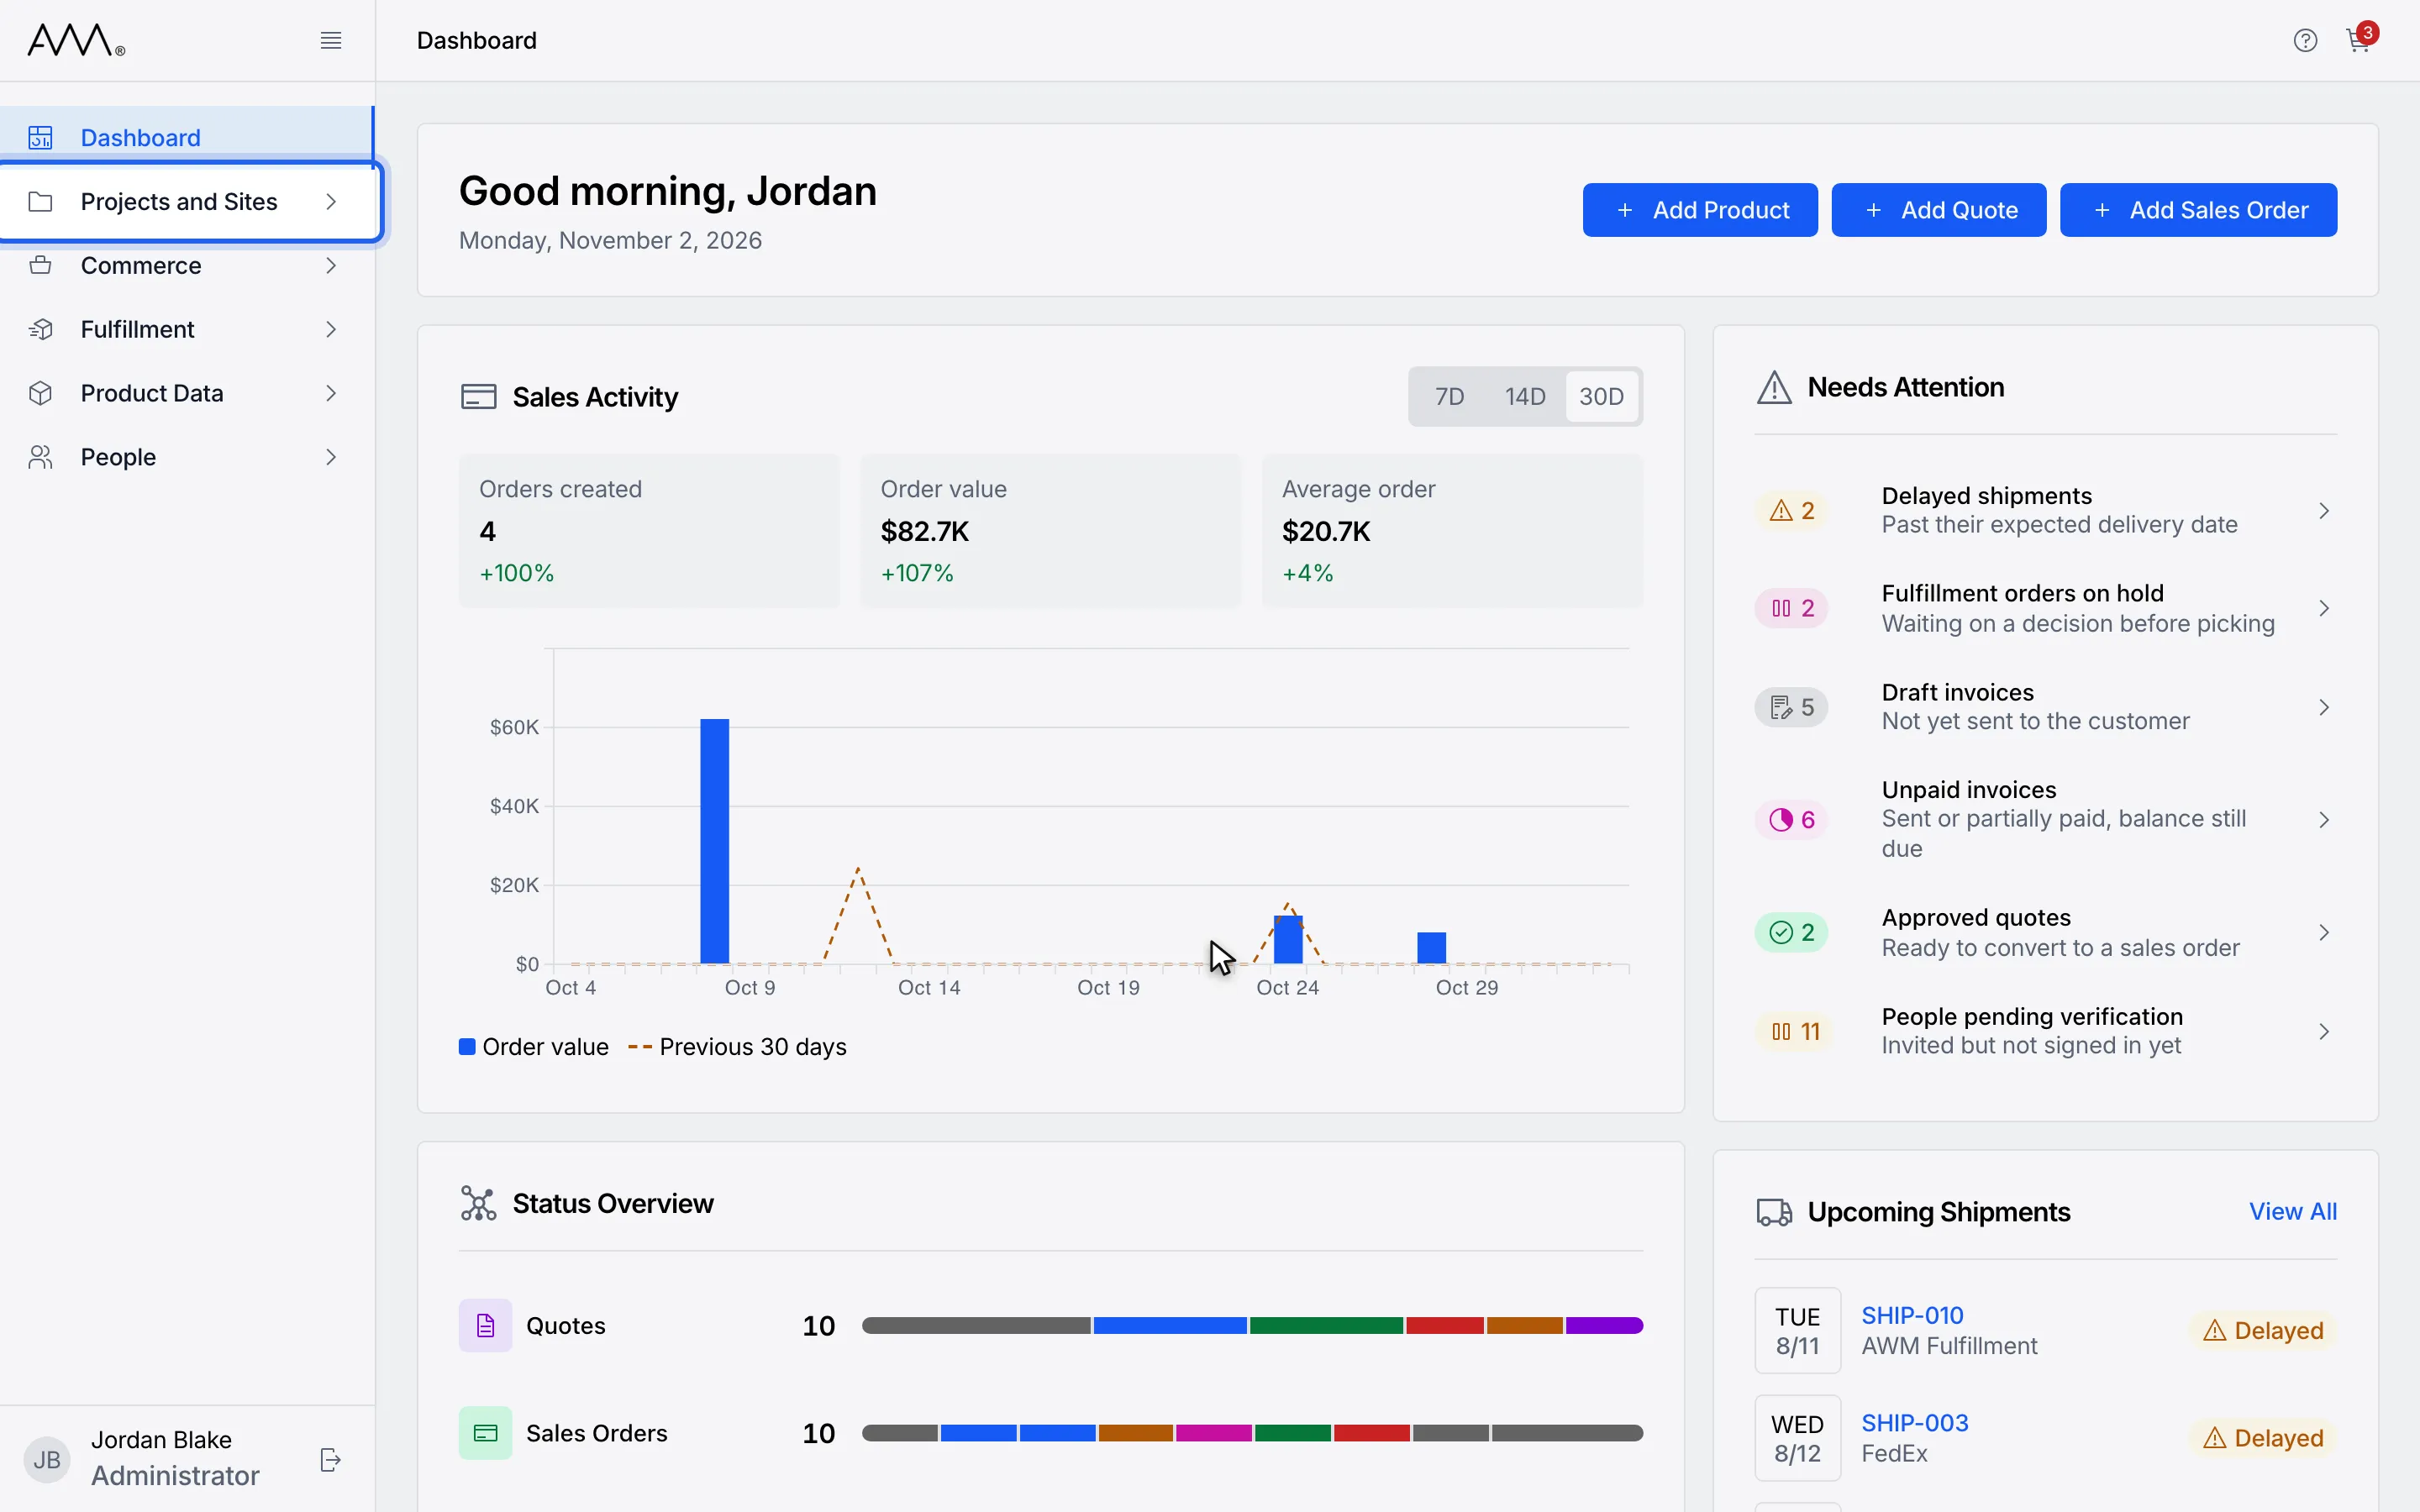
1In the sidebar, open Projects and Sites.
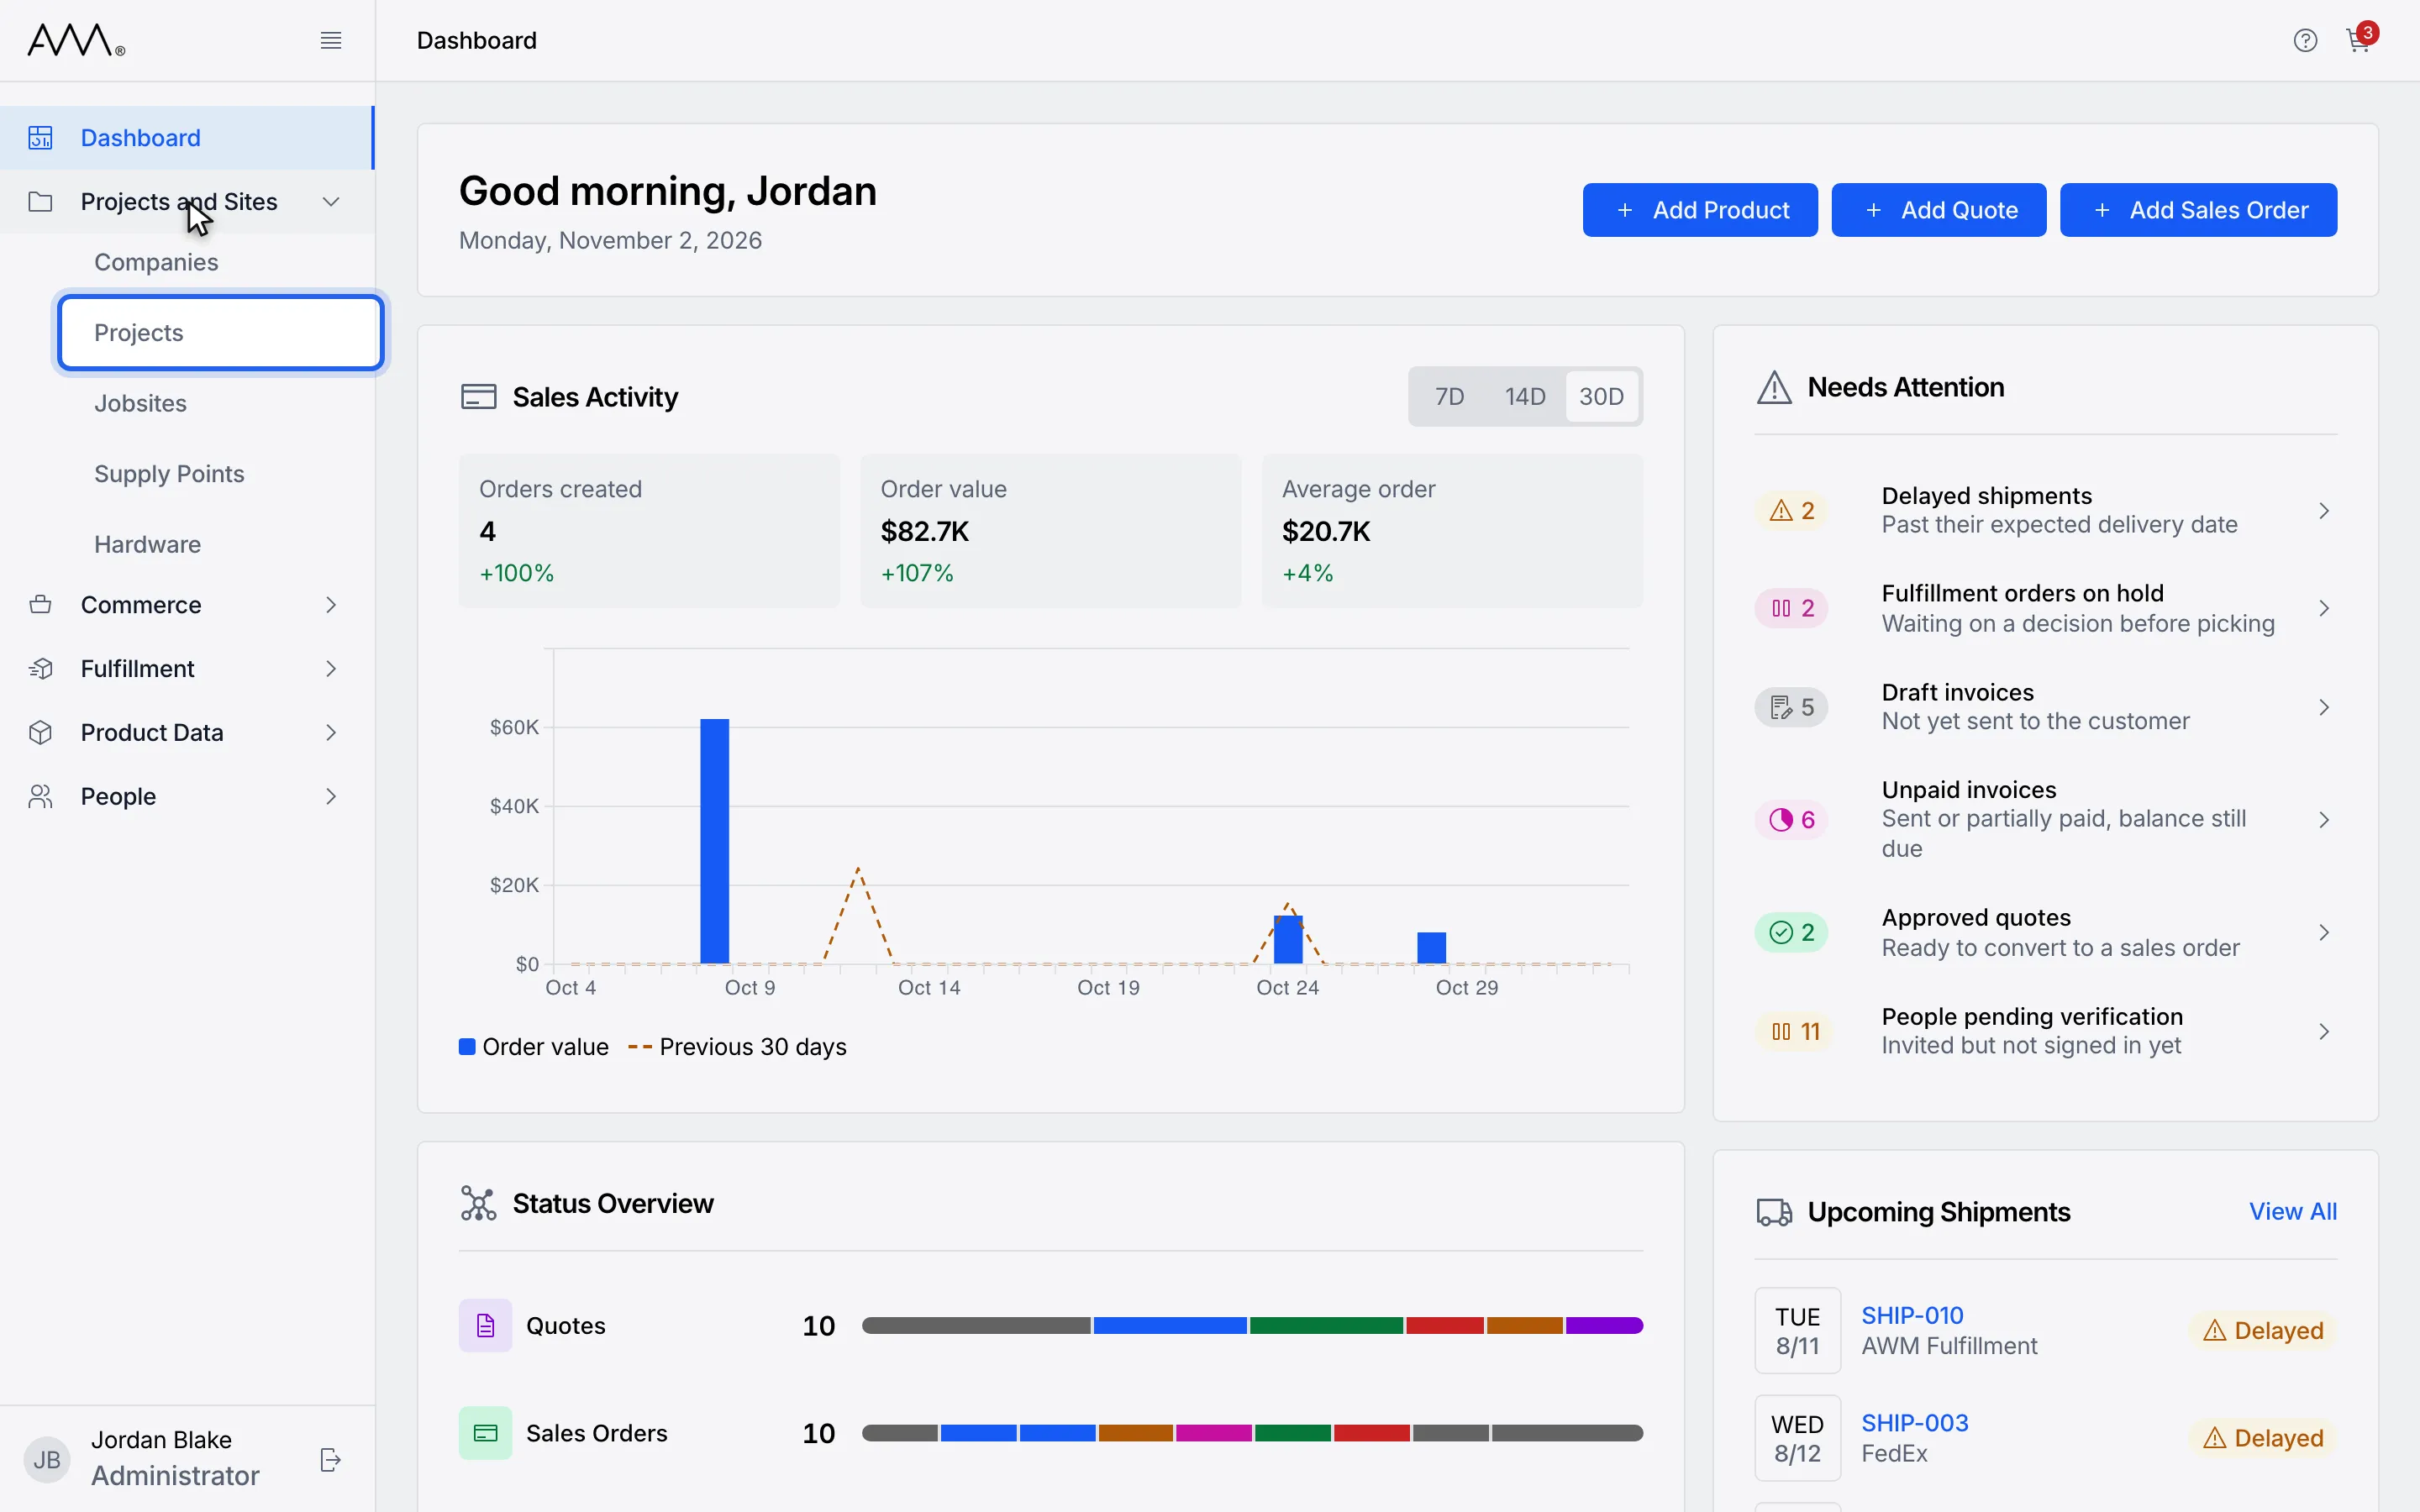
2Choose Projects.
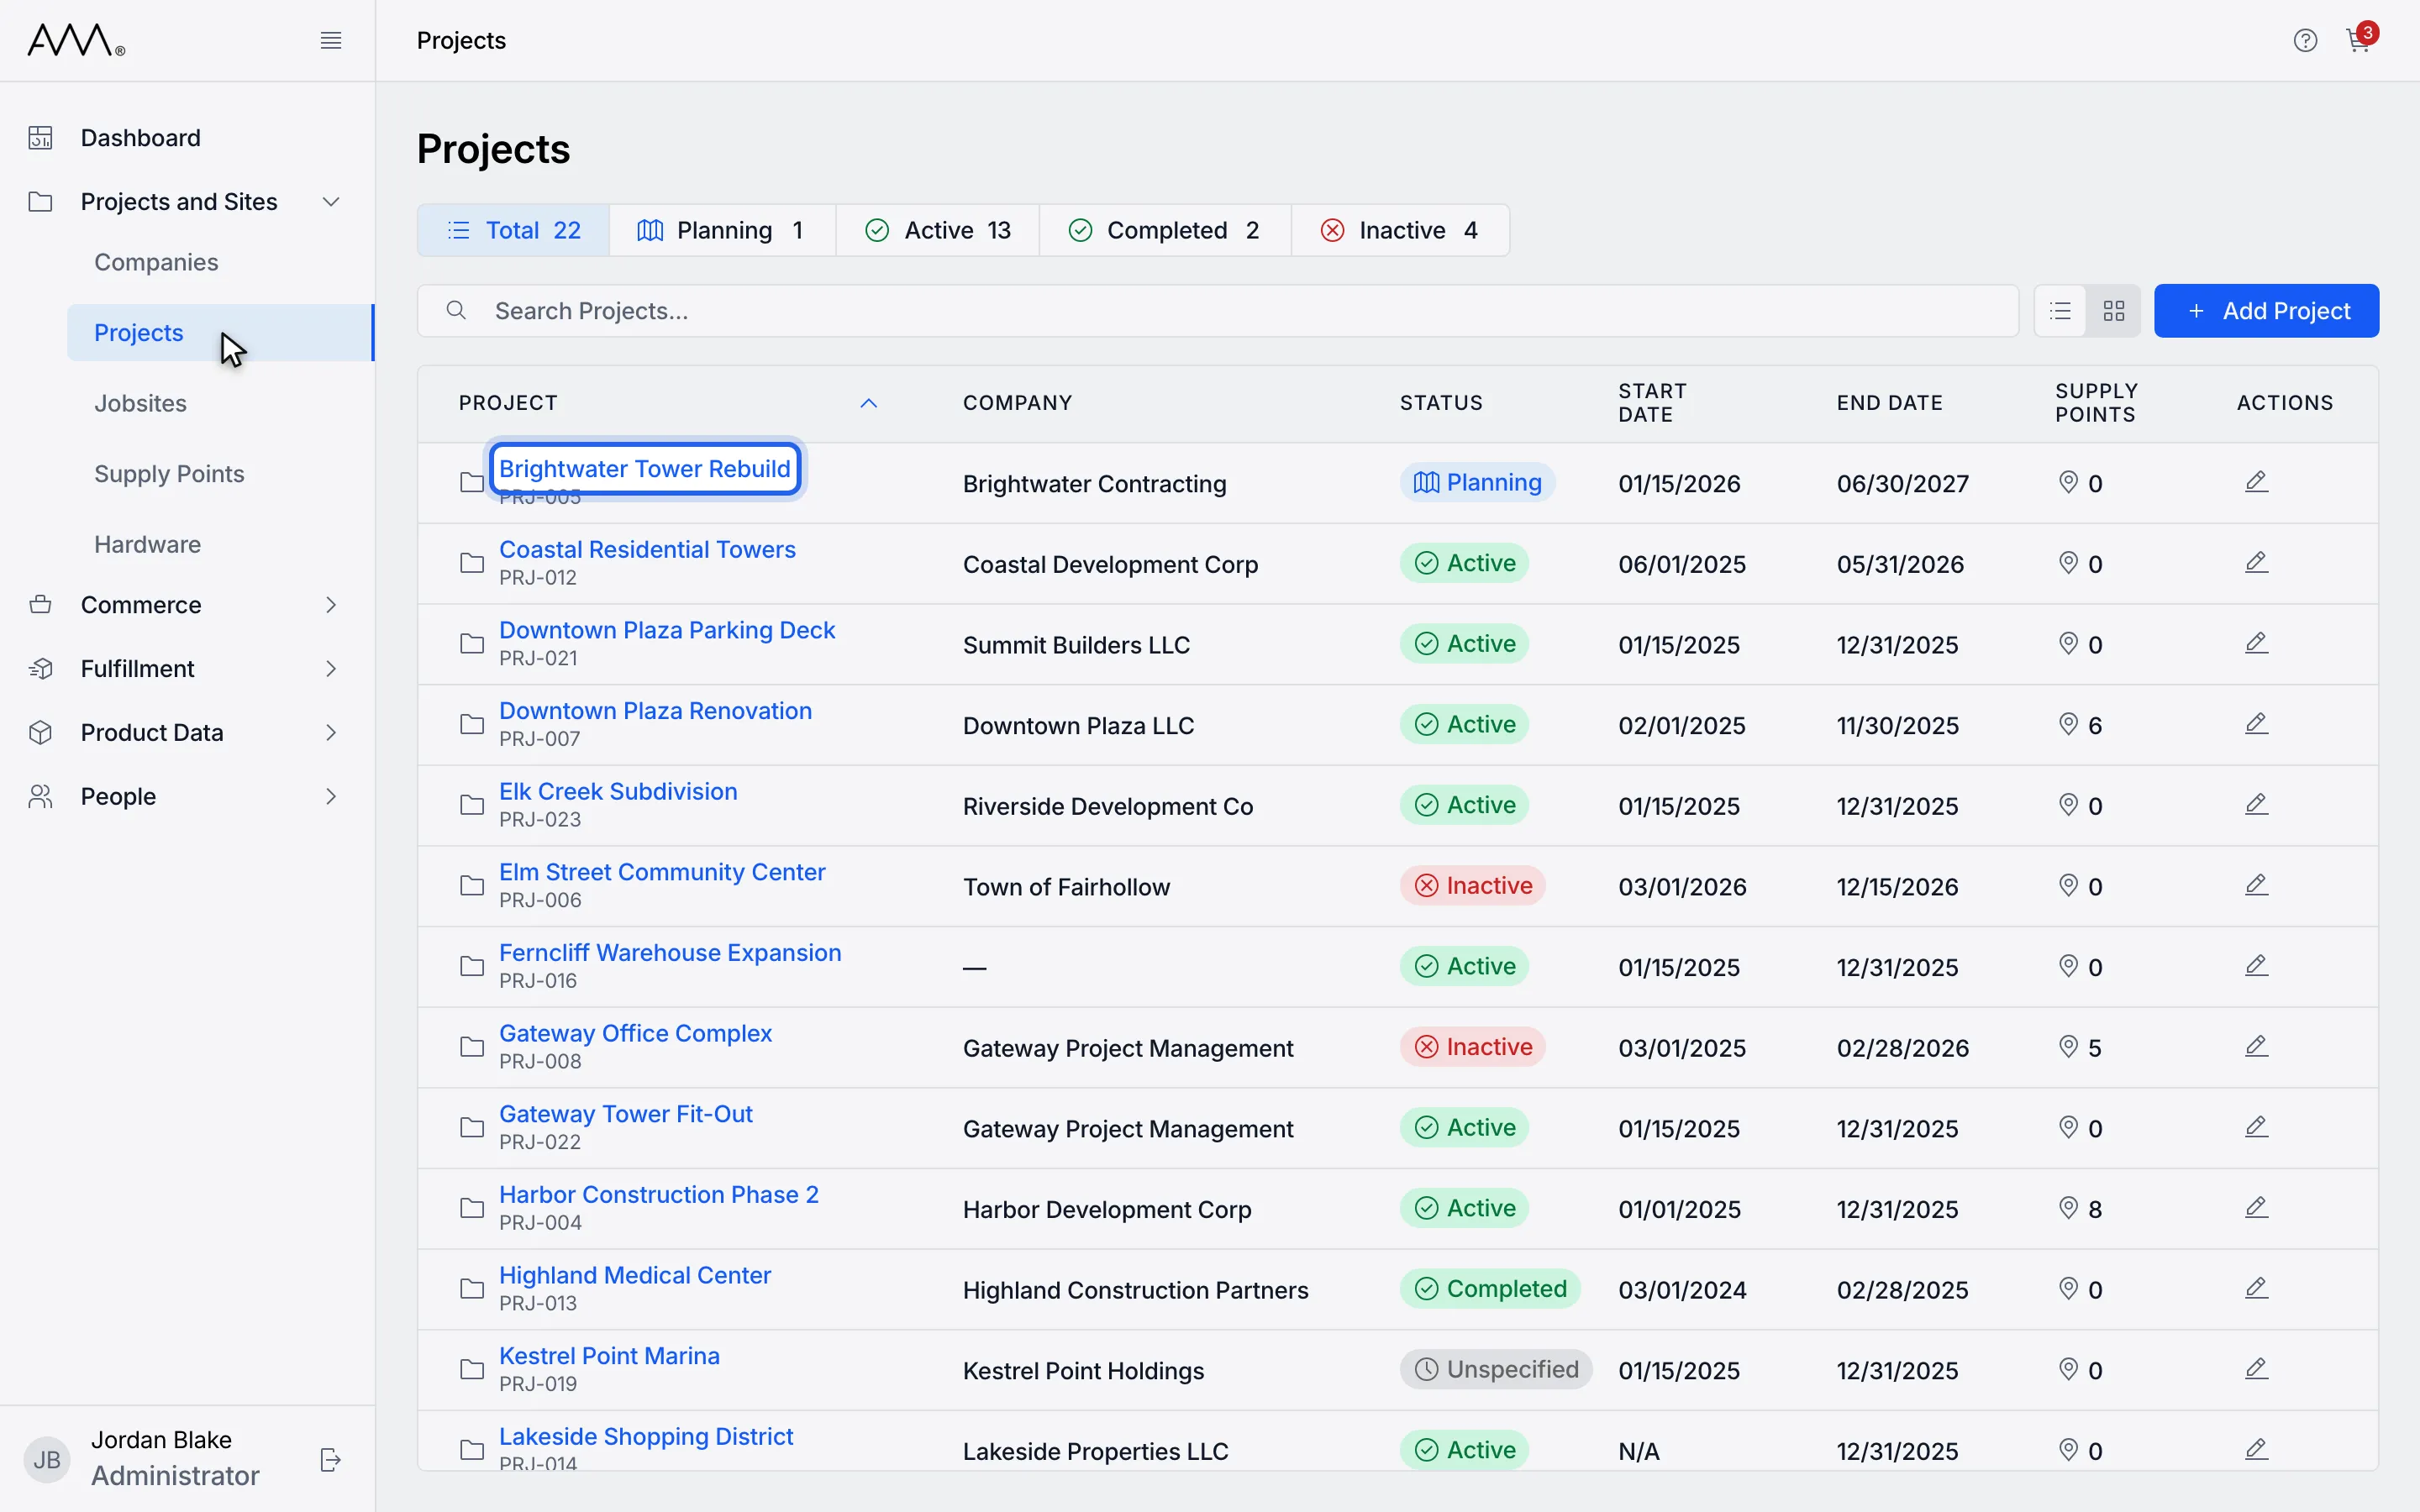
3Open the project.
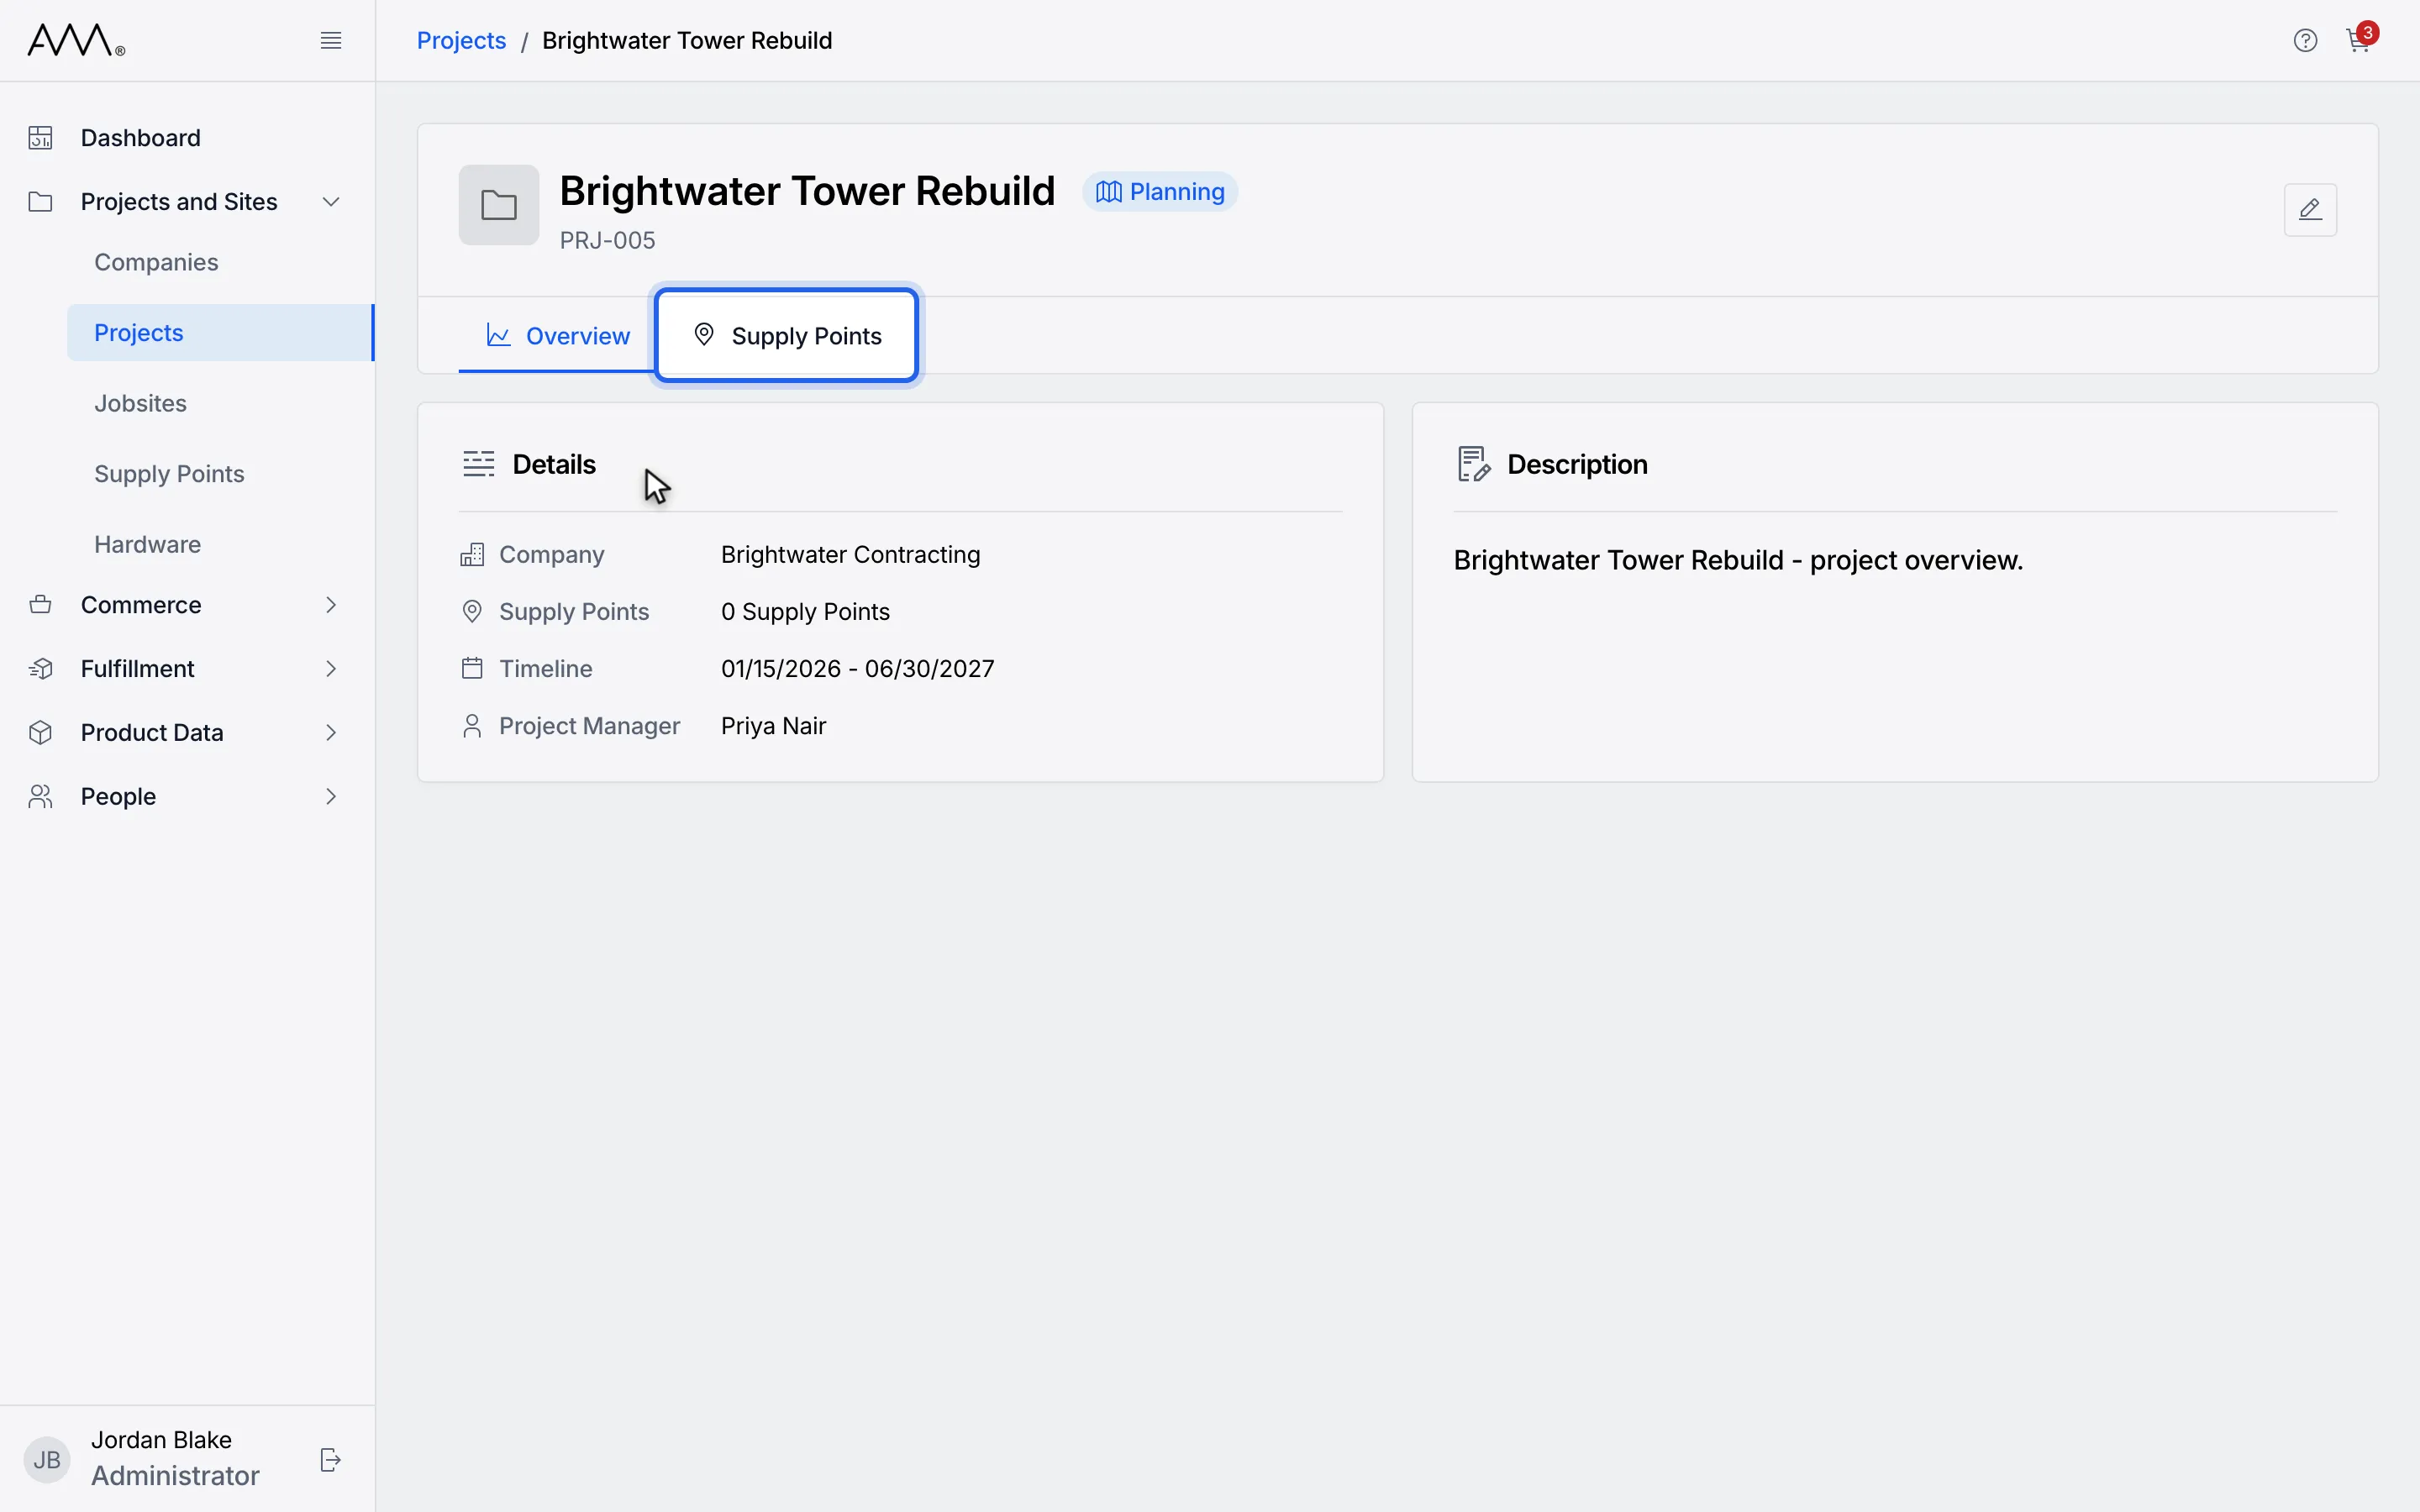
4Click the Supply Points tab.
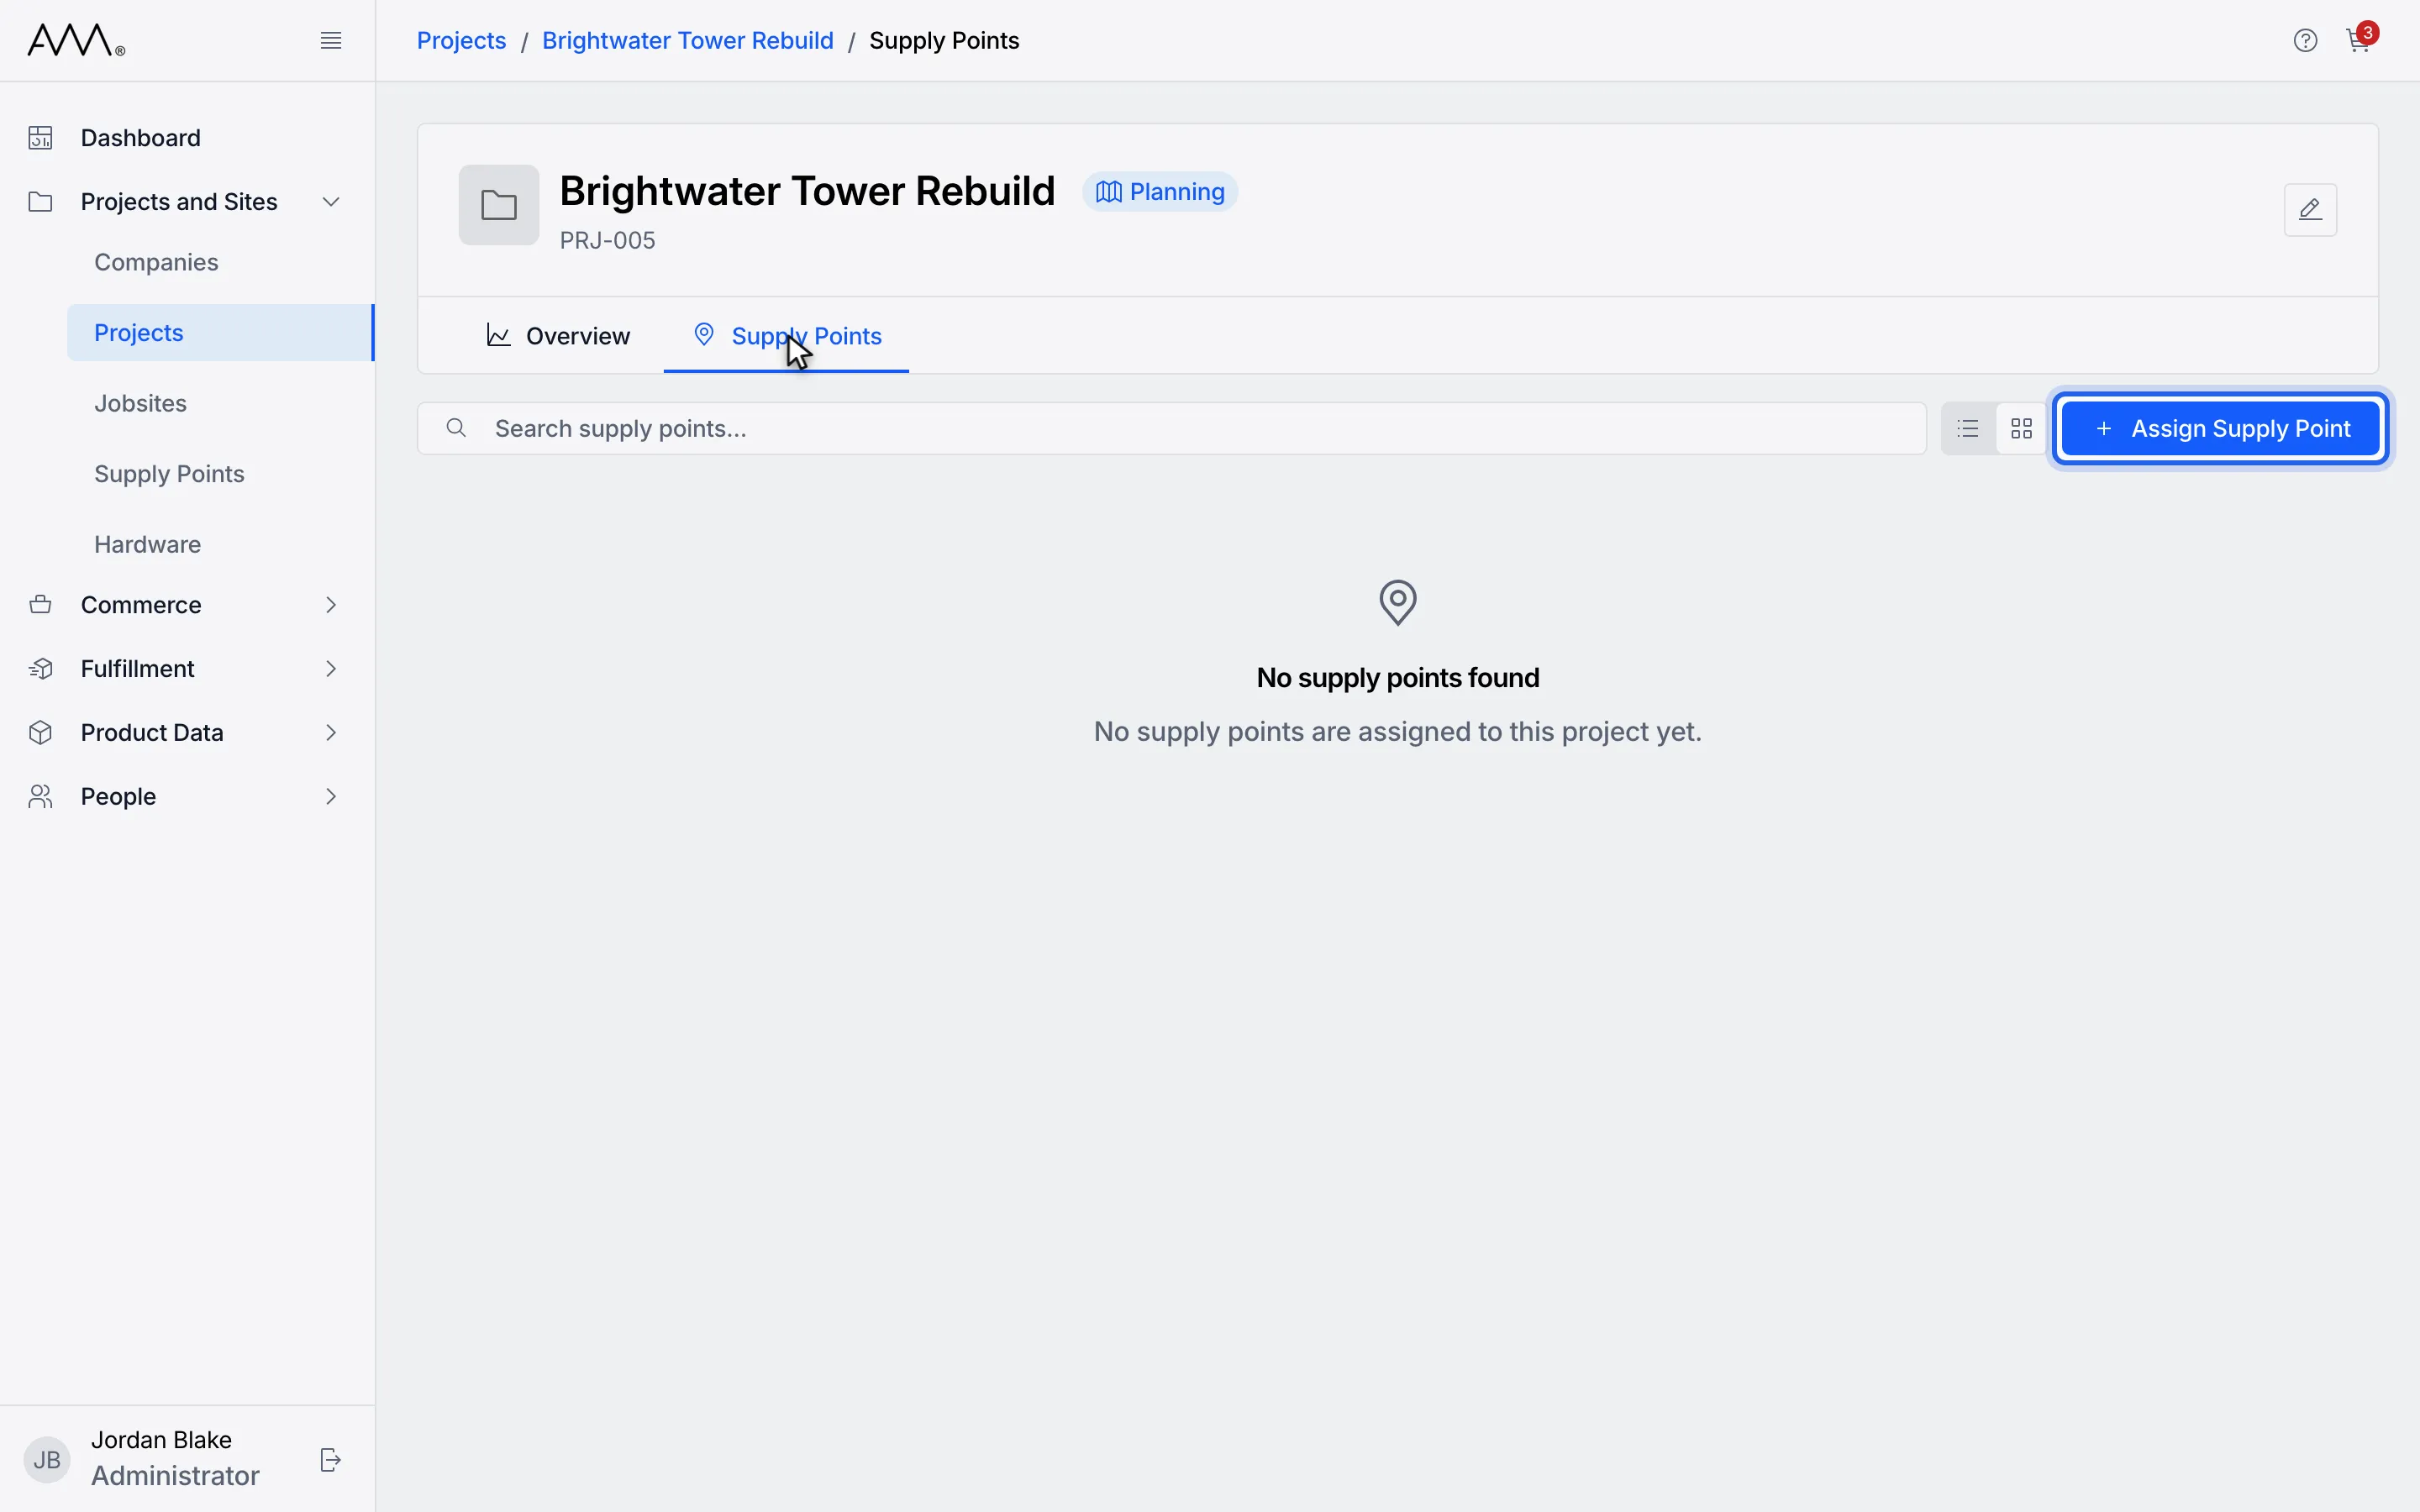
5Click Assign Supply Point.
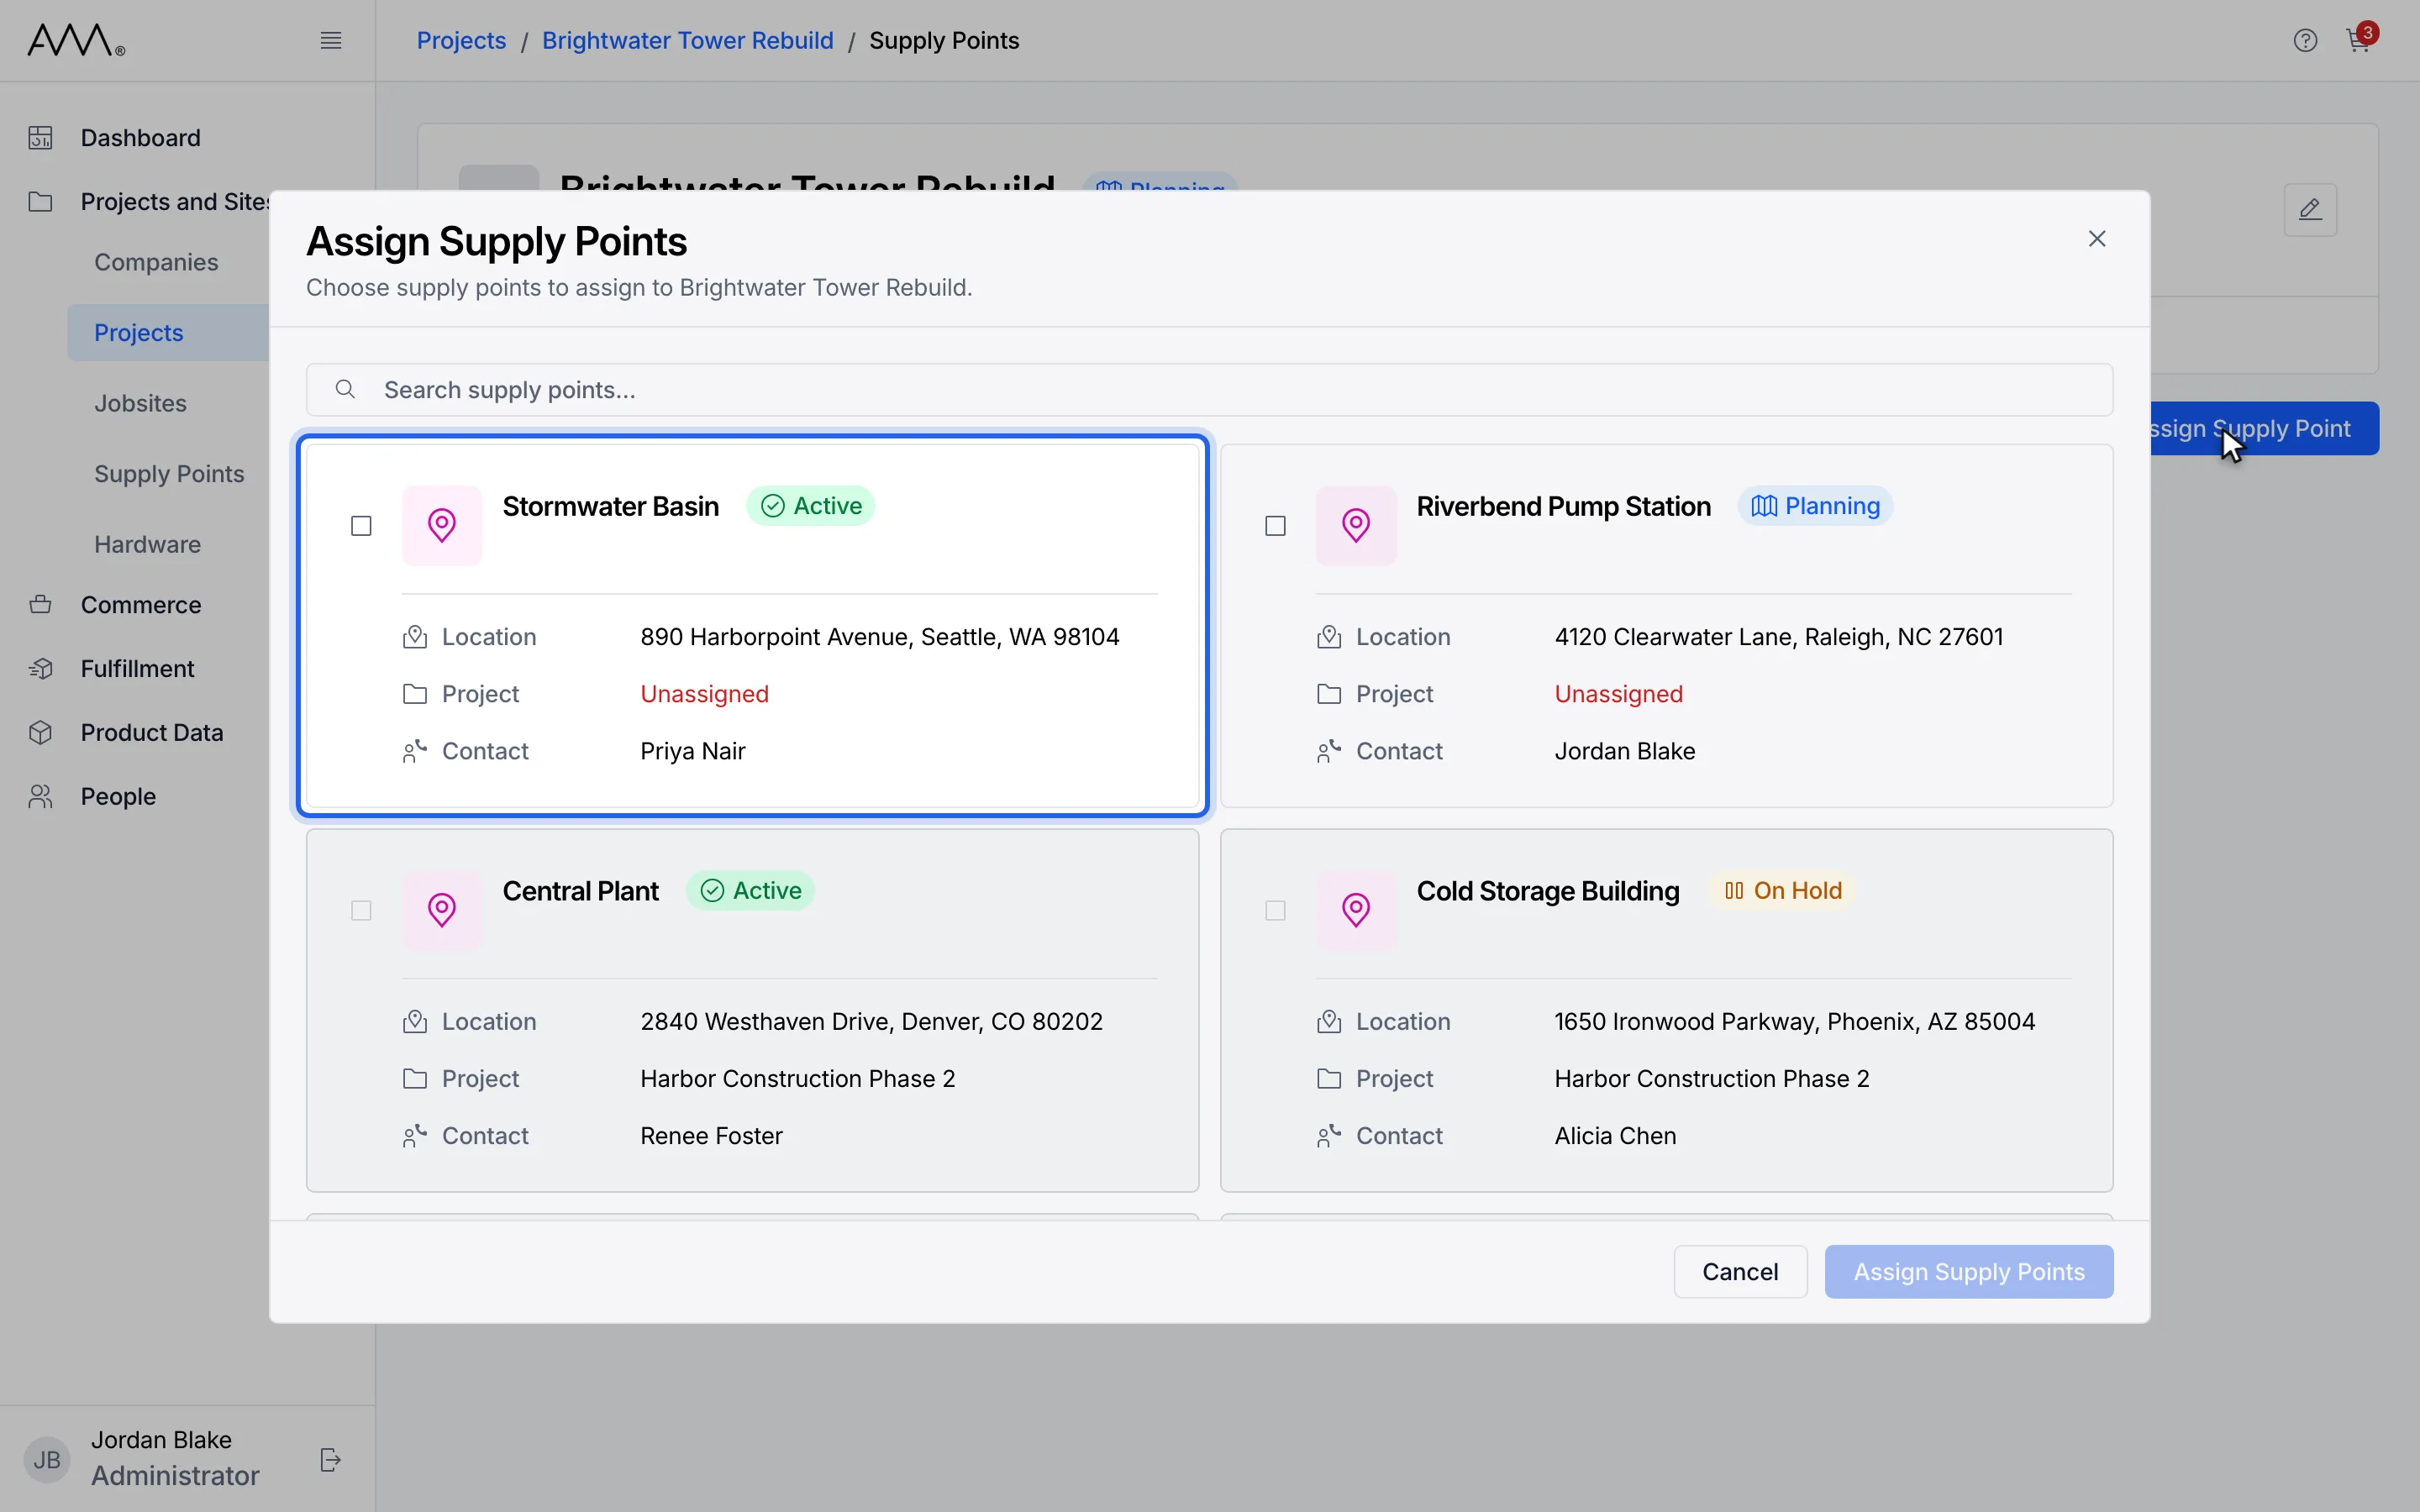
6Click a supply point card to tick it. Greyed-out ones are on another project.
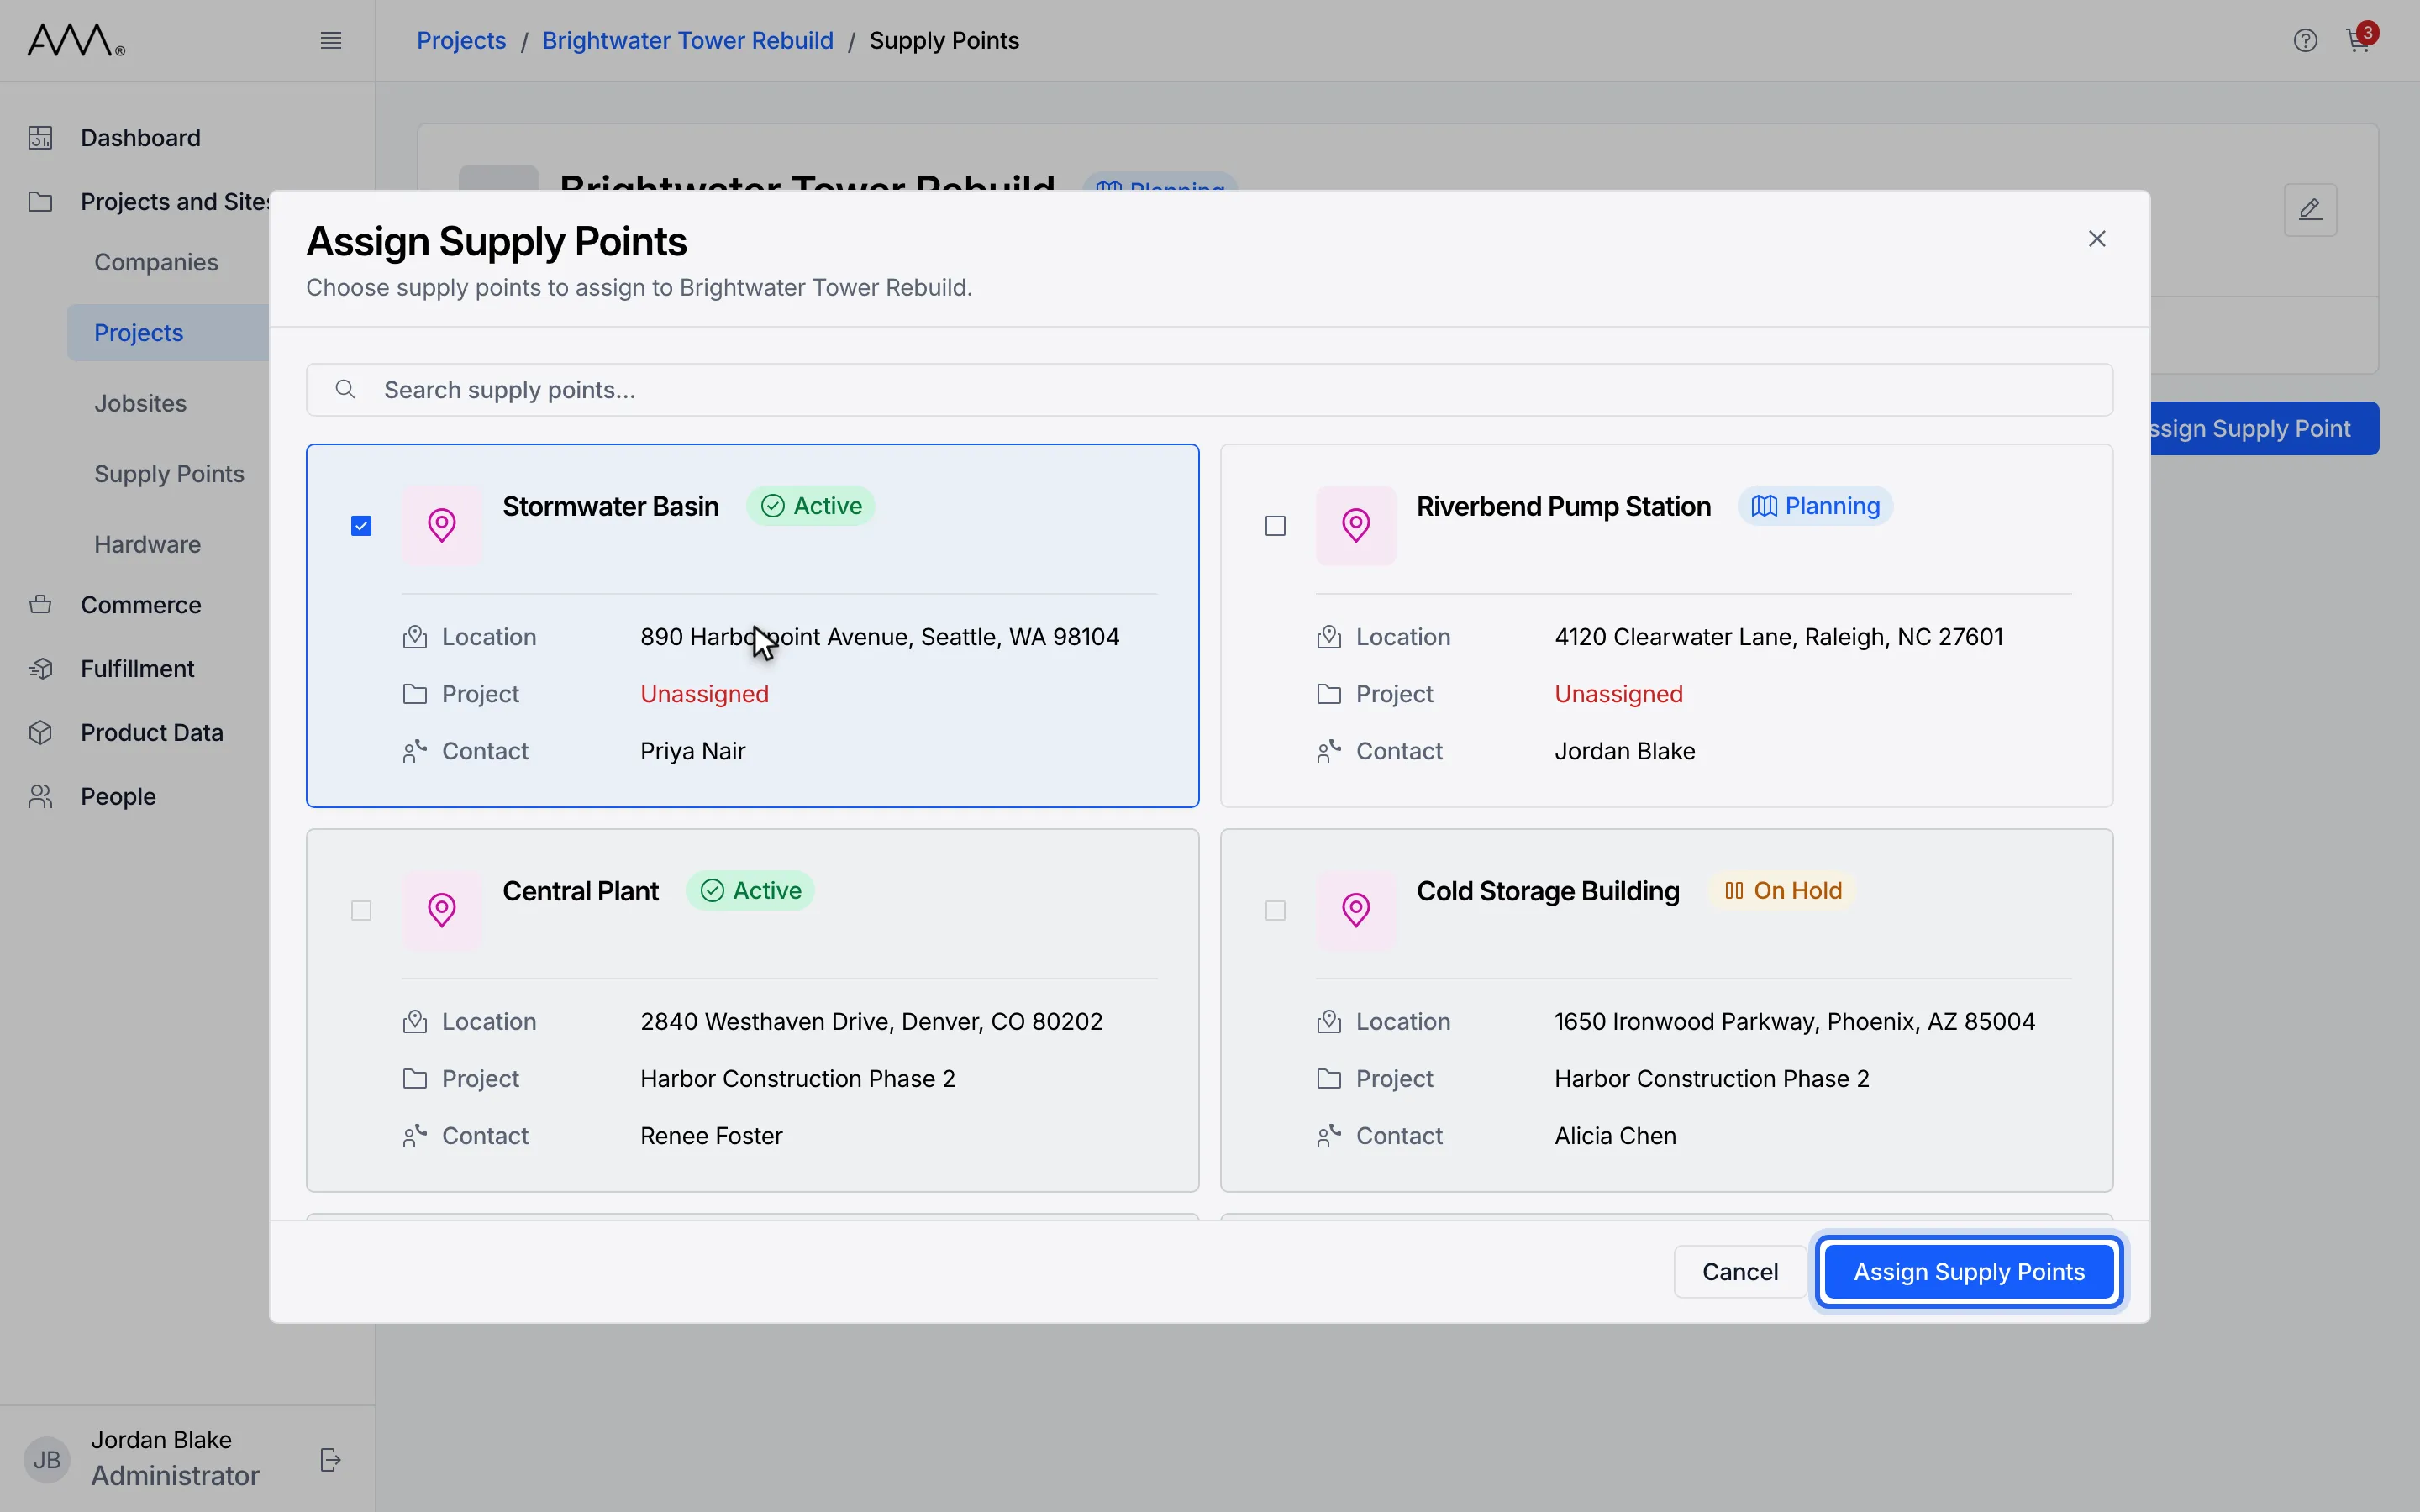
7Click Assign Supply Points.
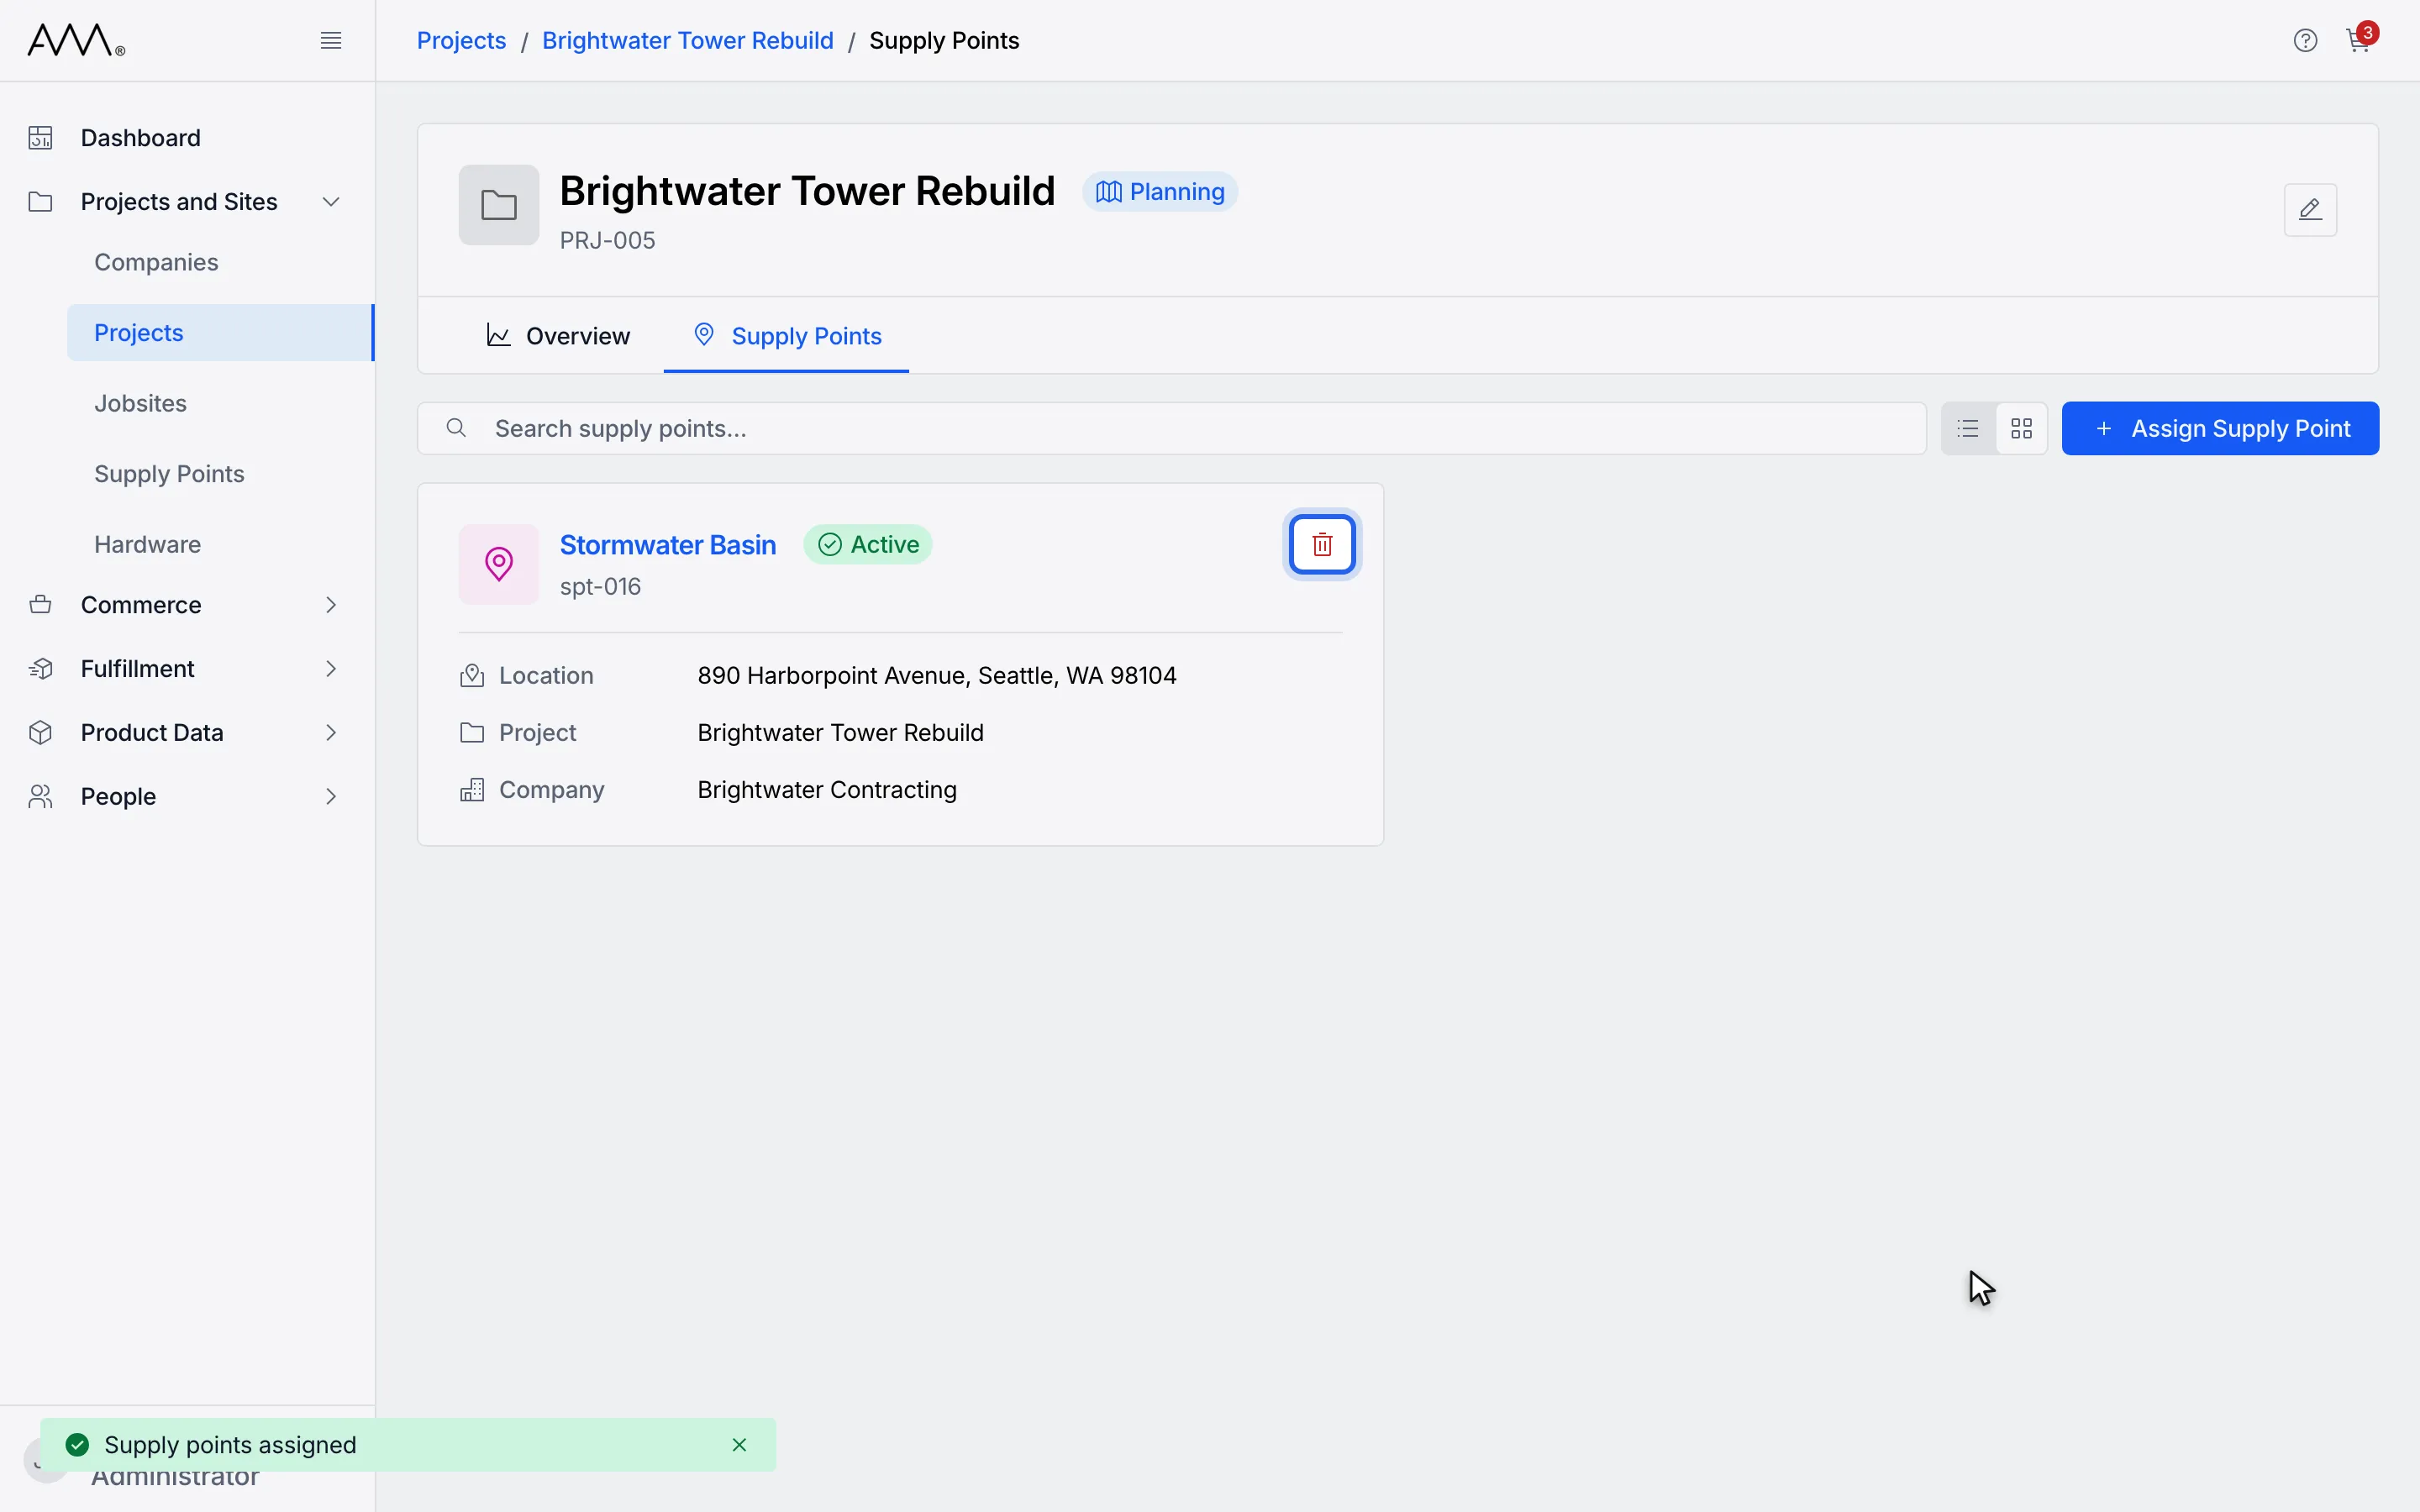
8To unassign a supply point, click the remove icon on its card.
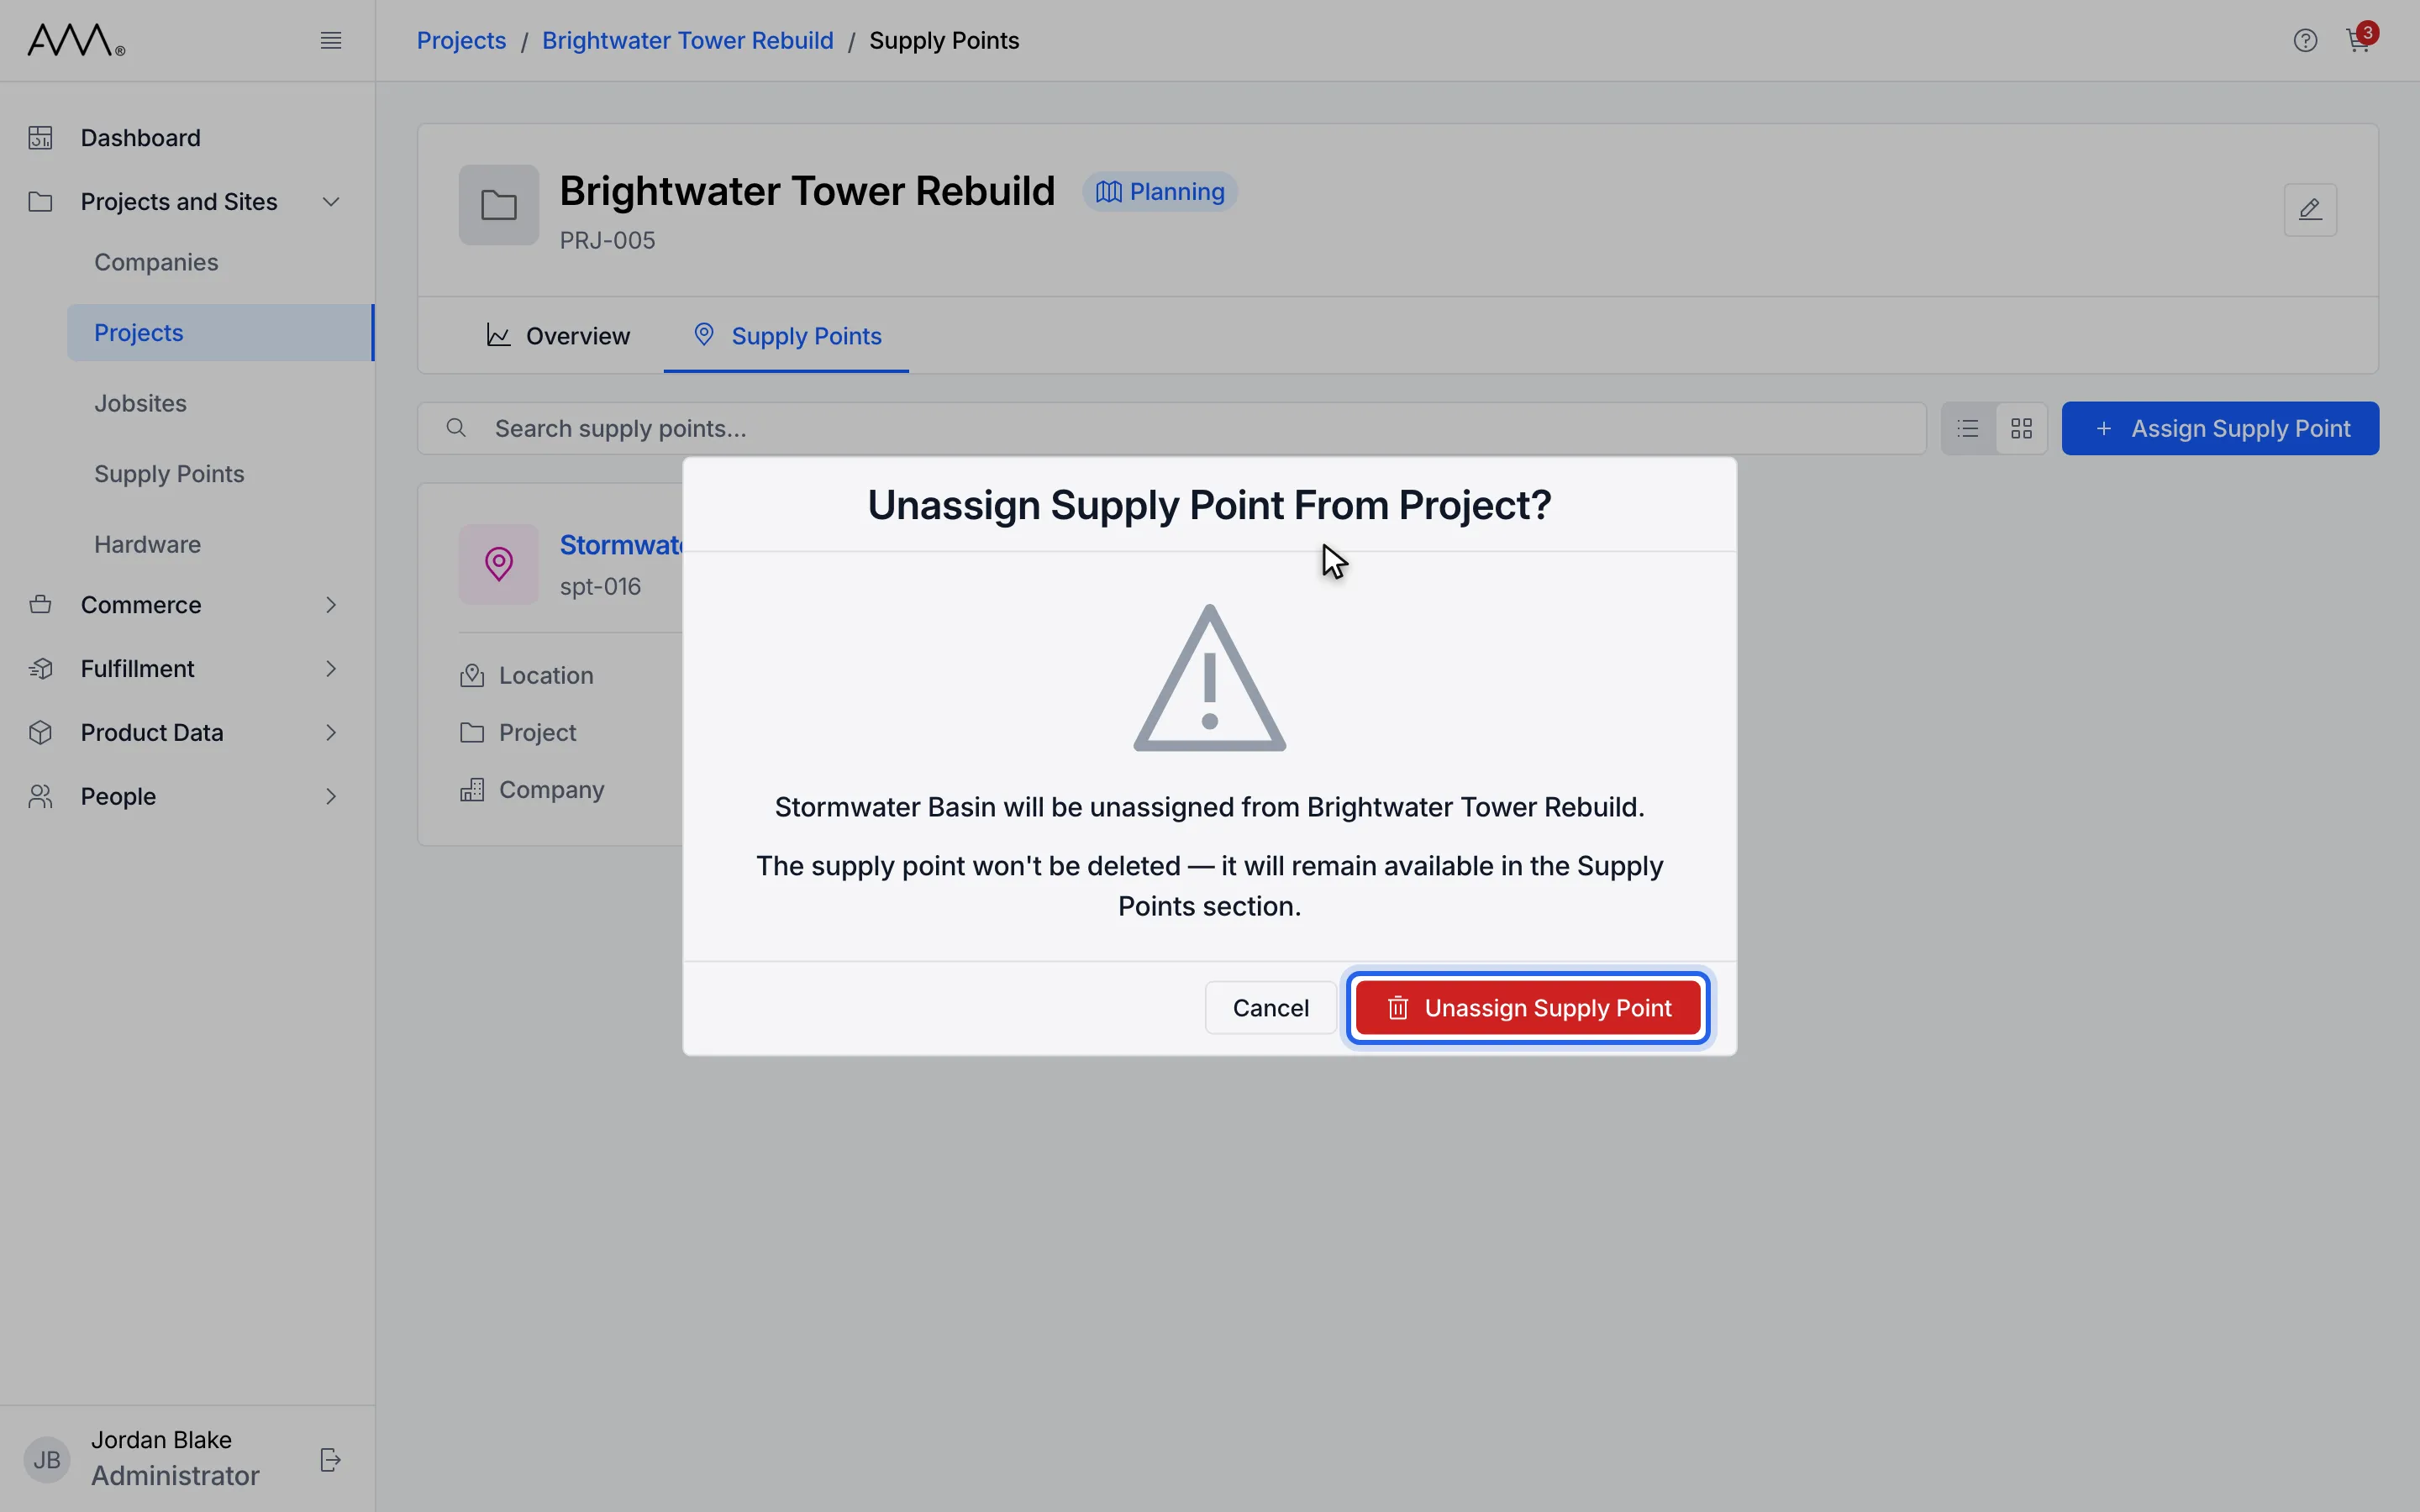
9Read the warning, then click Unassign Supply Point to confirm.
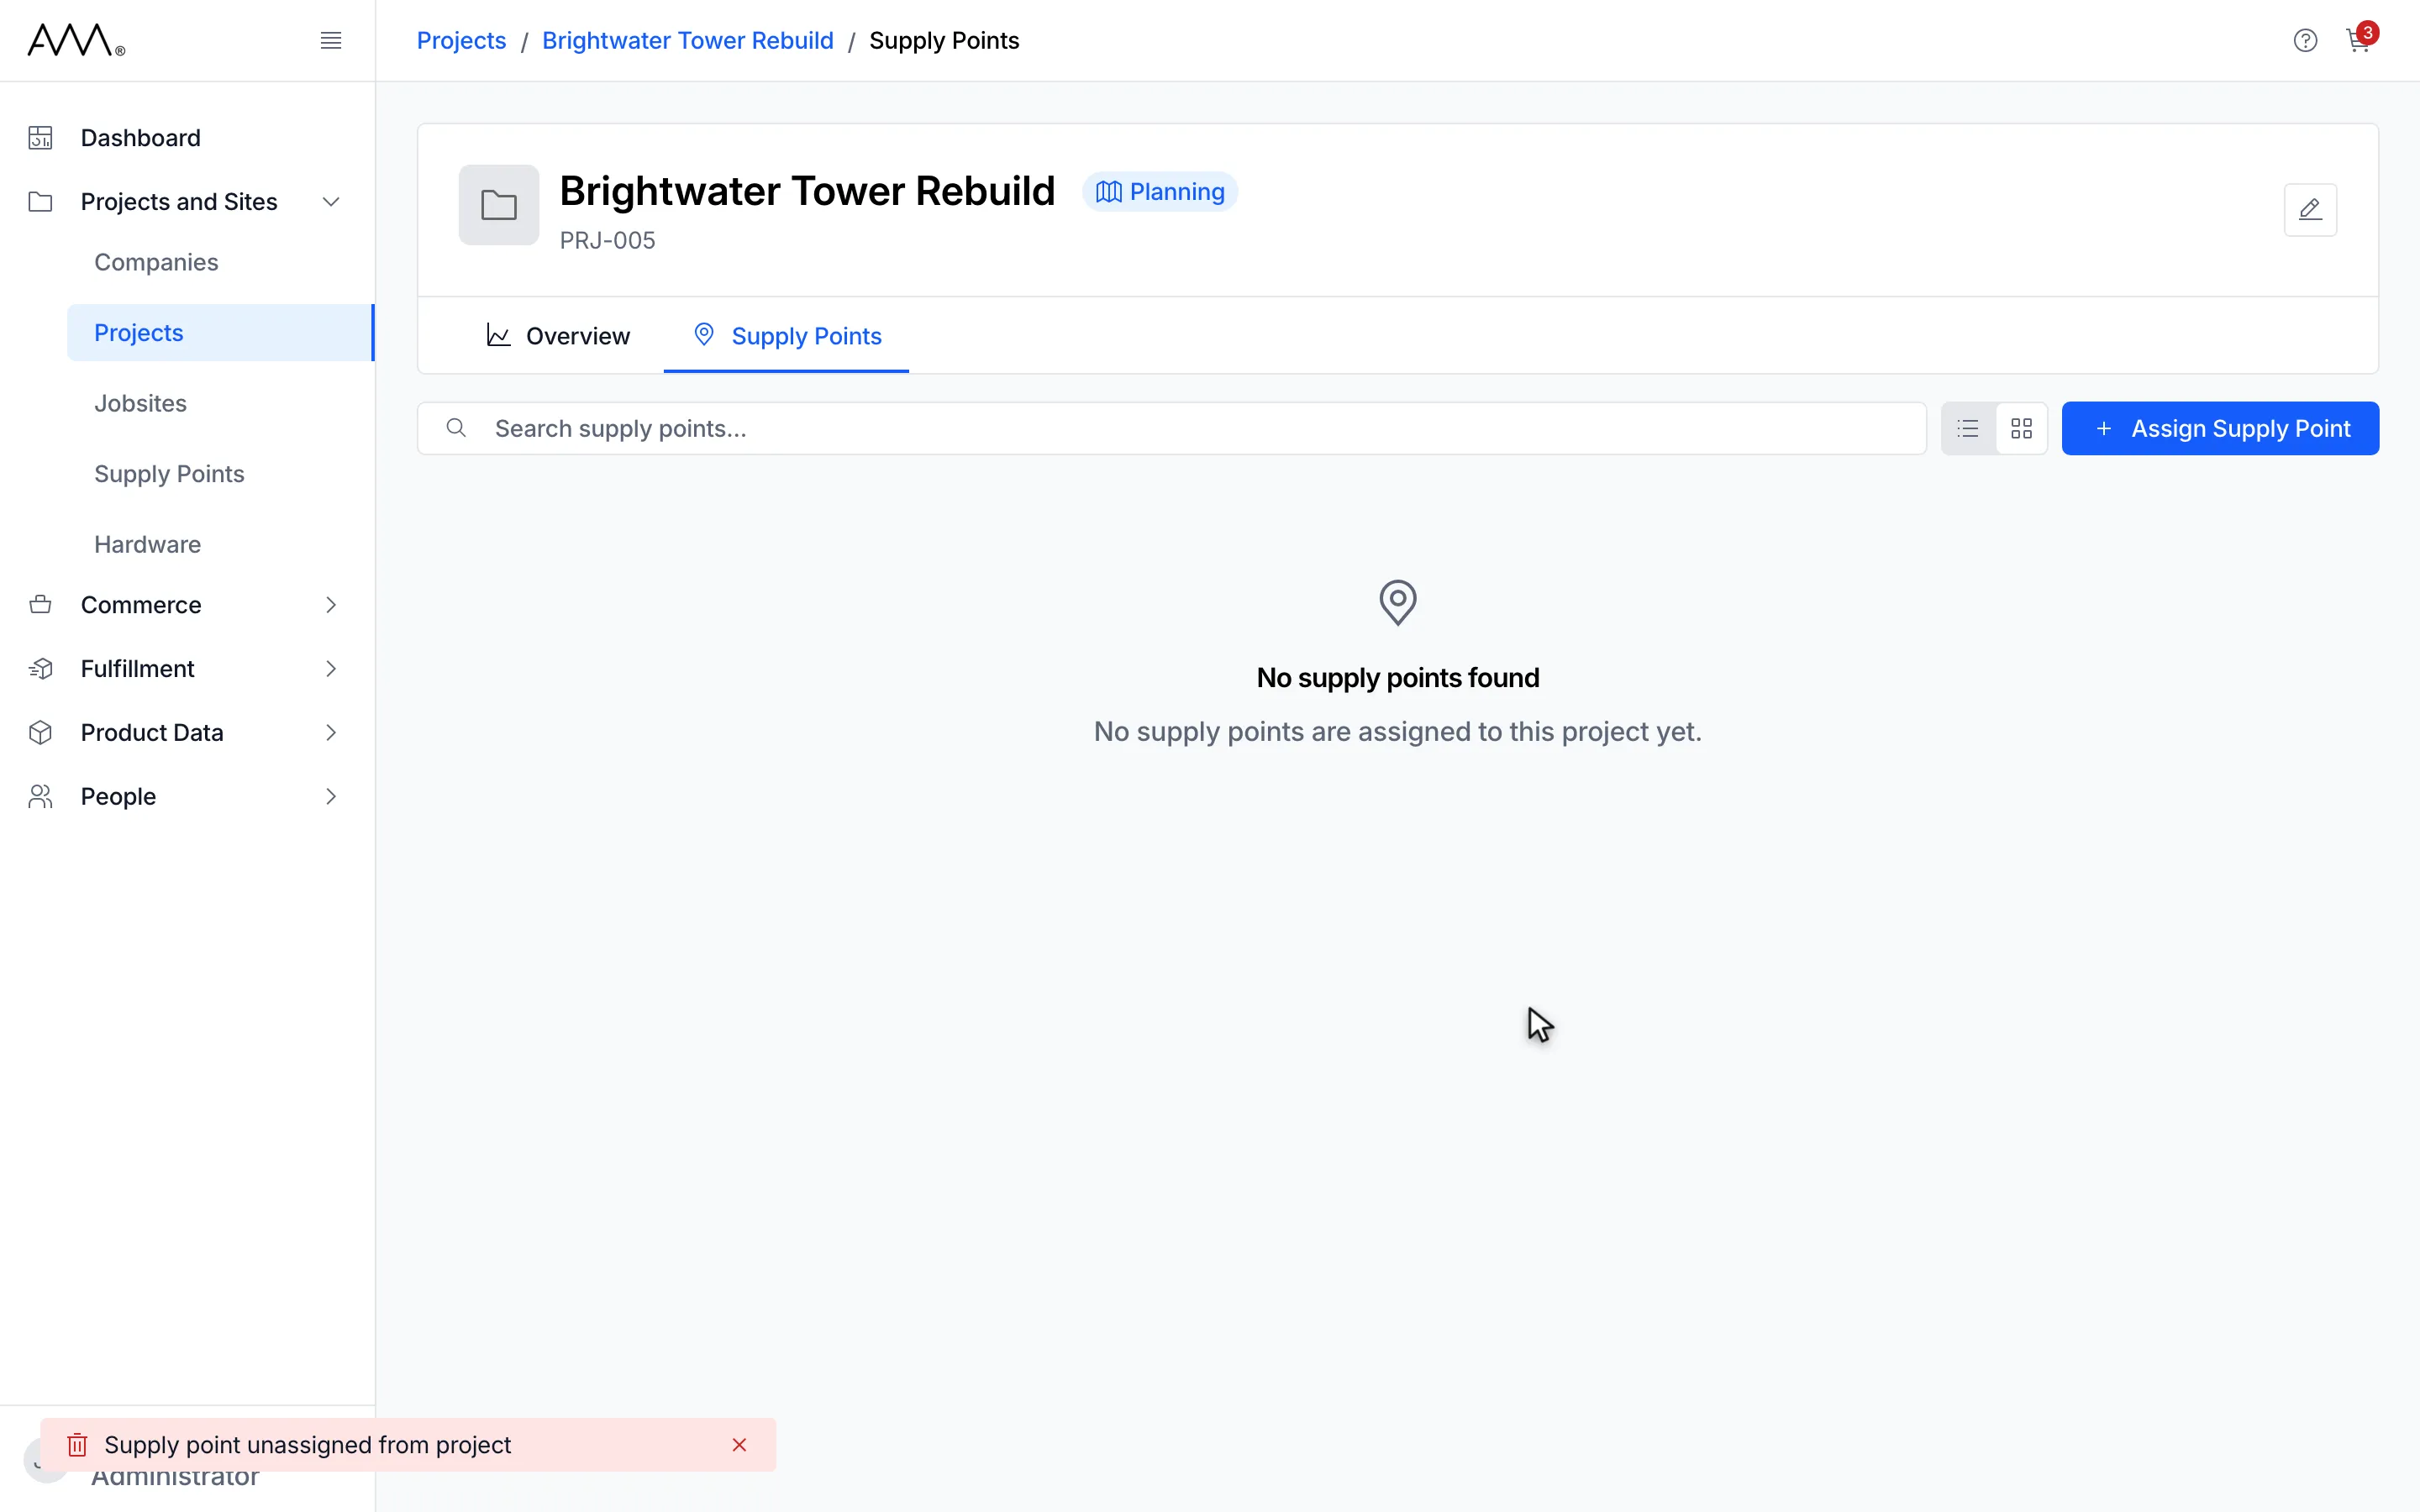
10The supply point leaves the project and stays available in the Supply Points list.
Watch this as a video (assign and unassign supply points on a project)
What happens next
Section titled “What happens next”After assigning, a Supply points assigned message appears, the dialog closes and the new cards appear on the Supply Points tab. The project’s supply point count updates in the list and on the Overview tab. A supply point you ticked before changing the search stays ticked and is listed under Selected but not shown by this search. If some supply points could not be assigned, the dialog stays open with those still ticked and shows Some supply points were assigned, but one or more failed. Please try again. If none could be assigned, it shows Couldn’t assign supply points. Please try again. If another user put your picks on a project in the meantime, it shows The selected supply points are now on another project. Choose other supply points.
After unassigning, a Supply point unassigned from project message appears (in red, although the removal succeeded) and the card disappears. If it fails, the confirmation shows Couldn’t unassign supply point. Please try again.
On the Supply Points tab, Search supply points… filters the assigned supply points by name, and the view toggle switches between cards and a table whose columns you can sort by clicking their headings. A project with no supply points reads No supply points are assigned to this project yet. When there is nothing left to assign, the dialog reads No supply points available.
Related
Section titled “Related”- Projects overview
- Supply Points overview
- Jobsites overview for assigning supply points to a jobsite